

What Is the Difference Between 2D and 3D? Key Differences Explained
Every successful design starts with the right approach, and choosing between 2D and 3D is one of the most important decisions in the design process. Whether you’re creating architectural plans, engineering drawings, product prototypes, or digital visuals, the format you choose directly affects accuracy, collaboration, and the final result.
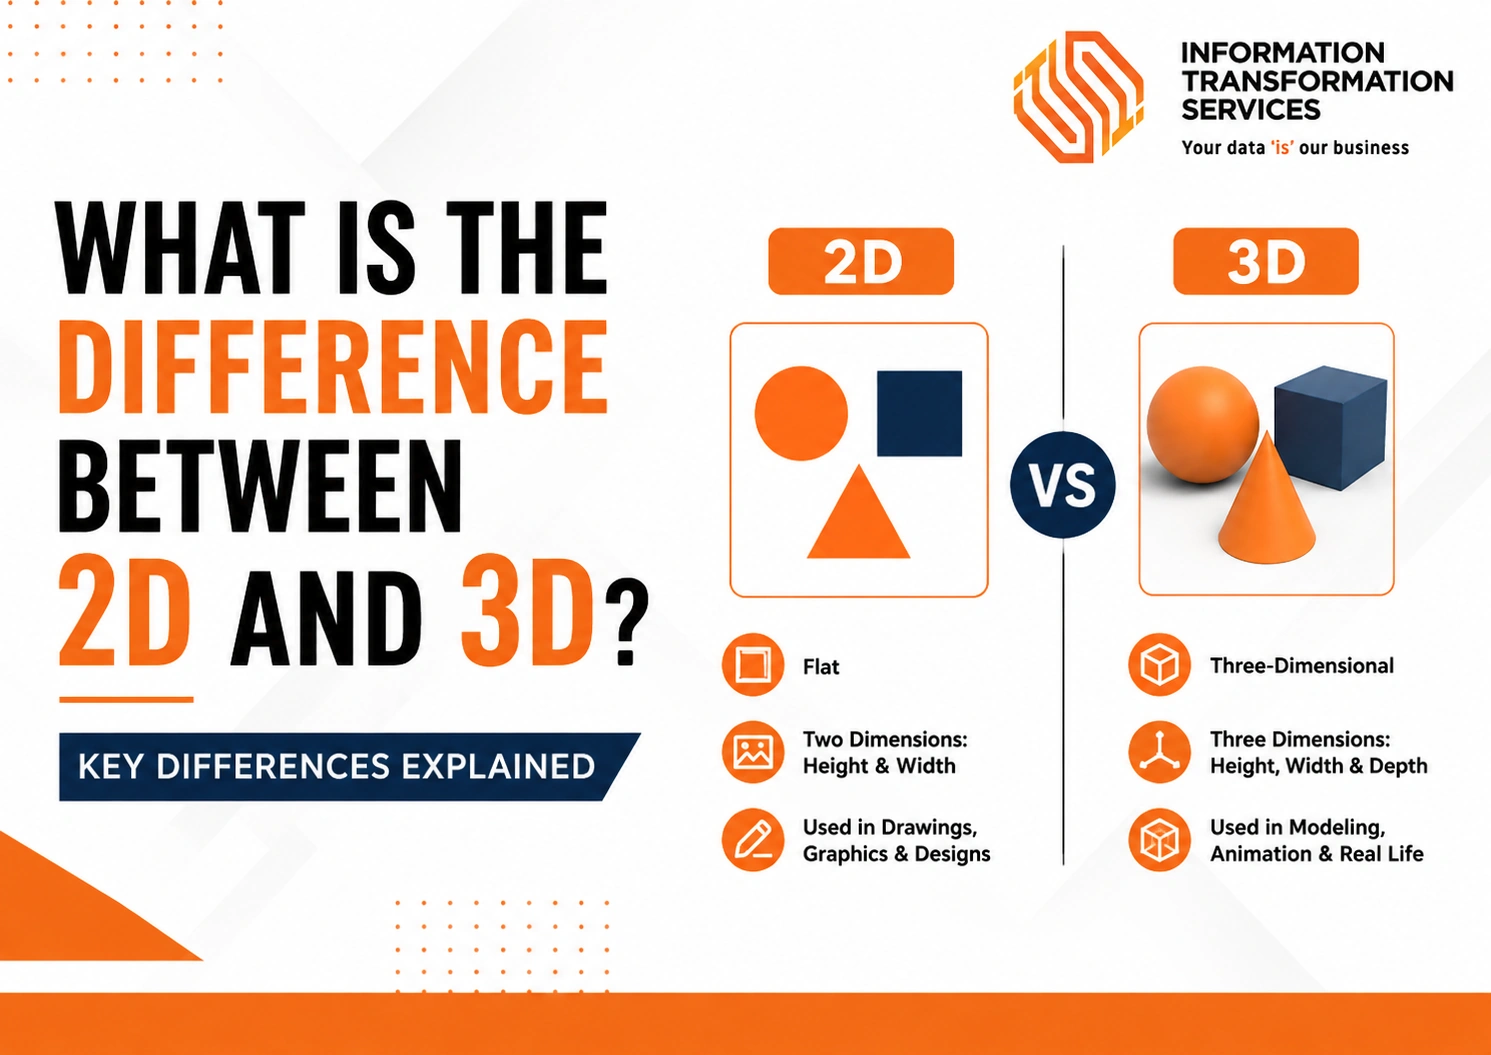
The difference between 2D and 3D is straightforward: 2D designs represent objects using height and width, while 3D designs add depth to create realistic, three-dimensional models. Although both are essential, each serves a different purpose depending on your project’s goals, complexity, and workflow.
In this guide, you’ll learn what the difference between 2D and 3D is, explore their advantages, limitations, real-world applications, and discover when to use each for the best results.
What Is 2D?
A 2D drawing represents objects on a flat surface using only height and width. It focuses on shape, size, and accurate measurements without adding depth. Architects, engineers, and designers use 2D drawings to create floor plans, technical sketches, diagrams, maps, and construction documents.
Example: A house floor plan is a 2D drawing. It clearly shows the layout of rooms, doors, and windows with precise dimensions, making planning and construction easier.
Because 2D drawings are simple to create and edit, teams can communicate ideas quickly and maintain accurate project documentation.
What Is 3D?
A 3D model represents objects using height, width, and depth, creating a realistic view of the final design. Users can rotate, zoom, and inspect the model from different angles before construction or manufacturing begins.
Example: A 3D model of the same house lets you walk through every room virtually, explore the exterior from any angle, and visualize materials, lighting, and space before construction starts.
Product designers, architects, manufacturers, and game developers use 3D modeling to test ideas, detect design issues early, create realistic presentations, and improve collaboration. Understanding the difference between 2D and 3D helps professionals choose the right design approach for every project while reducing errors and improving decision-making.
Design Process Breakdown: 2D Drafting vs. 3D Modeling
2D drafting follows a manual, view-by-view process where every line is drawn separately. 3D modeling builds one complete digital object first, then extracts any view automatically. The 3D process is faster to change and closer to how physical objects are actually made.
Both workflows start with an idea, but the path from that idea to the final output is completely different. Let’s walk through each one step by step, so you can see exactly where they split.
How 2D Drafting Works
In 2D, you work like a traditional draftsman sitting at a drawing board just digitally. Every view is a separate drawing.
Step-by-step:
- Set up the drawing sheet, choose paper size, scale, and units.
- Draw the main view (usually the front) using lines, arcs, and circles.
- Project additional views manually create top, side, and section views by measuring and aligning.
- Add dimensions and notes critical for manufacturing, placed on each view.
- Check for consistency: any change in one view must be manually updated in all others.
This process is excellent for simple parts, layouts, and schematics. But for complex assemblies, manually drawing every view can become slow and error-prone.
How 3D Modeling Works
In 3D, you think like a builder. You create one master model that contains all the geometric information.
Step-by-step:
- Choose a plane starting on a flat face (like a canvas) inside the 3D workspace.
- Create a 2D sketch and draw the basic profile, just like a 2D draft, but this sketch will become the base for a solid.
- Applying a feature uses operations like extrude (pull the shape into depth), revolve (spin it around an axis), or sweep (follow a path) to turn the sketch into a 3D body.
- Add more features: holes, fillets (rounded edges), chamfers, ribs, and patterns that repeat geometry.
- Build assemblies bring multiple parts together using mates (like snap-to constraints) to see how they fit and move.
- Generate drawings with one click, produce 2D views, dimensions, and even a bill of materials directly from the 3D model.
Because the model is the single source of truth, any change to it instantly updates every downstream element’s drawings, simulations, and CNC toolpaths.
| Process Step | 2D Drafting | 3D Modeling |
|---|---|---|
| Starting point | Draw one view at a time | Create a sketch, then build a solid |
| View creation | Manually project each view | Automatically generate any view from the model |
| Change management | Update each view by hand | Change once, updates ripple everywhere |
| Assemblies | Cannot simulate movement | Full motion simulation and interference checking |
| Final documentation | Prints, PDFs | Same, plus 3D files for manufacturing and simulation |
Visualization & Perspective: Flat Views vs. Immersive Reality
2D gives you flat, fixed views that are easy to print and read but lack depth. 3D lets you orbit, zoom, and even walk inside your design, making it feel real before a single part is made.
The way you see your design changes everything. 2D and 3D offer completely different visual experiences, and each one suits different stages of a project.
How 2D Visualization Works
In 2D, you are looking at a drawing from one fixed angle at a time. To understand the full object, you need multiple separate views.
- Orthographic projection: The standard method front, top, and side views drawn flat, each showing only two dimensions.
- Hidden lines: Dashed lines indicate edges that are behind a surface. You must mentally piece together the object in your mind.
- Sections and details: Special cut-through views to show internal features, drawn manually.
- Best for: Quick prints, precise measurements, and technical documentation where a simple, clear layout is needed.
Think of a flat furniture assembly instruction sheet. You see the pieces from the front and the side, with measurements written neatly. It works, but you don’t see the finished bookshelf in your room.
How 3D Visualization Works
3D opens up the entire object. You are no longer limited to one flat view — you can explore every angle.
- Orbit and pan: Spin the model freely using a mouse or touchscreen. View it from any direction instantly.
- Realistic rendering: Apply materials like wood, metal, or glass. Add lights and shadows. The result is a photorealistic image that looks like a product photograph.
- Walkthroughs and flyovers: In architecture, you can walk through a 3D building model room by room, even before construction begins.
- VR (Virtual Reality): Put on a headset and step inside your design. You can reach out, look around corners, and get a true sense of scale.
- Best for: Client presentations, design reviews, marketing visuals, and catching clashes between parts that flat drawings hide.
Imagine you’ve designed a new coffee maker. In 2D, you see its front and top views. In 3D, you can spin it, open the lid virtually, check the internal layout, and render a glossy product shot all from the same model.
Editing & Modifications: Which Is More Flexible?
3D modeling is far more flexible when changes are needed. A single edit updates everything automatically. In 2D, changes are manual and must be repeated across every view, which takes more time and increases the risk of mistakes.
The real test of any design workflow comes when something needs to change and in real projects, things always change. A client wants a thicker wall, a bolt hole moves slightly, or a part number gets updated. How each approach handles these moments makes a huge difference.
Editing in 2D: Manual and View by View
2D drawings are made of independent lines and shapes. There is no link between the front view and the side view. They are just two separate drawings placed next to each other.
- Change one view at a time: If you move a hole in the front view, you must also move it in the top view and the side view by hand.
- Easy to miss a spot: For complex parts with many details, it is common to forget to update one view. That leads to inconsistent drawings.
- No smart behavior: The software does not understand that a circle is a hole. It is just a circle. It cannot predict how the change should affect other views.
- Best for: Quick corrections on simple drawings, markups, or final annotations where only one view matters.
Think of it like editing a paper sketch with an eraser. You erase the line and redraw it. If the same line appears in another sketch, you have to find that sketch and do it again.
Editing in 3D: Smart and Parametric
Most modern 3D software is parametric. That means the model remembers how it was built. Every feature, a hole, a pocket, a rounded edge is stored as a step in a timeline. When you change one step, everything built after it updates automatically.
- Change once, update everywhere: If you increase the diameter of a hole in the 3D model, every drawing view, every dimension, and even the bill of materials will reflect the new size immediately.
- History-based editing: You can go back to an earlier step, adjust a sketch, and the whole model rebuilds itself. No need to redraw anything.
- Automatic detection of problems: If a change causes two parts to overlap, the software can warn you with clash detection. In 2D, you would have to spot this visually.
- Direct editing option: Some tools also allow you to push and pull faces directly without touching the history tree. This is useful for quick, one-off changes on imported models.
Imagine you’ve designed a phone case in 3D. The manufacturer says the corner radius needs to be 1mm larger. In 3D, you double-click that feature, type the new value, and the entire model along with its 2D drawings, toolpaths, and render images updates in seconds. In 2D, you would have to manually adjust every curve in every view and hope nothing was missed.
What Industries Use 2D vs 3D Design?
Both 2D and 3D design are spread across nearly every industry, but they serve different roles. 2D is the backbone for technical documentation, schematics, and simple manufacturing outputs. 3D is the powerhouse for product development, simulation, entertainment, and anything that needs visual realism or complex geometry.
No single industry uses only one format anymore. Most modern workflows blend them 3D for creation and analysis, 2D for documentation and specific machine inputs. Let’s break it down by which industries lean more heavily on each.
Industries That Depend on 2D Design
Some fields still run on precise, flat drawings. In these areas, 2D is not a stepping stone to 3D — it is the final deliverable.
- Architecture & Construction (Permitting and Documentation): While buildings are designed in 3D BIM software, the legal permit sets, floor plans, elevations, and site layouts submitted to authorities are often 2D sheets. They are universal, easy to print, and legally accepted.
- Manufacturing (Sheet Metal & Profile Cutting): Laser, plasma, and waterjet cutting machines read 2D DXF files. A flat pattern of a sheet metal part is exported directly as a 2D profile. No 3D file is needed on the shop floor for these operations.
- Electrical & Electronics: Circuit board layouts, wiring diagrams, and single-line diagrams are fundamentally 2D. PCB design software works in layers but the output is essentially a 2D map of traces and components.
- Fashion & Textile: Pattern making, marker layouts for cutting fabric, and embroidery designs are created in 2D vector software. The final patterns are flat templates that wrap a 3D body, but the template itself is 2D.
- Graphic Design & Branding: Logos, posters, packaging dielines, typography, and illustrations are inherently 2D. Even when they appear on 3D products, the design itself is created flat using tools like Adobe Illustrator or CorelDRAW.
- Civil Engineering (Plans & Profiles): Road alignments, drainage plans, and utility layouts are traditionally 2D plan-and-profile drawings. They convey slopes, offsets, and stationing clearly.
In these industries, 2D is not a limitation, it’s the most efficient way to communicate precise, flat information.
Industries That Depends on 3D Design
Other industries cannot function without depth, volume, and simulation. 3D is the core creative medium here.
- Product Design & Manufacturing: Every consumer product phones, chairs, appliances — starts as a 3D CAD model. Engineers test stress, fit, and motion before building physical prototypes. The 3D model drives CNC machining and injection molding directly.
- Automotive & Aerospace: Vehicles and aircraft are designed entirely in 3D. Full digital assemblies allow crash simulation, aerodynamic testing, and weight optimization. 2D drawings are extracted only for specific manufacturing steps or quality inspection.
- Architecture & BIM (Design Phase): 3D models in Revit, ArchiCAD, or SketchUp allow real-time walkthroughs, clash detection between structural and mechanical systems, and energy analysis. Clients see photorealistic renders long before construction begins.
- Animation, VFX & Film: 3D characters and environments in Maya, Blender, or Cinema 4D bring movies and TV shows to life. Even scenes with live actors use 3D for set extensions, digital doubles, and complex effects.
- Game Development: 3D is the foundation characters, props, vehicles, and entire worlds are modeled and textured. Some games use 2D sprites, but the majority are fully 3D.
- Medical & Dental: Custom implants, prosthetics, orthodontic aligners, and surgical guides are designed in 3D based on patient scans and 3D printed. 2D X-rays provide images, but the planning and device design happen in 3D.
- Interior Design & Furniture: Room layouts and custom furniture are modeled in 3D to show clients realistic previews with accurate materials and lighting. 2D floor plans support them, but the selling happens in 3D.
In all these fields, 3D provides the realism and simulation necessary to validate a design before costly physical work begins. But notice: almost all of them still use 2D for some documentation or machine input. The two worlds connect rather than compete.
Advantages of 2D Design
- Quick to create and edit: Simple layouts and schematics can be drawn in minutes.
- Low hardware requirements: Runs smoothly on almost any computer, even older laptops.
- Easy to share: PDF and DWG files are small, universal, and easy to print.
- Low software cost: Free or affordable tools like LibreCAD, QCAD, or DraftSight are widely available.
- Shallow learning curve: Basic skills can be picked up in days, making it accessible for beginners.
- Legally accepted: Construction permits, patent drawings, and inspection documents often require 2D formats.
Disadvantages of 2D Design
- No real depth: Hidden lines and multiple views are needed to understand the full object.
- Manual updates: Changing a feature means editing every view individually, which can lead to errors.
- Cannot simulate reality: No stress testing, motion analysis, or clash detection is possible.
- Limited for modern manufacturing: Cannot directly drive 3D printers or 5-axis CNC without conversion.
- Interpretation needed: The drawing must be mentally assembled by the reader, which can cause misunderstandings.
Advantages of 3D Design
- Realistic visualization: Spin the model, apply materials, and render photorealistic images instantly.
- Parametric intelligence: Change a dimension once, and all related views, drawings, and bills of materials update automatically.
- Powerful simulation: Test for stress, heat, fluid flow, and motion before building anything physical.
- Direct manufacturing output: Export STL for 3D printing, STEP for CNC machining, or IFC for BIM.
- Better collaboration: A 3D model is easier for non-engineers to understand, improving client and team communication.
- Reuse and automation: Create families of parts, automate repetitive features, and use libraries to speed up work.
Disadvantages of 3D Design
- Steep learning curve: Mastering a professional tool takes weeks or months of consistent practice.
- High hardware cost: Needs a dedicated graphics card, plenty of RAM, and a fast processor for smooth performance.
- Expensive software: Professional suites like SolidWorks, CATIA, or Maya can cost thousands per year per license.
- Larger files: Assemblies can grow to hundreds of megabytes, requiring careful data management.
- Overkill for simple tasks: A quick bracket or wiring diagram is often faster in 2D.
When Should You Use 2D vs 3D Design?
Pick 2D for flat, precise outputs like blueprints, laser-cut profiles, schematics, and permits. Pick 3D for complex shapes, moving assemblies, realistic previews, and any work that ends in 3D printing or simulation. Many projects use both 3D for design, 2D for final documentation.
This simple framework helps you decide in minutes, not hours. Ask yourself three things: your final deliverable, your project’s complexity, and who needs to understand the design.
Choose 2D When:
- You need quick technical drawings, floor plans, or schematics with exact dimensions.
- The project is flat or simple: a bracket profile, a wiring diagram, a site plan.
- Budget and hardware are tight; 2D tools run on almost any machine.
- Final delivery is a PDF, a printed drawing, a permit set, or a DXF for laser cutting.
- Legal or regulatory submissions require signed 2D documents.
Choose 3D When:
- The design has complex curves, internal voids, or moving assemblies.
- You must simulate stress, airflow, motion, or check for clashes before building.
- Clients or stakeholders need photorealistic renders or virtual walkthroughs to approve a concept.
- Manufacturing involves 3D printing, CNC machining, injection molding, or digital twin handover.
- You expect frequent design changes — parametric updates save hours and prevent errors.
Use Both When:
- You start with a 2D concept sketch, then build a 3D model for development and testing.
- Your team delivers 3D models internally but must issue 2D drawings for shop floor or regulatory use.
- Different departments need different views — engineers work in 3D, quality inspectors read 2D.
- You want one master 3D model that generates all 2D views, dimensions, and documentation automatically.
When 2D Modelling Is the Better Choice
- You need a fast, precise technical drawing that anyone can print and read.
- The final product is a flat output laser-cut profile, a wiring diagram, or a permit sheet.
- Your team or client has a limited software or hardware budget.
- The design is simple enough that multiple views are easy to manage.
- Regulatory bodies require signed 2D documentation.
When 3D Modelling Is the Better Choice
- You need to see how parts fit together, move, or look from every angle.
- The project involves complex geometry, organic shapes, or internal voids.
- You must simulate stress, heat, fluid flow, or motion before production.
- Manufacturing uses 3D printing, CNC machining, or digital twins.
- You present designs to clients who cannot read 2D technical drawings.
This hybrid workflow gives you the best of both worlds the creative power of 3D and the clear communication of 2D
Common Myths About 2D and 3D Design
Many people believe 3D has fully replaced 2D, or that 2D is only for beginners. These beliefs are false. Both formats serve real, active roles across industries every single day.
Myth 1: 2D is outdated and only for old-school drafters
Fact: Electrical engineers create wiring diagrams in 2D. Graphic designers build logos in 2D. PCB designers map circuits in 2D. These jobs are modern and growing.
Myth 2: You must master 2D before you can learn 3D
Fact: Many beginners start directly with 3D using free tools like Blender or Fusion 360. Understanding 2D views helps, but it is not a strict requirement.
Myth 3: 3D modelling is only for engineers and animators
Fact: Medical professionals design custom implants in 3D. Fashion designers drape 3D garments on virtual models. Architects walk clients through 3D buildings. 3D reaches far beyond engineering.
Myth 4: 2D is always cheaper and easier.
Fact: For complex assemblies with many changes, 2D edits become slow and error‑prone. 3D parametric updates save money by preventing mistakes.
Bottom line: Smart professionals use both. They pick 2D for clarity and precision on paper. They pick 3D for realism and simulation. Knowing when to switch is the real skill.
2D drives flat-profile cutting and documentation. 3D drives modern additive and subtractive manufacturing, simulation, and digital twins.
How 2D Serves Production
- Laser, plasma, and waterjet cutting: Machines read flat DXF files to cut sheet metal, acrylic, or fabric.
- CNC profile cutting: Simple 2-axis paths need only a 2D outline.
- Blueprints and shop drawings: Machinists and inspectors use printed 2D sheets for measurements.
- Patent and compliance drawings: Official submissions often require clean, flat 2D illustrations.
How 3D Serves Production
- 3D printing (additive manufacturing): Requires a solid 3D file (STL, 3MF, STEP) to print layer by layer.
- CNC milling and turning (subtractive manufacturing): CAM software generates toolpaths directly from 3D models, enabling complex 3D surfaces.
- Injection molding: Mold designers build 3D cores and cavities, simulate filling, and detect defects before cutting steel.
- BIM and digital twins: Construction teams use 3D models for clash detection, material takeoffs, and live operational monitoring.
File Complexity, Performance & Compatibility
2D files are lightweight, small, and universally compatible. 3D files carry rich geometry and intelligence but demand more storage, stronger hardware, and careful format management.
2D File Characteristics
- Common formats: DWG, DXF, PDF.
- File size: Usually a few kilobytes to a few megabytes — easy to email and store.
- Performance: Opens instantly on almost any computer, even without a dedicated GPU.
- Compatibility: PDFs and DWGs are industry standards; printers, cutters, and viewers read them natively.
3D File Characteristics
- Common formats: STEP, IGES, STL, OBJ, 3MF, IFC (BIM).
- File size: Can range from tens of megabytes for a single part to gigabytes for full assemblies.
- Performance: Needs a modern multi-core processor, sufficient RAM (16 GB or more recommended), and a dedicated graphics card for smooth rotation and rendering.
- Compatibility: Neutral formats like STEP allow transfer between different CAD tools. Native formats (SolidWorks, Inventor) retain parametric history but require the same software for full editing. Cloud platforms (Fusion 360, Onshape) reduce local hardware load and improve cross-team access.
Popular Software for 2D and 3D Design
Popular 2D Design Software
- AutoCAD: The industry standard for 2D drafting and technical drawings. Used in architecture, engineering, and construction.
- AutoCAD LT: A lighter, more affordable version focused purely on 2D.
- DraftSight: A professional 2D CAD tool popular with manufacturers and product designers.
- LibreCAD: Completely free and open-source 2D CAD software. Great for beginners and hobbyists.
- QCAD: Another affordable, user-friendly 2D drafting program. Simple to learn.
- Adobe Illustrator: The go-to tool for graphic designers creating logos, illustrations, and packaging dielines.
- Inkscape: A powerful free vector graphics editor. Works well for design, branding, and cutting files.
Popular 3D Design Software
- SolidWorks: A leading parametric CAD tool for product design, mechanical engineering, and manufacturing.
- Fusion 360: Cloud-based 3D CAD, CAM, and CAE platform. Free for personal use and startups.
- Inventor: Autodesk’s professional 3D mechanical design software.
- Blender: Completely free and open-source. Covers 3D modeling, sculpting, animation, rendering, and even video editing.
- Maya: Industry standard for 3D animation and VFX in film and games.
- 3ds Max: Popular for architectural visualization, game assets, and product rendering.
- Revit: Purpose-built for BIM (Building Information Modeling) in architecture and construction.
- SketchUp: Known for its simple interface. Widely used in architecture, interior design, and woodworking.
- FreeCAD: A free and open-source parametric 3D modeler aimed at mechanical engineering.
- Cinema 4D: Favored by motion graphics artists for its ease of use and powerful rendering.
The Future of 2D and 3D Design
3D grows smarter with AI, cloud, and real-time rendering. 2D remains essential for legal documents, schematics, and flat cutting. Both evolve together.
- AI generative design creates optimized 3D shapes automatically based on your goals.
- Real-time rendering and VR let clients walk through 3D models instantly.
- Cloud CAD and digital twins enable live, remote collaboration and predictive maintenance.
- 3D printing expands from prototypes to final production parts.
- 2D stays legally required for permits, patents, and compliance submissions.
- Flat schematics and cutting files remain the simplest, fastest output for many machines.
- AR overlays now place 2D instructions directly onto real-world job sites
Conclusion
Understanding the difference between 2D and 3D helps you choose the right design approach for your project. While 2D design provides accurate technical drawings and clear documentation, 3D design delivers realistic visualization, detailed simulations, and better design validation before production.
Instead of choosing one over the other, successful professionals use both. They often create concepts and technical documentation in 2D, develop detailed models in 3D, and generate production-ready drawings from those models. This workflow improves collaboration, reduces design errors, and saves time throughout the project.
Whether you work in architecture, engineering, manufacturing, product design, or digital media, learning both 2D and 3D design will strengthen your skills and help you deliver better results. By understanding when to use each approach, you can improve efficiency, communicate ideas more clearly, and complete projects with greater confidence.