

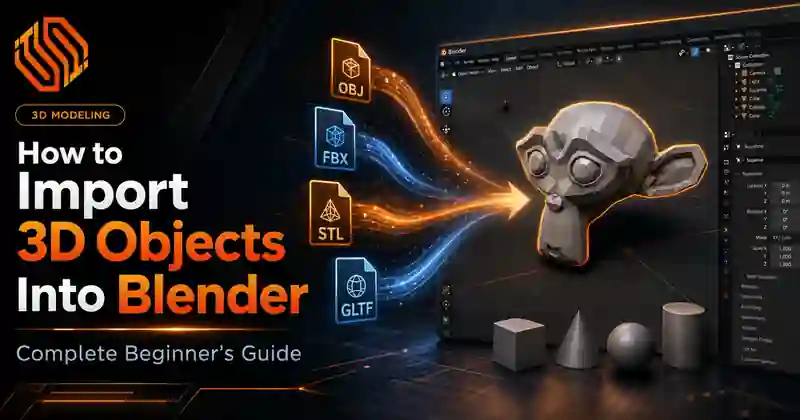
How to Import 3D Objects Into Blender Complete Beginner’s Guide
To import a 3D object into Blender, go to File > Import, choose the correct file format such as OBJ, FBX, GLB, glTF, or STL, select your model, and review the import settings. If the model imports with missing textures, an incorrect scale, or the wrong orientation, these issues can usually be fixed with a few simple adjustments. This guide explains how to import 3D models into Blender step by step and troubleshoot the most common import problems.
Step 1: Open and Save Your Blender Project
Launch Blender and open a new or existing project. Before importing anything, go to File > Save As and save the project in a dedicated folder.
Use a clear filename that reflects the project or asset, such as:
product-model-import.blend
Saving the project first gives you a clean starting point and keeps the Blender file, textures, references, and backups organized in one place.
Step 2: Select the Correct Import Format
Open the import menu by going to
File > Import
Blender will display the available file import options. Choose the format that matches your 3D model’s file extension.
Common options include:
- Wavefront (.obj) for OBJ models
- FBX (.fbx) for FBX assets
- glTF 2.0 (.glb/.gltf) for GLB and glTF files
- STL (.stl) for 3D-printing or CAD meshes
- Stanford (.ply) for PLY models and scan data
Always match the importer with the actual file type. For example, use the FBX importer for an .fbx file rather than trying to open it through another format option.
Native .blend files use a different workflow. Choose File > Open to load the complete project, or select File > Append when you only need a specific object, collection, material, or scene from another Blender file.
Step 3: Find and Select the Model File
After choosing the format, Blender opens the File Browser. Navigate to the folder where you extracted the 3D model package.
Select the main model file and check whether the folder also contains:
- Texture images
- Material files
- Animation files
- Low-poly and high-poly versions
- Rigged and unrigged versions
- Preview images
- Readme documents
Keep the original folder structure intact during the first import. Some formats depend on external files. An OBJ model may use a separate MTL file and texture folder, while a glTF asset may rely on external image and binary files.
Moving or renaming those files before importing can break their paths and cause missing materials or textures.
Step 4: Review the Blender import settings
Before clicking the import button, check the settings shown in the File Browser. Blender displays different options depending on the selected file format.
Beginners should pay attention to the following settings:
Scale
The scale setting controls how large or small the model appears inside the Blender scene.
Keep the default value during the first attempt unless the asset documentation provides specific measurements. You can adjust the scale later if the imported object appears unusually large, extremely small, or difficult to find.
Forward and Up Axes
Different 3D programs use different coordinate systems. One application may treat the Y-axis as up, while Blender uses the Z-axis.
The Forward and Up options help Blender convert the model’s orientation during import. Incorrect axis settings can make an object appear sideways, upside down, or facing the wrong direction.
Materials and Textures
Enable the available material and image options when you want Blender to import the model’s surface information.
The result depends on the file format and the data stored in the source file. OBJ, FBX, and GLB models may include material information, but complex shaders created in another program may not transfer exactly.
Animation
Formats such as FBX, GLB, and glTF can include animation data. Keep the animation option enabled when importing a character, machine, product demonstration, or another moving asset.
Disable it only when you need a static version of the model.
Armatures and Object Hierarchy
Rigged models may include bones, armatures, parent-child relationships, and several connected objects.
Keep the relevant hierarchy and armature options enabled if you need the original rig or animation structure. Removing them may leave you with only the mesh.
For a first import, the default Blender import settings usually provide a good starting point. When something goes wrong, change one option at a time. This makes it easier to identify whether scale, axes, materials, or animation caused the issue.
Step 5: Import the Model
Once you have selected the file and reviewed the settings, click the import button in the lower-right corner of the File Browser.
The button name changes according to the selected format, such as:
- Import OBJ
- Import FBX
- Import glTF 2.0
- Import STL
Simple models often appear within seconds. Larger files may take longer, especially when they contain:
- High polygon counts
- Multiple objects
- Large texture maps
- Armatures
- Animation clips
- Detailed scene hierarchy
Give Blender enough time to process the file. Clicking the import button repeatedly may create duplicate objects or make the scene harder to manage.
Step 6: Locate the Imported Model
After the import finishes, look at the Outliner in the upper-right area of Blender’s default workspace.
The Outliner displays every object and collection in the current scene. If the imported model appears there, Blender has successfully added it—even when you cannot see it in the 3D Viewport.
To bring the model into view:
- Select the imported object in the Outliner.
- Move the mouse pointer over the 3D Viewport.
- Press the Numpad period key.
This runs Blender’s Frame Selected command and centers the view around the selected object.
You can also open:
View > Frame Selected
When your keyboard does not have a number pad, press Home to frame all visible objects in the scene.
If the imported model is still not visible, check whether:
- The object entered the scene at an extremely small scale
- The model is positioned far from the scene origin
- Its collection is hidden
- Viewport visibility is disabled
- The model imported inside another object
- A unit mismatch affected its dimensions
Step 7: Inspect the Imported Model
Seeing the object in the viewport does not always mean the import worked perfectly. Check the model before you start editing, animating, or rendering it.
Review the following areas:
Dimensions and Scale
Open the Transform panel and check whether the model matches its expected size.
A product model created in millimeters may appear tiny in a scene that uses meters. Similarly, a CAD object may import much larger than expected because of a unit mismatch.
Rotation and Orientation
Confirm that the object stands upright and faces the correct direction.
If the model appears sideways or upside down, the source application probably used a different coordinate system. You can rotate the model manually or import it again with adjusted axis settings.
Location
Check whether the model sits near the world origin.
Objects imported far from the center of the scene can become difficult to navigate, rotate, or combine with other assets.
Materials and Textures
Switch the viewport from Solid mode to Material Preview to inspect the model’s surface appearance.
Look for:
- Missing colours
- Grey materials
- Bright pink surfaces
- Incorrect texture placement
- Distorted UV mapping
- Broken transparency
Pink surfaces usually indicate that Blender cannot locate one or more texture files.
Geometry and Shading
Inspect the mesh from several angles. Watch for:
- Missing faces
- Dark or black surfaces
- Incorrect normals
- Overlapping geometry
- Broken edges
- Unexpected smoothing
- Visible gaps in the mesh
These problems may come from the source file or from differences between the original software and Blender.
Object Hierarchy
Open the imported collection in the Outliner and check how Blender organized the asset.
A complex model may contain several meshes, empty objects, cameras, lights, armatures, and parented components. Make sure the important relationships remain intact before moving or deleting anything.
Animation
For an animated model, move the playhead along the Timeline and press Play.
Confirm that:
- The animation appears in the timeline.
- The armature controls the mesh
- Bones move correctly
- Objects remain connected
- No parts stretch or separate unexpectedly
A successful Blender model import should produce more than a visible object. The asset should enter the scene at a workable size, face the correct direction, retain the required materials and structure, and remain ready for editing, texturing, animation, optimization, or rendering.
How to Import Different 3D File Formats Into Blender
Blender uses a similar import process for most 3D files: open File > Import, choose the matching format, select the model, and review the result. The main difference is the type of data each format carries.
Use OBJ for static models, FBX for rigs and animation, GLB/glTF for PBR materials and real-time assets, and STL for 3D-printing geometry.
How to Import OBJ Into Blender
OBJ works best for static objects such as product models, furniture, props, and architectural assets.
- Keep the .obj, .mtl, and texture files in the same folder.
- In Blender, select File > Import > Wavefront (.obj).
- Choose the OBJ file.
- Keep the default scale and axis settings for the first import.
- Click Import OBJ.
- Switch to Material Preview to check the textures.
If the model appears grey or pink, Blender probably cannot locate the material or texture files. Restore the original folder structure before reconnecting textures manually
How to Import FBX Into Blender
FBX suits animated characters, game assets, machinery, and models with multiple connected parts.
- Select File > Import > FBX (.fbx).
- Choose the FBX file.
- Keep animation and armature options enabled for a rigged model.
- Review the scale, Forward axis, and Up axis.
- Click Import FBX.
- Check the armature and play the Timeline if the file contains animation.
An imported FBX model may appear sideways because Blender and the source software use different coordinate systems. Start with the default settings and only change the axes when the orientation is clearly wrong.
How to Import GLB or glTF Into Blender
GLB and glTF are strong options for web-based 3D, AR, games, and product configurators. They can preserve textures, PBR materials, hierarchy, and animation.
- Keep all related files together when using .gltf.
- Go to File > Import > glTF 2.0 (.glb/.gltf).
- Select the GLB or glTF file.
- Click Import glTF 2.0.
- Open Material Preview.
- Check the materials, transparency, and animation.
A .glb file is often easier to manage because it can store the model, textures, and other asset data in one file. Custom shaders may still look different after import, so review metallic, roughness, normal maps, and transparency.
How to Import STL Into Blender
STL carries mesh geometry but normally does not include textures, materials, rigs, or animation.
- Select File > Import > STL (.stl).
- Choose the STL file.
- Review the scale setting.
- Click Import STL.
- Check the model’s dimensions.
- Inspect the mesh for open edges or flipped normals.
Scale is the most common STL import problem. A file created in millimeters may appear too small or too large because STL does not always preserve the original unit information.
How to Import an Object From Another Blender File
Use Append when the asset already exists inside another .blend project.
- Open the destination Blender project.
- Select File > Append.
- Choose the source .blend file.
- Open the Object or Collection folder.
- Select the asset.
- Click Append.
The appended object becomes part of the current project and remains editable. Use Link instead when the asset should stay connected to the original Blender file.
Which Blender Import Format Should You Use?
Choose the format based on the data you need to preserve:
- OBJ: Static model and basic materials
- FBX: Rig, animation, and object hierarchy
- GLB/glTF: PBR materials and real-time assets
- STL: Printable mesh geometry
- BLEND Append: Editable assets from another Blender project
A successful import should preserve the information that matters to the project. Before editing the model, confirm its scale, orientation, materials, geometry, hierarchy, and animation.
How to Check a 3D Model After Importing It Into Blender
After importing a 3D model into Blender, check its scale, orientation, materials, geometry, hierarchy, and animation before starting any editing or rendering. A model may look fine at first glance but still contain incorrect dimensions, missing textures, flipped normals, or broken object relationships.
Check the Model’s Scale and dimensions.
Select the imported object and press N to open the Transform panel. Under the Item tab, compare the displayed dimensions with the model’s expected real-world size.
A unit mismatch can make a small product look as large as a building or reduce an architectural model to a tiny point. Confirm the dimensions before applying the scale. When the model size is correct but the scale values are not set to 1.000, use:
Ctrl + A > Scale
This resets the scale values without changing the object’s visible size.
Confirm the Rotation and Position
View the model from the front, side, and top. Make sure it stands upright, faces the correct direction, and sits close to the required scene location.
Imported FBX, OBJ, or CAD models sometimes appear sideways because the source software uses a different coordinate system. In that case, rotate the object manually or import it again using different Forward and Up axis settings.
Inspect Materials and Textures
Switch the viewport from Solid mode to Material Preview. This makes it easier to check colors, image textures, transparency, metallic surfaces, and roughness.
Look for:
- Grey or untextured surfaces
- Bright pink materials
- Stretched or misplaced textures
- Missing transparency
- Incorrect metallic or roughness values
Pink surfaces usually mean Blender cannot find the original texture files. Keep the model, material file, and texture folder together before reconnecting images manually.
Check Geometry and Shading
Rotate around the imported model and inspect it from several angles. Watch for black faces, visible holes, overlapping surfaces, broken edges, or unusual shading.
Flipped normals often cause dark or invisible faces. To fix them:
- Select the mesh.
- Enter Edit Mode.
- Select the affected geometry.
- Press Shift + N.
This recalculates the normals outside. It can correct surface direction, but it will not repair missing faces or damaged topology.
Review the object hierarchy
Open the imported collection in the Outliner and check how Blender organized the asset.
Complex FBX and GLB files may include:
- Several mesh objects
- Armatures and bones
- Parent-child relationships
- Empty objects
- Cameras and lights
- Separate material parts
Avoid deleting unfamiliar objects until you understand their purpose. An empty object, for example, may control the position or movement of several connected parts.
Test the Animation
When the model includes animation, move the Timeline playhead or press Play.
Check that:
- The armature moves the correct mesh
- Model parts remain connected
- Bones deform the surface properly
- No section stretches or stays behind
- The animation starts and ends correctly
When the mesh does not move, confirm that Blender imported both the armature and animation data.
Common Blender Import Problems
- Model not visible: Select it in the Outliner and press Numpad . to frame it.
- Model too large or small: Press N, check Dimensions, and correct the scale.
- Model sideways or upside down: Adjust the rotation or re-import with the correct Forward and Up axes.
- Textures missing or pink: Keep texture files with the model and use File > External Data > Find Missing Files.
- Black faces or bad shading: Enter Edit Mode, select the mesh, and press Shift + N.
- Animation not working: Check that Blender imported both the armature and animation data.
How to Prepare an Imported 3D Model for Professional Use
Once the model imports correctly, clean and organize it before moving into texturing, animation, or rendering. A production-ready 3D model in Blender should have accurate dimensions, clean geometry, working materials, and a clear object structure.
- Rename objects and collections: Replace unclear names such as Cube.001 with descriptive labels.
- Confirm the scale: Check the real-world dimensions, then use Ctrl + A > Scale when the size is correct.
- Set the object origin: Place the origin where the model should rotate, scale, or animate.
- Remove unnecessary elements: Delete unused cameras, lights, duplicate meshes, and empty collections.
- Check mesh quality: Look for overlapping faces, open edges, duplicate vertices, and incorrect normals.
- Review materials and textures: Confirm that image maps, transparency, roughness, and metallic values display correctly.
- Reduce unnecessary polygons: Optimize high-poly assets when they are intended for games, websites, AR, or real-time applications.
- Save a clean version: Keep the original imported file and save a separate cleaned project for production work.
When Should You Use Professional 3D Modeling Services?
Professional 3D modeling services are helpful when a model needs more than a basic import or scale adjustment. Some files require expert cleanup before they are ready for rendering, animation, games, AR, or product visualization.
You may need professional support when:
- The model has broken or missing geometry
- Textures and materials do not load correctly
- A high-poly model needs optimization
- CAD files need conversion into Blender-ready assets
- Rigging or animation breaks after import
- Multiple product models need consistent scale and quality
- The file format does not match the required platform
IT-S supports businesses with 3D model creation, conversion, cleanup, texturing, and optimization for product visualization, animation, gaming, architecture, and interactive projects.
Working with an experienced 3D team can save time, reduce technical errors, and provide a clean, production-ready model that fits the final project requirements.
Conclusion
Importing a 3D model into Blender is straightforward when you choose the correct file format, review the import settings, and verify the model after import. A quick check of the scale, orientation, materials, geometry, and animation helps prevent common issues and ensures the model is ready for editing, rendering, animation, or 3D printing. If the asset has broken geometry, missing textures, or requires optimization, professional 3D modeling services can help prepare a clean, production-ready model.