

How to convert multiple lines to polyline in AutoCAD?
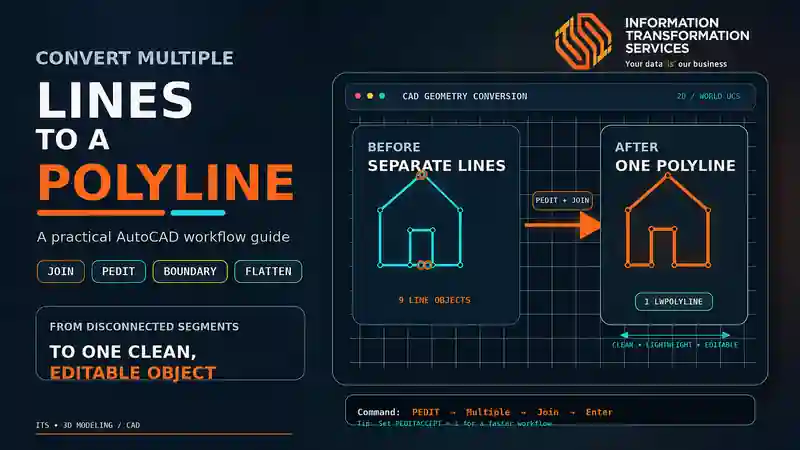
Separate lines in AutoCAD quickly become a headache. Offsetting a shape, measuring area, applying a hatch, or extruding a profile turns into extra cleanup when every segment stands alone.The solution is simple. Turn those multiple lines into one clean polyline.
In this guide, you will learn the fastest ways to do it using the JOIN and PEDIT commands. I will also share practical tips most tutorials skip, including how to deal with small gaps, elevation problems, and multilines, plus a quick system variable that removes the annoying confirmation prompt.
These methods work in current AutoCAD and AutoCAD LT versions and follow Autodesk’s recommended approach. By the end, you will convert lines into usable polylines quickly and without frustration
Why Convert Lines to a Polyline?
- AutoCAD treats every separate line as an independent object, which increases file size and slows down selection in large drawings.
- A single polyline lets you change layer, color, or linetype once for the entire shape instead of editing each segment.
- Grip editing becomes cleaner because you control the full path rather than individual endpoints.
- Fewer objects improve drawing performance and reduce the risk of accidentally moving or deleting one small segment.
- Continuous geometry works more reliably with data extraction, quantity take-offs, and many automation tools.
Converting multiple lines into a polyline creates cleaner, lighter, and more stable drawings that stay easier to manage as the project grows.
Method 1: Using the JOIN Command (Fastest Method)
When your lines already touch at the ends, the JOIN command gives you the quickest result. You select the lines once and AutoCAD turns them into a single polyline.
Here is the practical way to do it:
- Type JOIN and press Enter.
- Click and select all the connected lines (or draw a window around them).
- Press Enter.
AutoCAD immediately converts the selected lines into one polyline.
To check the result, simply click any part of the shape. The entire object should be highlighted together. This confirms it is now a single polyline.
This method works well for clean drawings where lines meet properly at the endpoints. If the lines have even small gaps, JOIN will not connect them. In that case, use the PEDIT method shown in the next section.
Method 2: Using the PEDIT Command (Most Flexible Method)
When lines have small gaps or do not touch perfectly, the JOIN command often fails. In these cases, the PEDIT command gives you better control and higher success rate.
Here is the practical way to do it:
- Type PEDIT and press Enter.
- Select one of the lines.
- Type Y when AutoCAD asks if you want to turn it into a polyline, then press Enter.
- Type J for Join and press Enter.
- Select the remaining lines.
- Press Enter twice to complete the command.
Unique points most tutorials miss:
- You can type M (Multiple) right after starting PEDIT. This lets you select many lines at once and convert them together.
- The final polyline takes the properties (layer, color, linetype) of the first object you select. Always start with the line that has the correct properties.
- PEDIT can join lines and arcs in the same operation. JOIN sometimes struggles with mixed geometry.
- If lines have small gaps, PEDIT still tries to connect them. You can also set a join tolerance for better results.
- After conversion, the new polyline becomes a lightweight polyline (LWPOLYLINE) by default, which keeps the file lighter.
Pro Tip
Type PEDITACCEPT and set the value to 1. This permanently removes the “Do you want to turn it into one?” prompt and speeds up the conversion process.
PEDIT delivers more reliable results than JOIN on drawings that contain small gaps or imperfect connections.
How to Convert Individual Lines to Polylines (Without Joining Them)
Most guides only cover joining lines into one continuous polyline. Very few explain how to convert each line into its own separate polyline while keeping them independent.
This becomes useful when you want polyline features (like width or linetype generation) on single segments but still need to move or edit them separately later.
Here is the simple way to do it:
- Type PEDIT and press Enter.
- Type M for Multiple and press Enter.
- Select all the individual lines.
- Type Y and press Enter.
- Press Enter one more time without choosing Join.
What most tutorials miss:
- The original Line objects get replaced. You cannot undo this change easily later if you need true Line entities again.
- Single-segment polylines still allow you to set a global width, which normal lines do not support.
- These individual polylines work better with some data extraction and quantity tools that ignore regular Line objects.
- The drawing stays lighter compared to keeping hundreds of regular lines, especially in large files.
Use this method only when you specifically need polyline properties on separate segments.
Convert Lines to Polylines Faster with a Simple LISP
When you need to convert a large number of separate lines into polylines without joining them, a short LISP routine saves significant time.
Here is a simple and reliable routine:
(defun c:LTPL ( / ss i e)
(setq ss (ssget ‘((0 . “LINE”))))
(repeat (setq i (sslength ss))
(setq e (ssname ss (setq i (1- i))))
(command “_.PEDIT” e “_Y” “”)
)
(princ)
)
Practical steps to use it:
- Copy the code.
- Open Notepad, paste the code, and save the file as LTPL.lsp.
- In AutoCAD, type APPLOAD, select the file, and load it.
- Type LTPL and press Enter.
- Select the lines and press Enter.
Every selected line becomes its own single-segment polyline. The lines stay completely separate.
Important points most guides skip:
- This routine only works on Line objects. It ignores arcs and polylines.
- It does not join the lines. Each line stays independent.
- Once converted, the original Line objects are replaced. You cannot easily return them to pure Line entities.
- For daily use, add the LISP to your Startup Suite inside APPLOAD so it loads automatically every time you open AutoCAD.
This method works especially well on drawings that contain hundreds of individual lines where using PEDIT Multiple becomes slow.
Create a Clean Polyline from Closed Lines with the BOUNDARY Command
When your lines already form a fully closed shape, the BOUNDARY command creates a new polyline faster than joining the original lines.
Here is the practical way to do it:
- Type BOUNDARY and press Enter.
- Click once inside the closed area.
- Press Enter.
AutoCAD immediately creates a new polyline that follows the outer boundary.
Important details most guides never mention:
- BOUNDARY creates a completely new polyline. The original lines stay in the drawing.
- You can choose to create a Polyline or a Region in the BOUNDARY settings.
- The new polyline always appears on the current layer, not on the layer of the original lines.
- BOUNDARY can detect internal islands (holes) if you enable island detection in the settings.
- This method fails if the shape is not fully closed, even by a tiny gap.
Use BOUNDARY when you want a clean new polyline quickly and plan to delete or keep the original lines separately.
Which Method Should You Use?
Pick the method that matches your drawing condition:
- Choose JOIN when the lines already touch cleanly at the ends. It finishes the job in the fewest steps.
- Choose PEDIT when the lines have small gaps or when you need better control. It handles imperfect geometry more reliably.
- Choose the Multiple option in PEDIT or the LISP routine when you only want to convert lines into separate polylines without connecting them.
- Choose BOUNDARY when the lines form a fully closed shape and you prefer a new clean polyline.
In most project drawings, PEDIT delivers the most consistent results. Use JOIN only on clean geometry and BOUNDARY when you specifically need a fresh closed outline.
When You Should Not Convert Lines to a Polyline
Converting lines into a polyline is not always the smartest move. In certain situations, it actually reduces control and makes later changes more difficult.
Keep the original lines when you expect to stretch, break, or relocate single segments later. A polyline forces you to edit the entire chain, which slows down detailed adjustments.
Avoid conversion when the lines represent different elements, such as structural members versus temporary guidelines. Merging them hides important distinctions and makes future revisions harder.
Also skip the conversion on very basic geometry. Turning two or three simple lines into a polyline adds no real advantage and only increases the complexity of the drawing.
In these cases, leaving the lines unchanged keeps the file flexible and easier to manage over the life of the project.
How to Handle Special Cases When Converting Lines to Polylines
Not every drawing converts smoothly. Some situations need extra steps before JOIN or PEDIT can work properly. Here are the cases that cause the most trouble and the practical way to solve them.
Lines with small gaps
Even tiny gaps stop the JOIN command. Switch to PEDIT and use the Join option. PEDIT tries harder to connect lines that sit very close to each other.
Different elevations
Lines drawn at different heights will never join. Type FLATTEN, select the lines, and press Enter. This brings every line to the same level so the conversion can succeed.
Multilines
A Multiline cannot convert directly into a polyline. First type EXPLODE, select the Multiline, and press Enter. After exploding, run PEDIT or JOIN on the individual lines that appear.
Mixed lines and arcs
Both commands can handle mixed geometry, but PEDIT produces more consistent results when straight lines and arcs sit together in the same shape.
Almost closed shapes
When the first and last points sit very close but do not touch, convert the lines first. Then start PEDIT again, select the new polyline, and type C to close it.
These extra steps solve the problems that stop most conversions from working on the first try.
Common Problems and Quick Fixes
Some problems keep showing up in real drawings even when the steps look correct
Lines are inside a block
JOIN and PEDIT cannot touch lines locked inside a block. Explode the block first. After that, convert the individual lines normally.
Lines sit on a different UCS
When objects were drawn in another coordinate system, the commands often do nothing. Switch back to the World UCS, then try the conversion again.
Overlapping or tiny leftover segments
Hidden overlaps and zero-length lines quietly block the join. Run OVERKILL first. It cleans the mess so the conversion can succeed.
The result turns into a 3D polyline
This happens when the original lines have different heights. Flatten the lines before converting. You get a clean 2D polyline that stays light and easy to work with.
The new polyline has too many points
After joining, open PEDIT again and remove the extra vertices. The shape stays accurate but becomes much cleaner to edit.
Fixing these issues early prevents most repeated failures and keeps the drawing stable.
Tips to Speed Up Your Line to Polyline Workflow
A few practical habits make the conversion process noticeably faster and more reliable, especially on large or messy drawings.
Set PEDITACCEPT to 1 one time and leave it. AutoCAD stops asking for confirmation and the command runs smoother every time after that.
Create a short command alias for PEDIT. On long projects this small change saves dozens of keystrokes each day.
Always run OVERKILL before converting large groups of lines. It removes overlapping and duplicate segments that silently cause join failures.
When converting many separate lines at once, use the Multiple option inside PEDIT instead of selecting objects one by one. The process finishes much faster and keeps the selection clean.
After every conversion, open the Properties palette and confirm two things: the object type shows as Polyline and the layer is correct. Catching these details immediately prevents errors from spreading through the rest of the drawing.
These habits take almost no extra time but produce cleaner results and fewer repeated fixes across real project work.
Conclusion
Converting multiple lines into a polyline is a simple but powerful skill in AutoCAD. Clean geometry saves time on offsets, hatches, area calculations, and 3D work.
Use JOIN when the lines already touch cleanly. Switch to PEDIT when gaps exist or when you need more control. For large numbers of separate lines, use the Multiple option or a simple LISP routine. When the shape is fully closed, the BOUNDARY command creates a fresh polyline quickly.
These methods follow official AutoCAD workflows and deliver consistent results across real project drawings. Master them once, and you will handle line-to-polyline conversion quickly and confidently in every future drawing.