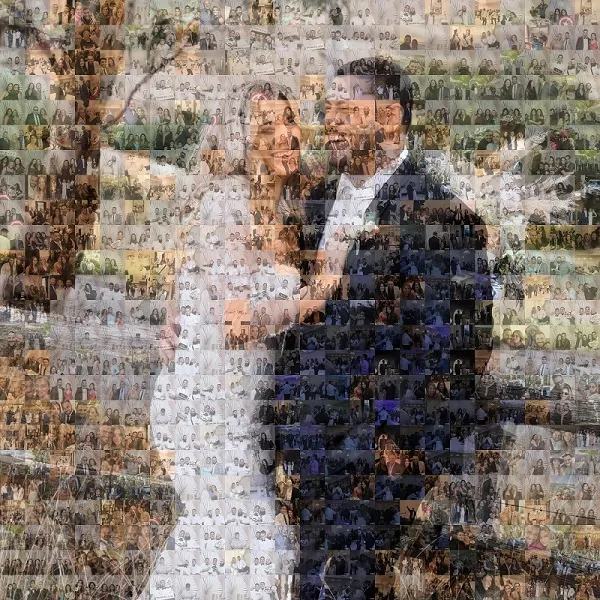
How To Turn An Image Into A Mirror Mosaic
In traditional mirror mosaic art, tiny bits of marble, glass, mirror, or tile are used to create patterns or images. The pieces are usually adhered to a surface, such as a wall, a frame, a piece of décor, or anything else, using mortar or adhesives. Mirror mosaics can range from being fairly concise to more convoluted, with a wide variety of colours and shapes that combine to form elaborate arrangements. Mosaic artists have been framing mosaics for decades because they have recognized their exquisite beauty, and so have art enthusiasts. Consequently, this art form keeps its ever-lasting charm. Moreover, with the digitalization of art and design, approaches like the mirror mosaic are now utilized by digital artists and image editors to enhance their compositions, making them more endearing to viewers than before. Though it is unquestionable that the original work of art and relevant practices will always have their inherent appeal and charisma, digital art tools make art more accessible to those who enjoy expressing themselves via their creations yet lack the crucial resources and skills. In keeping with the exact accessible mode of expression, this blog will focus on applying a mirror mosaic effect to digital photographs and artwork.
Step 1: Selecting A Base Photograph
Pick a photograph that poses a high resolution, like 300 DPI, to be sure that the ultimate mosaic effect remains brilliant and detailed after editing.
Think about the subject matter of the shot. A vibrant subject, such as a portrait or a bright scene, works especially satisfactorily with the mirror mosaic effect. Seek for a picture that owns a wide range of light and shadow, which can make more engaging reflections.
Discern the goal of the image enhancement. For example, if the effect is to be used as an artistic or promotional piece, assume how the ultimate plan will echo the message you want to communicate.
Be sure the image’s aspect ratio is suitable for the mosaic effect. Do not utilize excessively cropped or distorted images because it might compromise the adequacy of the grid and reflection process.
Address the lighting within the original picture, as the solid light contrasts and shadows usually intensify the visual appeal of mirror mosaics.
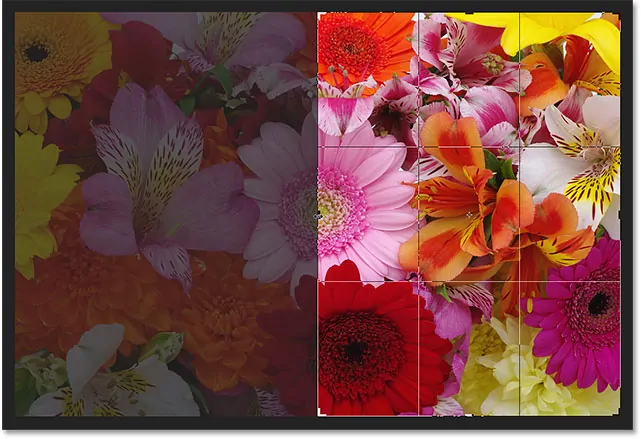
Step 2: Dividing The Image Using Grid Overlay

Identify the size of each grid tile, which can shift depending on the required mosaic formation. Bigger tiles make a more abstract appearance, while smaller tiles produce better details and a crisp general effect.
Ensure that the grid’s proportions coordinate the measurements of the image so that each tile fits equally across the whole photo. The harmony of grid placement helps you get an even final effect.
Check that the grid overlay keeps symmetry, particularly for mirror effects to look outwardly engaging. The consistency of the grid will play a part in the clean and consistent transition between mirrored pieces.
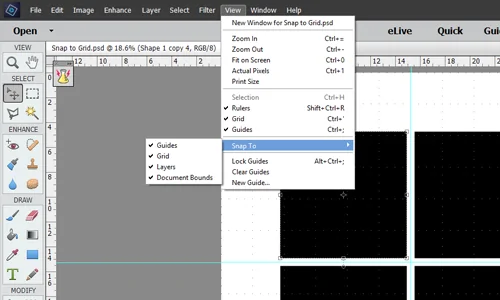
Utilize software guides or snapping tools to flawlessly set the grid lines over the image. Accuracy at this stage can facilitate smoother mirroring during the following steps.
After you are done setting up the grid, preview the result to confirm if the segments fit your aesthetic vision and adjust the grid format in a similar manner.
Step 3: Creating A Reflective Alignment Of Segments
Partition the image into smaller, similarly sized fragments according to the grid layout. Each part speaks to a little section of the picture that will go through the mirroring effect. These parts should conform with the tiles made earlier within the grid overlay.
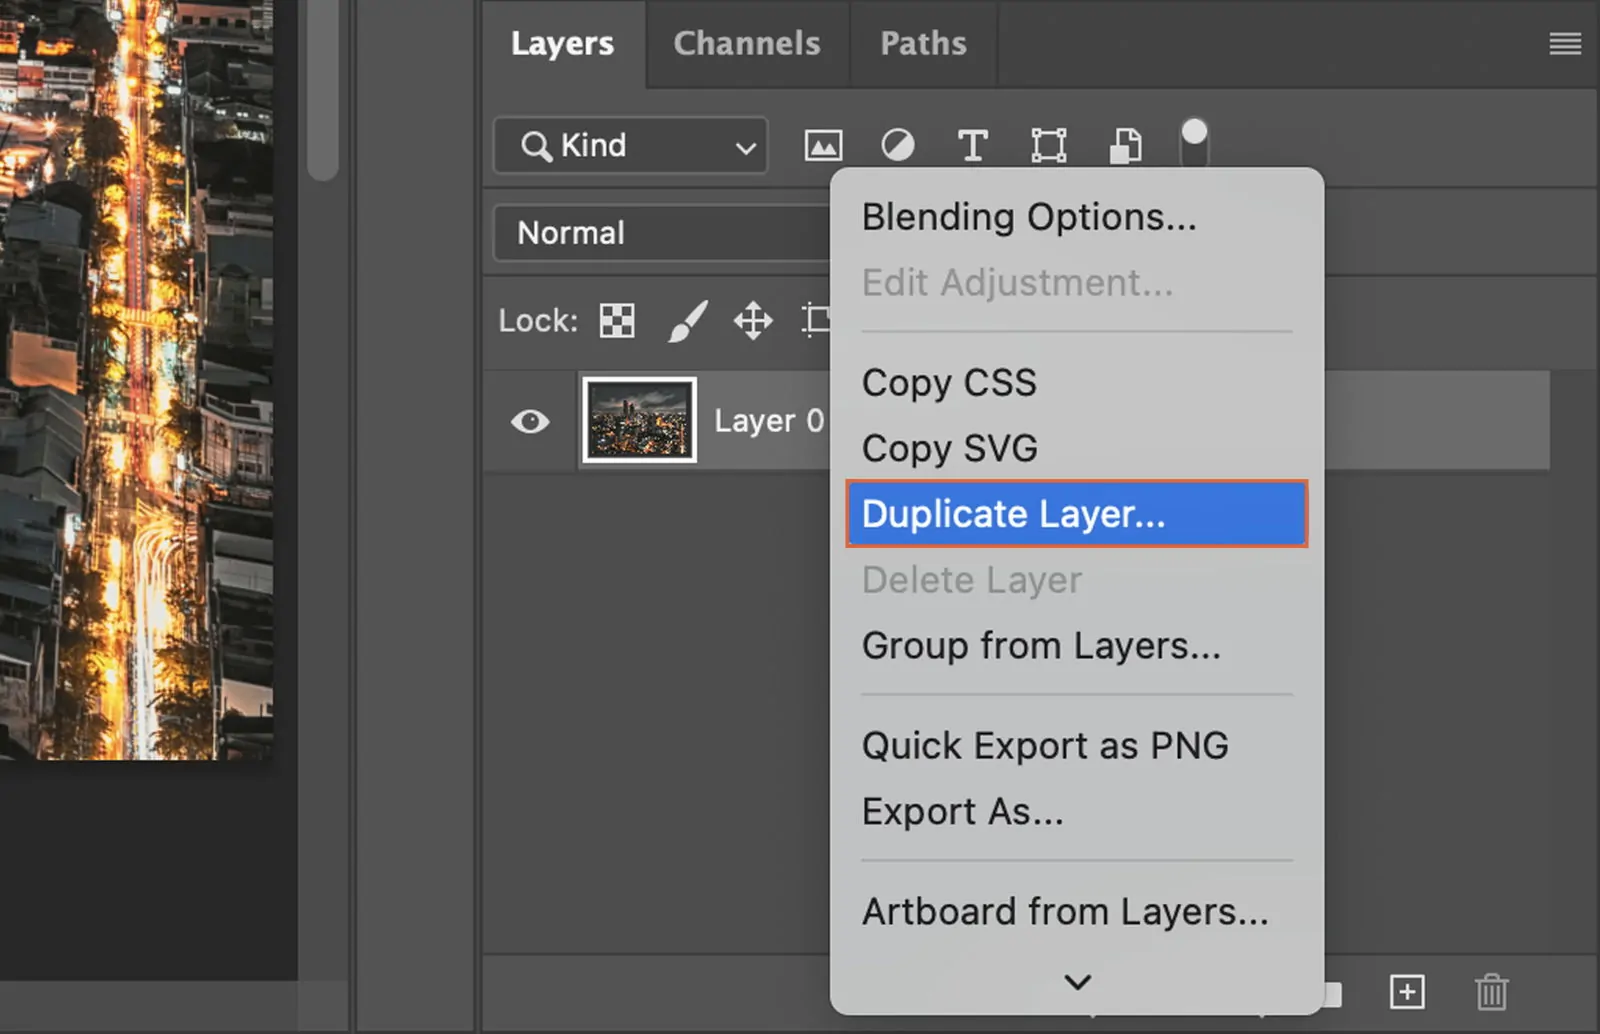
Utilize the moving tool and extract the pieces of the photo from each segment. That will be done by clicking on each grid area and duplicating it into isolated layers, permitting you to control each portion freely.
At this stage, you have to confirm that each part maintains its unique quality and proportion. As required, zoom in on critical ranges, guaranteeing no detail is misplaced in the mirror effect application.
Inspect how each segment will accommodate and reflect in relation to its encompassing tiles. Some segments might require extra resizing or adjustment to suit the ultimate mirrored grid superbly, guaranteeing uniform reflections.
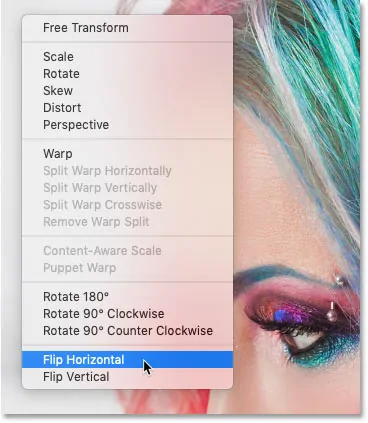
Assess whether the fragmented segments will be horizontally, vertically, or diagonally mirrored, depending on the required result for your mosaic’s visual fashion.
Step 4: Adding Mirror Effects To The Fragments
Turn over each segment horizontally, vertically, or along other chosen axes to form the reflection. Confirm that the reflections are proportional and appropriately oriented with adjoining tiles for a smooth shift between segments.
Alter the intensity of the reflected fragments. The reflection can be nuanced or striking depending on the intensity of contrast you need to get between the initial and mirrored segments. Play with the strength of the impact for diverse results.
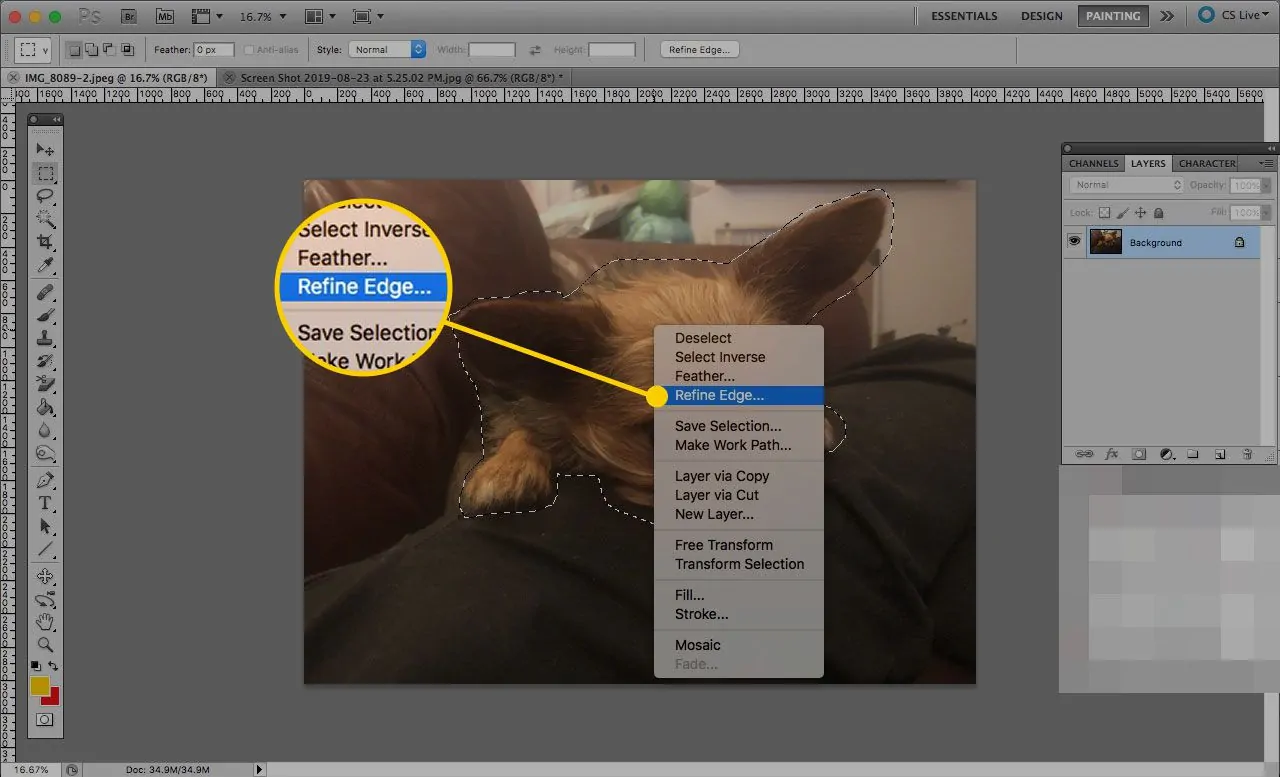
Refine the edges of each mirrored tile to avoid harsh lines where the initial segment and its mirror overlap. Delicate blending or feathering of the edges can make the reflections show up more organic.
Sometimes, the mirrored parts may require slight perspective alterations to look consistent with the overall composition of the mosaic. Utilize transformation tools to scale and reposition each piece as essential.
Persistently evaluate the general visual harmony of the mirrored areas. Be sure that each tile’s reflection goes with the rest of the grid, contributing to the overall concordance.
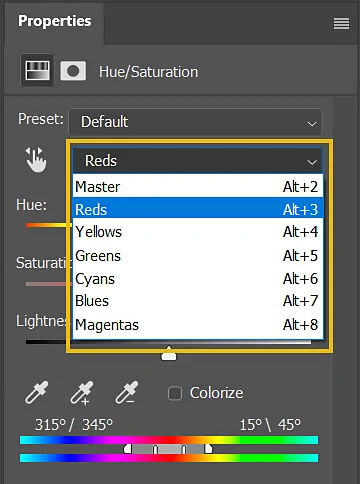
Step 5: Boosting The Colours And Contrast Level
Once you have applied the mirror effect, proceed with making the mosaic more dynamic and vibrant.
Enhance the saturation or dynamic quality of the colours inside each mirrored area. That makes the reflections more noticeable, boosting depth and abundance in the composition. Adjust the hue for more sensational visual impacts.
Experiment with the brightness of individual tiles to get more contrast between the reflective parts and the original areas. That can help the mirrored portions look pronounced, improving their visibility without overpowering the photo.
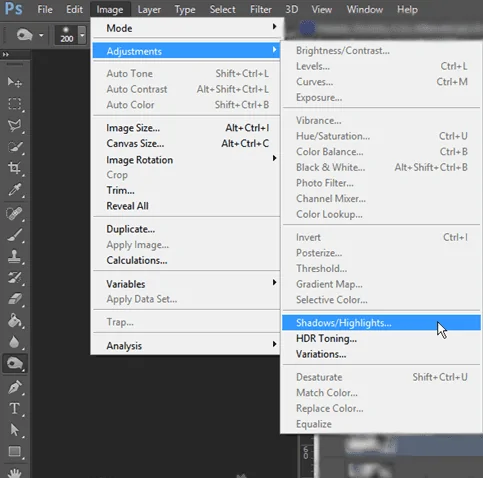
Address the shadow and highlight ranges within the mirrored segments, ensuring that they integrate well with the encompassing tiles. Appropriate shading can aid in making the reflections look more realistic and scenic.
Raise the contrast in the ranges where the mirror reflects bright lights or dark shadows. That adds clarity and sharpness to the mirrored pieces, emphasizing subtle elements that usually get lost without contrast.
Make sure that all modified parts maintain a uniform level of upgrade, making the widespread mosaic consistent instead of inconsistent in colouring or lighting. Consonance is key to accomplishing a refined and proficient final concept.
Step 6: Fine-Tuning The Edges

This step focuses on refining the boundaries between the mirrored tiles and making the general mosaic effect look smooth and consistent.
Utilize blending tools to relax any harsh lines where the mirrored tiles encounter the initial segments of the photograph. Blending the edges is necessary to prevent sharp or uneven borders that can disturb the flow and proportion of the mosaic.
Use the feather technique around the edges of the tiles to make a smooth move between the reflection and the adjoining ranges. That will decrease the visibility of grid boundaries, making the mirror effect more natural.
Give special attention to how light acts around the edges. Confirm that the lighting within the original picture accommodates the mirrored segments to make compatible shadows and highlights along the edges. That uniformity will keep up a realistic formation.
Use Zoom into the smaller segments to examine and polish complex details, like texture or small objects, guaranteeing they transition smoothly without clumsy breaks or creases at the edges.
Regularly preview the picture while refining edges. Rotate and shift segments on the off chance that it is essential to confirm that the general composition maintains a natural, proportional flow, improving the overall charm of the mirrored mosaic.
Step 7: Polishing The Effect
This final step involves evaluating the general photograph. Carry out any fundamental changes to colour, contrast, or edge refinement. Check that the mirrored effect is adjusted and that no portion of the picture feels messy or too assertive.
Tune little particulars, such as sharpening the composition or altering the focus. Such small tweaks can help improve the surface or elements inside the mirrored segments, infusing more depth and clarity to the general setting.
Review for any undesirable artifacts, pixelation, or irregular reflections inside the mosaic. Tend up the photo by expelling any diversions or flaws to preserve a proficient and cohesive appearance.
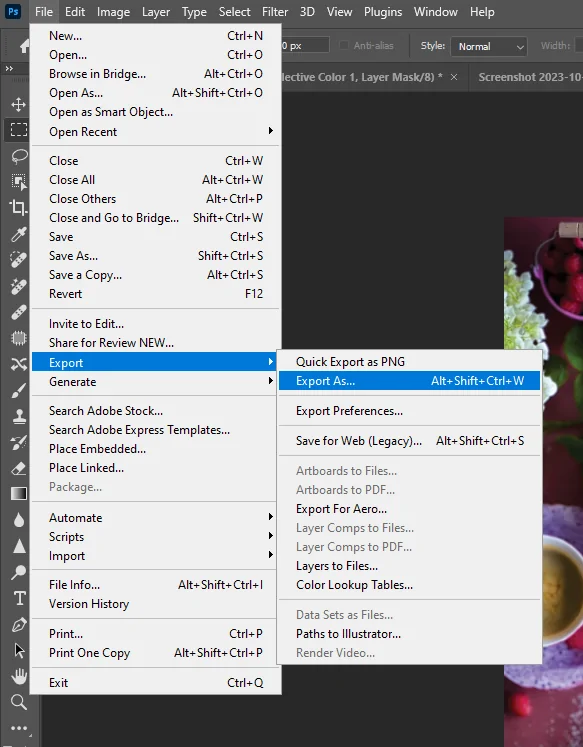
Before moving to the export phase, alter the picture size and resolution, considering its designated use, like printing or web sharing.
If you intend to get a printout, select a high resolution like 300 DPI, whereas for web sharing, go for a resolution value that is suitable for faster loading.
After you are done with all concluding adjustments, including the final resolution, you can export the final image in a proper format per your intended usage.
Conclusion
To conclude, turning an image into a mirror mosaic art piece is a stylistic approach that yields unique, elaborate, attractive, and visually striking compositions. There are various other effects that sometimes can be achieved from a mirror mosaic effect, like a futuristic approach and even surreal characteristics. The fragmented layout of mirror work adds to the intricacy of photographs, which transforms even the environments with minimum features into detailed settings. In addition, though separated into fragments, the whole image still gives a harmonious and cohesive impression, which invites the onlooker to pay attention to the contribution of each singular component in the fulfilment of the whole scene.
