How to Test 3D Models Across Devices for Web and AR
3D models often behave differently once they move from design tools into real web and AR environments. A model that appears correct in Blender or a desktop viewer can break in mobile browsers, display missing textures, lose scale accuracy, or fail to launch in AR on iOS or Android devices.
This guide explains a structured testing process for verifying 3D models across desktop browsers, mobile devices, and AR platforms before deployment. It focuses on practical validation steps, including file integrity checks, rendering consistency, interaction testing, performance evaluation, and AR behavior across supported devices.
The goal is to help ensure that a single 3D asset performs reliably across different environments without visual errors, scaling issues, or platform-specific failures after publishing.
You will follow a step-by-step workflow that reflects real production testing practices used before shipping web-based 3D and AR experiences.
STEP 0: Export Validation
Go to your /model-source/ folder and export your 3D model as GLB or GLTF, then open the exported file in a 3D viewer to immediately verify that it loads correctly without warnings or errors; confirm that textures are properly embedded or correctly linked without missing paths, the scale matches real-world dimensions, the axis orientation is correct for web and AR rendering, and there are no broken materials, missing meshes, or geometry issues, and if any problem appears at this stage, fix it directly in your /model-source/ file and re-export the model before starting any browser or AR testing.
STEP 1: Set a Controlled Testing Environment

Start by locking a single testing environment so all results stay consistent across devices. Use one production viewer or a single <model-viewer> setup, upload one fixed version of your 3D file to a staging URL, and ensure every test runs on that same link. Prepare a minimum device set including Chrome on desktop, Safari on iPhone, and Chrome on Android, plus one low-end device if available for performance checks. This ensures you are validating the same model under controlled conditions, so any issue you detect reflects real device, browser, or AR limitations rather than differences in files or test setups.
STEP 2: Validate the 3D Model File Before Web Testing
Open the 3D model in Blender or any local 3D viewer from the /model-source/ folder, then confirm that it loads without errors, textures are properly assigned and visible, scale matches a real-world reference object, and all materials and meshes are intact without issues such as black surfaces, missing textures, or empty geometry; if you detect any visual error, broken material, or scaling problem at this stage, stop immediately and fix it in the source file before exporting again, because any issue here will propagate into browser and AR testing and invalidate all later results.
STEP 3: Desktop Web Test
Open your staging URL from the /desktop-test-build/ folder in Chrome and load the 3D model, then rotate it with your mouse, zoom in and out, and toggle fullscreen on and off while confirming that textures render correctly, lighting remains stable, and scale does not shift. after that, repeat the same exact test in Firefox, Edge, and Safari; open the browser developer console in each browser to confirm there are no errors or warnings affecting rendering; and if you notice any visual inconsistency, interaction issue, or console error in any browser, stop immediately and fix it before moving forward to mobile testing.
STEP 4: Mobile Web Test
Open the same staging URL from your /mobile-test-build/ folder on an iPhone (Safari) and Android device (Chrome), load the 3D model fully, then rotate it using touch gestures, pinch to zoom in and out, and move around the model while checking that performance stays smooth without lag or frame drops, textures remain consistent with desktop output, and scaling behaves correctly on both devices; if you notice any stuttering, visual distortion, texture mismatch, or performance drop, stop immediately and fix the issue before moving to AR testing.
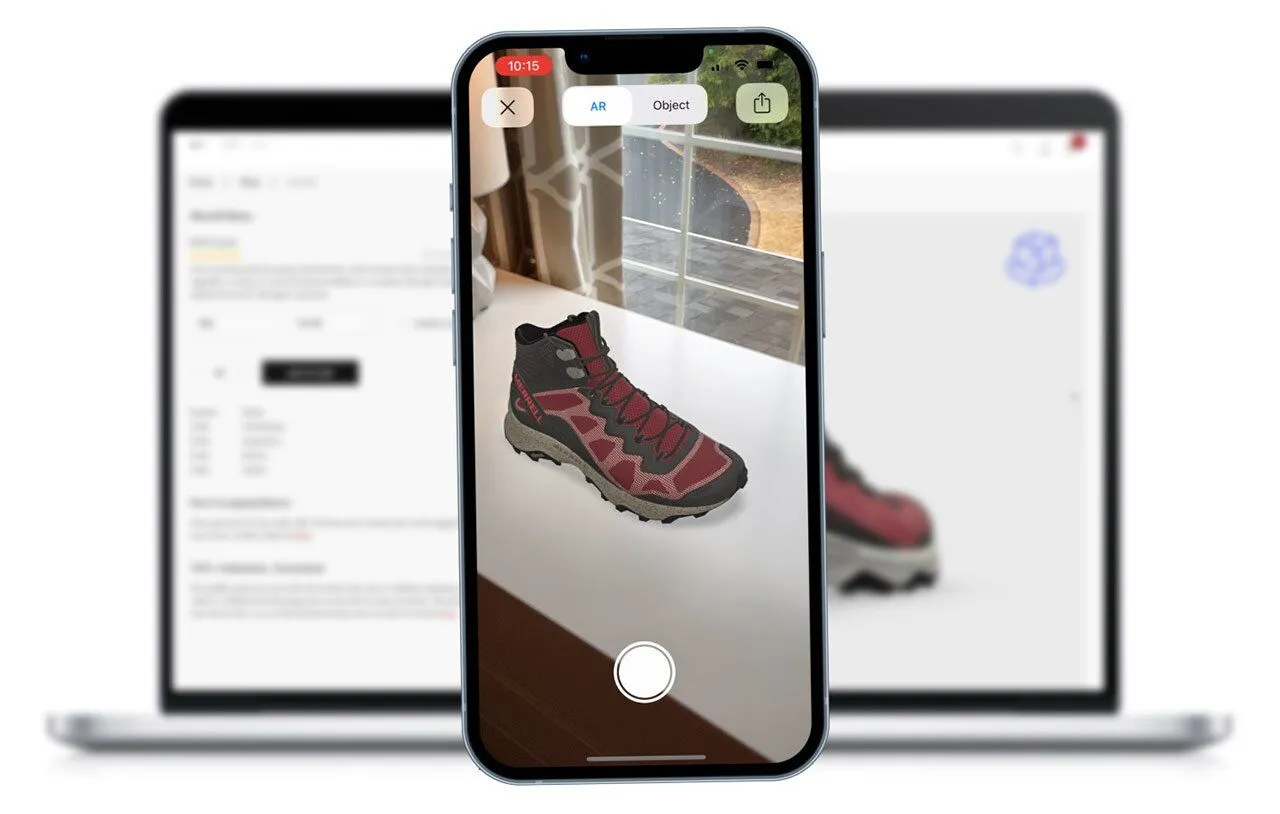
STEP 5: AR Launch Test (iOS + Android)
Open your staging URL on both iOS (Safari) and Android (Chrome) from your /ar-test-build/ folder; load the 3D model fully; then tap the AR button (Quick Look on iOS and Scene Viewer or WebXR on Android) to start AR mode; allow camera permissions when prompted, and confirm that the AR session launches without crashes or reload loops while the model appears correctly in real-world space, anchors firmly on detected surfaces, and maintains stable scale and position as you move your device; if the AR button does not appear, the session fails to start, or the model shifts, floats, or disappears, treat it as a production-level failure and stop testing immediately until the issue is fixed in export settings or AR configuration.
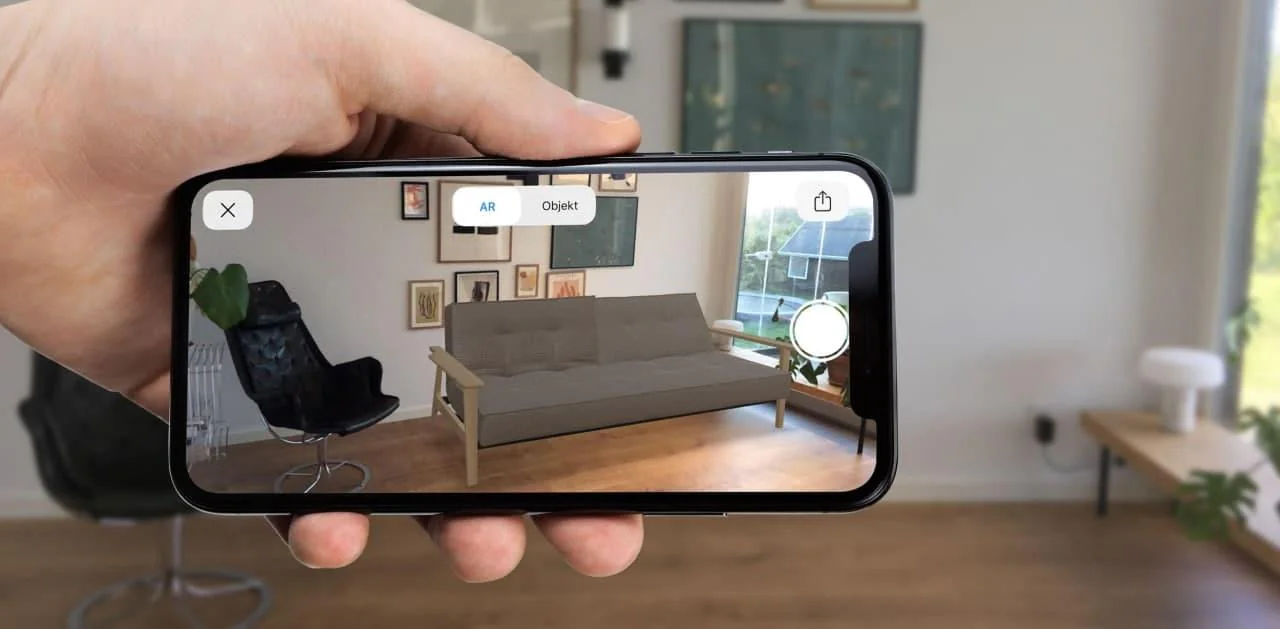
STEP 6: Real-World Scale Validation

Open the AR view from your /ar-test-build/ folder on both iOS (Safari → Quick Look) and Android (Chrome → Scene Viewer/WebXR), then place the model on a flat surface and compare its size directly with real objects around you (table, chair, hand, or room space) while walking around it and changing viewing distance; check that the model stays proportionally accurate from different angles and does not appear oversized, undersized, or visually distorted in space, and if you notice any scale mismatch, exit AR, go back to your /model-source/ folder, fix the export scale in your 3D software, and re-export the file before retesting.
STEP 7: Performance Stress Test

From your /performance-test-build/ folder, load the 3D model on both a low-end Android device and a standard smartphone, then rotate the model continuously, zoom in and out repeatedly, and switch between normal view and AR mode (if available) while observing performance under real mobile conditions such as responsiveness, frame stability, and loading behavior; check for slow load times, frame drops, overheating, texture lag, or freezing during interaction, and if any instability or performance degradation appears, stop immediately, optimize the model by reducing polygon count, compressing textures, or lowering file size in your /model-source/ folder, re-export the asset, and retest before moving to final cross-device validation.
FINAL STEP: Cross-Device Consistency + Approval Gate
Use your /final-qa-build/ folder and open the model on desktop (Chrome); mobile (iPhone Safari and Android Chrome), and AR mode on both devices. Rotate, zoom, and launch AR to confirm textures, lighting, scale, interaction, and performance remain consistent across all environments. If any mismatch, AR failure, or performance issue appears, stop immediately, fix it in /model-source/, re-export, and repeat the full workflow before approving for publishing.
Common 3D Model Testing Issues and How to Identify Them
Open the same GLB model in /desktop-test-build/ and /mobile-test-build/ and compare behavior across Chrome, Safari (iOS), and Android Chrome to quickly detect real deployment issues before fixing anything in /model-source/.
Texture appears gray or black
Cause: textures not embedded in GLB or broken external texture paths after upload
Result: model loads but looks untextured or flat
Check: inspect missing textures in viewer or network tab
Model scale is wrong in AR
Cause: incorrect unit setup during export (Blender meters vs centimeters mismatch)
Result: furniture becomes oversized or product appears too small in real space
Check: compare AR size with real-world objects
Different look on iOS vs Android
Cause: USDZ conversion and material simplification in Apple Quick Look
Result: metallic or reflective materials look different across devices
Check: compare same model in iOS AR and Android Scene Viewer
Model freezes or loads slowly on mobile
Cause: high polygon count or uncompressed textures in GLB
Result: long load time, lag, or partial rendering on mid-range phones
Check: test on mobile data and lower-end devices
Model rotated incorrectly
Cause: axis mismatch during export (Y-up vs Z-up issue)
Result: model appears tilted or facing wrong direction in browser
Check: compare orientation in Blender vs web viewer
AR placement is unstable
Cause: scale/anchor metadata mismatch in export or viewer interpretation
Result: model drifts, jitters, or shifts on surface in AR
Check: test on flat surfaces while moving device around
Recommended Tools for Testing 3D Models Across Web and AR
Use a fixed tool stack across your /model-source/, /desktop-test-build/, and /mobile-test-build/ workflows so every result stays consistent and reflects real production behavior.
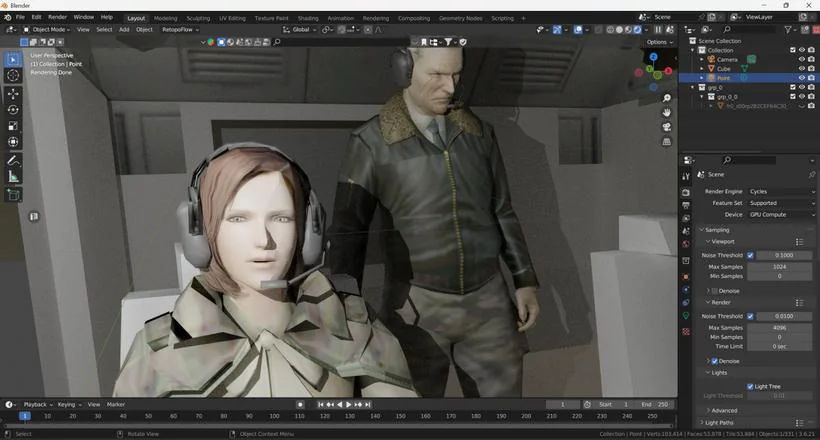
Blender (source validation + fixes)
Use Blender inside /model-source/ to check scale, axis orientation, materials, and textures before export, then re-export GLB/GLTF after fixing issues to prevent web and AR errors later.
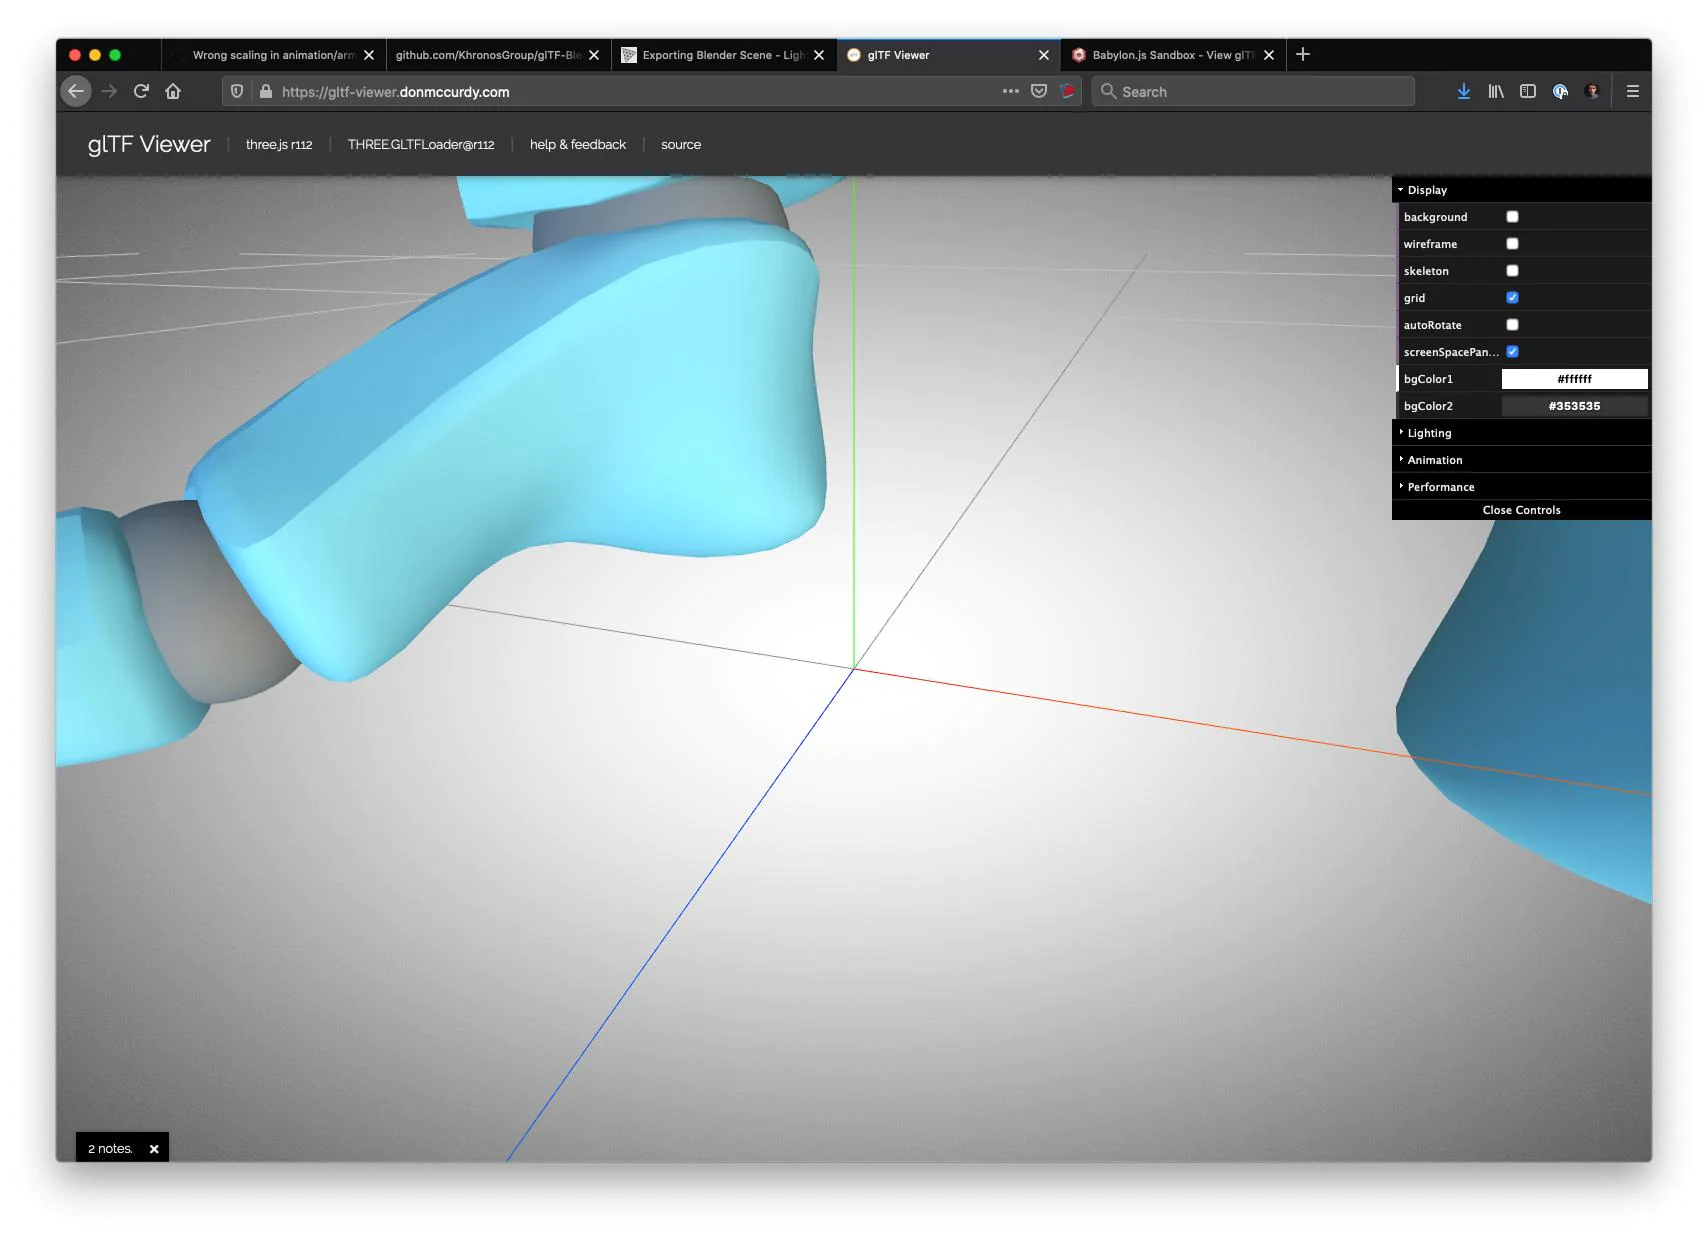
glTF Viewer (quick file check)
Use a glTF/GLB viewer immediately after export to confirm the model loads correctly, textures are embedded, and no geometry or material errors exist before uploading to your staging environment.
Chrome DevTools (web debugging)
Use Chrome DevTools during testing in /desktop-test-build/ to inspect console errors, monitor loading issues, and identify broken textures or failed asset requests in real time.
Safari (iOS real-device AR testing)
Use Safari on an iPhone to test Quick Look AR behavior, check model scaling in real space, and verify material consistency directly on Apple’s rendering pipeline.
Android Chrome + Scene Viewer (AR testing)
Use Android Chrome to launch Scene Viewer or WebXR from your /ar-test-build/ URL, confirm AR entry works, and validate surface anchoring and scale behavior.
glTF Validator
Run your exported file through a glTF validator to detect structural issues like missing textures, incorrect references, or non-compliant export settings before publishing.
Draco Compression Tools
Use Draco or similar compression tools when models are heavy, then retest in /performance-test-build/ to ensure reduced file size improves loading speed without visual quality loss.
Texture Optimization Tools
Optimize textures before final testing to reduce load time and prevent freezing on low-end devices during mobile and AR interaction.
Conclusion
You test 3D models across web and AR environments as a structured validation workflow, not a one-time check, to ensure the model behaves correctly in real conditions before deployment. You start in your /model-source/ folder with export validation, then move through desktop and mobile testing, and finally complete AR and cross-device checks to catch issues like broken textures, incorrect scaling, AR launch failures, and performance drops on mobile devices.
This workflow ensures the same model performs consistently across Chrome, Safari, Android, iOS, and AR viewers like Quick Look and Scene Viewer without unexpected visual or technical differences after publishing.
