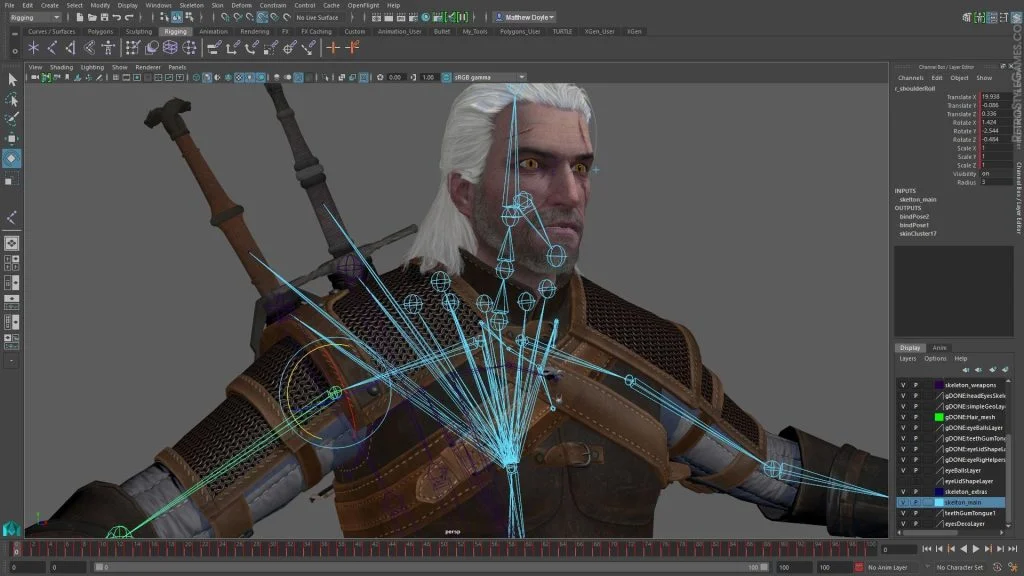
How to Rig a 3D Character in Maya for Game Animation
You can spend weeks getting your model to look absolutely perfect, but if the skeleton underneath is a mess, everything falls apart the second it moves. The shoulders pinch, the joints warp, and the whole thing instantly looks like a glitchy nightmare.
In the everyday game dev 3d character creation workflow maya artists use, rigging is that invisible bridge. It is the crucial step right after you finish texturing, but right before you hand things off to an animator. It links your static 3D mesh to an interactive digital skeleton. Film rigs can be as heavy and complicated as the director wants, but game rigs have to be super lightweight. They need to calculate smooth movements in real time at 60+ frames per second, or your game will lag.
When a rig is sloppy, animators waste days fighting broken controls, and developers get stuck troubleshooting error messages in the game engine. This step-by-step guide skips the dry textbook talk and gives you a simple, practical way to master model rigging inside Autodesk Maya.
Step 1: Clean Your Mesh for Flawless Rigging
To get your mesh completely ready for a flawless game dev 3d character creation workflow maya pipeline, you start by selecting your character and clicking Mesh > Cleanup to open the options window. You check Select matching polygons, tick the boxes for both Faces with more than 4 sides and Non-manifold geometry, and hit apply so you can quickly locate and manually fix those illegal polygons.
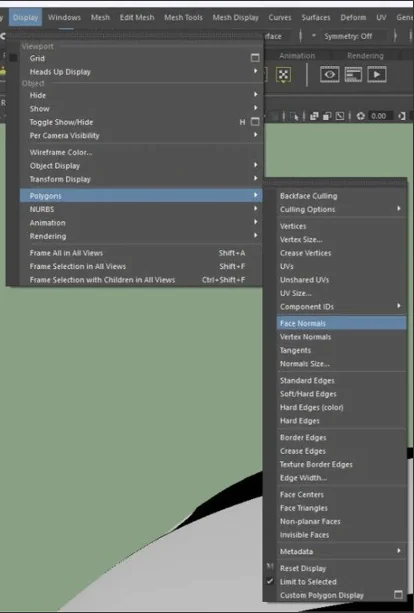
Next, you switch over to Vertex mode, drag a large selection box over your entire model, click Edit Mesh > Merge, and set the threshold value to 0.001 to instantly weld hidden overlapping vertices without gluing fine details like fingers or eyelids together. To make sure your surfaces point outward and don’t become invisible in the game engine, you click Mesh Display > Unlock Normals, click Conform to face all polygons in the same uniform direction, run Soften/Harden Edges to smooth out the surface shading, and manually select any remaining dark patches to apply Mesh Display > Reverse.
You wrap up this entire model rigging preparation by selecting your mesh, clicking Edit > Delete by Type > History to wipe out Maya’s heavy background tracking memory, and finally clicking Modify > Freeze Transformations to drop your character’s position, rotation, and scale attributes back to absolute zero.
Step 2: Sourcing Free 3D Character Models for Maya to Practice On
To skip modeling from scratch and start practicing immediately, you jump onto platforms like Animation Mentor to download the beginner-friendly Stewart or Squirrels rigs, search community portals for the Morpheus or Knight Spider rigs for advanced anatomical challenges, browse Truong CG for creature assets, or grab an un-rigged base mesh from Reallusion if you want to build a skeleton from scratch.
Before clicking download, you always look for native .ma (Maya ASCII) or .mb (Maya Binary) files to ensure the asset loads instantly with pre-built control handles, only picking an .fbx file if you plan to manually build custom control curves or use Maya’s Quick Rig tools.
To execute this step in your game dev 3d character creation workflow without breaking its internal references, you open a completely fresh, empty scene inside Maya, click File > Import from the top menu, locate your downloaded file, and hit import. As soon as the character appears in your viewport, you open your Outliner and instantly lock the geometry layers so you only click on the actual animation controllers, completely preventing you from accidentally warping or dragging the character’s skin out of place during your model rigging practice.
Step 3: Building Your Skeleton and Placing Joints
Now that you have sourced the perfect practice character from Step 2, you transform this static digital puppet into a living asset by building its internal skeleton. To execute this foundational phase of your game dev 3d character creation workflow maya setup, you first clear out old data using Edit > Delete by Type > History and Modify > Freeze Transformations, then toggle on Shading > X-Ray Joints so the bone structure stays perfectly visible inside the mesh skin.
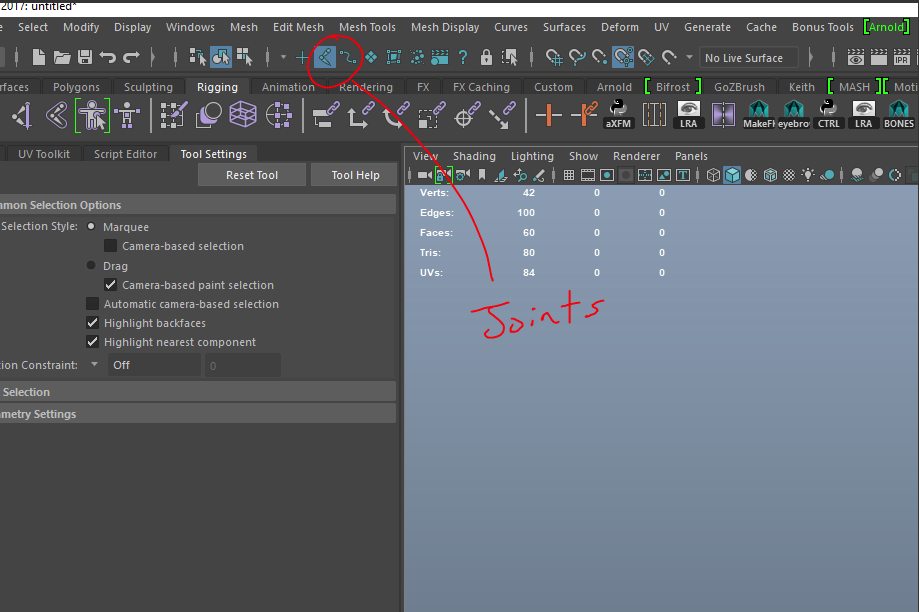
Next, you switch your menu to Rigging, open the Skeleton > Create Joints options, and enable Projected Centering to let Maya automatically snap each joint dead-center inside the limbs. Working in flat 2D views from the hip root outward, you draw a natural forward ‘S’ curve for the spine, place the shoulder, elbow, and wrist in the top view while keeping the elbow pushed slightly back to guide future animation tools, and map out the hip, knee, elevated ankle, ball, and toe from the side view.
To keep this model rigging pipeline pristine, you open the Outliner to replace all default names with clear sequential labels ending in _JNT, middle-mouse drag child joints into parent joints to establish a proper family tree, and wrap up by opening Skeleton > Orient Joint to align the primary axis down the bone stream so every custom controller rotates predictably without twisting.
Step 4: Skinning and Weight Painting
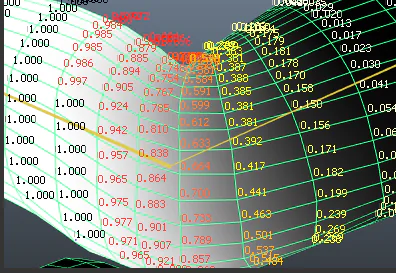
Now that you have successfully built a rock-solid skeleton in Step 3, you need to attach your character’s outer mesh to those internal bones so the body actually moves when the skeleton rotates. To execute this critical phase of your game dev 3d character creation workflow maya pipeline, you select your root joint and polygon mesh together, navigate to the Rigging menu, and click Skin > Bind Skin using the Joint Hierarchy and Classic Linear settings to officially lock the skin to the skeleton. Once bound, you open Skin > Paint Skin Weights Tool to control exactly how individual joints deform the surrounding vertices, using a visual grayscale map where white represents total control, black means zero impact, and gray provides a smooth transition
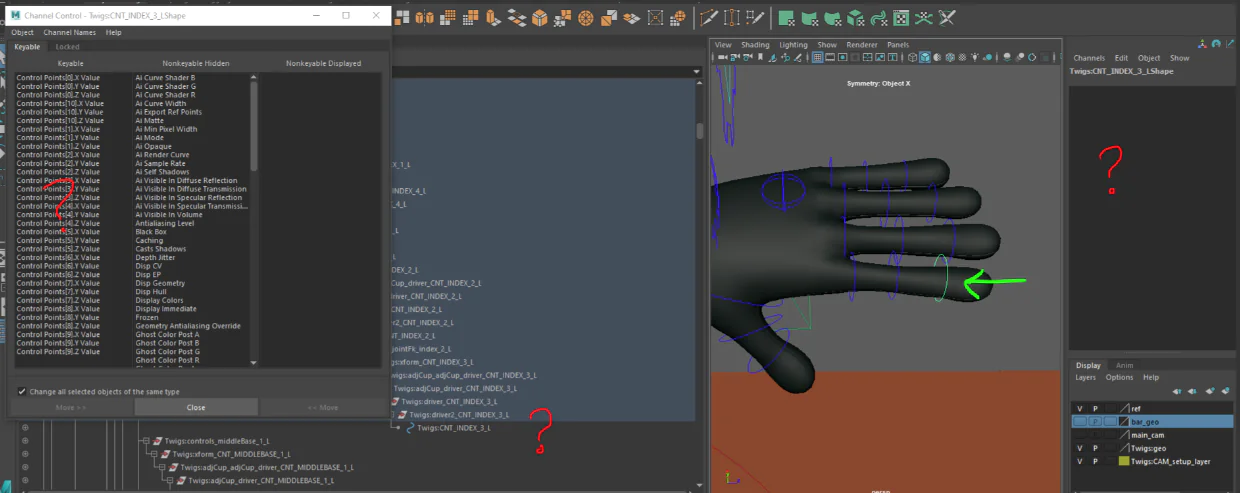
You hold B and drag your mouse to resize your brush on the fly as you switch between the Replace, Add, and Smooth operations, or you open the Component Editor to type in precise numerical values for specific vertices. To safeguard your progress during this meticulous model rigging stage, you lock nearby joints in your influence list to prevent accidental paint bleeding, and the moment you perfectly weight one half of your character, you reset the rig to its default Bind Pose and click Skin > Mirror Skin Weights to instantly duplicate your hard work to the opposite side
Step 5: Building Switchable IK/FK Control Handles
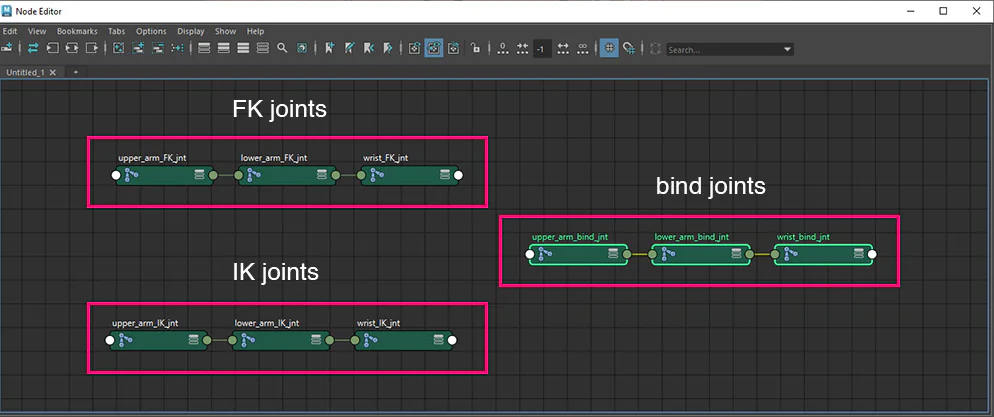
To give your character a professional steering wheel, you duplicate your cleanly oriented base skeleton twice to create separate, unparented IK and FK joint chains. You generate NURBS control curves for the FK setup, snapping them directly to the joints via Modify > Match Transforms before parenting the FK joints to these shapes so they rotate smoothly. Next, you select Skeleton > Create IK Handle using a Rotate Plane Solver to link the topand bottom joints, lock a locator near the elbow joint with a Pole Vector constraint to prevent messy twisting, and parent the IK handle to a dedicated hand control curve .
To finish this phase of your game dev 3d character creation workflow maya pipeline, you select the hand control curve, click Modify > Add Attribute to build a custom floating slider called IKFK_Switch, and apply an Orient Constraint across the three joint hierarchies. Finally, you open the Node Editor to link your master switch to the constraint weights through a Reverse node while mapping it to the curves’ visibility, establishing a flawless model rigging setup that seamlessly toggles your active viewport controls between positional and rotational manipulation.
Step 6: Creating Global Controls, Set Driven Keys, and Rig Testing

Now that you have built switchable IK/FK control handles to steer your limbs in Step 5, you must unify everything and test the rig so animators can easily handle the model without breaking it. To execute this final phase of your game dev 3d character creation workflow maya pipeline, you generate a master global control shape at the character’s feet, parenting the main hip control and root skeleton joint directly to it to manage overall positioning and engine scaling without creating cyclic errors.
Next, you centralize control over secondary animations, cloth, or blend shapes by opening Animation > Key > Set Driven Key > Set, loading your control curves as the driver and the target joints or shapes as the driven variables. You establish automated proportional relationships by keying both objects at their baseline values, shifting the driver attribute to its maximum limit, adjusting the driven object to its final pose, and clicking the key again to lock the link. Finally, you put your completed model rigging setup through extreme stress tests, utilizing your global and limb controls to push the mesh into severe bending angles so you can instantly smooth out any collapsing geometry around the armpits or groin with your weight painting tools before exporting your flawless skeletal mesh directly to your game engine.
Step 7: Final Rig Export and Game Engine Integration
Now that you have finalized your workspace and stress-tested your mesh deformations in Step 6, you are ready for the final step: pulling your character out of Maya and bringing it to life inside your game engine.
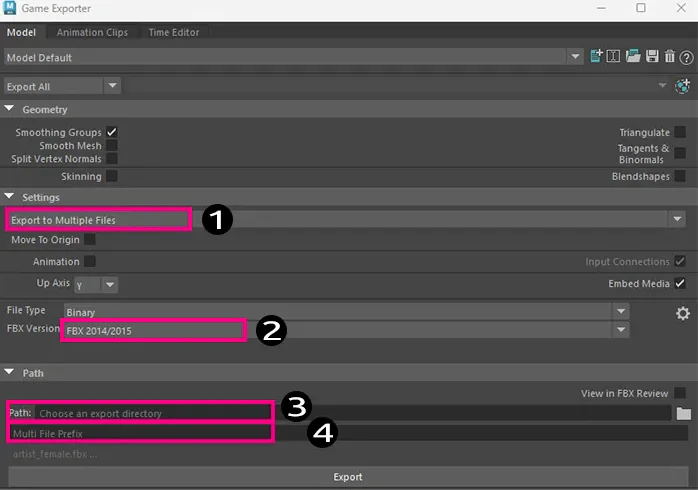
To execute this final phase of your game dev 3d character creation workflow maya pipeline, you bake all animation keys directly onto the deformation bone hierarchy and strip away the heavy control shapes, constraints, or non-deforming elements so the engine only processes the essential data. Next, you select only your final polygon mesh and the root joint, exporting them as a clean FBX file with “Selected Objects” and “Bake Animation” checked to ensure your motion data translates flawlessly.
Step 8: Export to Unity or Unreal
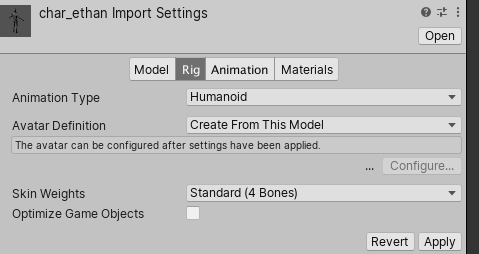
If you are importing your character into Unreal Engine, you set the skeleton dropdown to “None” to generate a fresh master skeleton asset, making sure to check “Import Animations” and “Import Morph Targets” to preserve your custom animations and facial shapes. If you are bringing your asset into Unity instead, you select your imported FBX file, navigate straight to the Rig tab in the Inspector, and switch the Animation Type from Generic to Humanoid so the engine automatically maps your bipedal bones. This completes your model rigging pipeline, leaving you with a fully functional, production-ready character ready for gameplay.
Tools Required for Rigging a 3D Character in Maya
To build a professional rigging pipeline in Maya, you depend ( on a specific set of core tools that manage bone hierarchies, mesh deformation, and animator-friendly interfaces.
Joint Tool: You use this to create the skeletal hierarchy by placing joints at the character’s pivot points.
IK Handle Tool: You apply this to create Inverse Kinematics, which allows for intuitive limb movement by calculating chain rotations automatically.
Skinning Tools (Smooth Bind): You use these to attach the 3D mesh to your skeleton, ensuring the geometry follows the bones during movement.
Paint Skin Weights Tool: You utilize this to manually adjust how much influence each bone has on specific vertices, which is critical for fixing unnatural mesh deformation.
Set Driven Key (SDK): You employ this tool to create proportional relationships where one controller (like a finger curl or facial feature) drives the movement of multiple other joints or shapes.
Node Editor: You use this window to visually map complex relationships, such as connecting switchable IK/FK setups or mapping constraints to custom attributes.
Constraint Tools: You apply constraints (Parent, Point, Orient, Pole Vector) to link the movement of control objects to the deformation joints without parenting them directly into the export hierarchy.
Conclusion
By following this game dev 3d character creation workflow maya pipeline, you successfully bridge the gap between a static 3D model and a fully interactive game character. You progress through building a functional skeletal hierarchy, implementing intuitive IK/FK switching systems, and perfecting mesh deformations through precise weight painting. Finally, by cleaning your rig for export and correctly integrating your asset into a game engine like Unreal or Unity, you guarantee that your character remains performant and production-ready.
Mastering this workflow not only professionalizes your output but also ensures your animations perform reliably under the rigors of real-time gameplay. With your rig now optimized and engine-ready, you possess a solid, professional foundation to begin animating your character and bringing your creative vision to life within your game environment.
