How To Equalize Images
Equalizing an image refers to enhancing the overall balance of images, including brightness and contrast. To equalize photographs, an equalizer tool is often employed to add the desired transformations in the formation of the visual narrative. The most often used equalizer in image editing is a histogram, which is utilized to evenly distribute pixel intensities across the available tonal range, stimulating the general lighting conditions. Histogram equalization can help improve the clarity of both the dark and bright zones of images, which can be helpful primarily for images that have inadequate lighting and contrast. By adjusting the histogram, editors can elevate images with ideally better contrast, enhanced textures, modified colours, and overall feature clarity. In brief, using equalizer tools can facilitate global adjustments of images by covering broader aspects of an image, upgrading clarity, and increasing the conformity of all of the visual elements. The following steps of this blog will simplify the approach of using an equalizer like a histogram to edit images for enhanced lighting, contrast, and visibility.
Step 1: Analyzing The Photograph
Load the image in your preferred editing program to assess its general quality.
Watch the brightness levels, noticing any regions that show up too dull or excessively bright.
Look at the contrast by focusing on the difference between light and dark areas of the picture.
Look for irregular lighting or shadows that might distract from the main subject.
Attend to colour accuracy; look for phoney tints caused by inappropriate lighting or camera settings.
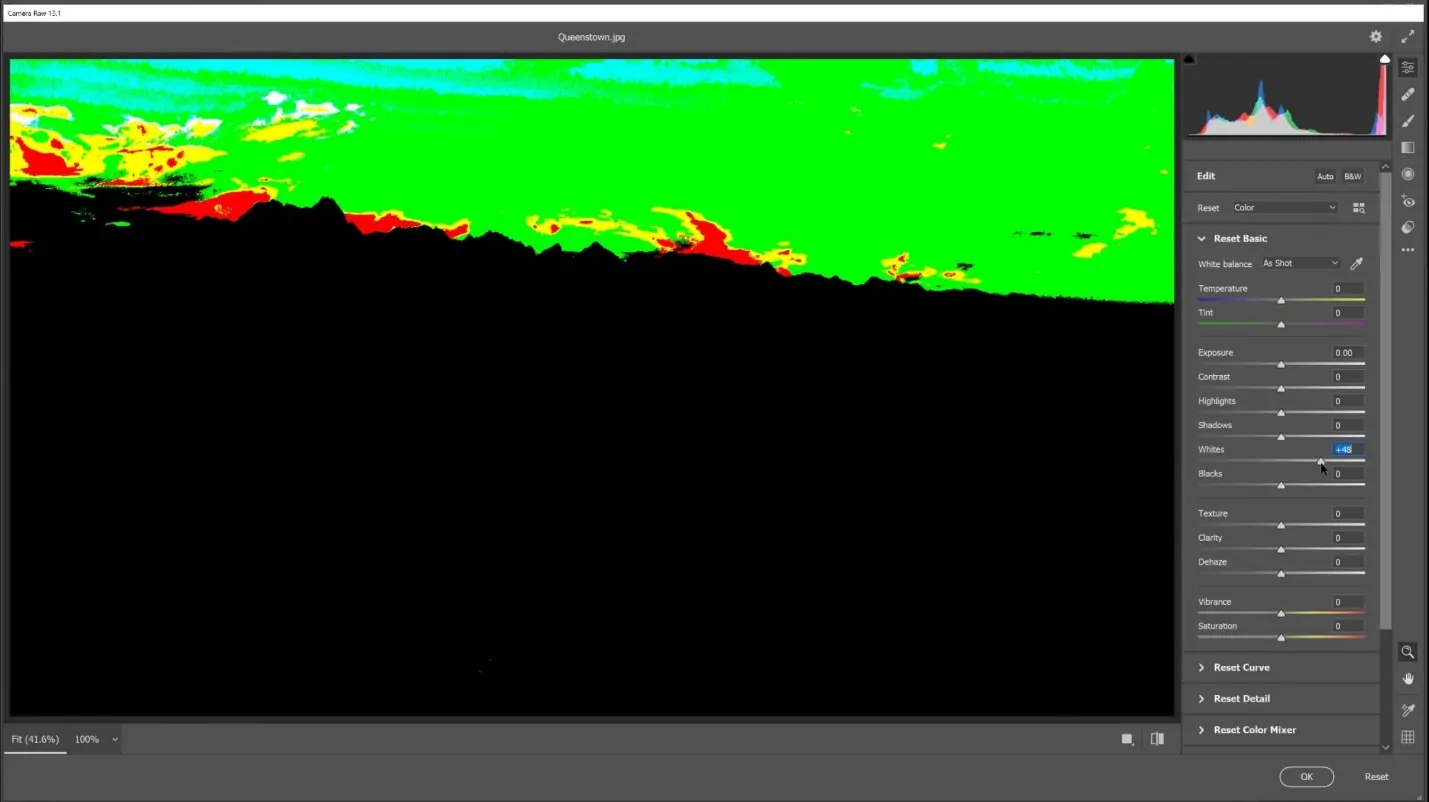
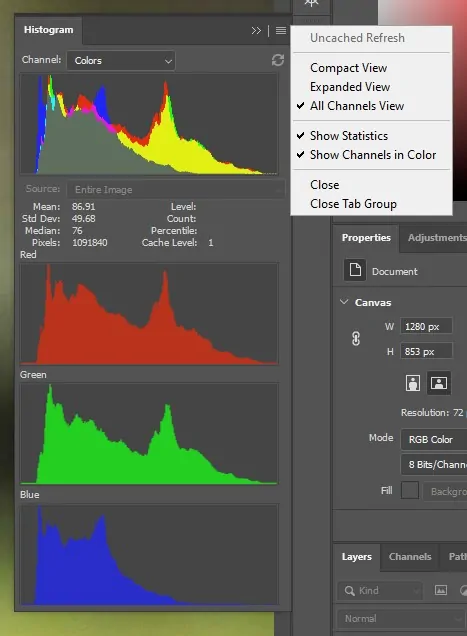
Utilize the histogram feature of your software to examine the image’s tonal range and identify zones missing detail.
Concentrate on problem ranges where highlights are blown out, or shadows are too profound.
Observe the photo’s surface and detail quality, guaranteeing the resolution is high enough for alterations.
Watch any particular details, including facial features or intricate designs, that need to stand out after equalization.
According to your analysis, choose the key adjustments needed to adjust the photo.
That intensive analysis will help direct targeted edits within the equalization process.
Step 2: Utilizing Exposure Adjustment Tool
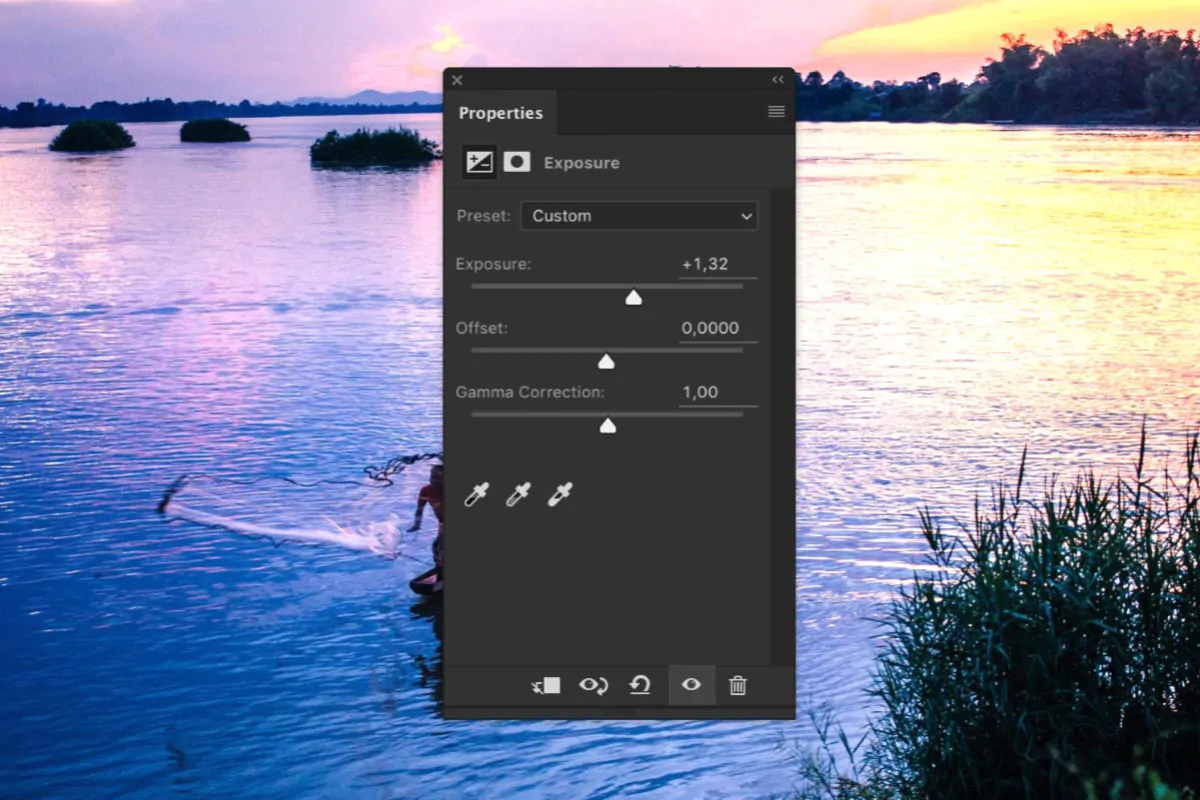
Navigate to the exposure adjustment tool in your editing app, which is typically labelled as Exposure or Brightness.
Begin by somewhat increasing the exposure to brighten dark regions, ensuring that details become more visible.
Prevent over-exposing the photograph, as it can result in washed-out highlights that lack detail.
Inspect how the changes influence the overall balance, centring on holding natural tones.
Alter highlights separately, decreasing intense bright spots without diminishing the rest of the photograph.
Alter shadows to recover details in darker zones, making sure that they blend consistently with mid-tones.
Utilize the Mid-tone adjustment, if accessible, to form a balanced transition between highlights and shadows.
Continually compare the edited version with the initial to make sure your alterations are natural and viable.
Rely on the histogram to confirm that brightness levels are equitably distributed over the tonal range.
Refine until the exposure looks consistent and goes with the image’s subject and temperament.
At the end of this step, your image will be ready for more targeted equalization processes.
Step 3: Applying Histogram Equalization
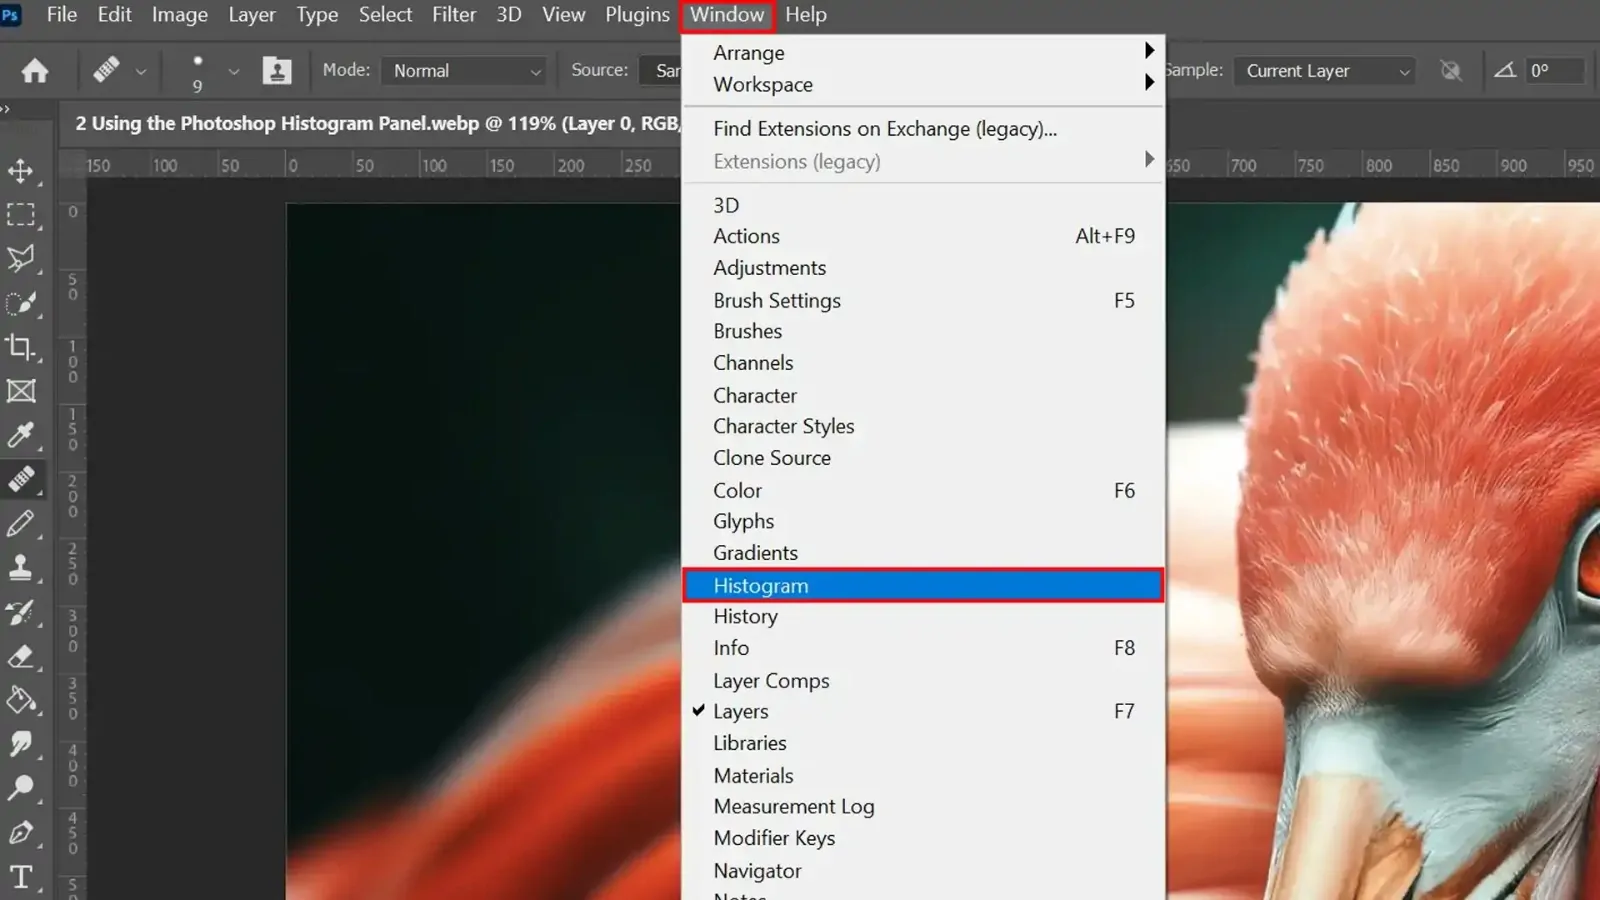
Find the histogram equalization tool in your editing app, which is usually found under advanced adjustments or contrast settings.
Open the equalizer tool, and be sure that the histogram shows the distribution of light and dark regions in your photo.
Utilize an automatic equalization option, if accessible, as a beginning point for enhancement.
Supervise the impact by reviewing if the contrast is more adjusted and details within the highlights and shadows are adequately revealed.
Alter the settings manually if required, focusing on spreading the tonal values equally over the histogram.
Avoid making the adjustments too excessive, which can result in an unnatural or excessively processed appearance.
Compare before and after versions to make sure the equalization improves the image’s depth without warping its particulars.
Try fine-tuning sliders like gamma correction or contrast to attain ideal results.
Save the settings in case the program supports presets for consistent results on comparative images.
Conclude the adjustments once the picture accomplishes the specified harmony and clarity of detail.
Histogram equalization will enhance the tonal range, making the image more dynamic and visually engaging.
Step 4: Modifying Levels And Curves
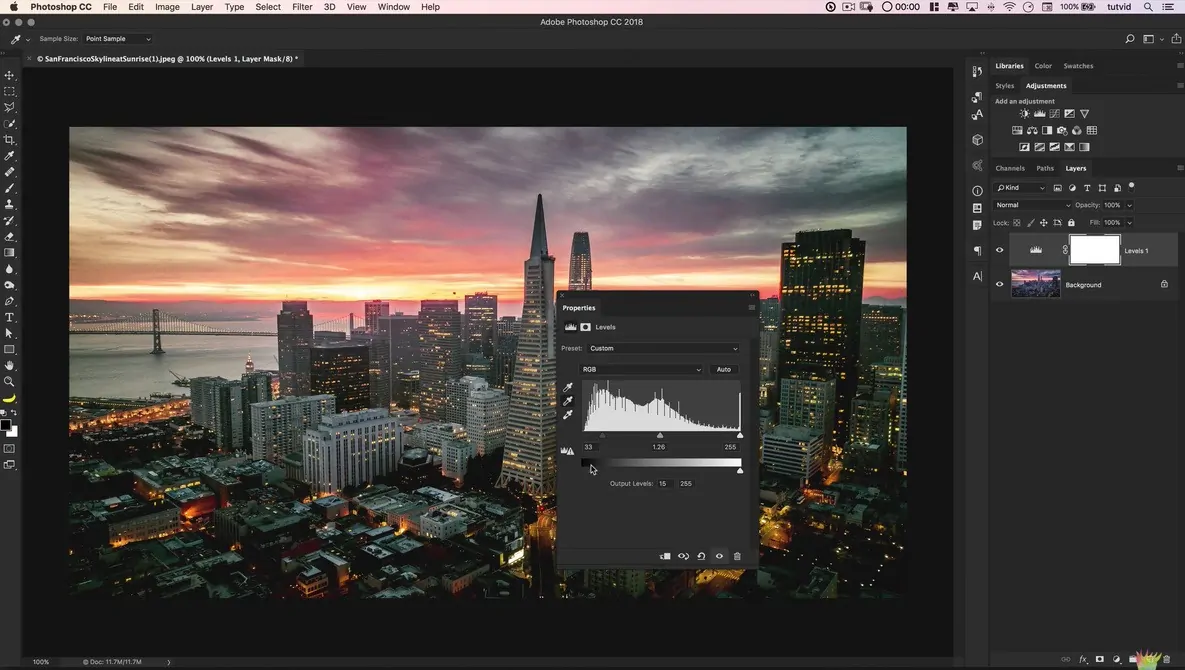
Head to the Levels or Curves adjustment tool in your editing program.
Start with the Levels adjustment to adjust the darkest and brightest points of the photo utilizing the sliders.
Pull the black point slider inward to develop shadows, confirming that darker zones are well-defined.
Drag the white point slider inward to illume highlights, improving the overall glow.
Alter the mid-tone slider to manage the brightness balance without overexposing or over-darkening.
Swap to the Curves adjustment for more exact tonal control over the photo’s spectrum.
Make an S-curve to extend contrast by somewhat decreasing shadows and boosting highlights.
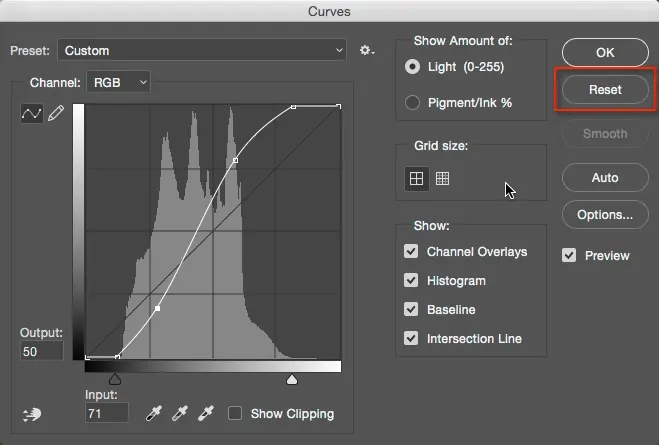
Play with control points on the curve to tune particular tonal areas without influencing others.
Work on retaining details within the highlights and shadows while improving texture and profundity in mid-tones.
Utilize before-and-after previews to ensure that the adjustments accommodate the natural appearance of the image and the aimed style.
That step brings tonal accuracy and includes depth to your photo, complementing the prior equalization adjustments.
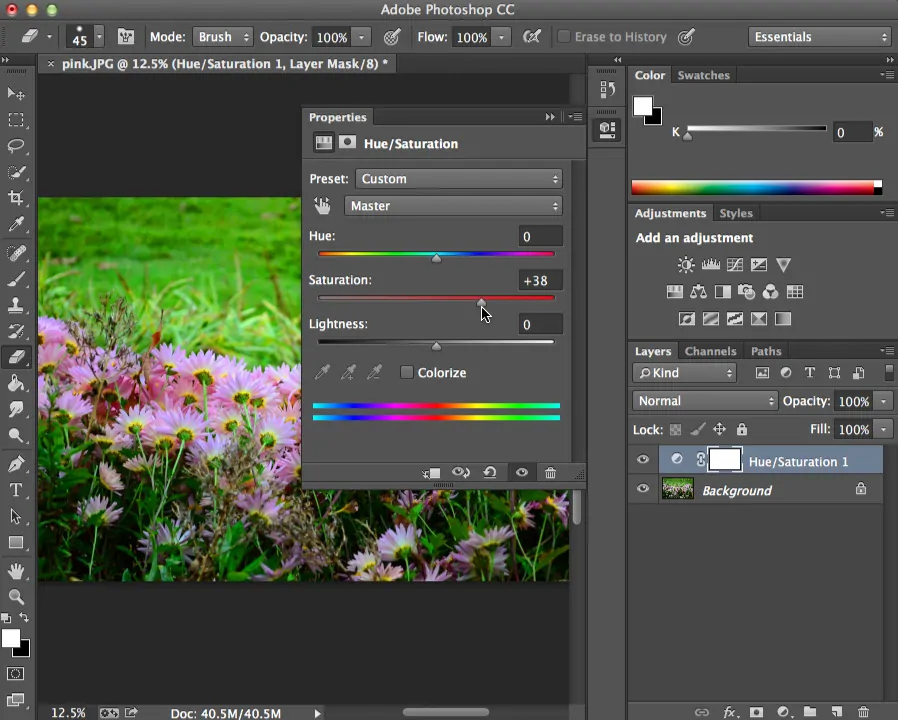
Step 5: Balancing The Colors
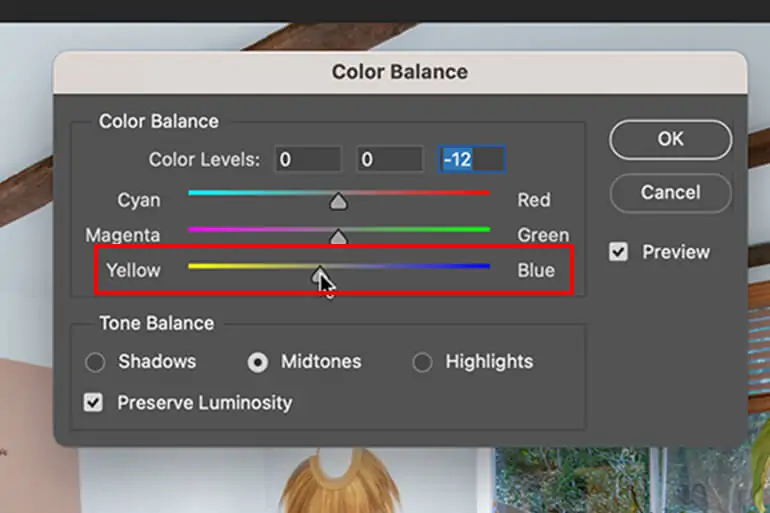
Head to the colour balance or white balance tool in your editing program.
Start by adjusting the white balance to neutralize any colour cast generated by lighting problems.
Utilize the sliders for the Red, Green, and Blue channels to accommodate the overall colour temperature.
Expand warmth by including more red and yellow tones, or cool down the picture by incorporating blue tones.
Review different sections of the photograph, as the uneven colour balance can influence skin tones, scenes, or foundation components.
Adjust any unnatural colour tints by altering the shadows, mid-tones, and highlights separately to preserve realism.
Utilize the selective colour adjustment feature to fine-tune certain regions where colour issues prevail, like green-tinted shadows or blue highlights.
Make sure that imperative components such as faces or objects retain natural colour integrity while keeping up the overall aesthetic.
Utilize the HSL sliders to make precise colour adjustments for more distinctive or minute results.
Compare with the initial image to make sure that the colours look accommodated and visually engaging while remaining genuine to the scene.
This step can progress colour balance and improve the photo’s authenticity, setting the stage for a tended, well-balanced final photograph.
Step 6: Sharpening The Subtle Elements
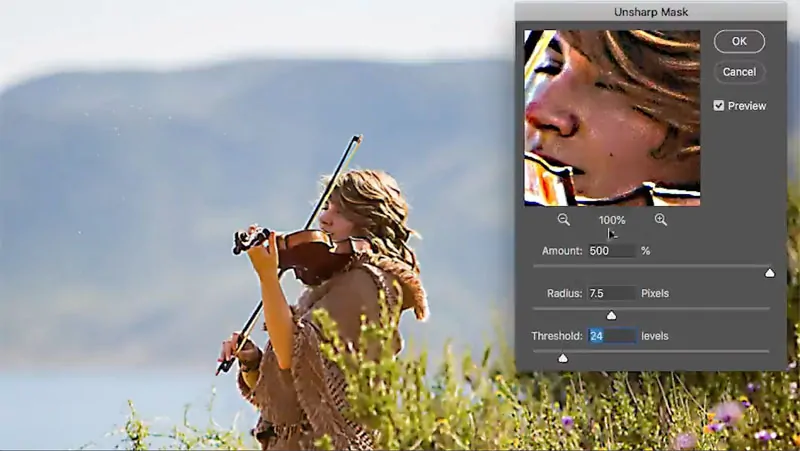
Choose the sharpening tool in your editing app, typically named Sharpness, Clarity, or Detail.
Begin by applying a nuanced amount of sharpening, concentrating on upgrading surfaces without presenting noise.
Alter the radius slider to control how broadly the sharpening impact spreads, guaranteeing it focuses on rims.
Utilize the detail slider to polish better details, particularly in zones with intricate surfaces, like skin or texture.
Be careful not to oversharpen because it can lead to halo impacts or grainy patches.
Employ local sharpening for zones that require more detail, like the eyes in a portrait or fine highlights in architecture.
In case your software permits, utilize the masking feature to apply sharpening as it were to high-contrast ranges, leaving smooth or uniform areas unaffected.
Zoom in to 100% to examine sharpening results, guaranteeing sharpness does not present any undesirable artifacts.
Utilize the deblurring techniques if the photo has motion blur, stopping sharpened ranges from looking bizarre.

Compare the sharpened picture with the initial to guarantee the ultimate look shows up fresh but not over-processed.
Sharpening can improve clarity and freshness, including depth to surfaces and emphasizing the subtle elements in your photograph.
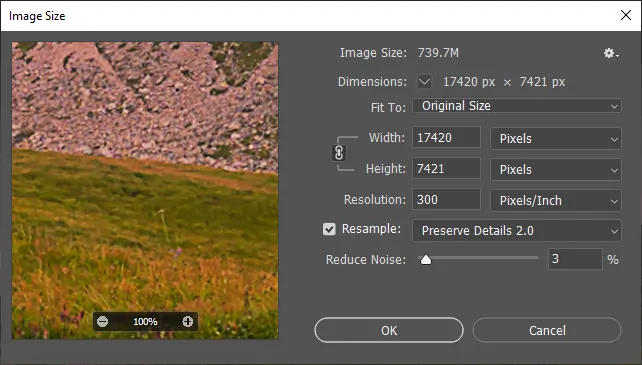
Step 7: Saving The Final Image
Survey the ultimate adjustments made to the image, guaranteeing everything appears proportional and improved as desired.
Select the proper file format for your intended use. JPEG is perfect for web use, whereas TIFF is ideal for high-quality prints.
Specify the resolution for export according to the intent of usage. Web pictures typically require 72 DPI, whereas print images require 300 DPI or greater.
Alter the quality setting for formats like JPEG to guarantee a suitable symmetry between file size and picture clarity.
If you want to form further edits in the future, save a duplicate in a non-destructive format, such as PSD or XCF, with all layers untouched.
Before exporting, double-check the photograph for any colour irregularities, pixelation, or issues that may have emerged during altering.
Name the file distinctly to keep it organized, and select a destination folder for simple access afterwards.
Utilize the Save for Web option if you are planning the image for online sharing, optimizing it for quicker loading times.
Lastly, export the picture and back up a duplicate to secure your work.
Conclusion
In conclusion, employing an equalizer such as a histogram strives to disperse values uniformly throughout the tonal range of an image. It improves the distribution of contrast throughout the visual scene by sampling the pixels in different areas of the image and applying equalization locally. Nevertheless, using an equalization can sometimes cause certain areas of the image to be unduly dark and others to be too bright. This implies that you will need to make additional adjustments to the image using other effects or be moderate in your modifications within the histogram.
