How To Create Realistic Grass In Cinema 4D
Cinema 4D is a popular 3D modelling and animation software in various industries, such as film, video game development, and architecture. One of the critical elements in creating realistic environments is the grass, which can add depth and realism to a scene. Creating natural grass in Cinema 4D can seem daunting, but it can be easily achieved with the right tools and techniques. This tutorial will cover various ways to create realistic grass in Cinema 4D. We will explore using textures, Hair, and particle systems to achieve different types of grass, from short and sparse to tall and thick. Ultimately you will have a good understanding of how to create realistic grass in Cinema 4D and be able to apply these techniques to your projects.
Before we go through the techniques for creating realistic grass in Cinema 4D, it’s essential to understand some basic principles of grass. Hay can have different lengths, thicknesses, colours, and densities depending on the environment and climate it grows. Understanding these characteristics of grass can help you create more realistic and believable grass in your 3D scenes. Consider the lighting and composition of your background, as these factors can significantly affect the appearance of grass. With these principles in mind, let’s explore the different techniques for creating realistic grass in Cinema 4D.
Creating Realistic Grass with Textures:
Using textures is one of the essential techniques for creating realistic grass in Cinema 4D. Textures can help you make the appearance of individual blades of grass and create variations in colour, length, and thickness. There are several types of surfaces that you can experiment with to make different kinds of grass. Here are some examples:
Procedural Textures: The software generates procedural textures and can create repeating patterns or random variations in grass colour, length, and thickness. These types of textures are great for creating large areas of grass that look natural and organic.
Image-Based Textures: Image-based textures use photographs of natural grass to create the appearance of individual blades of grass. These textures can create a more detailed and realistic look but can also be more time-consuming to create and render.
Noise Textures: Noise textures are a type of procedural texture that can create random variations in grass colour, length, and thickness. These textures create a more natural and organic look for your grass.
When using textures, paying attention to the scale and repetition of the texture is essential. If the texture is too large or repetitive, it can create an unnatural look for your grass. Additionally, you may need to adjust the texture’s brightness and contrast to create a more realistic look.
Another important aspect of using textures for creating realistic grass is using the proper mapping technique. Mapping determines how the texture is applied to the surface of the grass. There are several mapping techniques, such as UV mapping, cubic mapping, and spherical mapping. Each method has advantages and disadvantages, so it is essential to experiment with each to find the best mapping technique for your scene.
Finally, using alpha channels can help create the appearance of individual blades of grass. An alpha channel is a black-and-white image that determines which areas of the texture are visible and which sites are transparent. Using an alpha channel, you can create the appearance of individual blades of grass while still using a procedural or image-based texture.
Using textures is a powerful technique for creating realistic grass in Cinema 4D. By experimenting with different textures, mapping techniques, and alpha channels, you can create convincing grass that can add depth and realism to your 3D scenes.
Creating Realistic Grass with Hair:
Hair is another powerful tool for creating realistic grass in Cinema 4D. Using Hair, you can create individual blades of grass that move and sway in the wind, creating a more natural and organic look.
Create a Hair Object: To create a hair object, select the thing you want to add Hair to and go to the “Hair” menu. Select “Add Hair” from there to create a new hair object.
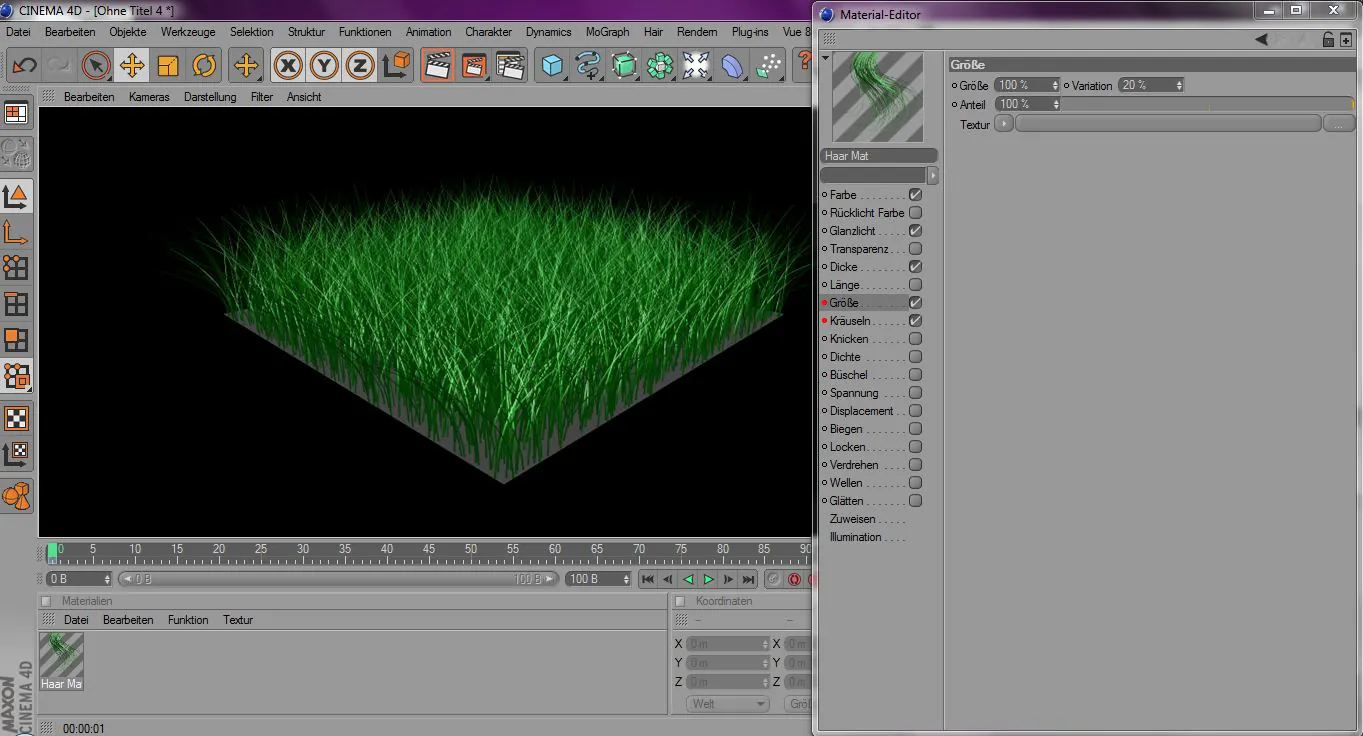
Adjust Hair Settings: Once you have created a hair object, you can adjust the settings to make the appearance of grass. Some necessary settings to modify include the hair length, density, thickness, and colour.
Style Hair: You can style the Hair using the various styling tools available in Cinema 4D, such as comb and brush tools. That creates a more natural and organic look for your grass.
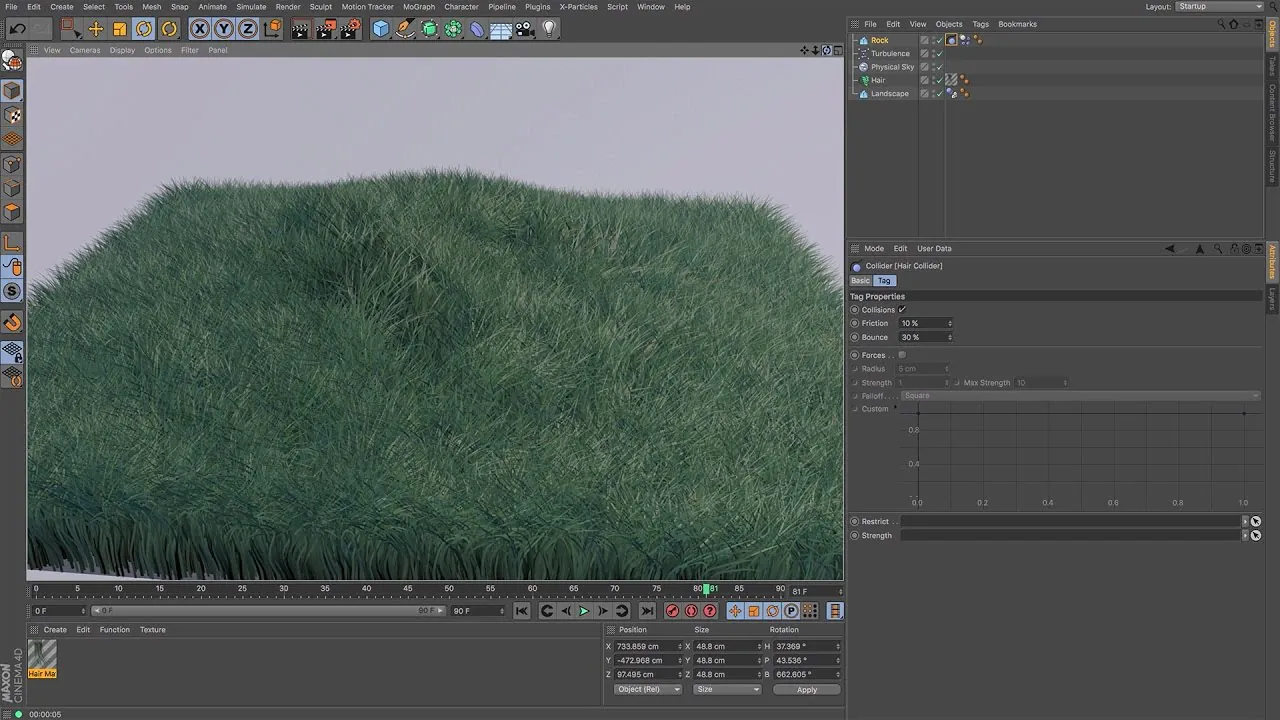
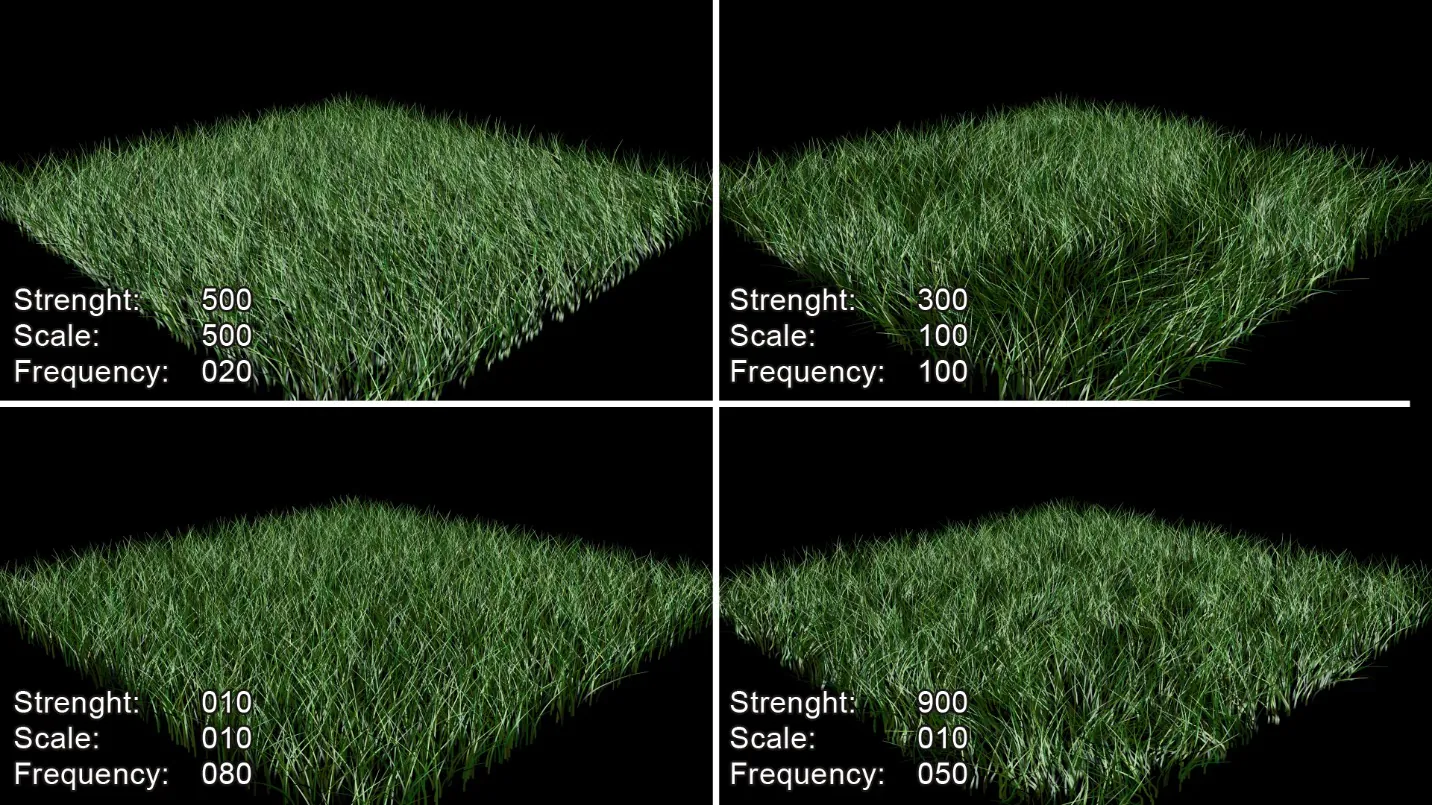
Add Dynamics: To create the appearance of movement and wind in your grass, you can add dynamics to the hair object. It will cause the individual blades of grass to move and sway in the wind, creating a more realistic and organic look.
Render Hair: Once you have styled your Hair, you can render it using the Hair Render settings in Cinema 4D. That will create the final appearance of your grass.
When using Hair to create grass, paying attention to its thickness and density is essential. If the Hair is too thick or too dense, it can create an unnatural look to your grass. Additionally, you may need to adjust the Hair’s colour and length to make a more convincing appearance.
One advantage of using Hair to create grass is the ability to easily create individual blades of grass that move and sway in the wind. That makes your grass look more natural and organic and can add depth and realism to your 3D scenes.
Overall, using Hair to create grass in Cinema 4D is a powerful technique that can help you create convincing grass that adds depth and realism to your 3D scenes. You can make natural and organic hay by adjusting hair settings, styling Hair, and adding dynamics.
Creating Realistic Grass with Particle Systems:
Particle systems are another technique that can be used to create realistic grass in Cinema 4D. Using particle systems, you can create individual blades of grass that move and sway in the wind, creating a more natural and organic look. It would be best if you used the Particle Emitter in Cinema 4D to make grass using particle systems.
Create a Particle Emitter: To create a particle emitter, select the object you want to add grass to and go to the “Particles” menu. Select “Add Particle Emitter” from there to create a new particle emitter.
Adjust Particle Settings: Once you have created a particle emitter, you can adjust the settings to make the appearance of grass. Some necessary settings to adjust include the particle size, density, velocity, and lifespan.
Create Grass Particles: To create grass particles, you must create a grass model and assign it to the particle emitter. That will make individual blades of grass that move and sway in the wind.
Add Dynamics: To create the appearance of movement and wind in your grass particles, you can add dynamics to the particle emitter. It causes the blades of grass to move and sway in the wind, creating a more realistic and organic look.
Render Particles: Once you have created your grass particles, you can render them using the Particle Render settings in Cinema 4D. That will create the final appearance of your grass.
When using particle systems to create grass, paying attention to the particle’s size and density is essential. If the particles are too large or dense, they can create an unnatural look for your grass. Additionally, you may need to adjust the particle’s velocity and lifespan to create a more convincing appearance.
One advantage of using particle systems to create grass is the ability to easily create individual blades of grass that move and sway in the wind. It creates a more natural and organic look to your grass and can add depth and realism to your 3D scenes.
Overall, using particle systems to create grass in Cinema 4D is a powerful technique that can help you create convincing grass that adds depth and realism to your 3D scenes. By adjusting particle settings, creating grass particles, and adding dynamics, you can make grass that looks natural and organic.
Tips for Creating Realistic Grass in Cinema 4D:
Now that you have learned some of the techniques for creating realistic grass in Cinema 4D, some tips can help you make even more convincing grass in your 3D scenes:
Use Reference Images: Reference images can significantly help create realistic grass. Find high-quality photographs of grass or visit a natural grassy area to observe the characteristics of grass blades, such as length, thickness, and colour.
Pay Attention to Lighting: Lighting is essential when creating realistic grass. Use natural lighting and shadows to create depth and realism in your grass.
Experiment with Textures: Experiment with different types of textures, such as noise, image-based, and procedural textures, to create different kinds of grass.
Use Dynamics: Adding dynamics to your grass can create the appearance of movement and wind, making it more realistic.
Add Variety: Real grass is not uniform in appearance. Add variety to your grass by creating different lengths, thicknesses, and colours.
Conclusion:
Creating realistic grass in Cinema 4D is essential for any 3D artist. Using techniques such as textures, Hair, and particle systems, you can create convincing grass that adds depth and realism to your 3D scenes. Additionally, you can make even more convincing grass by paying attention to lighting, using reference images, and experimenting with textures. With these tips, you are now ready to create realistic grass in Cinema 4D!
