How To Create A Watercolor Painting Effect
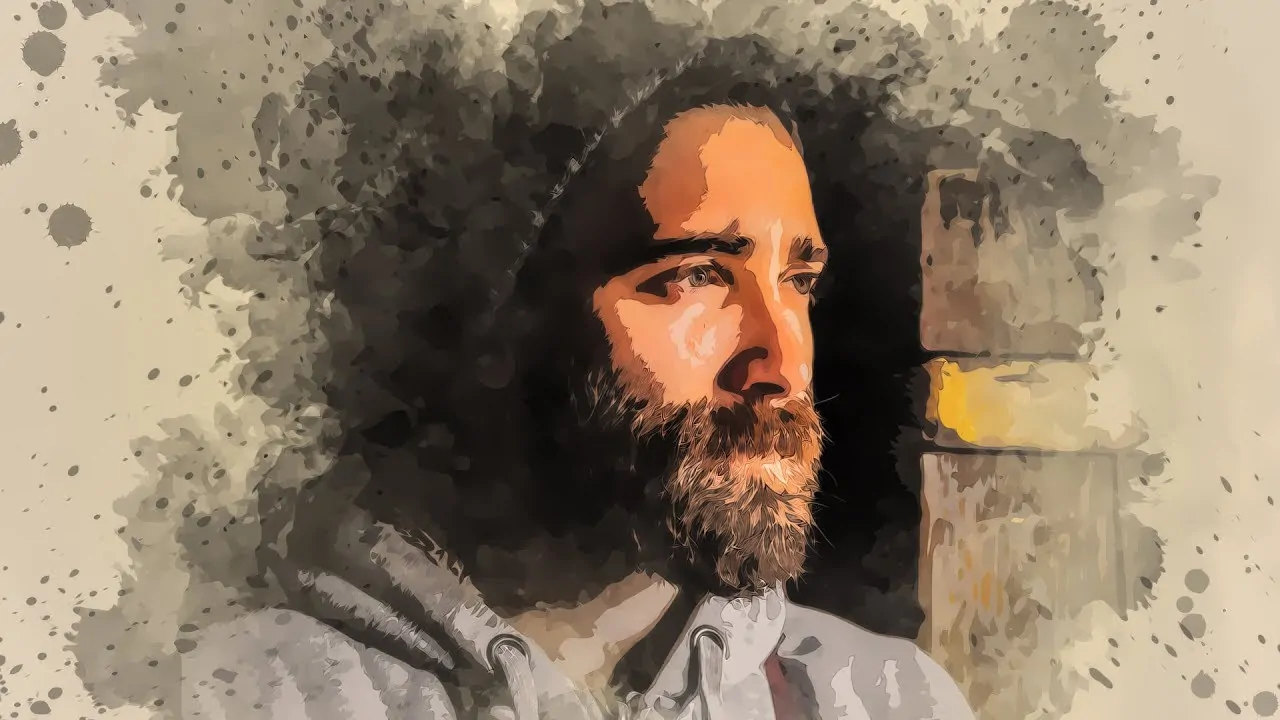
The watercolor painting is created using the control of the water-to-pigment ratio, resulting in relative lightness and darkness in your paint. It allows artists to create various creative effects with varying color intensities and blending levels. During the Renaissance and Baroque eras in Europe, watercolor paint, which is more like what we know now, first appeared. However, nature studies and sketching were its primary uses at the time. These pieces were frequently either scientific documentation or preparatory work for the real artwork. Yet, with time, this art approach gained popularity as a mature art medium as it can be used by everyone, even with little or no painting skills. Even now, watercolor paintings are viewed as stunning compositions that hold diverse possibilities of expression. This art is still predominant among artists and enthusiasts who often creatively integrate the watercolor practice into various other art kinds, including drawings, illustrations, and mixed media art. Moreover, with the digitalization of art and enhancement of image enhancement techniques, the watercolor painting effect is now also added to images and designs to adorn the compositions with gentle aesthetics. This blog will provide the steps and techniques to create a watercolor painting effect in images simulating the features of an actual watercolor painting.
Step 1: Image Selection And Adjustment
Firstly, you need to select a desired photograph on which you will add a watercolor effect, then open your editing software like Adobe Photoshop or any other.
Move to the file menu and click on the open button, after which you can locate and open your chosen image using the open option.
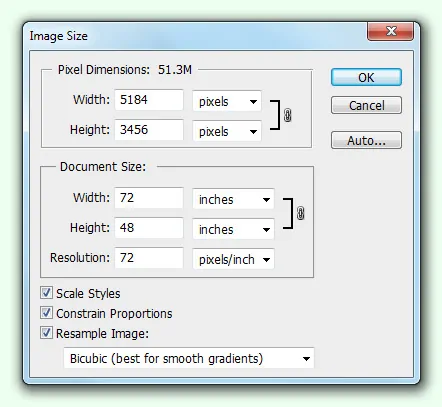
Make sure that the image you choose has a better resolution, like 300dpi, so that it keeps its quality after going through editing and manipulation.
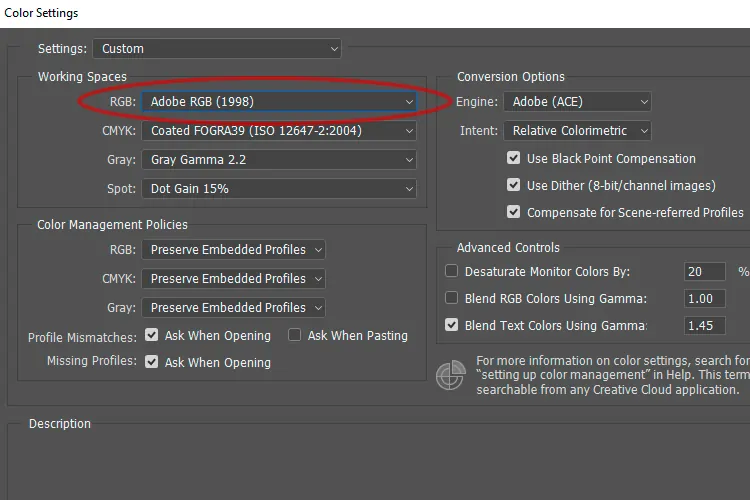
Before you move to detailed edits, you must use RGB color mode for your image by using image > mode > RGB color if your shot does not hold it already.
In the end, save your prepared image in your program’s native format, like a PSD that preserves layers and settings.
Examine the overall composition to note if there are still any preparatory moves required to refine the base photo further.
Step 2: Creating A Duplicate
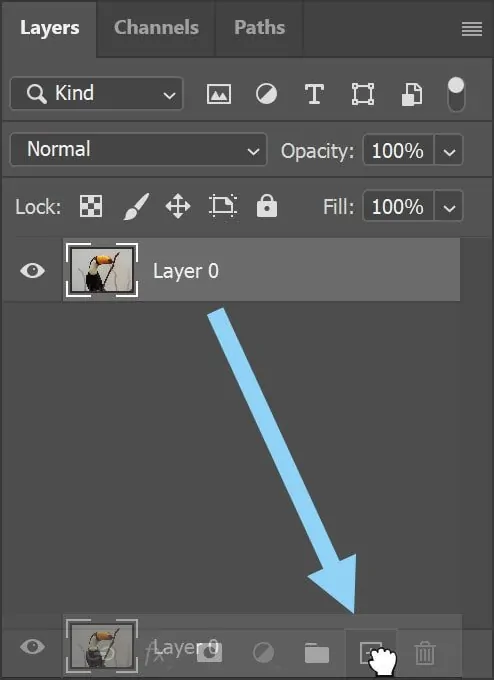
Move to the Layer panel area and locate the background image layer. Click to select this layer so that you can make it workable as the editing process goes on.
On right-clicking that Layer, you will see the option Duplicate Layer. Select this option to make a duplicate of your background image layer.
You can rename your layers to organize them. That layer usually has a title like Layer 1, on which you can double-click and add a new descriptive title such as Watercolor Effect.
As you create a duplicate of your image layer, you can now modify it and add adjustments as you like. That way, you will keep your original image intact.
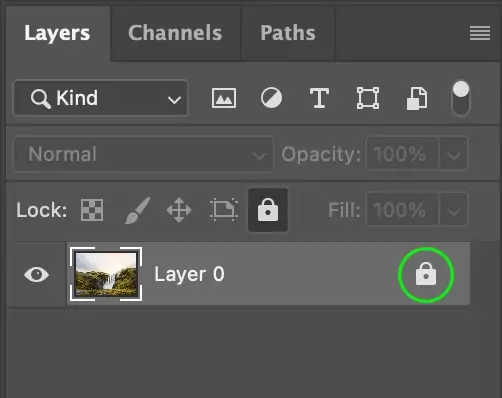
Furthermore, consider locking your original photo layer or background layer by clicking on the sign of lock on the layer.
Also, click on the eye-like symbol existing beside that layer to temporarily hide it, directing your sharp focus onto the layer you will work on.
Step 3: Applying The Watercolor Filter
Recheck that the duplicate layer you created in Step 2 is active before carrying on to the watercolor effect application.
Head to the top menu to locate it, and click on the Filter option. In return, you will access a dropdown menu from where you can select Filter Gallery and explore various artistic filters.
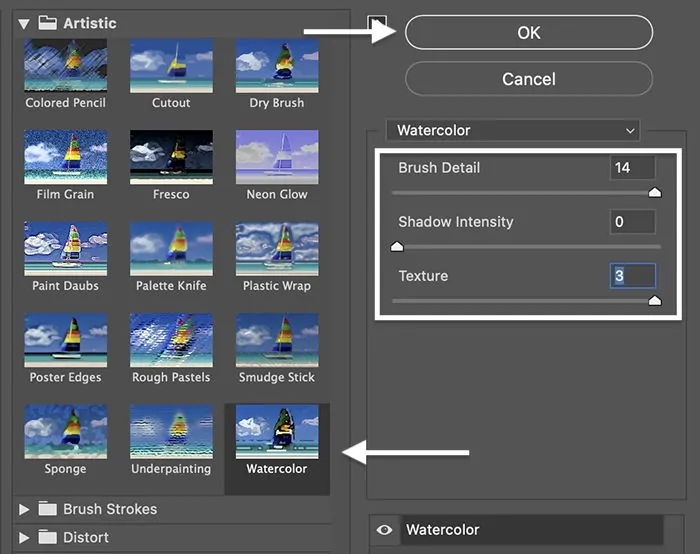
Now, you need to find the Watercolor filter inside the Artistic folder. The Watercolor filter can help blend and soften the colors or details you are simulating the appearance of traditional watercolor artworks.
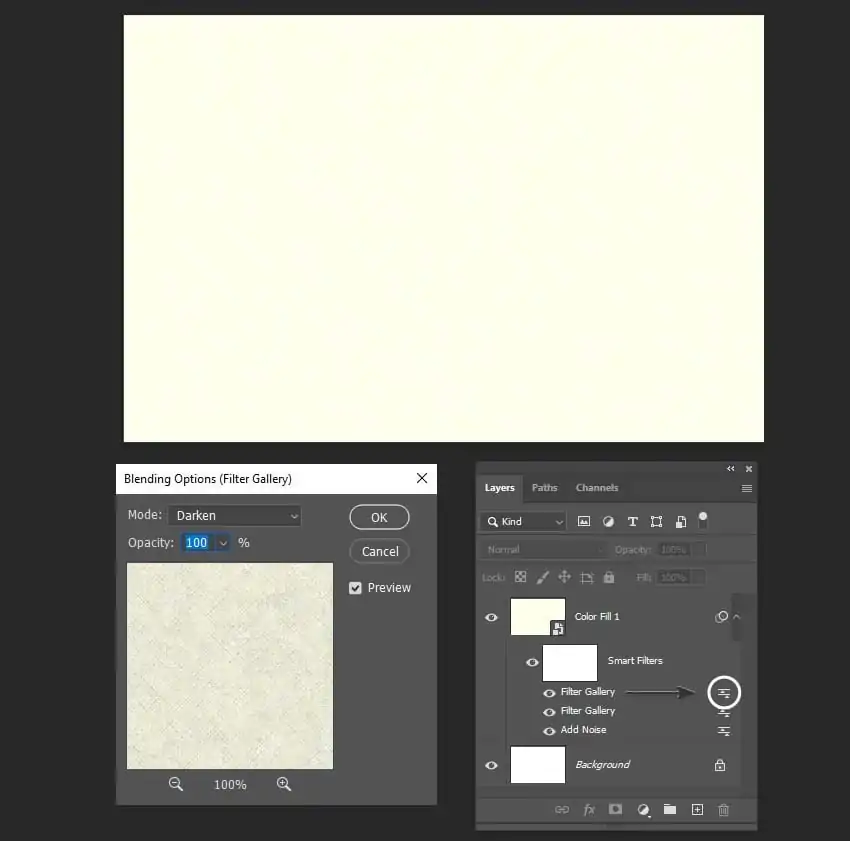
When selecting the watercolor filter, you will see various options, including brush detail, texture, and shadow intensity. You need to adjust them according to your desired look.
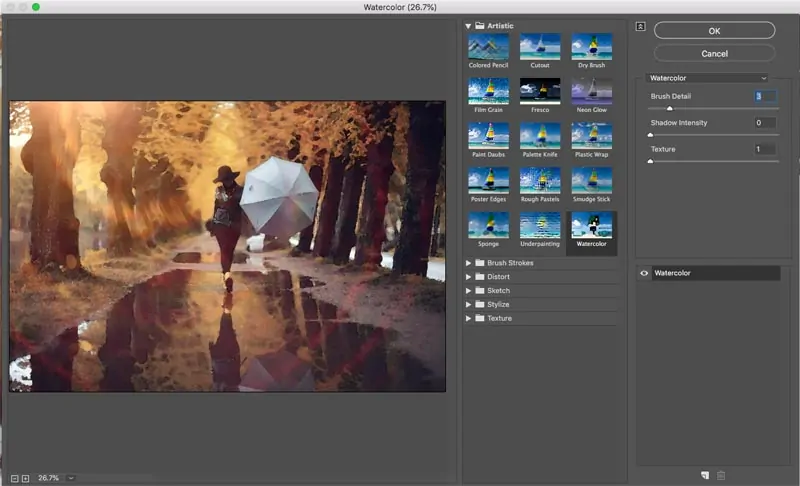
For instance, you can control the brush clarity by decreasing or increasing the effect, creating a softer or sharper effect respectively.
Similarly, to make the image lighter or darker, you can adjust the shadow intensity accordingly. Also, it enhances the texture values to amplify the natural aspect of the composition.
After you are okay with all the parameters of your effort, you can click on OK to finalize the filter application.
Step 4: Adding Natural Textures
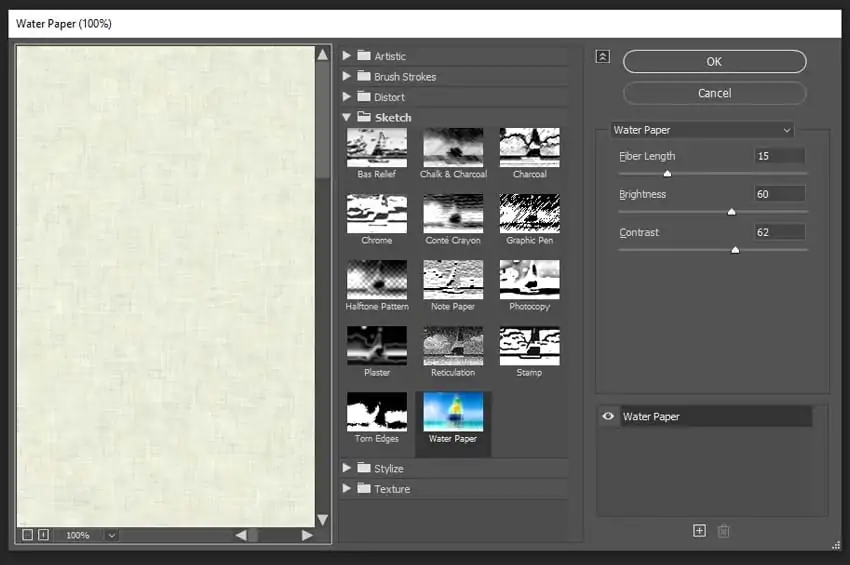
To make the watercolor effect look more naturalistic, find a texture which looks more like genuine watercolor paper. You can explore grainy and rough surfaces online or make your own texture using specified tools within your software.
Open your imported or created texture in your software, select it, and use Ctrl+C to copy it and then Ctrl+V to paste it onto a new layer.
Ensure to keep that texture layer above your photo layer in the panel. Utilize the transform tool and scale the texture to spread onto the image completely.
Vary the blending mode of the texture layer; apply the Multiply mode if you want to boost the contrast and darkening, and use the Overlay blending mode to softly integrate the texture into the image.
Decrease the opacity to around 20 to 30 per cent, which is usually ideal for this effect. However, you can adjust it according to your choice.
After you are satisfied with how the texture looks in relation to your composition, you can lock your texture layer, avoiding any incidental modifications.
Step 5: Applying Blur Effects
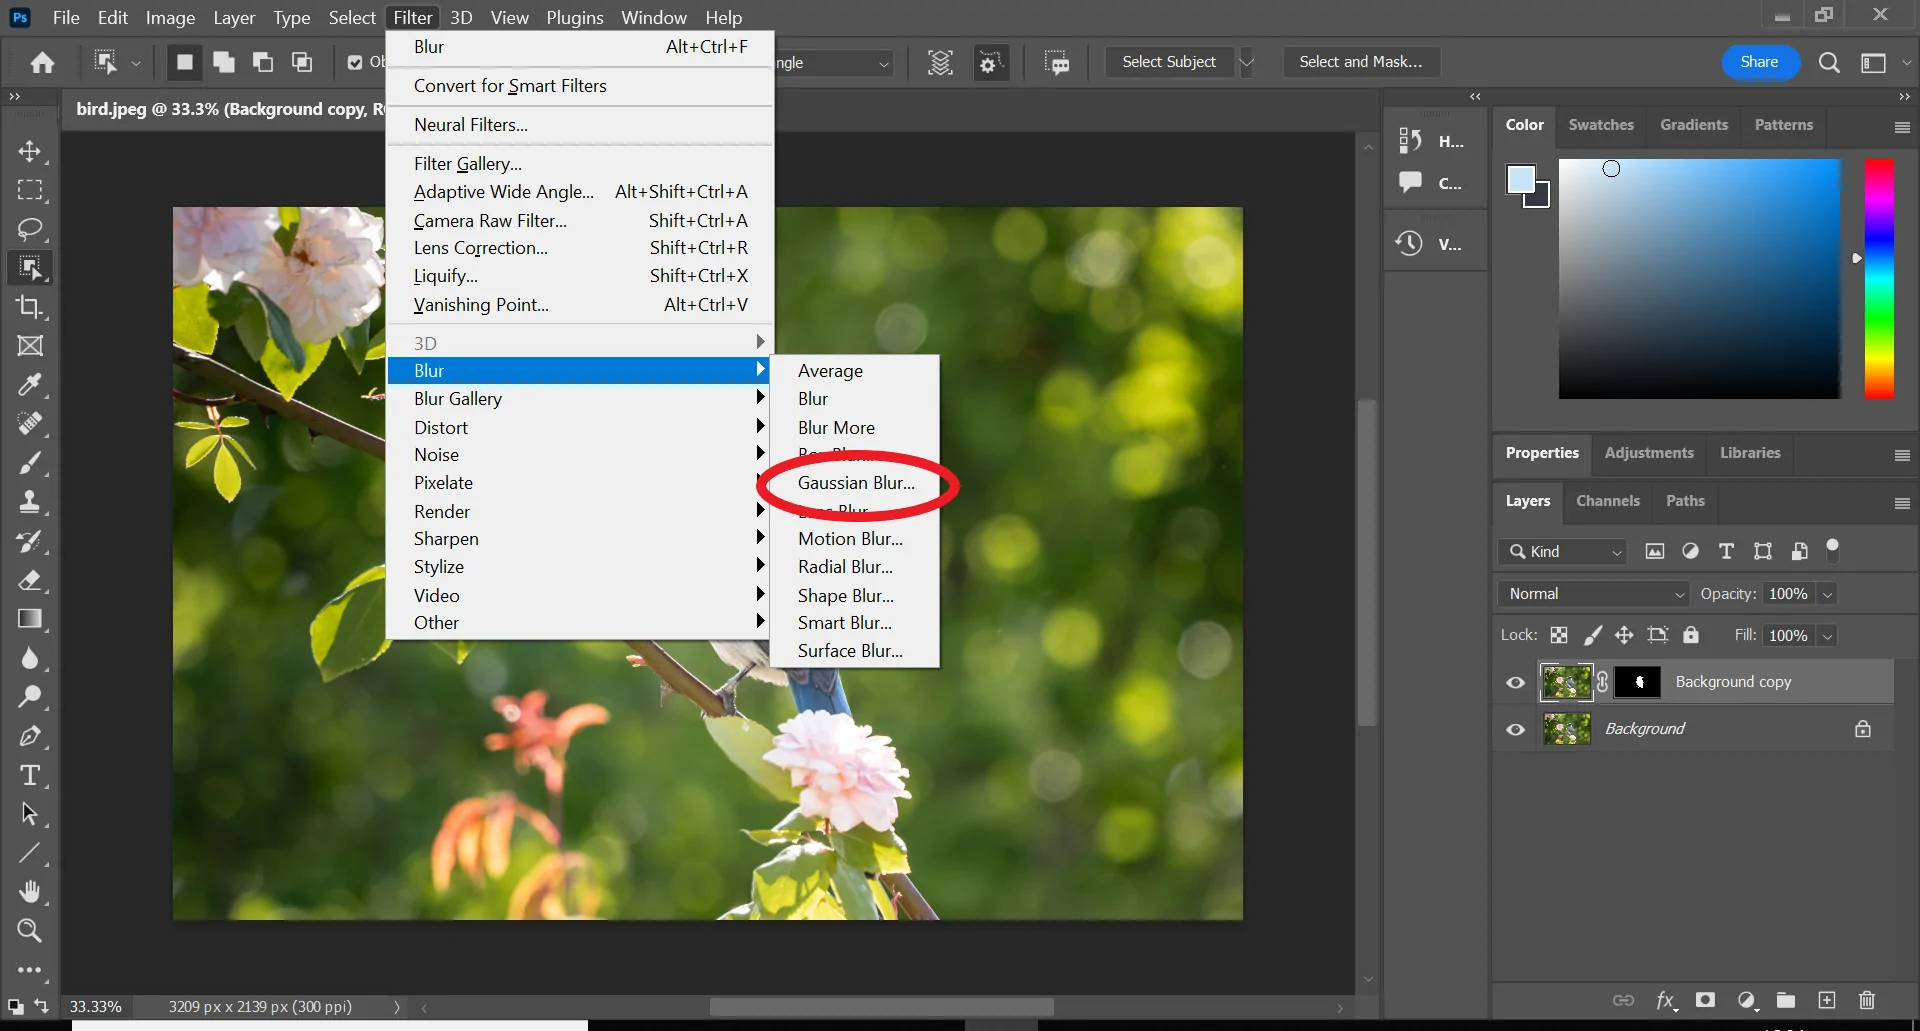
Activate the duplicated or water effect layer by clicking on it, as you will now add blur effects onto it to further add to the softness and organic appeal of your image.
Begin applying blur effects by heading to the main menu and selecting Filter > Blur > Gaussian Blur to unlock the settings window of that blur.
Within the Gaussian blur settings window, you will spot the Radius slider that controls the blur level. You can begin with a low value, like 1 to 3 pixels, gradually enhancing till you attain the expected appearance.
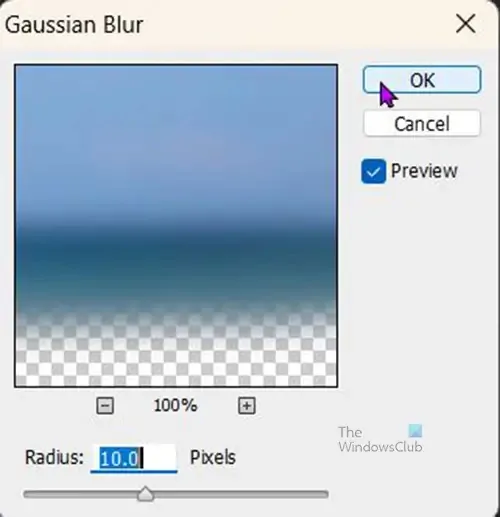
While modifying the Radius value, you must keep an eye on the transformations the image undergoes. Usually, the lower value can offer you a more natural feel, though you must be considerate of the prominence of the critical details.
After you are satisfied with the blur outcomes, you can finalize the blur effect by clicking OK. And your image will get softer and blend, mimicking a tangible watercolor painting.
Step 6: Enriching The Colors

This step will involve the image’s color enhancement using the Hue/Saturation Adjustment Layer.
Proceed to the Layer panel and click on the Adjustment Layer icon that looks like a half-filled circle.
You will see a few options from which you need to select Hue/Saturation to add a new adjustment layer above your photographs. It will also open the settings related to Hue and Saturation.
Move the Hue slider left if you prefer cool color schemes. In the same way, moving the slider to the right will provide the image with a warmer color plot.
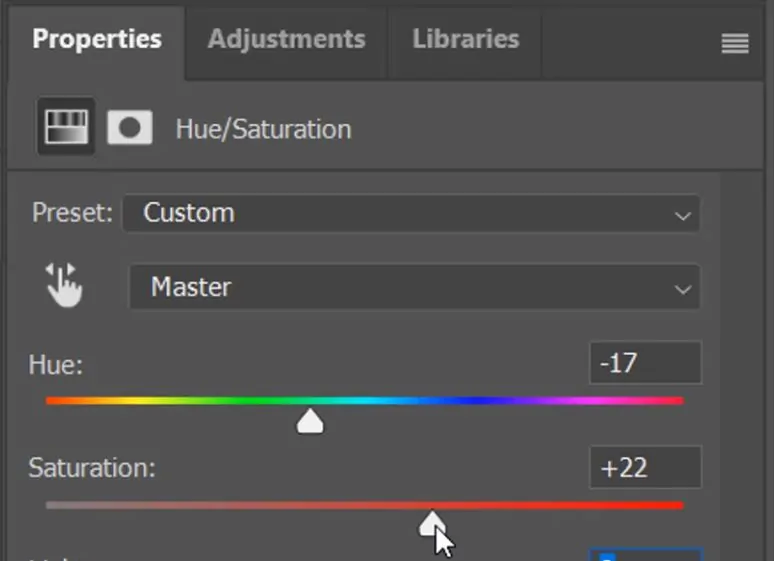
After finalizing the hue values, you will shift the saturation slider to manipulate the intensity of the colors. For vibrance and liveliness, increase the Saturation, and to get a more nuanced effect, decrease the value.
Now, you will work on the Lightness slider, which is about the brightness aspect of the composition. Just like you did with Saturation and Hue values, you need to set a brightness value that is neither too washed out nor too fake but nuanced.
Step 7: Polishing The Composition
This final step is about adding final touches to your composition or any further refinement to polish the overall temperament.
Add subtle highlights and shadows to accelerate the depth, starting with creating a new layer to add these elements.
Utilize a gentle, soft brush with a low opacity level in white or black; after setting brush parameters, start painting highlights in white and shadows in black in certain areas of your image as per your desire.
Consider adding a little noise to elevate the feel of a watercolor painting. Move to the Filter option, then click Noise and Add Noise. You must enhance the grainy feel to give the impression of the watercolor art paper’s rough texture.
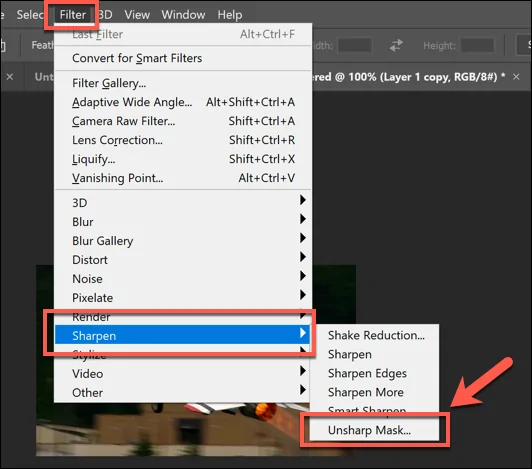
Sometimes, going through various edits, the final image may end up losing its sharpness. In that case, you should apply some sharpening effects. You can locate the sharpening filter by following Filter > Sharpen > Unsharp Mask. That will help you retain the overall sharpness.
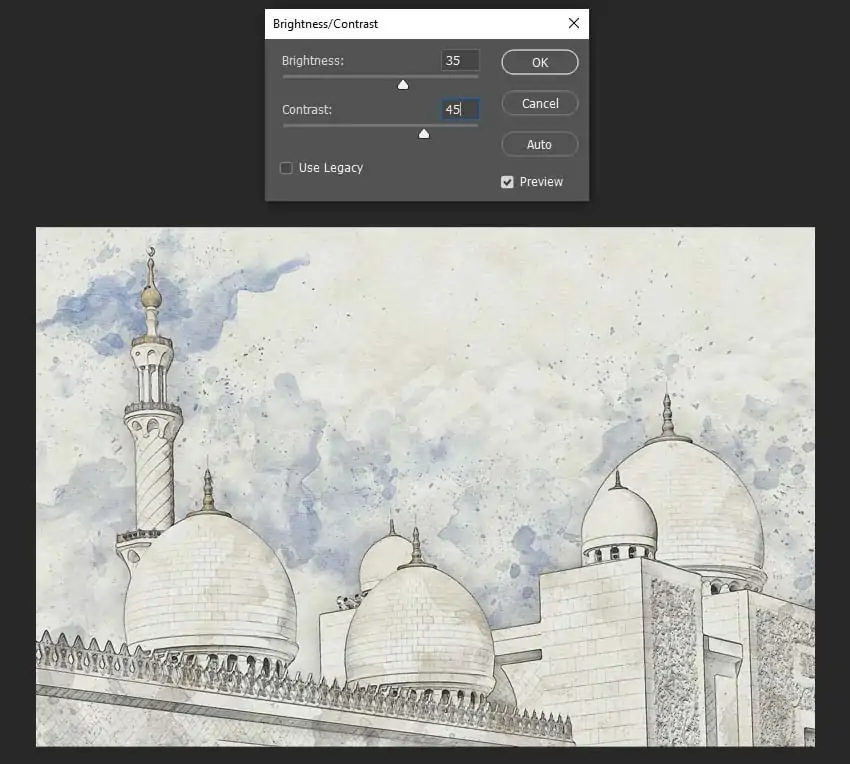
As needed, alter the overall contrast by using the Levels or Curves adjustment layer to upgrade the predominant shadows and highlights.
You can enhance the contrast to achieve a dynamic formation or decrease the contrast to go for a softer impression.
When you are satisfied with the overall setting, you can group all related layers for easy organization.
Finally, you can save and export the final image in a suitable format and resolution.
Conclusion
In conclusion, the digital watercolor effect gives your photos a blended appearance and richness that makes them look like genuine works of art. You can use watercolor filters or effects offered by various image editing applications, like Adobe Photoshop, Lightroom, and GIMP, to instantly transform your images. Also, you can experiment with built-in brushes, blur effects, blending modes, opacity variations, and many more to add to the realistic aspect of the painterly formation further. In the end, you’ll be stunned at how your everyday shots are transformed into endearing artworks.
