How To Create A Dew Drop Effect
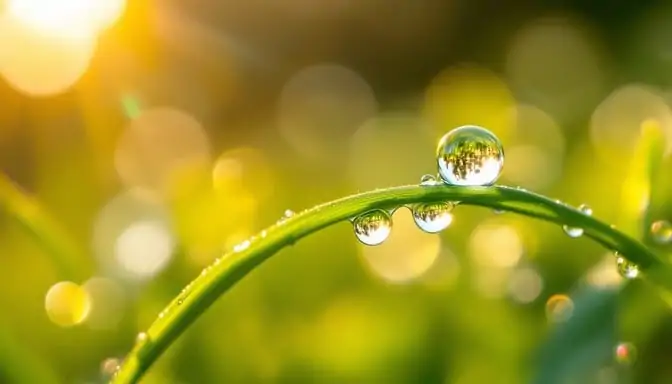
The natural dew is a captivating scenery to glimpse in the early morning, which occurs when water vapour from the atmosphere condenses onto cool surfaces like leaves to produce small, glittering drops. The tender beauty of the dew drops is often pacifying to the eyes, like various other natural occurrences we see around us. Their brief timespan till sunrise further adds to their adorability and mesmerism for the onlookers. The transformation dew drops make to earth is quite inciting for photographers to capture these breathtaking scenes depicting the fleeting majesty of nature. Moreover, besides taking actual shots capturing the natural dew drop formation, the ordinary images can also be enhanced using a dew drop effect addition. To enhance images using a dew drop effect, tools like the Ellipse Tool, Transform Tool, Direct Selection Tool, Gradient Tool, Layer Style, Brush Tool, Smudge Tool, Gaussian Blur, and many others are utilized. Moreover, a range of blending modes and opacity adjustments further help create a true-to-life look in the dew drop effect. This blog will present a step-by-step process to create a dew drop effect in your everyday photographs, enhancing their realism and natural elements.
Step 1: Loading The Base Image
Begin your editing process by initiating Photoshop and opening your chosen photograph; make sure the photo you choose contains high resolution to get clear details.
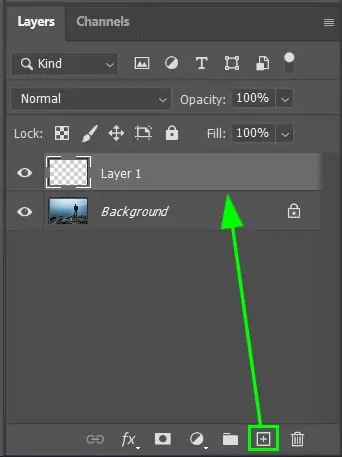
Move to the layers area and tap on the New Layer button. You will add a new layer that is transparent above your initial image layer.
Once made, double tap on your newly made layer and rename it with a specific title like Dew Drops, keeping up the organization throughout the process.
Activate the Dew Drops layer by clicking on it, ensuring that all upcoming adjustments will be applied to it without affecting the original or background layer.
Think about revising the blending mode of the layer, such as changing it into an Overlay or Soft Light. It will help enhance transparency later.
Before you move to step 2, you need to save the file in a PSD format to save layers for future adjustments.
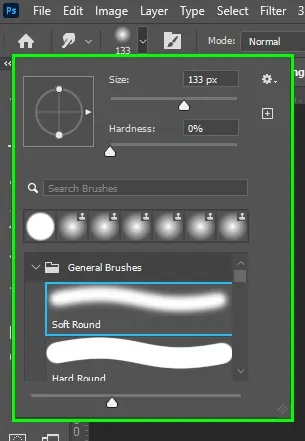
Step 2: Utilizing The Ellipse Tool
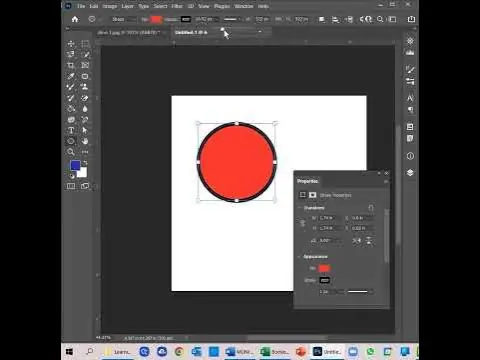
Explore the toolbar and find the Ellipse Tool option, then click on it to activate it. If you don’t find these tools, you can click on the shape tool option, and it will show options, including the Ellipse Tool.
Check the top options to select the Shape Mode for the tool, as it aids in creating editable vector shapes.
After choosing the mode, you will select the fill colour box and choose a light blue or any natural colour to simulate the water.
Now, using subtle movements, click and drag the arrow to the zone. You need to create an ellipse form to make the first dew drop. Also, as you click and drag, press the Shift button to make perfect circles or elongated shapes as per your requirement.
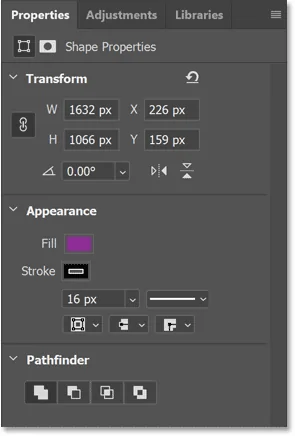
To manipulate the drop size, use the Transform tool with Ctrl+T to accommodate your desired size for the dew drops.
Make the multiple drops by clicking on the shape layer inside the layers panel and duplicating it.
If you are opting to make the drops more like a teardrop, you can use the Direct Selection Tool and set the anchor points.
Step 3: Working On Gradient And Transparency Enhancement
Select the Dew Drop layer from the panel to begin working on gradients and transparency.
To unlock the Gradient Panel, head to Window and click on the Gradient button, which will show the relevant options.
For the options that appear, you can click to select a linear gradient, which is usually suitable, or you can also create your own gradient by picking sky blue or white colours, simulating water texture and transparency.
Tap on the gradient bar and drag and drop to the dew drop shape, applying the gradient fill. Be sure that the gradient is applied from top to bottom, as it enhances realism by showing light reflections.
Make the drop more lifelike by gradually minimizing the opacity level of the gradient fill. You can put the opacity value to 70 to 80, making the background to be more see-through.
If you are not satisfied enough with the gradient’s appearance, you can modify its direction by setting the angle or consider reapplying it to get a smooth appearance.
Utility Opacity and Fill sliders from the layers panel to attain ideal transparency and softness.
Step 4: Including Shadows For Depth
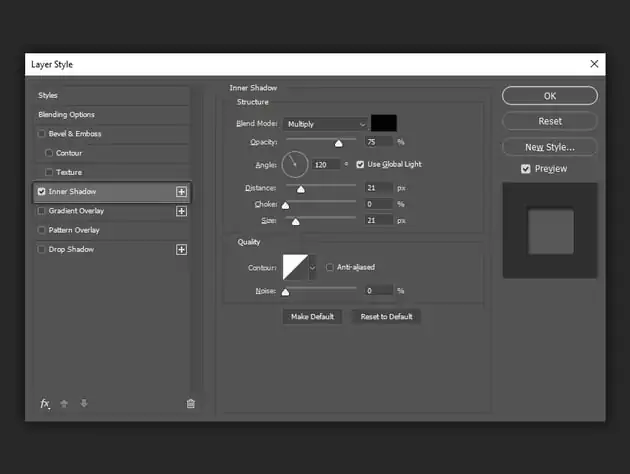
Make the shape active by selecting the Dew Drop Layer and double-clicking on the thumbnail to unlock the dialog box for Layer Style.
From the Layer Style window, you will choose the Inner Shadow option and specify its opacity according to how dark you want to make the shadow look. Usually, a value of 20 to 30 per cent is ideal.
Furthermore, you need to set the angle to usually 120 degrees, considering the natural light direction.
Form softer or more defined shadows as per your desires by adjusting the Distance and Choke sliders.
To apply outer shadow, pick the Drop Shadow option from the layer styles, setting the opacity to 40 to 60 for enhanced depth.
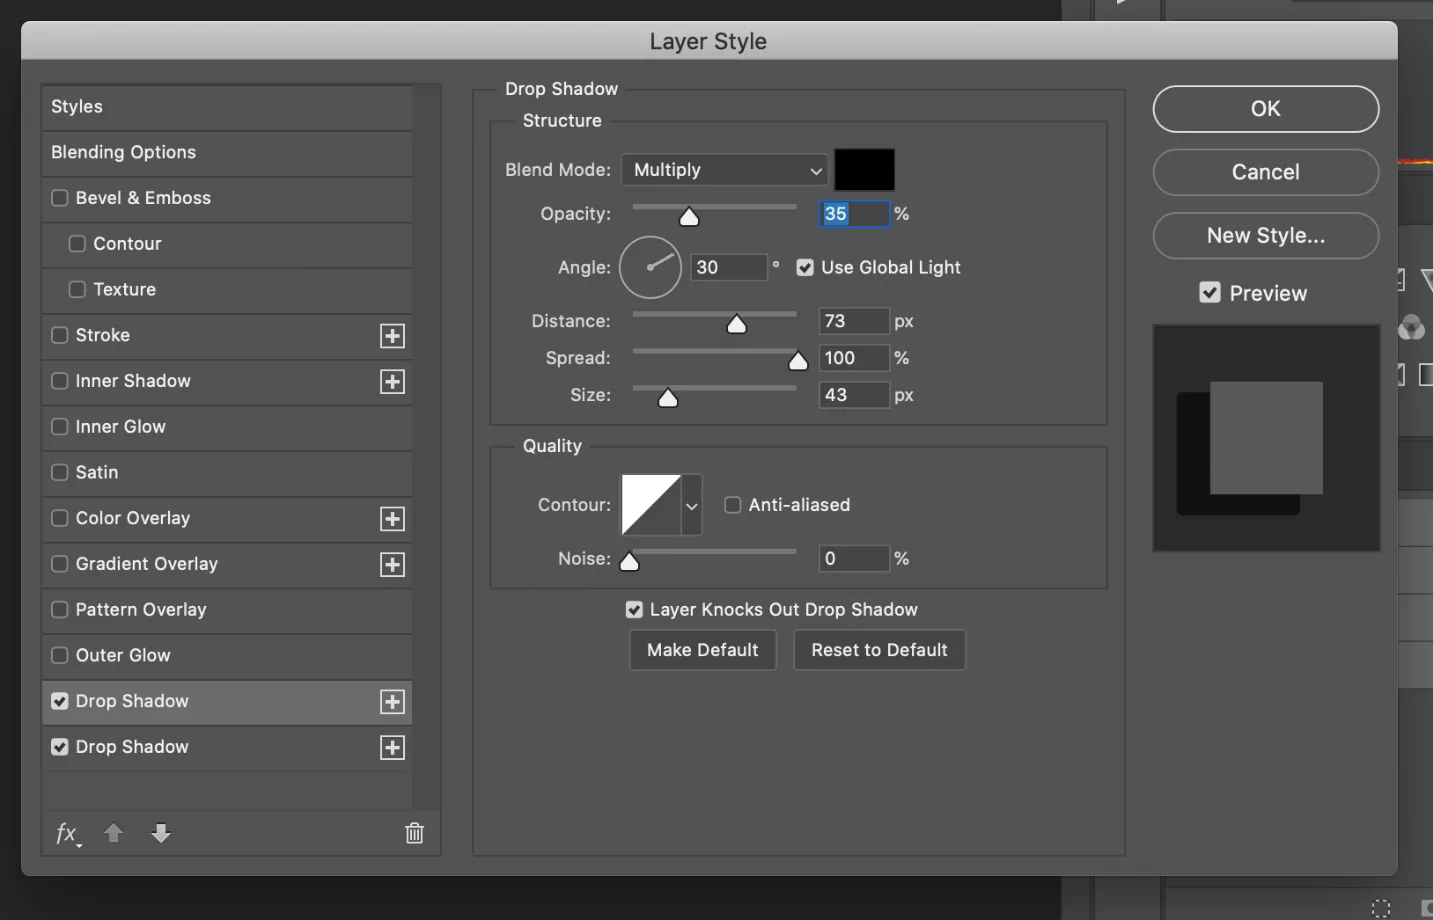
Set the Distance to regulate the shadow extension and modify the Spread value to lower or higher according to the intensity of the shadow.
Moreover, set the Size to 10 to 5px to build natural soft shadows.
Make the shadows more realistic by changing their black colour to blues or dark grey to match the dew drop colour and its surroundings.
In the end, finalizing the changes by clicking OK and keeping the Layer Style window open to make real-time moves till getting satisfactory outcomes.
Step 5: Smudging The Details For Realism
Locate the Smudge Tool and specify its Strength value to 10-15 per cent to do a gradual shaping.
Utilize a soft and round brush, making soft, smooth smudging for raising naturalism. Consider varying the brush size as well to conform to the drop size.
Gently pull the edges of the drop to fine-tune its shape. Utilize small strokes around the drop to provide it with a curved layout.

You can also employ smudging to blend sharp lines or blunders in the gradient fill, getting an immaculate shift between light and dark zones.
Intermittently, you may need to use the zoom out button to confirm that the smudging is not distorting the dew drop excessively and is maintaining the overall harmony.
Step 6: Creating Light Reflections
To create a reflection, you will add a new layer above the Dew Drop layer and rename it with a particular title like Reflection Layer for better organization.
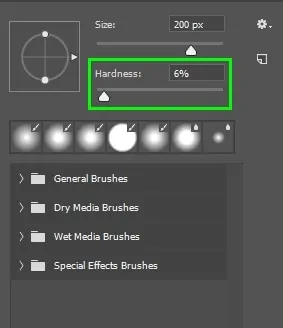
Pick a soft round brush with zero % hardness to get a soft reflection effect. Also, adjust the brush tool’s size accordingly.
The colour you select for creating reflection can be any lighter shade, light yellow, light blue, or even white for a natural impression.

To reflect the behaviour of light rays reflecting from a drop’s surface, you can add a tiny dot or streak onto the top surface of your dew drop.
Lower the opacity of your reflection layer according to the desired intensity you want to see in the reflection.
If your reflection still lacks the desired level of realism, consider using a gentle layer of smudging to aid in smooth blending.
Before finalizing the reflection effect, reposition the reflection in relation to the direction of the light source, such as at the top left or right sides of the dew drop.
Step 7: Adjusting Opacity Values
Activate the dew drop layer to add final touches to it, extending its realism and natural appeal.
Firstly, you need to focus on blending by manipulating the opacity; for instance, you can decrease it up to 80 or 90 % to amplify the depth and integration with the backdrop.
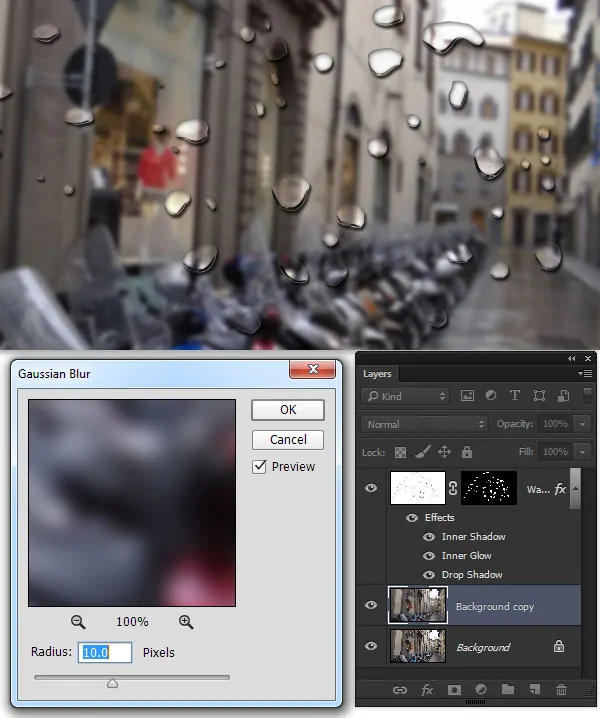
Secondly, you may need to add a subtle touch of colour by following Filter> Blur> Gaussian Blur, which will further soften the edges of the drop for a delicate harmony of overall components. For natural outcomes, specify the blur radius as 1 to 2px.
Since you are using multiple tools and strategies to focus on blending and softening so, there is a possibility that the drop may go over blurred or blended. To cope with that, you can use a layer mask to redefine particular areas or overcome the excessive blur.
In the end, assess the overall composition and reconsider the opacity. With all adjustments applied, you may need to set it to around 70 to 80% and save the final composition in a suitable format and resolution.
Conclusion
In summary, the dew drops in the morning present a lovely scene glittering like diamonds while spreading on flowers and leaves and grass. Capturing these beautiful sights results in pleasing shots that make us stunned and wonder how infinitely adorable the natural world can be. Similarly, taking inspiration from landscape photography and presenting scenes dominated by dewdrop wonders, the image enhancement techniques enable us to add these effects to everyday photographs. This way, you can heighten the visual allure of your images by infusing a fascinating atmosphere like a dew drop defect onto them.
