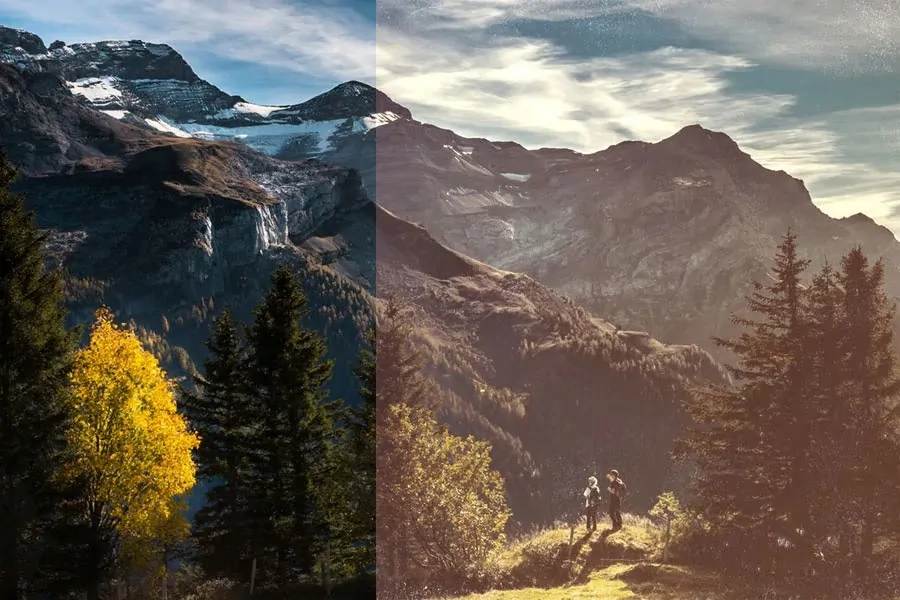
How To Create A Vintage Wash Effect
The vintage wash effect is an in-favour image enhancement approach that imitates the washed and nostalgic look of old photos. This effect is inspired by old film photography in which the images used to get a washed appearance over time due to atmospheric changes and chemical reactions. Recreating images using such a faded vintage effect makes them possess a feeling of cosiness and everlastingness in various kinds of photographs and graphic works. To attain a vintage wash effect, subtle tones of sepia, cyan, or pastel shades are added to images to create a desaturated impression. Secondly, the highlights are often softened to create a low-contrast, wistful look, while the shadows often hold some colours, emphasizing the overall depth within the scene. Furthermore, a matte finish effect is added by using the tonal curve and lifting its black point, which further reduces harsh contrasts by flattening the dark zones. To simulate the imperfections seen in analogue films and photos, grain or textures are applied to the images. The detailed steps to create a vintage wash effect using advanced tools and techniques are as follows:
Step 1: Decrease The Saturation Level
Load your photograph in an image editing program such as Adobe Photoshop, GIMP, or Lightroom.
Find the saturation adjustment tool, which is often found within the hue/saturation board or a comparative module.
Steadily decrease the saturation level to lessen the intensity of colours while holding detail for a natural formation.
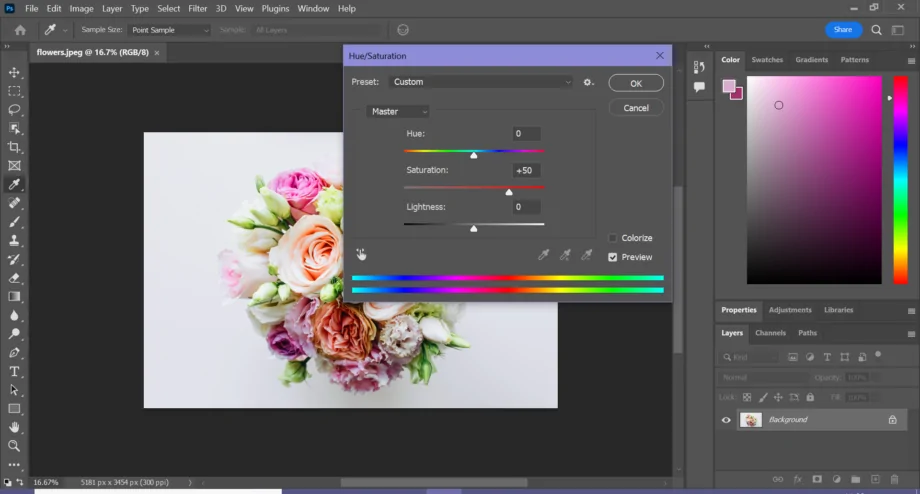
Do not over-desaturate the objective, which is to attain faded colours, not a black-and-white picture.
Use focused on desaturation, if accessible, to tone down particular colours, such as bright blues or greens, which will be too overwhelming.
Modify incrementally to preserve balance, making sure that the overall colour tone shows up softened and unified.
That desaturation control step will set up the foundational faded and nostalgic aesthetic for the vintage wash effect to be applied in the following steps.
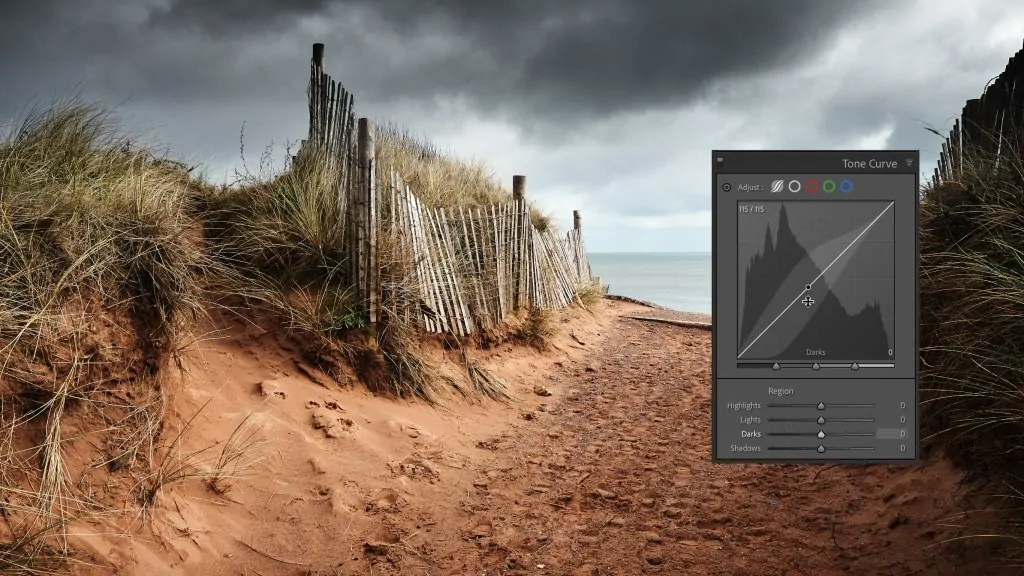
Step 2: Modify The Tonal Curve
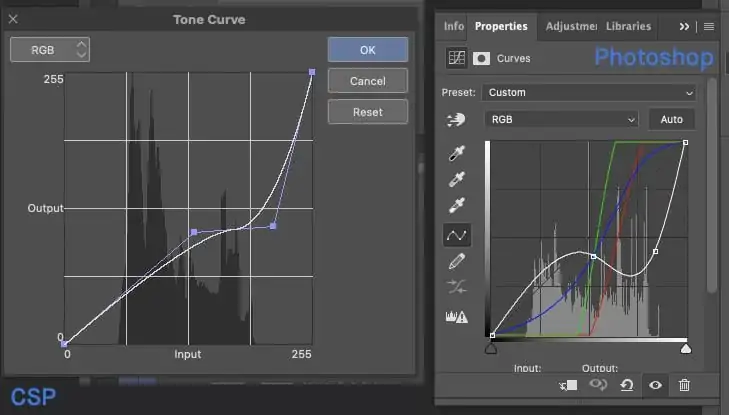
Head to the Tone Curve or equivalent feature in your editing app.
Raise the lower portion of the curve, that is, for shadows, slightly upward to form a matte impact, lessening the intensity of dark tones.
Delicately lower the highlights segment of the curve to relax bright zones, dodging sharp contrast.
Alter the mid-tones slightly to adjust the shift between shadows and highlights.
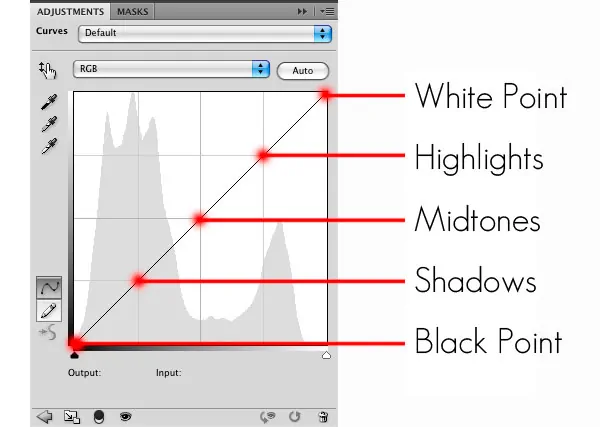
Confirm that the black point is slightly lifted to attain the characteristic flatness of vintage photographs.
Play with the shape of the curve, but aim at a delicate S-shape or linear alteration for a natural impression.
Polish these adjustments to preserve clarity and detail while preserving the image’s faded, vintage aspect.
This step is pivotal for revising the tonal range into a flatter, milder formation typical of aged photos.
Step 3: Use Split Toning Tool
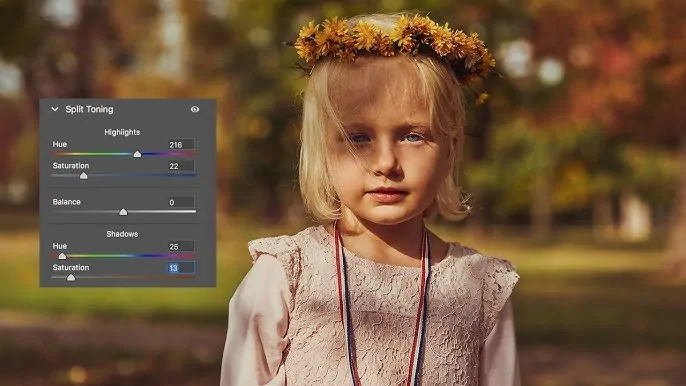
Head to Split Toning or a similar tool in your photo editing app like Lightroom or Photoshop.
Choose a warm tone, such as sepia or orange, for the highlights to provide a nostalgic gleam.
Employ a cooler tone, like cyan or teal, to the shadows to get adapted depth and contrast.
Alter the intensity sliders for each tone, guaranteeing none of them overwhelms the image by keeping the effect subtle and harmonious.
Try the blend slider, if accessible, to control the symmetry between warm highlights and cool shadows.
Polish the saturation levels to attain a balanced look that conforms to the desaturated colours.
Audit the general result, making sure that the tones improve the vintage style without overpowering the photo’s natural subtle elements.
Including split toning makes the signature warm-and-cool blend seen in aged photos, upgrading the nostalgic aspect of the vintage wash effect.
Step 4: Use The Grain Tool
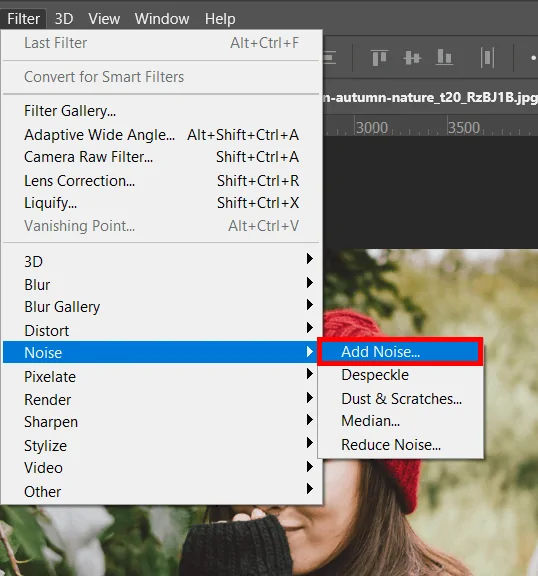
Activate the Grain or Noise tool in your editing program and modify the grain settings, beginning with low-intensity values, to imitate the nuanced blemishes of analogue film.
Grow the grain size slightly to provide a more discernible surface, but do not make it excessively coarse to retain a natural appearance.
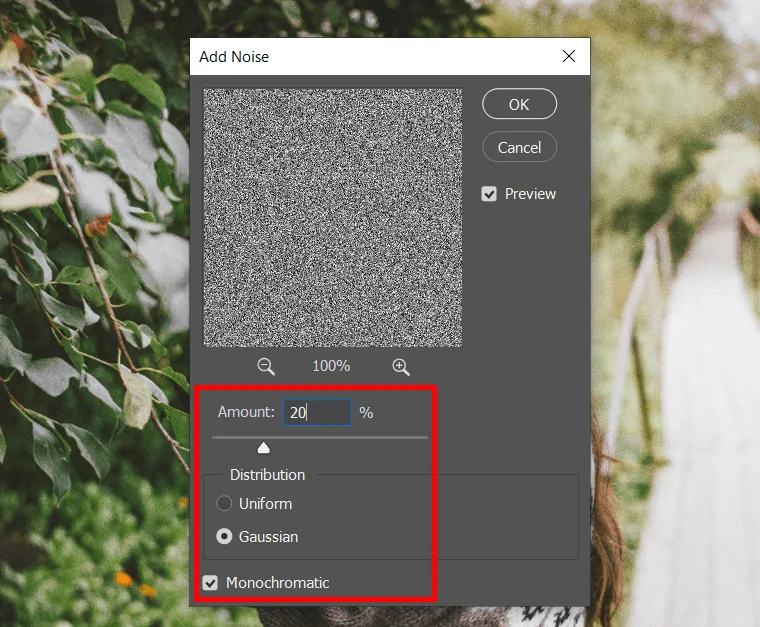
Regulate the roughness or softness of the grain according to the required style. Use softer grain suits, lighter tones, or rougher grain to add more drama.
If your app supports layer-based edits, overlay a film grain texture to improve naturalism.
Add the grain consistently over the picture, guaranteeing it incorporates consistently without overpowering the visual details.
Use Zoom in and assess the composition to affirm the grain looks consistent and fits the vintage wash effect.
This step includes a material quality to your image, arresting the nostalgic blemish of film photography. Grain is fundamental for verifying the vintage style.
Step 5: Decrease The Contrast

Find the Contrast adjustment slider in your photo editing program.
Smoothly decrease the contrast to mellow the difference between highlights and shadows.
Screen the picture closely to guarantee it holds detail and depth, even as the tonal range evolves flatter.
Refine the midtones utilizing features like curves or levels to preserve harmony and avoid making the picture show up excessively dull.
Alter brightness as required to compensate for decreased contrast and keep up an indeed exposure.
Converge contrast reduction with other impacts, such as tonal curves, to get cohesiveness within the prevailing aesthetic.
Compare the before and after versions to affirm that the softened contrast coordinates the vintage, faded formation without affecting the image’s clarity.
Lessening contrast upgrades the washed-out look, which is characteristic of vintage photography, further enhancing the nostalgic tone of your photograph.
Step 6: Add Vignette Effect
Activate the Vignette tool or effect in your image editing program.
Darken the edges of the photograph by altering the intensity slider of the vignette effect, subtly drawing focus to the centre.
Specify the vignette’s size to form a delicate shift between the darkened edges and the precise centre.
Refine the roundness of the vignette to confirm that the darkened zones have a natural, circular fade.
Play with the feathering option to relax the transition between darkened and lighter districts of the image.
Alternatively, alter the exposure at the centre to scarcely brighten it, improving the focus on the central subject.
Survey the overall impact to guarantee the vignette goes with the vintage aesthetic without dominating the details within the image.
A vignette makes a nostalgic frame for the image, highlighting the centre and complementing the aged appearance by mimicking older camera lenses’ characteristic field of focus.
Step 7: Refine The Composition
Locate the Exposure or Brightness adjustment tool in your editing program.
Alter the exposure to rectify the overall brightness of the picture, making sure that it is neither too dark nor too sunny.
Slightly lower the exposure on the off chance that the picture shows up too sharp or intense after other adjustments, making a more subtle, faded appearance.
Utilize the shadows and highlights sliders to polish the depth of dark and light zones, guaranteeing proportional tonality.
Utilize the blacks and whites sliders to handle the darkest and lightest regions for a consistent exposure all through.
Audit the image’s details to guarantee subtle adjustments to help improve the vintage aesthetic without presenting harsh extremes in brightness or darkness.
Be sure that the ultimate exposure gives the photo a cohesive, aged feel, with slight fading and delicateness typical of vintage-washed photographs.
Tuning exposure integrates everything together, guaranteeing that the composition has an equally washed-out, timeless impression suiting the vintage wash effect.
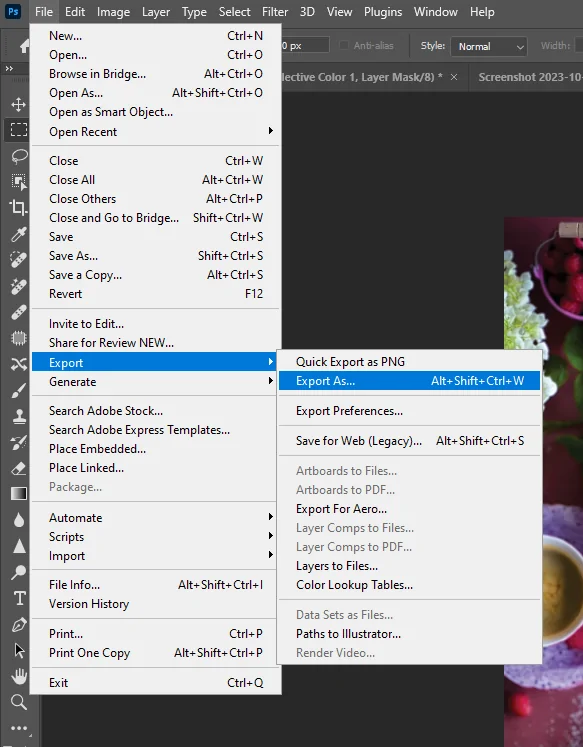
Once satisfied with the final look of your vintage wash effect, you can proceed with saving and exporting the ultimate image.
Conclusion
In conclusion, the vintage wash effect is getting increasingly popular due to the dreamy appearance and sense of timelessness it adds to photographs. By creating an atmosphere, defining a tone, or arousing certain emotions, contemporary photographs appear to be taken in a completely different period. Whether you want to add a trace of nostalgia to personal memories, give your projects a vintage charm, or boost the aesthetic appeal of your social media posts, the advanced image manipulation techniques make it simple. In the end, you can create compositions that take the viewers back in time. The vintage wash style will provide your modern images with an eternal and antique aura.
