How To Add A Striation Effect To Images
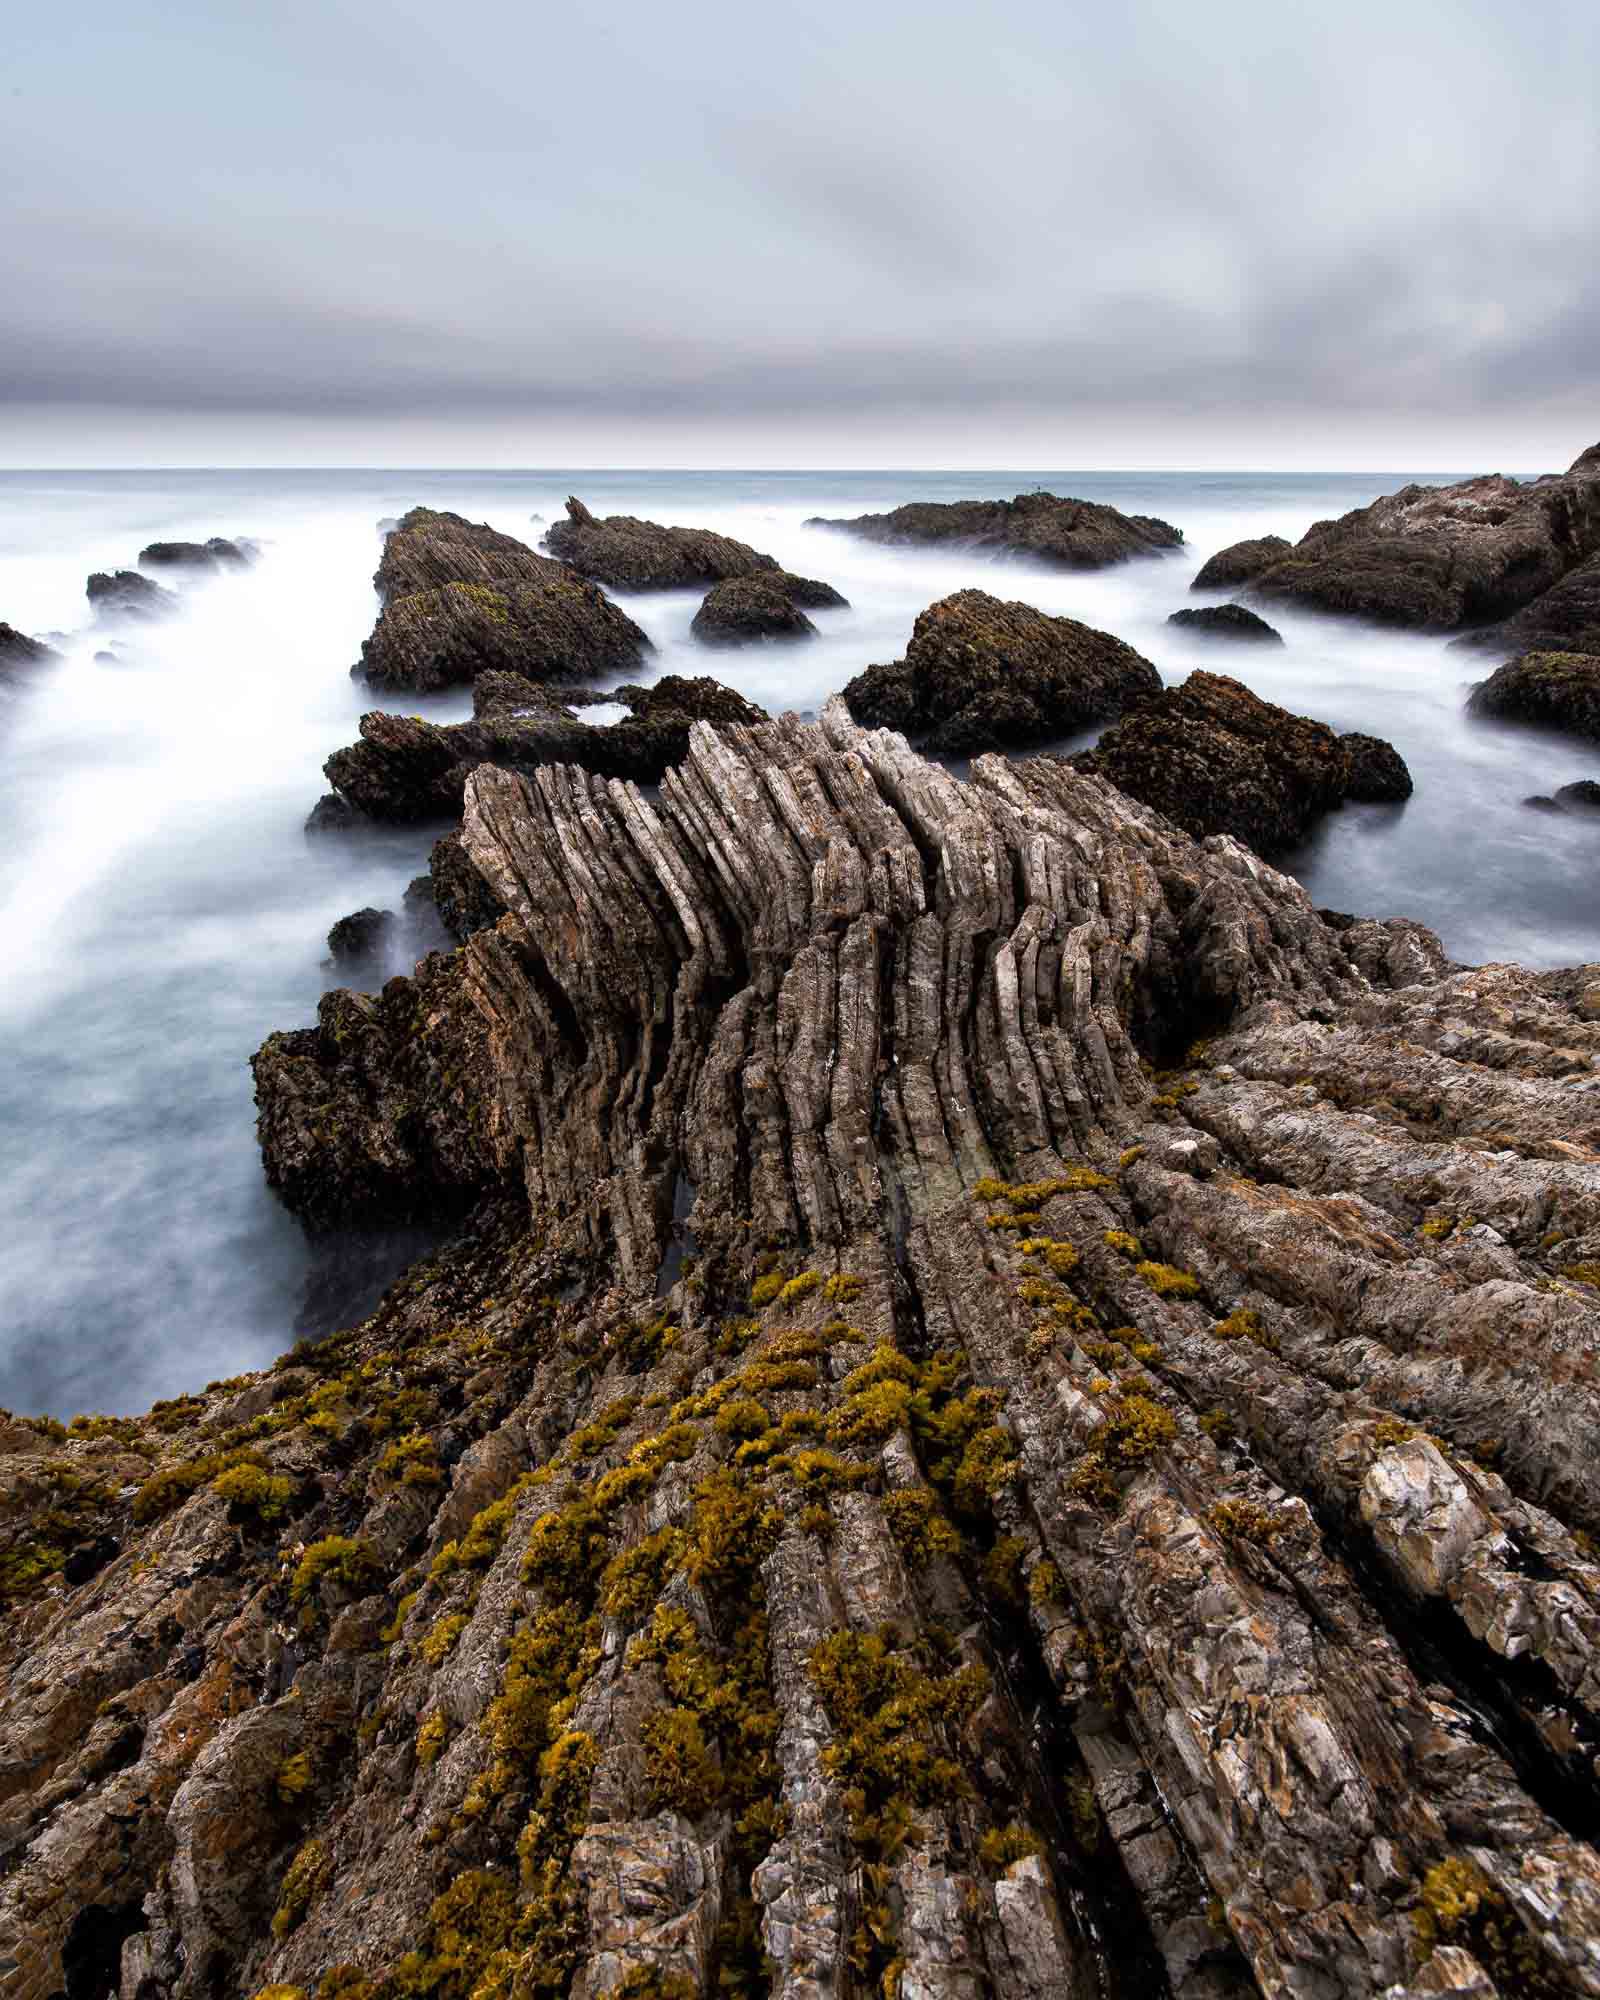
The striation effect is often seen in candid photography, in which the elements found within a scene appear to be in the form of parallel lines, groove-like designs, or streaks. The images containing striation exhibit catchy texture, enhanced depth and a symmetrical appeal. Oftentimes, apart from its natural emergence into images due to existing patterns, a striation effect is also deliberately introduced into images using advanced manipulation techniques. The prominent options involve layering, gradient tools, texture overlays, blending mode settings, opacity settings, layer masking, blur tools, brush tools, and adjustment layers. The images, after adding a striation effect, present dynamic textures and patterns, simulate different materials, or elicit interesting moods within the onlookers. This approach can be implemented in various art genres by adding linear patterns or streaks to produce directional effects or even an illusion of motion. The striation effect can also be used to highlight certain foreground or background elements depending on the aim behind a certain visual representation or design. Another aspect of this editing tool is creating futuristic or minimalistic environments in images using directional patterns or motion blur effects. To add a striation effect to an image, you need to follow a comprehensive set of tools and techniques, as illustrated in the steps below.
Step 1: Image Upload
Start Adobe Photoshop on your PC, then press on File within the top menu bar and click on the Open button from the dropdown menu.
Scan your files to find the photo you need to edit.
Make sure you select a high-resolution picture to preserve detail and improve the ultimate striation effect.
Tap Open after specifying your file to load it into your software.
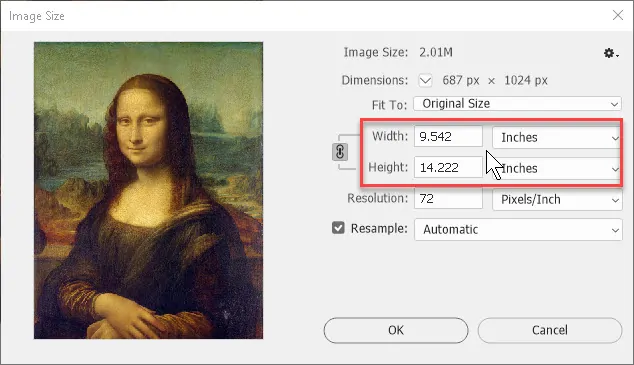
After the photograph shows up on your workspace, confirm its dimensions by going to Image > Image Size. Make sure the resolution is at least 300 DPI for professional-level outcomes.
Save a beginning version of your photograph by reaching to File > Save As. Pick an appropriate file format, like PSD, to enable further editing.
Make a duplicate of the initial picture layer by tapping Ctrl + J. That duplication provides a backup of your base layer if you wish to undo changes.
Be sure that the Layers panel is dynamic by activating it through Window > Layers, as you will be working broadly with layers during this process.
Step 2: Creating A New Layer
Proceed to the Layers panel, usually found on the proper side of the workspace.
Press the New Layer symbol, usually a square with a plus symbol, located at the foot of the Layers panel.
A new blank layer will show up over your primary image within the Layers panel.
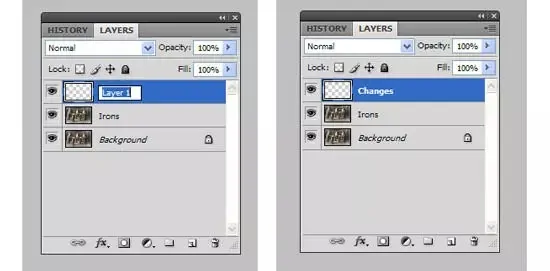
Retitle the layer by double-clicking on its title and entering Striation Effect Layer for transparency in your workflow.
Make sure that this new layer is selected; it’ll be where you have to apply the striation effect.
Confirm the layer is transparent by reviewing its thumbnail within the Layers panel; it ought to appear in a checkerboard pattern.
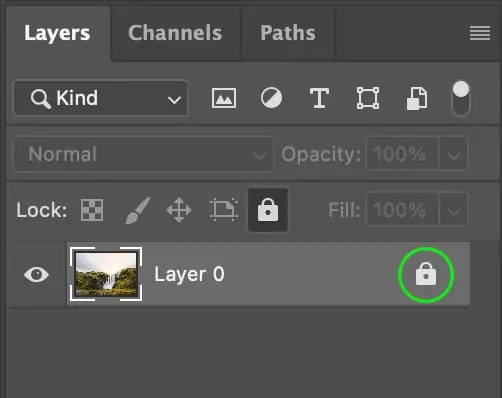
Lock the initial photo layer by clicking the lock symbol within the Layers panel to anticipate unintended edits.
Press Ctrl + Shift + N as a keyboard shortcut to form further layers if required for intricate edits.
Manage your layers appropriately, as it ensures a smoother editing process when applying the effect.
Step 3: Using The Gradient Tool
Choose the new layer named Striation Effect Layer from the Layers panel to guarantee the alters are applied to it.
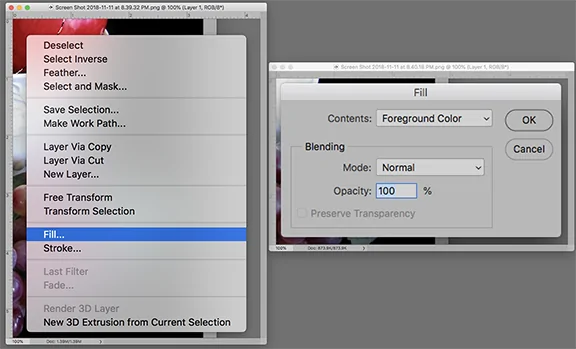
Head to the Edit > Fill option and select a solid neutral colour, such as black or white, as the base, if required, for better contrast.
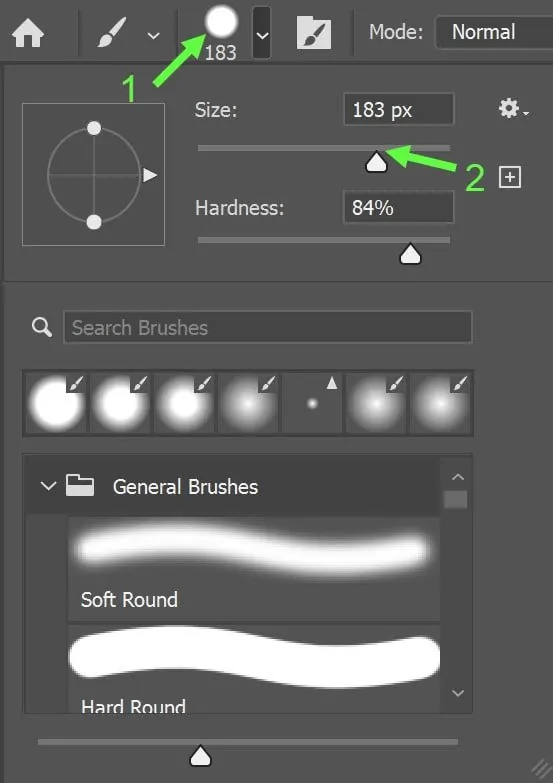
Get to the Gradient Tool using the key shortcut G or directly access it from the toolbar. Be sure that it is set to Linear Gradient within the top menu.
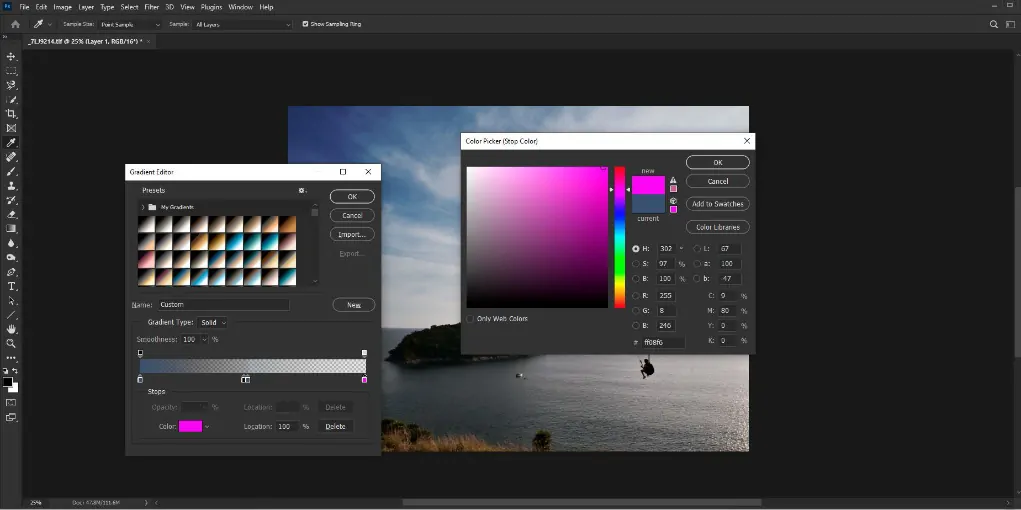
Activate the gradient editor by clicking the gradient preview box within the toolbar; after that, create or pick a preset with parallel lines or streak designs.
Pull the Gradient Tool horizontally, vertically, or diagonally across the canvas to form streaks that accommodate your liked striation angles.
To get a more complex striation design, proceed to Filter > Noise > Add Noise or Filter > Blur > Motion Blur to provide it with a fine linear impression.
On the other hand, you can import a pre-made striped surface design by dragging it into Photoshop and resizing it over the picture utilizing Ctrl + T.
Step 4: Blending Mode Adjustments

Within the Layers panel, choose the Striation Effect Layer to guarantee the changes apply to that layer.
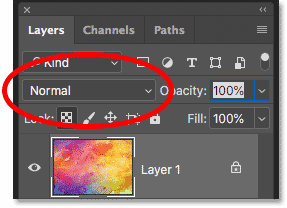
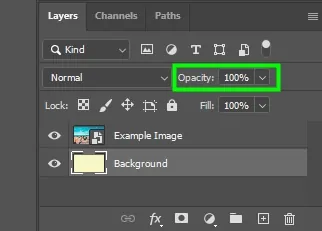
Move to the top of the Layers panel to access the Blending Mode dropdown menu, which is by default set to Normal.
Press on the dropdown menu and play with different blending modes to incorporate the striation design effectively.
To get a softer blend, try Overlay or Soft Light modes to upgrade the surface without overwhelming the underlying picture.
On the off chance that you need the striations to stand out more dashingly, Multiply or Screen modes can drive a better contrast.
Alter the blending mode until the effect conforms well with the image’s tone, surface, and main subject.
Once done with choosing a blending mode, watch how the striations communicate with the foundation to guarantee a natural integration that includes depth and dimension to the composition.
As needed, change the opacity of the striation layer after adapting the blending mode to regulate its intensity further.
Step 5: Tuning The Opacity
Within the Layers panel, confirm that the Striation Effect Layer is chosen.
At the top of the Layers panel, find the Opacity slider following the blending mode dropdown.
Begin by reducing the opacity to around 50%, then slowly adjust it while previewing the effect on your picture.
Bringing down the opacity permits the underlying image to exhibit through, making the striation effect more nuanced and more blended with the initial image.
Discover the proper balance where the striations include texture without overpowering the photo.
If you are utilizing the effect to highlight certain zones, look into altering the opacity more specifically by adding a mask later.
Be sure that different images may need differing opacity levels, depending on the resilience of the effect and the temperament you need to make.
After being done with the effect’s subtlety and blending, conclude the opacity setting before proceeding to further advancements.
Step 6: Masking The Effect
Within the Layers panel, choose the Striation Effect Layer and press the Add Layer Mask symbol at the foot, which is usually a rectangular shape with a circle interior.
It will make a mask following the striation layer, which regulates the visibility of the striation effect.
Select the Brush Tool from the toolbar, put the brush in a soft, round shape, and confirm the colour is set to black.
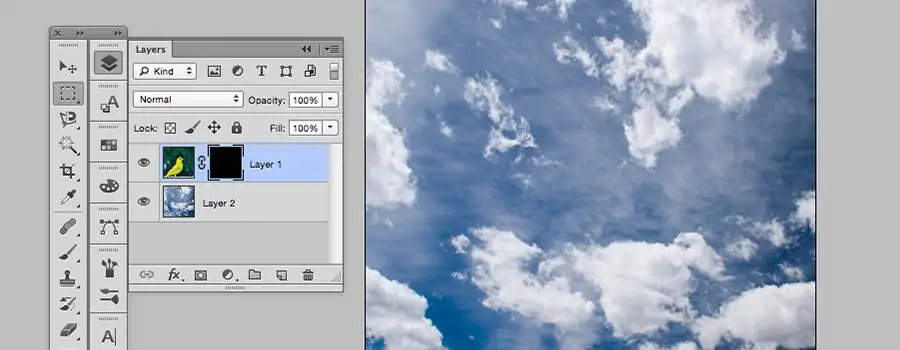
With the mask chosen, gently paint over ranges of the image where you need to lessen or totally dismiss the striation effect.
Alter the brush size and opacity for more exact control, permitting you to tune which zones keep up the striation effect and which do not.
On the off chance that you incidentally remove too much of an effect, swap the brush colour to white and paint over the ranges you would like to restore it.
To make a more natural move, utilize a gradient or soft brush strokes onto the edges, easing the lines where the striation design interacts with the initial image.
Once you have finished masking, zoom in and audit the picture for any harsh edges or ranges that will require further blending for a consistent result.
Step 7: Fine-Tuning The Final Image
Move to the Adjustments panel and make any final changes to improve the general photo.
Think about adjusting the Brightness/Contrast by clicking Image > Adjustments > Brightness/Contrast to confirm that the image’s details are accommodated.
If you think it is vital, utilize Color Balance to alter tints or tonal values for stronger coordination between the striation effect and the rest of the photo.
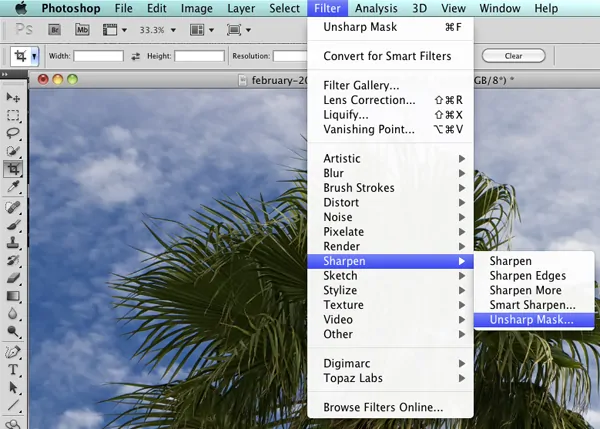
To improve profundity and visual appeal, apply a Sharpness filter by reaching to Filter > Sharpen > Unsharp Mask. Alter the Amount and Radius sliders according to your craved sharpness level.
To polish particular zones, consider including another adjustment layer, for example, Levels or Curves, for more localized alters without influencing the whole photo.
Be sure that the photo keeps up with natural lighting and texture, with the striation effect enhancing instead of overpowering the primary subject.
Once you are okay with the adjustments, flatten the picture using Layer > Flatten Image, and after that, save the file in the craved format, JPG, PNG, etc.
Audit the photograph one more to guarantee the striation effect blends well with the photo, improving it while maintaining its unique integrity.
Conclusion
In summary, striation is common in our environment, from natural structures to man-made objects, as you can also see it naturally appearing in photographs. Such patterns enhance the symmetrical aspect of images by emphasizing the role of uniformity and organization in visual art. Though with advancements in art innovations, the artists, as well as the viewers, are both more inclined to abstract and raw art approaches, symmetry and uniformity are never going to be out of trend. Besides, the striation effect is cherished by artists and editors to enhance the proportion, dimensions, and overall visual depth of their compositions.
