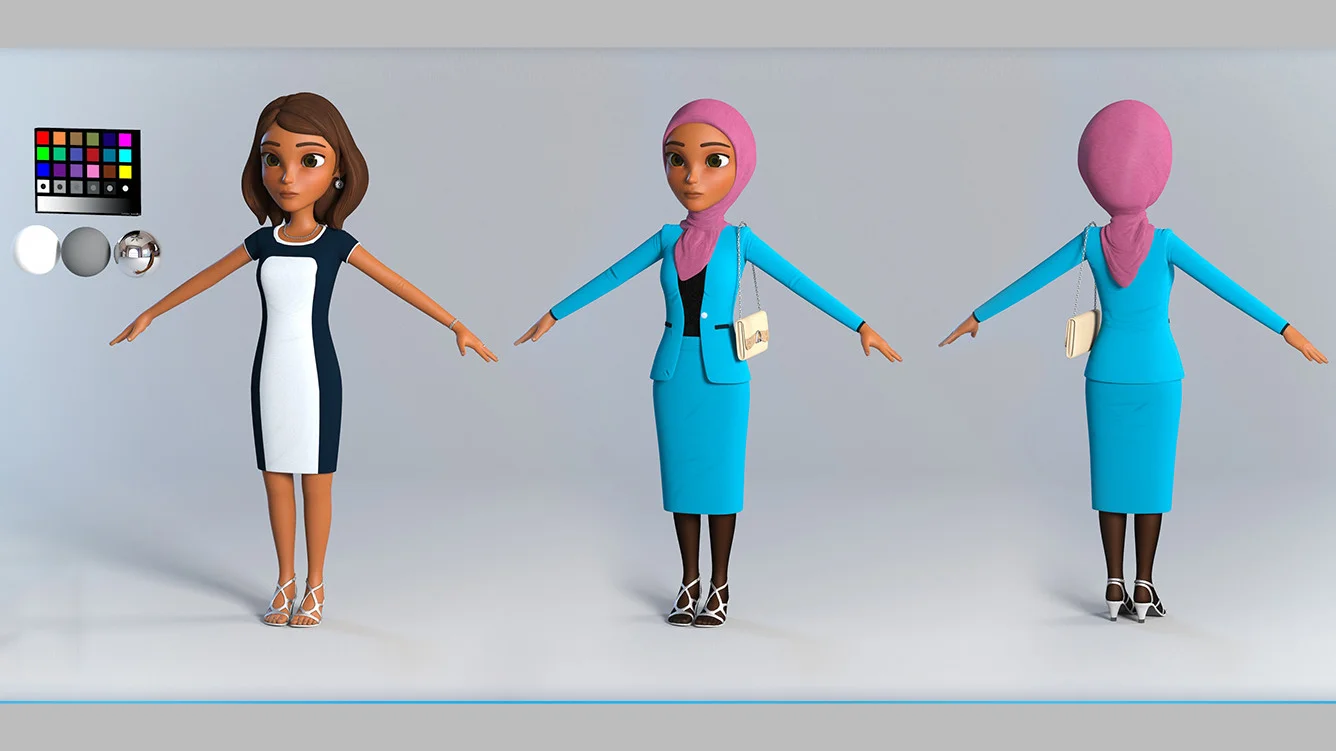
How to Make 3D Models for Animation
Creating animation-ready 3D models can become frustrating when artists realize that a visually impressive model does not automatically translate into a functional asset within an animation pipeline. You spend hours refining shapes, adding details, and perfecting proportions, only to discover that the character collapses at the elbows, the mesh stretches unnaturally during movement, or the rig refuses to deform properly because of poor topology. Fixing broken edge flow, cleaning messy geometry, and rebuilding UVs after the fact wastes valuable production time and introduces avoidable errors. For freelancers, students, and studios working under deadlines, these technical mistakes slow down rendering, complicate rigging, and reduce overall animation quality.
This guide will show you how to make 3D models for animation using a structured, production-focused workflow designed to prevent these issues from the start. You will learn how to build a clean topology that supports smooth deformation, optimize polygon distribution for performance, prepare meshes correctly for rigging, and ensure compatibility across rendering engines and animation software.
Step 1: Define the Purpose and Set Up Your Project
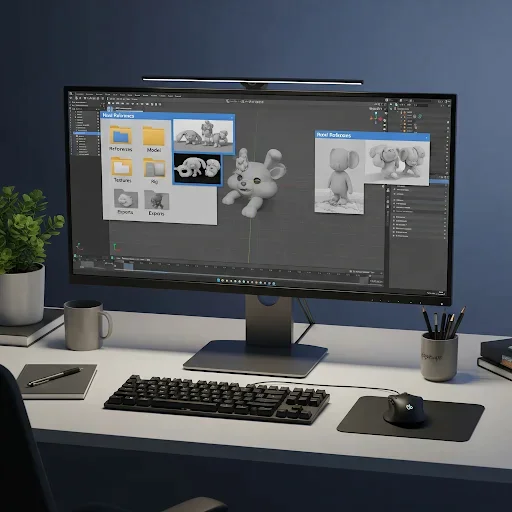
Before modeling, decide exactly what your 3D model is for film, game, or real-time applications and set your polygon budget, texture resolution, and deformation needs. Create a project folder on your system, then inside it, make subfolders for References, Model, Textures, Rig, and Exports. Save all reference images in References and write a short file noting the target software, scale, and frame rate. Open your 3D software, set scene units and grid scale, and ensure viewport stats display polygon counts. This preparation keeps your model organized, optimized, and ready for animation from the start.
Step 2: Choose and Configure Your 3D Software
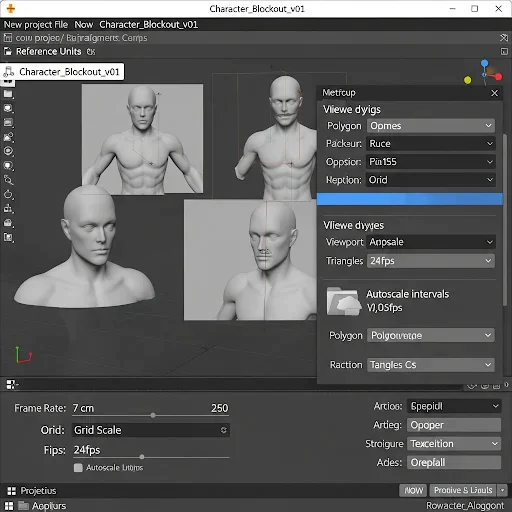
After completing Step 1, open the 3D software that matches your project needs: Blender for free workflows, Maya or 3ds Max for professional animation, or ZBrush for high-detail sculpting. Immediately create a new project inside your Step 1 folder and save it with a clear name, e.g., Character_Blockout_v01. Import your reference images into the viewport or as background planes so you can align proportions accurately. Set scene units (centimeters or meters) and adjust the grid scale to match your target platform. Set the frame rate to 24fps for cinematic projects or 30–60fps for games. Enable viewport overlays or statistics to monitor polygon and triangle counts while modeling. Configure your project to autosave at regular intervals and create a backup folder within your project directory. With this setup, you ensure your workspace is organized, your references are visible, and your scene is ready for accurate modeling.
Step 3: Gather References and Block Out the Base Mesh
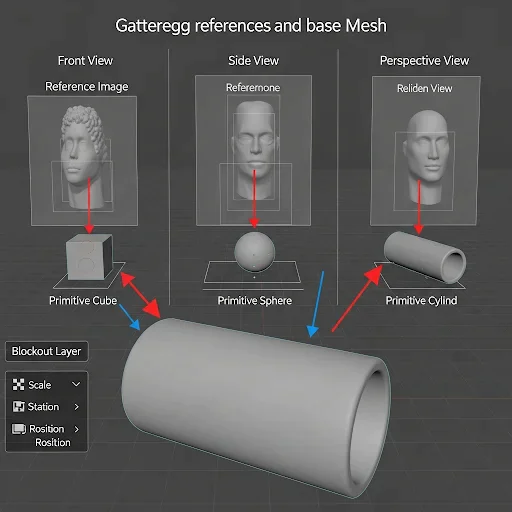
Start by collecting all necessary references. Save front, side, and perspective images into your 01_References folder from Step 1. Open them in your 3D software and align them in the viewport as background planes or reference images. Create a new object layer for the base mesh in your project file. Begin blocking out the model using simple primitives, cubes, spheres, and cylinders to match the overall proportions from your references. Adjust scale, position, and rotation of each primitive to align with your references, keeping shapes separate for easier editing. Do not add details yet; focus only on silhouette, proportion, and primary forms. Once the base shapes are correctly aligned, save the file as Model_Blockout_v01 to preserve your progress before moving on to detailed modeling.
Step 4: Build Clean Topology
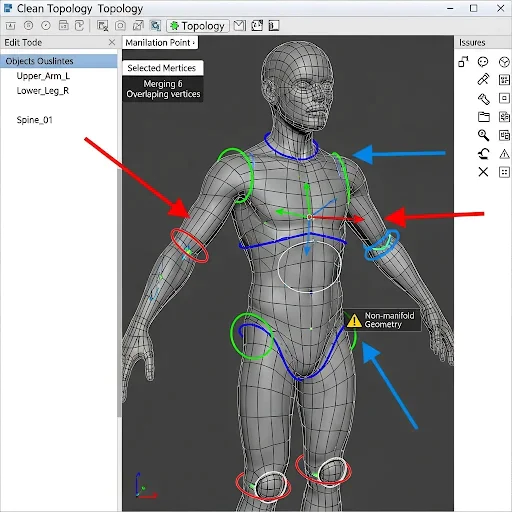
After completing your blockout in Step 3, start converting your primitive shapes into a clean, animation-ready mesh. Select each base shape and enter edit mode (or equivalent in your software). Use quad polygons instead of triangles whenever possible and create edge loops around joints like elbows, knees, and shoulders to support smooth deformation. Merge overlapping vertices, remove unnecessary faces, and check for non-manifold geometry. Keep polygon distribution even across the model, denser in areas that bend, and simpler in flat regions. Rename all objects clearly in your outliner or scene hierarchy, e.g., Upper_Arm_L, Lower_Leg_R, to maintain organization. Save your file as Model_Topology_v01 before proceeding to detailing or sculpting.
Step 6: Retopology for Animation
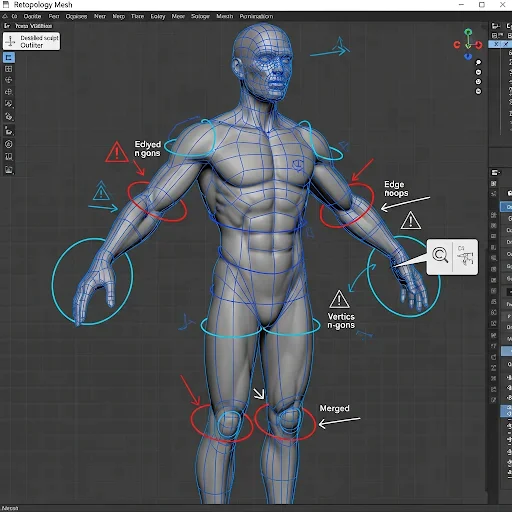
Start retopologizing your model to make it animation-ready. Create a new mesh layer over your detailed model. Use quad polygons to redraw the surface, following natural deformation lines around joints such as elbows, knees, shoulders, and fingers. Place edge loops around bending areas to support smooth motion. Reduce unnecessary polygons in flat or static regions to optimize performance. Merge vertices where faces overlap and remove triangles or n-gons that can cause animation artifacts. Keep the mesh clean and evenly distributed. Continuously toggle visibility of the original detailed mesh to check alignment. Save the retopologized model as Model_Retopology_v01 and make a backup in your 02_Model folder.
Step 7: UV Unwrapping
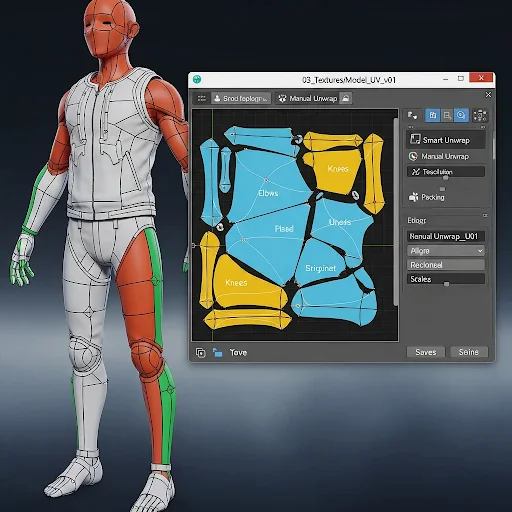
Prepare your model for texturing by unwrapping its UVs. Select your mesh and enter UV editing mode in your software. Mark seams along natural edges where folds or cuts occur, such as clothing lines, armor joints, or limb connections. Use smart unwrap or manual unwrap to flatten the mesh while minimizing stretching. Check the UV layout in the UV editor and scale or pack islands to maximize texture space. Keep important deformation areas, like elbows or knees, with more UV resolution. Once satisfied, export or save the UV layout as Model_UV_v01 in your 03_Textures folder for texturing. Save incremental backups to prevent losing your unwrap work.
Step 8: Texturing & Materials
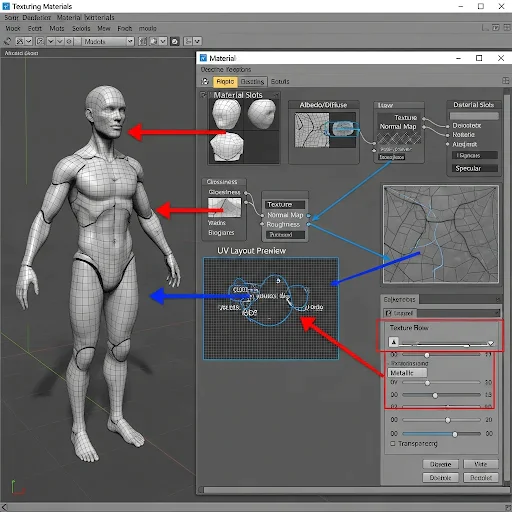
Open your material editor and create a new material slot for each mesh or object. Import your texture maps diffuse/albedo, normal, roughness, and specular, and assign them to the corresponding channels. Use your saved UV layout from Step 7 to align textures accurately. Paint or tweak textures directly in the software if needed, focusing on details in visible and deforming areas. Adjust material properties like glossiness, metallic, and transparency to match references. Continuously preview your model in the viewport with proper lighting to check texture placement and shading. Save your file as Model_Textured_v01 and back it up in your 03_Textures folder.
Step 9: Prepare for Rigging and Test Deformation
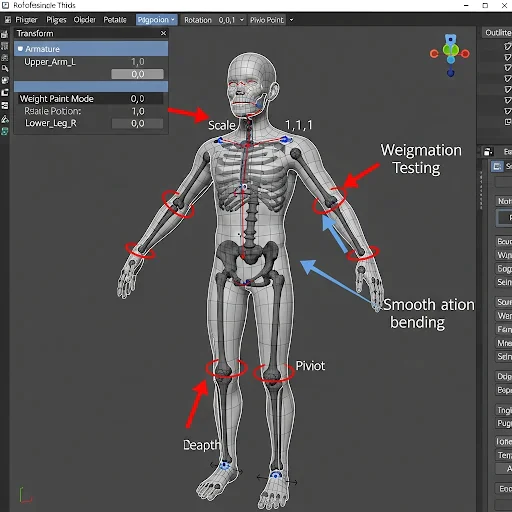
After texturing in Step 8, get your model ready for rigging. Check that all meshes are clean, non-manifold, and free of overlapping faces. Apply all transformations (scale, rotation, position) so the model sits correctly at the origin. Set the pivot points at natural joints like shoulders, elbows, and knees. Group or parent objects logically in your outliner and name them clearly. Add a simple test armature or bones and assign basic weight painting to check deformation. Rotate joints and bend limbs to ensure edge loops deform smoothly without stretching or collapsing. Correct topology or weight issues immediately. Save this file as Model_RigPrep_v01 and back it up in your 04_Rig folder.
Step 10: Exporting for Animation
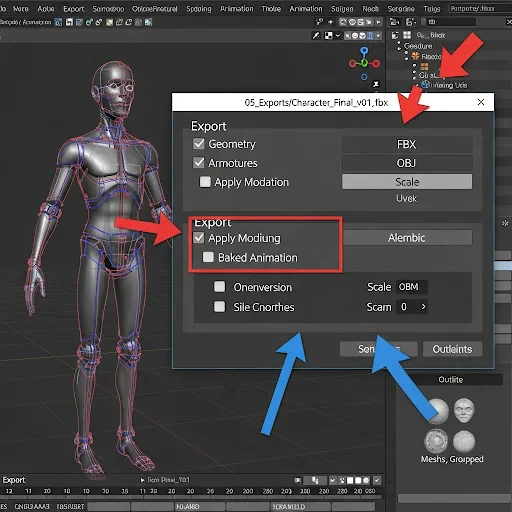
After preparing and testing your model in Step 9, export it in a format compatible with your target platform or animation software. Select all meshes and rig components, apply all transforms, and ensure modifiers are applied. Choose FBX for animation pipelines, OBJ for static models, or Alembic for complex simulations. In the export settings, enable geometry, armatures, and baked animations if applicable. Set the scale and unit conversion to match your target engine or software. Save the exported file in your 05_Exports folder with a clear name, e.g., Character_Final_v01.fbx. Open the exported file in the target software to verify geometry, textures, and rig behavior, correcting any errors before final use.
Step 11: Rendering Your Animated Model
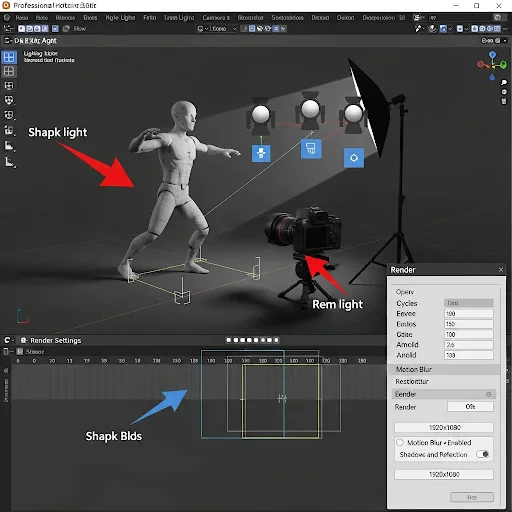
Place your model in the scene and position lights to highlight key areas. Set the camera angle and resolution for your final output. Assign materials and textures if they didn’t transfer during export. Scrub the timeline or play the animation to check that all deformations, textures, and rigging behave correctly. Adjust render settings, for example, enable Cycles or Eevee in Blender, Arnold in Maya, and turn on motion blur, shadows, and reflections if needed. Render a quick preview pass to verify quality and fix any issues. Once satisfied, render the full animation or image sequence and save it in your project folder under 06_Renders with a clear file name like Character_Render_v01.
Step 12: Final Checks and Optimization
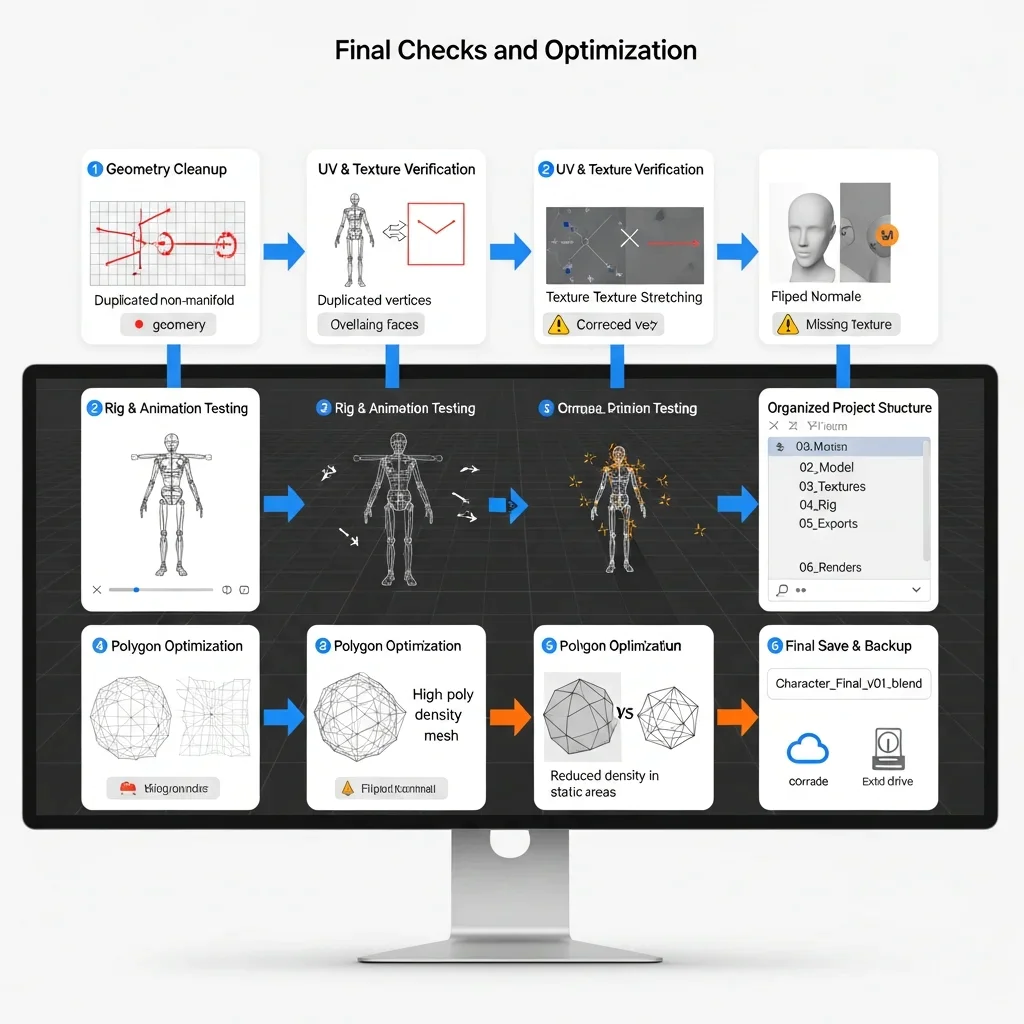
Open your project and remove any non-manifold geometry, duplicated vertices, or overlapping faces. Verify that UVs and textures are correct, with no stretching, flipped normals, or missing maps. Rotate all joints and play through the animation to ensure rigs and deformations work smoothly. Reduce unnecessary polygons in static areas while keeping detail where needed, and make sure all objects, textures, and exports are correctly named and saved in their respective project folders (02_Model, 03_Textures, 04_Rig, 05_Exports, 06_Renders). Save a final version with a clear name, e.g., Character_Final_v01.blend, and back up your project to an external drive or cloud storage. Completing these steps ensures your 3D model is fully optimized, ready for animation, rendering, or integration into a game engine without errors.
Conclusion
Follow these steps carefully to create clean, animation-ready 3D models that perform efficiently in any pipeline. Start by setting up your project and references, choosing the right software, and building your base mesh with proper topology. Add details, retopologize, unwrap UVs, apply textures, prepare for rigging, and test deformations at every stage. Export correctly and render previews, then perform final checks for geometry, UVs, and naming conventions. Avoid common mistakes like non-manifold geometry, missing edge loops, or unchecked UVs. Save incremental versions and back up your project to ensure nothing is lost. By following this structured, actionable workflow, you will consistently produce models that look professional and animate smoothly across any software or game engine.
