How To Animate A Rig In Blender
3D animation is no longer limited to film studios or high-end game production. Today, it drives content across YouTube, Instagram reels, advertisements, and freelance marketplaces. What used to be a complex studio-only skill is now something individual creators can learn and apply with the right workflow.If you’ve ever watched a character move smoothly on screen and wondered how that life-like motion is created, it all starts inside Blender.
Blender is a powerful, free, open-source 3D software used in both professional pipelines and beginner workflows. It provides an all-in-one environment where artists build models, create rigs, animate movement, set lighting, and render final scenes.
However, the real challenge begins when you start animating characters. Learning how to animate a rig in blender is where most beginners struggle. Joints twist incorrectly, IK controls behave unpredictably, feet slide during walk cycles, and motion quickly loses realism if the setup is not understood properly.
These issues are not random; they come from how rigs, weight painting, keyframes, and animation constraints work together in a production workflow.In this guide, you will learn a clear, structured, and practical workflow for animating a rigged character in Blender, following real production-style steps from setup to final export.
Steps to Animate a Rig in Blender
Step 1: Scene Setup
To start animating a rig in Blender, we first prepare a clean and simple scene so everything works smoothly. You open Blender and switch to the Animation workspace, where we already have the timeline and controls ready for animation.Next, you delete the default cube (press X → Delete) because we only want to work with the object or rig we plan to animate. This helps us stay focused and avoid confusion.
After that, we set the frame rate to 24 FPS from the Output Properties. This gives us smooth and natural motion, which is important for good animation. Then, we go to the timeline and set the start and end frames (for example, 0 to 120) so we know how long our animation will be.Finally, you can turn on Auto Keying if you want a faster workflow. This allows Blender to automatically save your movements as keyframes when we animate the rig.
Step 2: Import & Verify Rig
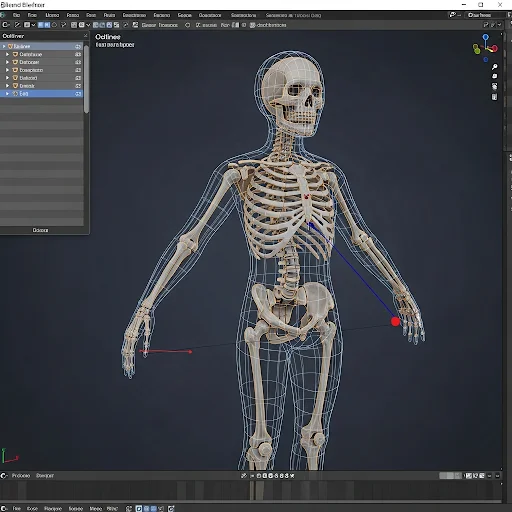
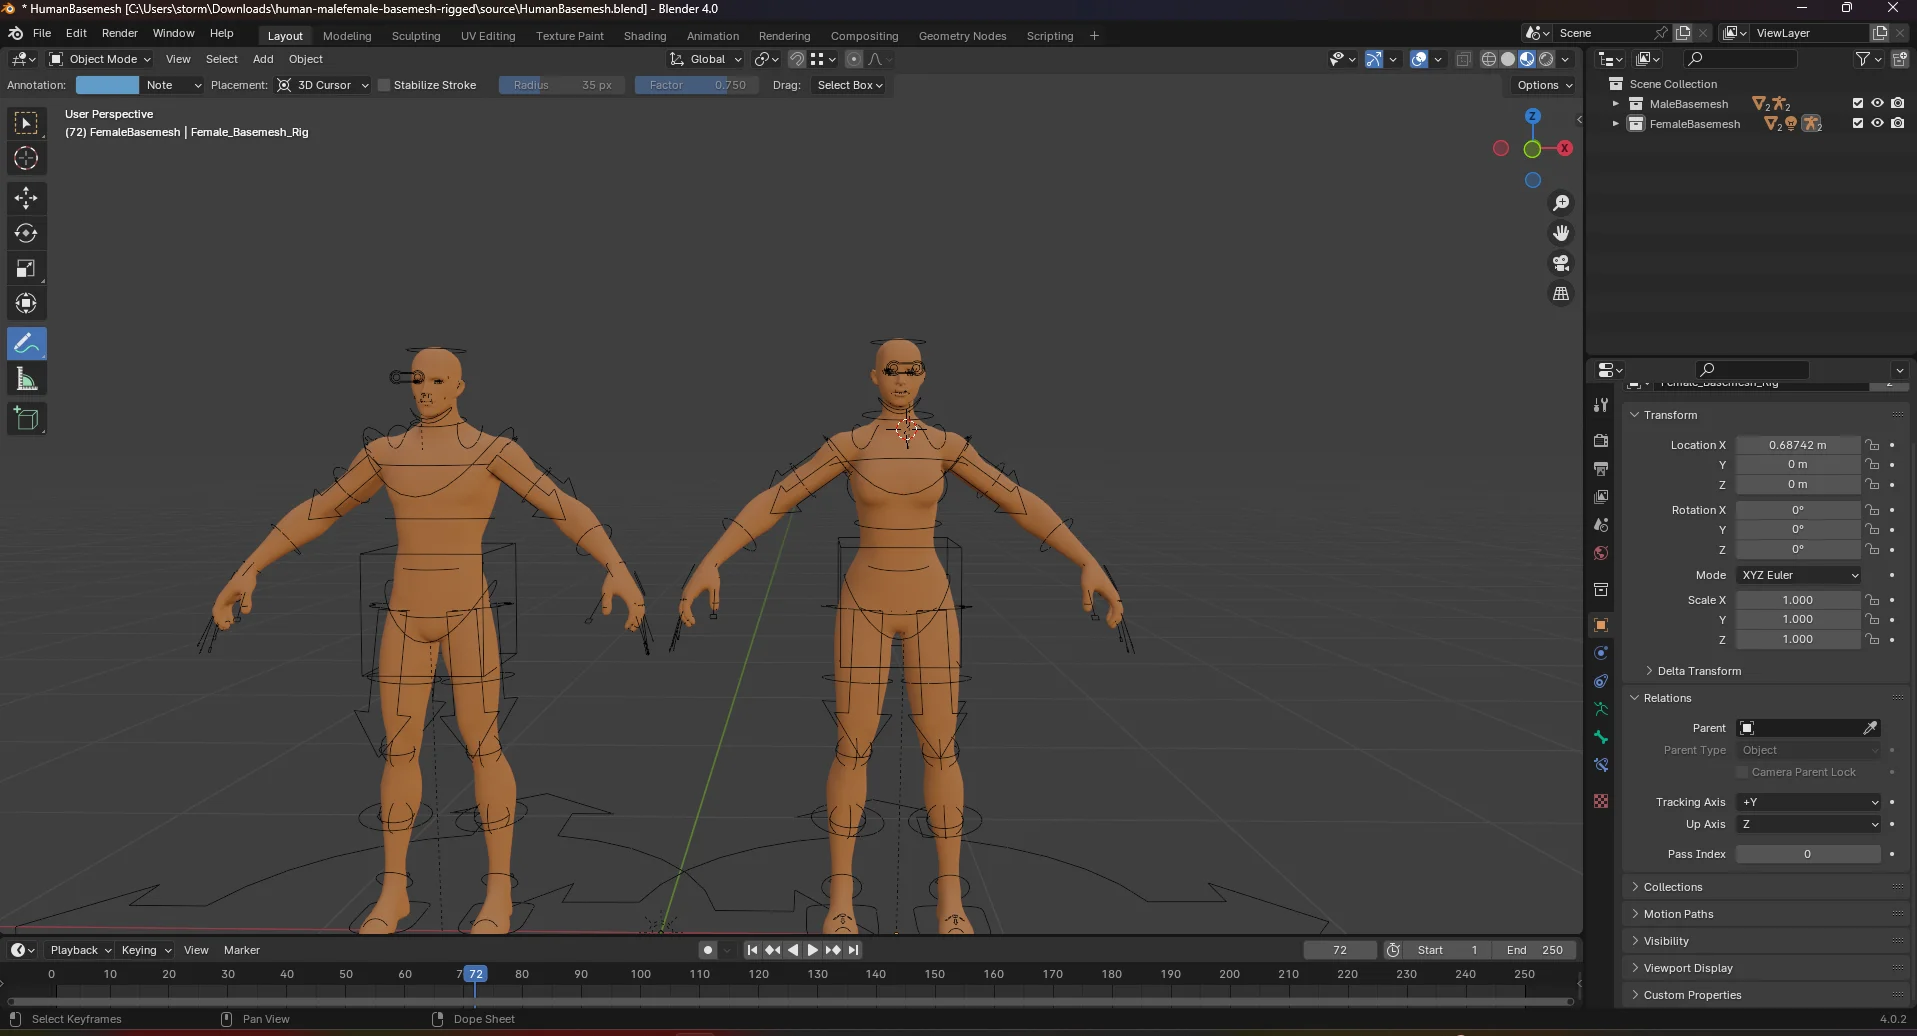
Now we bring our character into Blender and make sure the rig is working correctly before we start animation. You can import your character using formats like FBX, glTF, or by using Append if it’s another Blender file. Once the model is in the scene, we check if the armature (skeleton) is present; this is what controls the movement of the character.
Next, you go to the Outliner and check the bone structure. We make sure the bone names look clean and organized, because this helps us control the rig easily during animation. After that, you verify the weight painting (vertex groups) to confirm that each part of the mesh is correctly attached to the bones.
Finally, we test everything in Pose Mode. You select a few bones, rotate or move them, and check if the mesh follows properly. If the body moves smoothly with the bones, your rig is ready. If not, you fix it now before moving forward.
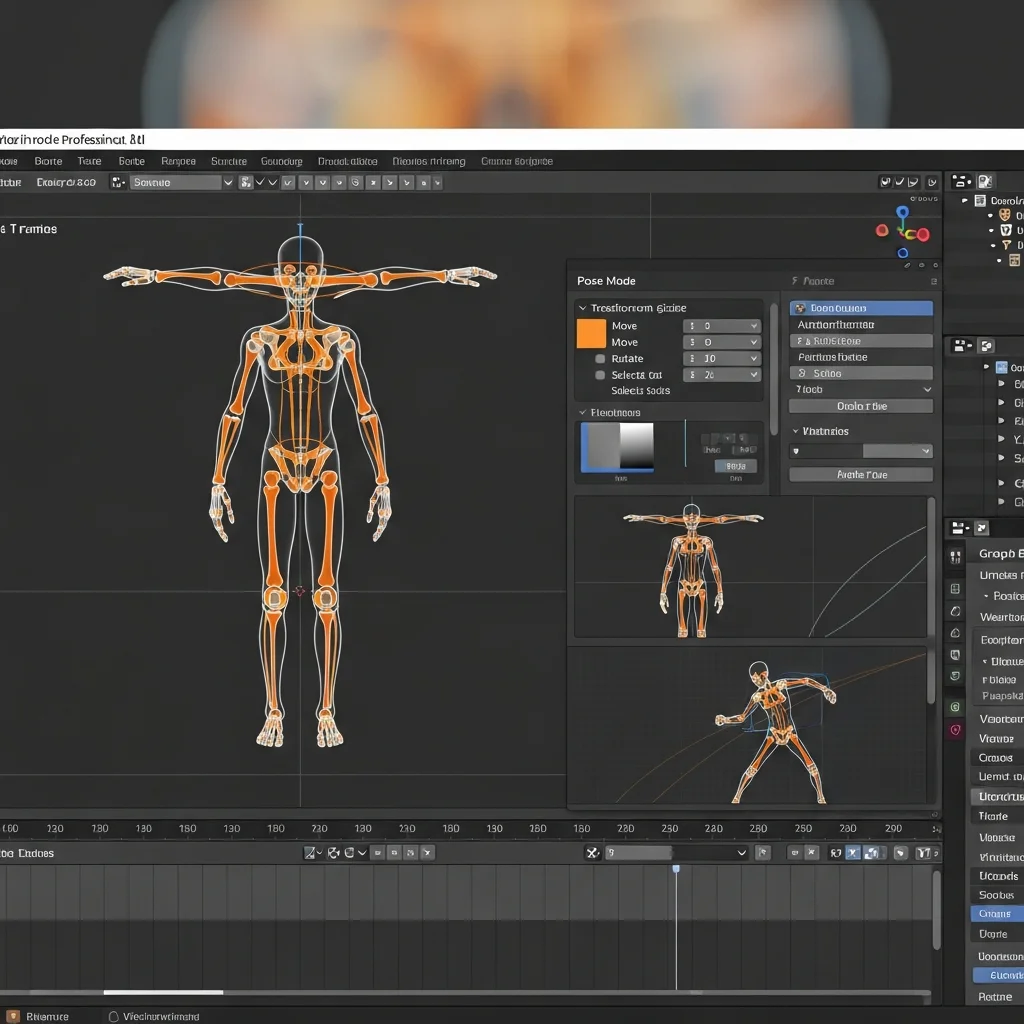
Step 3: Pose Mode & Bone Control
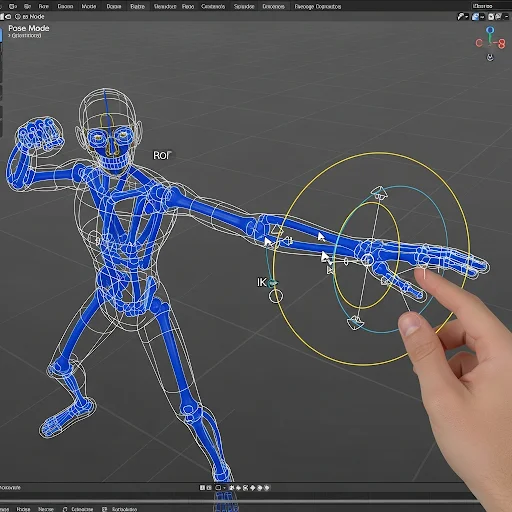
First, you select the armature and switch to Pose Mode, because this is where we actually move and animate the bones. Once you are in Pose Mode, you can click on any bone to select it and start adjusting the character’s pose.You can rotate bones using R, move them with G, and press X, Y, or Z to control movement on a specific axis. This helps you create clean and accurate poses. If you make a mistake, you can quickly press Ctrl + Z to undo it and try again.
To make things easier, you can use Inverse Kinematics (IK), which lets you control a full limb (like an arm or leg) by moving just one point. This makes posing faster and more natural. You can also lock certain bones so they do not move by accident, which keeps your animation clean and controlled.Finally, we organize bones into layers or groups so everything stays easy to manage, especially when working with complex rigs. At this point, you have full control over your character and are ready to start posing for animation.
Step 4: Adding Keyframes
First, we go to frame 1 in Blender and set a clean base pose like a T-pose or A-pose so the animation starts from a stable position. Then we insert the first keyframe by selecting the rig and saving Location and Rotation, which locks the starting pose. After that, we move to a new frame, adjust the pose according to the action we want, and insert another keyframe to record the change. For better consistency, we can use “key all bones” so every part of the rig is properly saved in each frame. If needed, we can also copy and paste poses between frames to speed up the workflow and keep movements consistent. For symmetrical actions like walk cycles, we use pose flipping to mirror movements and maintain balance between left and right sides.
Step 5: Graph Editor & Curves
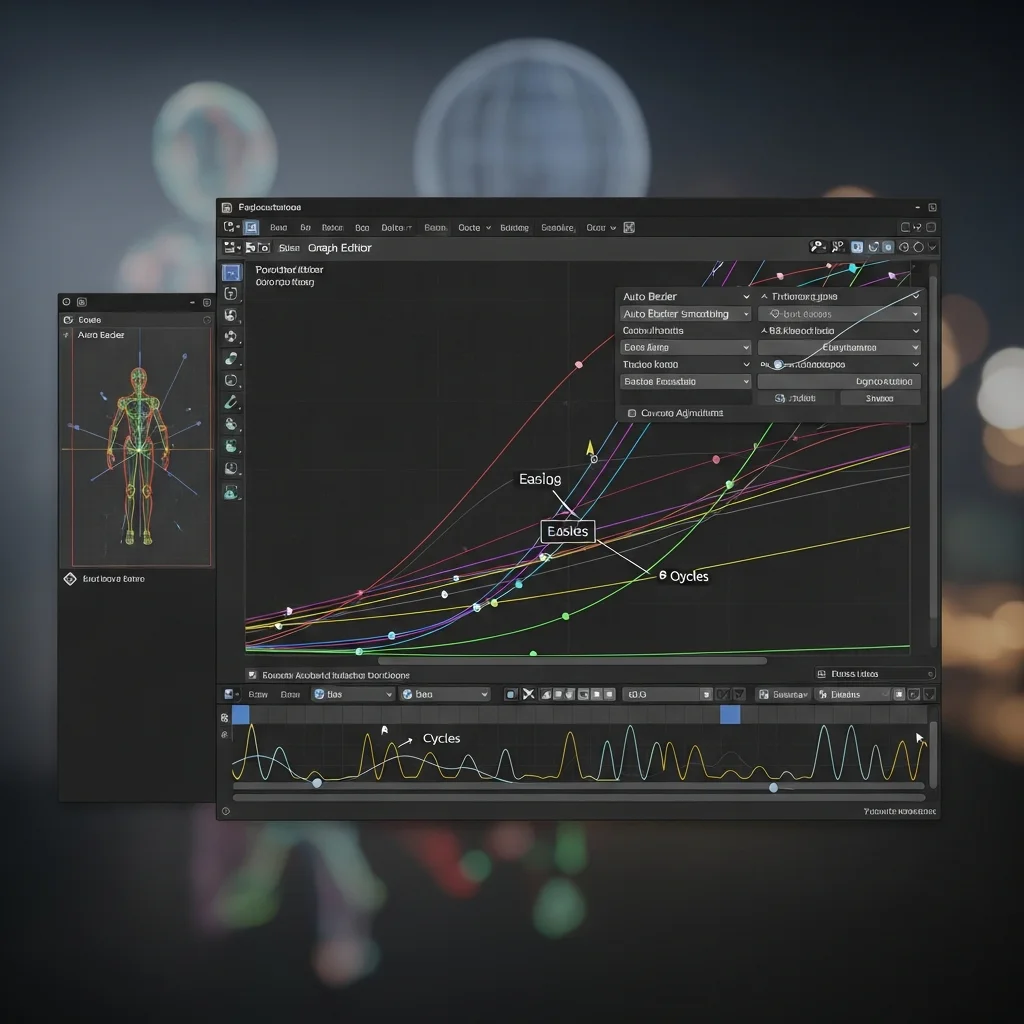
Now we refine the motion at a deeper level using the Graph Editor in Blender. First, we switch to the Graph Editor and select all animation curves by pressing A, so we can see and control the full motion data. Then we smooth the movement using Auto Bezier or easing options, which helps remove stiff or robotic motion.
Next, we adjust the curve handles manually to control how the animation speeds up or slows down, especially for acceleration and deceleration in movement. After that, we can use Normalize Curves to compare different animations on a balanced scale, making it easier to judge timing and motion quality. Finally, if we want looping animations like walk cycles, we add a Cycles modifier, which automatically repeats the motion smoothly without visible breaks.
Step 6: Polishing the Animation
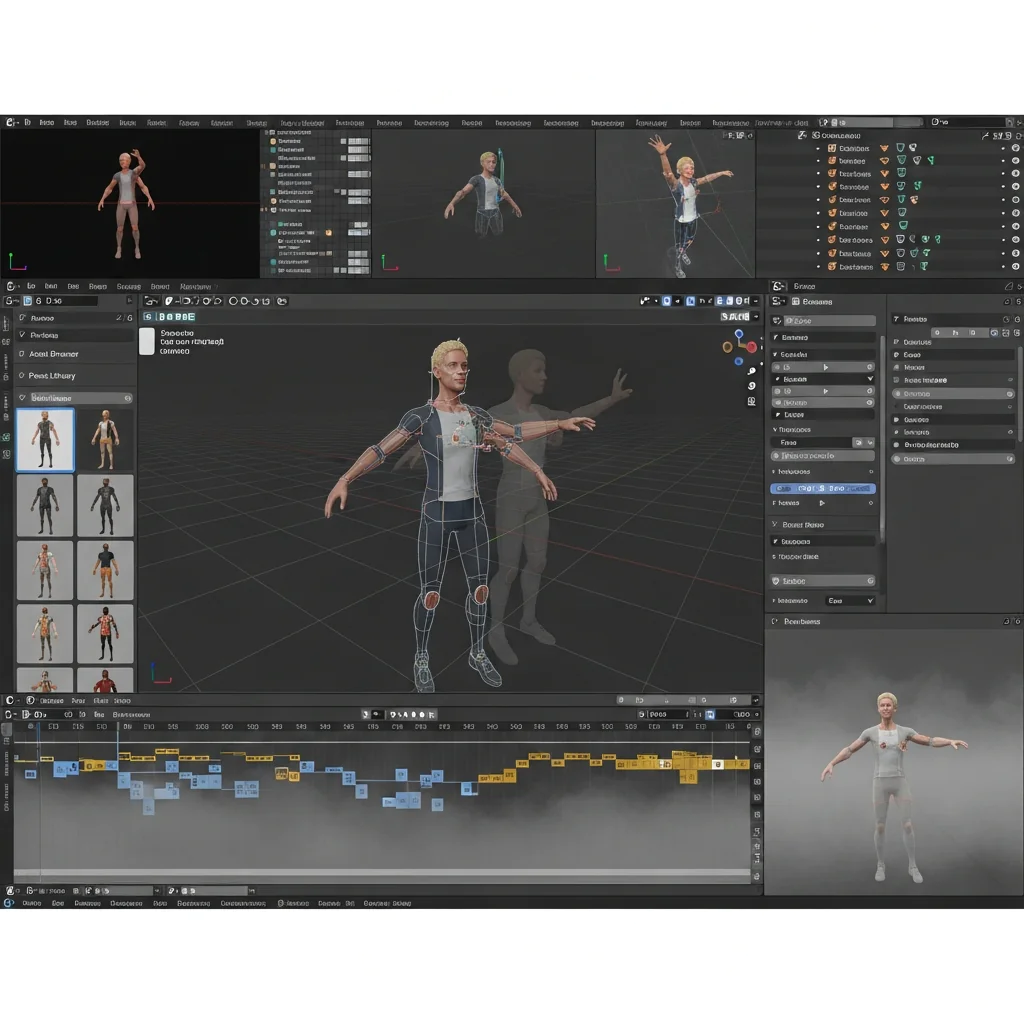
Now polish the animation in Blender to make it more alive and professional. Add secondary motion like follow-through and overlap so body parts continue moving slightly after the main action. Apply squash and stretch (when needed) to give more energy and expressive movement. Offset timing so smaller parts like fingers or hair slightly lag behind the main motion, creating a natural feel. Use the Asset Browser or Pose Library to quickly reuse poses and keep consistency. Finally, review the animation from different camera angles to make sure everything looks correct before rendering.
Step 7: Export & Render
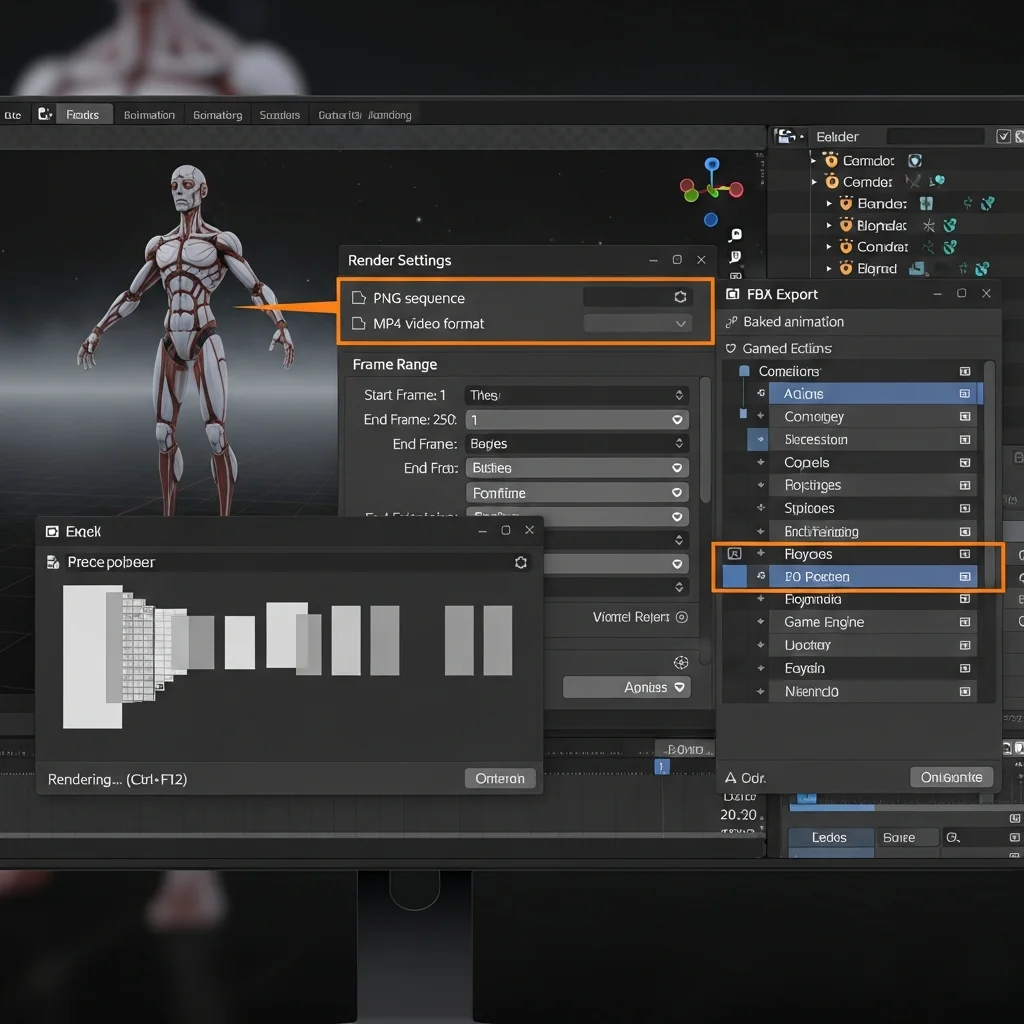
Set the output format in Blender as either PNG sequence for high-quality frames or MP4 for a direct video file. Then set the correct frame range so only the part of the animation you want gets rendered.
Press Ctrl + F12 to start rendering the animation and let Blender process all frames for you. If the animation needs to be used in other tools or game engines, export it as FBX with baked animation so all movements are properly saved for you.
For projects with multiple actions, use the NLA Editor to combine and organize animations into one timeline so you can manage everything in a clean and controlled way.
Now the complete animation workflow in Blender is finished, and you have gone through every important stage from start to end. You began with a clean scene setup, where you prepared a simple and organized environment so the animation process could stay focused and efficient. Then you imported and checked the rig to make sure the character’s skeleton and deformation were working properly before animation.After that, you moved into Pose Mode and started controlling the rig using bones, which is the core of character animation. You learned how keyframing works by setting poses over time and creating movement step by step.
Conclusion
Now the complete animation workflow in Blender is finished, and you have gone through every important stage from start to end. You began with a clean scene setup, where you prepared a simple and organized environment so the animation process could stay focused and efficient. Then you imported and checked the rig to make sure the character’s skeleton and deformation were working properly before animation.
After that, you moved into Pose Mode and started controlling the rig using bones, which is the core of character animation. You learned how keyframing works by setting poses over time and creating movement step by step.
