How To Adjust The Brightness And Contrast Of An Image In Lightroom
An essential stage in photo post-processing for photographers is adjusting an image’s brightness and contrast. By boosting an image’s vibrancy and tonal range, it can greatly improve the visual impact of the image. The robust photo editing software Adobe Lightroom provides various tools for adjusting brightness and contrast, which enables photographers to enhance and manipulate their photos in several ways. Brightness and contrast can be easily and intuitively adjusted in your photos, one of the most fundamental and vital adjustments you can make. These two adjustments are necessary to create a balanced and appealing picture. Contrast, on the other hand, is the distinction between an image’s light and dark regions, whereas brightness refers to the amount of lightness or darkness in an image. Whether attempting to produce a moody and dramatic or bright and happy image, changing these settings can significantly alter a photo’s overall look and feel. In this blog post, you can follow us as we demonstrate how to change an image’s brightness and contrast in Lightroom. We’ll go over the fundamental procedures for modifying an image’s overarching brightness and contrast, as well as more advanced techniques for modifying particular features of an image. By the end of this post, you will have a solid understanding of how to adjust the brightness and contrast in Lightroom and be able to create visually stunning and professional-looking images that stand out from the crowd.
A Brief Overview Of The Lightroom Interface And The Tools
Adobe Lightroom is an emphatic photo editing program that offers photographers many different methodologies to improve and manipulate their images. Modifying the brightness and contrast is the most basic and significant change you can make to your images with these tools. The Basic panel in the Develop module is where Lightroom’s brightness and contrast settings are situated. The Exposure, Contrast, Highlights, Shadows, Whites, Blacks sliders, and others are available in the Basic panel and can be used to adjust the brightness and contrast image.
The Exposure slider allows you to adjust the overall brightness of your image. Moving the sIf you move the slider to the right, the image will become brighter, while moving it to the left will make the image darker. The Contrast slider adjusts the difference between the brightest and darkest areas of your image, making it more vibrant and visually appealing.
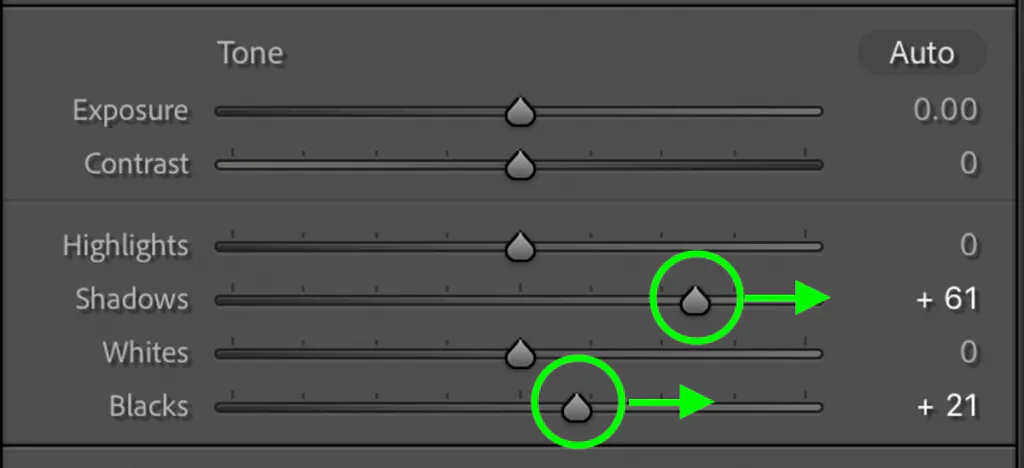
The Highlights and Shadows sliders allow you to adjust the brightness of specific areas of your image. Moving the Highlights slider to the left will reduce the brightness of the brightest parts of your image while moving it to the right will increase the brightness. Similarly, moving the Shadows slider to the right will brighten the darker areas of your image, while moving it to the left will make them darker.
The Whites and black sliders allow you to adjust the brightness of your image’s whitest and blackest parts. Moving the Whites slider to the right will make the white areas of your image brighter while moving it to the left will make them darker. Similarly, moving the Blacks slider to the right will make the black areas of your image darker, while moving it to the left will make them lighter.
Aside from these basic controls, Lightroom offers more advanced techniques for adjusting brightness and contrast, such as using the Tone Curve or the Graduated Filter tool.
The Tone Curve helps you to adjust the brightness and contrast of specific areas of your image by manipulating a curve.
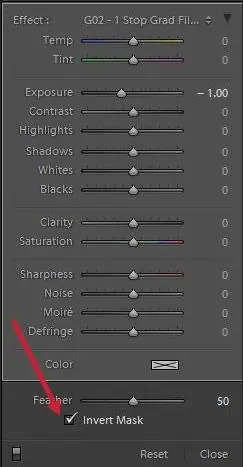
The Graduated Filter tool allows you to adjust the brightness and contrast of specific parts of your image, such as the sky or the ground, by applying a filter that gradually fades in or out.
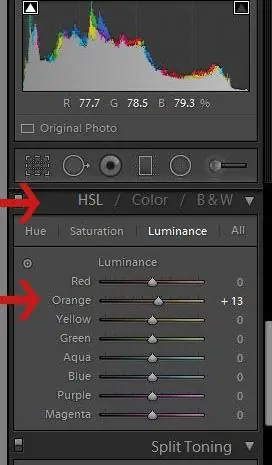
Histogram
The histogram is a graph representing your photo’s brightness and contrast distribution. It shows the number of pixels in your photo with a specific brightness value. The histogram can help you identify areas of your photo that are overexposed or underexposed. Here’s how you can use the histogram:
Open your photo in Lightroom.
Click on the Develop module.
Click on the Histogram panel to view the histogram.
Adjust the basic adjustment sliders to see how they affect the histogram.
The histogram displays a graph with a black line representing the brightness values distribution in your photo. The left side of the histogram represents the darkest areas of your photo, while the right side represents the brightest areas. The middle of the histogram represents mid-tones. If the graph is shifted towards the left side, it means that your photo is underexposed, and if it’s shifted towards the right side, it means that your photo is overexposed. You can use the basic adjustment sliders to adjust the exposure and brightness of your photo to create a more balanced histogram.
Clipping Indicators
Clipping indicators show areas of your photo that are overexposed or underexposed. Lightroom displays clipping indicators as coloured areas on your photo. Here’s how you can use the clipping indicators:
Open your photo in Lightroom.
Click on the Develop module.
Click the triangle icon next to the histogram panel to view the clipping indicators.
Adjust the basic adjustment sliders to see how they affect the clipping indicators.
The clipping indicators show areas of your photo that are overexposed or underexposed. If an area of your photo is overexposed, it will be displayed as red. If an area of your photo is underexposed, it will be displayed as blue. You can use the basic adjustment sliders to adjust the exposure.
Filters And Brushes
Filters and brushes in Lightroom are powerful tools that selectively adjust brightness and contrast in specific areas of an image. Filters, such as the Graduated Filter or Radial Filter, allow you to adjust specific areas of an image by creating a mask. For example, you can use a Graduated Filter to the brightness and contrast of the sky in a landscape photo without affecting the rest of the image. By adjusting the position and shape of the filter, you can control the intensity and direction of the adjustments. Brushes in Lightroom allow you to make selective adjustments to specific areas of an image using a brush tool. It is particularly useful for fine-tuning adjustments in areas that are difficult to adjust with a filter. For example, in a landscape photo, you can use a brush to lighten or darken a person’s face or a tree trunk. You can also use the brush to adjust the contrast of a specific area, making it stand out more in the image. Both filters and brushes in Lightroom are powerful tools that allow you to adjust the brightness and contrast in your images selectively. By using these tools effectively, you can create stunning images with rich, vibrant colours and striking contrast.
Here are the steps to adjust the brightness and contrast of an image in Lightroom:
Step 1: Import the Image First, open Lightroom and import the image you want to adjust. Click the Import button in the screen’s bottom left corner, select the image folder, and click the Import button.
Step 2: Enter the Develop Module. Once you have imported the image, click on the Develop module at the top of the screen. That will open the editing panel, where you can adjust the image.
Step 3: Adjust the Brightness To adjust the image’s brightness, scroll down to the Basic panel on the right side of the screen. Here you will see several sliders, including Exposure, Contrast, Highlights, Shadows, Whites, and Blacks. Move the Exposure slider to the right to increase the image’s brightness. Alternatively, you can adjust the Shadows or Blacks slider to increase the brightness of the darker areas of the image.
Step 4: Adjust the Contrast To adjust the image’s contrast, move the Contrast slider to increase or decrease contrast accordingly. Increasing contrast will make the highlights brighter and the shadows darker while decreasing contrast will have the opposite effect.
Step 5: Fine-Tune the Adjustments After making the initial adjustments to the brightness and contrast, you can fine-tune the image by adjusting the other sliders in the Basic panel. For example, you can use the Highlights slider to recover details in the bright areas of the image or the Whites slider to make the image appear brighter overall. Similarly, you can use the Shadows slider to recover details in the darker areas of the image or the Blacks slider to make the image appear darker overall.
Step 6: Preview the Adjustments As you adjust the image, you can preview the changes in real-time by clicking on the Before/After button, which will show you a side-by-side comparison of the original and edited images, allowing you to see the impact of your adjustments.
Step 7: Save the Edited Image Once satisfied with the adjustments, you can save the edited image by clicking the Export button to open the Export dialogue box, where you can choose the file format, quality, and destination for the image.
Conclusion:
In conclusion, adjusting brightness and contrast is a simple process in Lightroom, and it can greatly improve the quality and visual impact of your images. By following these steps, you can lead you quickly and easily adjust the brightness and contrast of any image to create stunning results.
