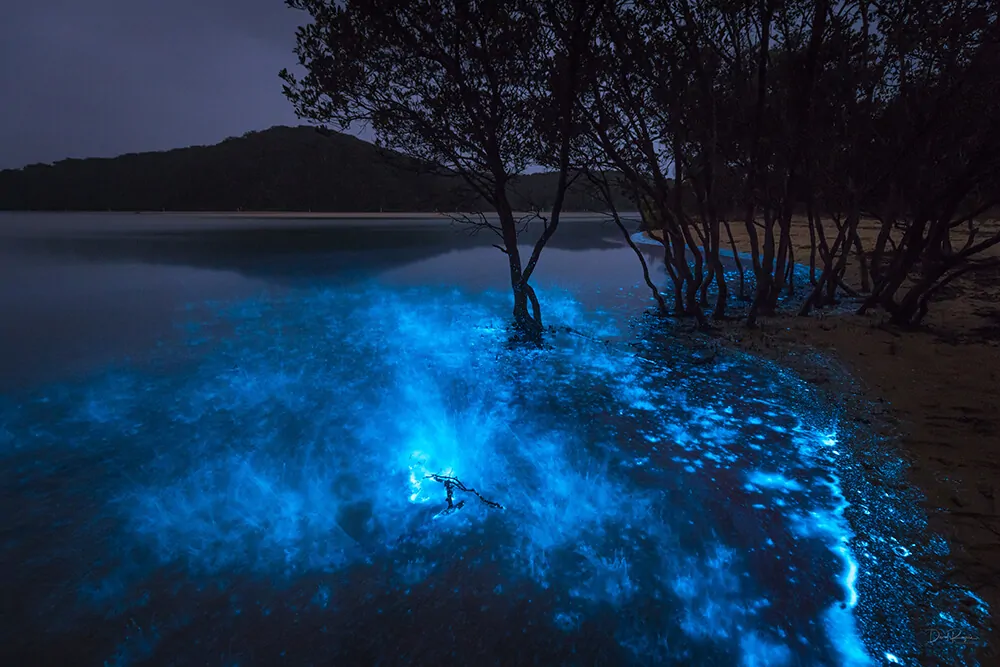
How To Add Luminescence Effects To Images
Luminescence refers to the emission of light from a substance when its electrons absorb energy and get excited, resulting in the production of energy in the form of photons. This process is also often considered as cold light emission, as unlike the light or radiation produced by materials because of thermal conduction, it doesn’t involve heat. There are different kinds of luminescence, like bioluminescence, chemiluminescence, radioluminescence, photoluminescence, triboluminescence, and others. Though most of the forms of luminescence are related to electron movements, some are also caused by different factors like chemical reactions, electrical energy, friction, etc. Overall, the luminescence phenomenon is visually often pleasing, as looking at glowing things is no less than witnessing a mesmerizing magical sight. That is the main reason behind the utilization of this effect as a creative approach to enhance visual artworks, graphic designs, illustrations, and even photographs. Various advanced software contain a vast set of tools and features, including blur options, blending modes and opacity adjustments, layer masks, feather tools, brush tools, and HSL adjustments. All these tools effectively help in simulating luminescence effects in images that look akin to naturally occurring phenomena. This blog will present the detailed process of adding luminescence effects to images using advanced editing tools and techniques.
Step 1: Choose And Duplicate The Image
Begin by loading your chosen photograph in an editing program such as Adobe Photoshop.
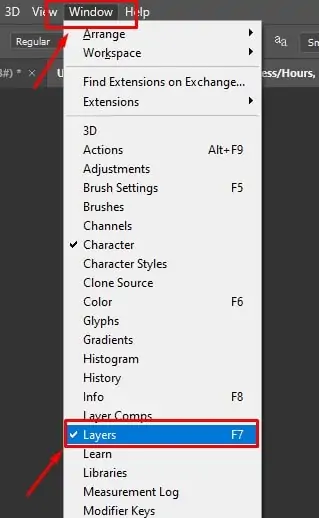
Make sure the Layers panel is in view. In case not, enable it by clicking on Window > Layers.
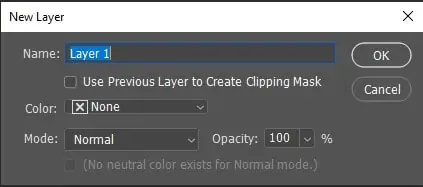
After that Right-click on the initial picture layer within the Layers panel. Tap on Duplicate Layer from the choices. On the other hand, you can press Ctrl+J on Windows or Cmd+J on Mac for a fast shortcut.
For way better arrangement, rename the copied layer to something such as Glow Effect or Luminescence Layer.
Making a duplicate of the initial layer guarantees that you work non-destructively, preserving the original photograph while applying effects on the duplicate.
Make sure that the duplicate layer is over the initial layer to make subsequent alters and adjustments visible.
Step 2: Select The Specific Zones
Assess the photo and choose which zones should be modified with the luminescence or glow effect. These ranges may incorporate objects including lights, highlights, or particular parts you need to upgrade.
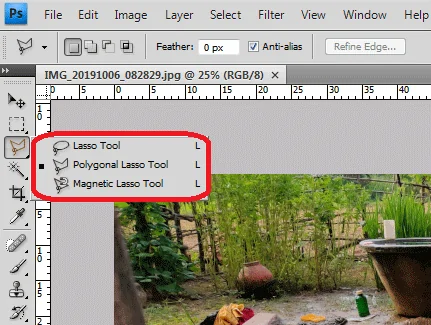
From your software’s toolbar, select either the Lasso Tool for freehand selections, the Quick Selection option for regions with defined edges, or the Magic Wand feature for shining and uniform regions.
Utilize the Lasso Tool to manually outline the glowy ranges. Utilize the Quick Selection or Magic Wand by clicking and dragging over the focused-on light zones.
Polish the selection utilizing Shift to include to selection or Alt/Option to subtract from it.
Go to select > Modify > Feather and set a radius of about 10 to 30 pixels. It will soften the edges of the selection to make a smooth glow transition.
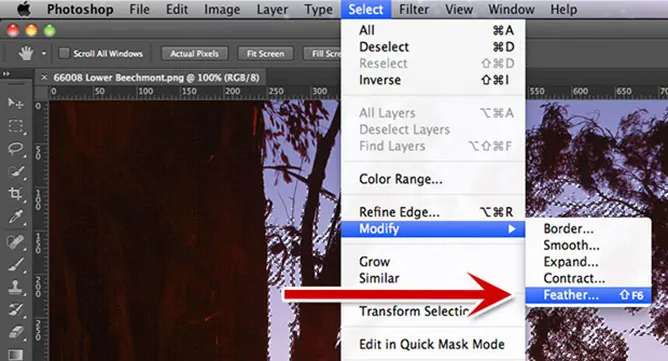
Keep it as a selection channel by selecting Select > Save Selection for later alters.
Step 3: Use The Blur Effect To Create The Glow
Ensure that the light source areas are still chosen from Step 2, and tap on Ctrl+J or Cmd+J to duplicate the choice onto a new layer. That new layer will include only the light source zones.
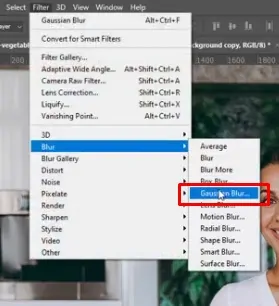
Move to Filter > Blur > Gaussian Blur within the menu bar. You will find a pop-up window emerge with a slider for altering the blur radius.
Advance the radius to form a delicate, glowing impact around the chosen zones. Begin with 10 to 40 pixels, depending on the required glow level and picture resolution.
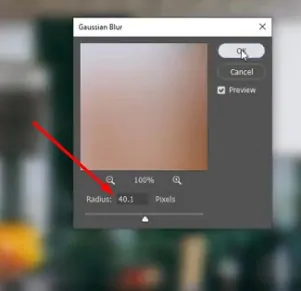
Preview the blur effect and fine-tune until the glow shows up delicate yet appealing.
In case you need to upgrade the intensity of the glow, make a copy of the blurred layer using Ctrl+J or Cmd+J once more. Combine this effect to make a solid luminescence as required.
Do not over-sharp or add harsh glows and keep the blur smooth and natural.
Step 4: Modify Colours And Brightness

Tap on the duplicated glow layer from the third step to be sure that it is dynamic for further adjustments.
Move to Image > Adjustments > Brightness/Contrast. Grow the Brightness to create a glow which is more intense and striking. Set the Contrast to improve the difference between the glowing regions and the surrounding elements of the photograph.
Proceed to Image > Adjustments > Hue/Saturation. Drag the Hue slider to alter the colour of the glow. You can make glowing effects in different colours, like blue, green, or neon pink, according to the theme of the image. Modify Saturation to maintain the intensity of the glow’s colour, making it either more dynamic or muted.
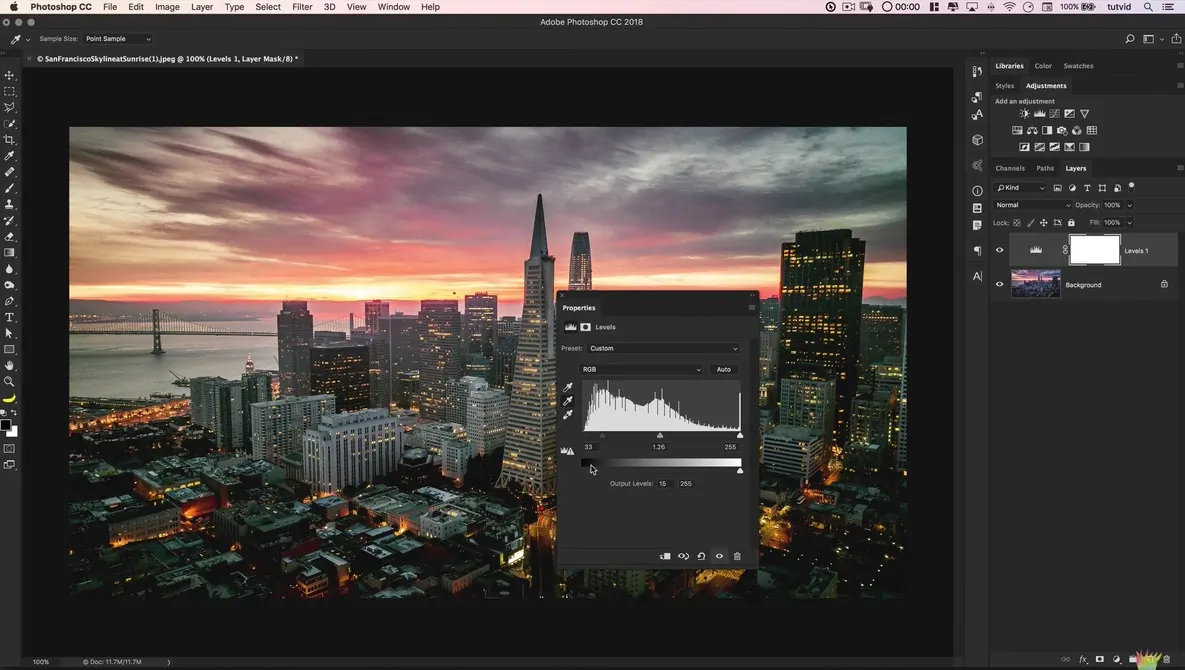
For additional dominion over the glow’s brightness and contrast, utilize Image > Adjustments > Levels or Curves. Alter the input levels or curves to brighten the highlights or alter the midtones, helping the glow blend consistently with the photograph.
Revise the blending mode of the glow layer choosing form options like Soft Light, Overlay, or Linear Dodge for more sensational impacts. It will allow the glow to integrate smoothly with the primary image.
Step 5: Blending Mode Settings
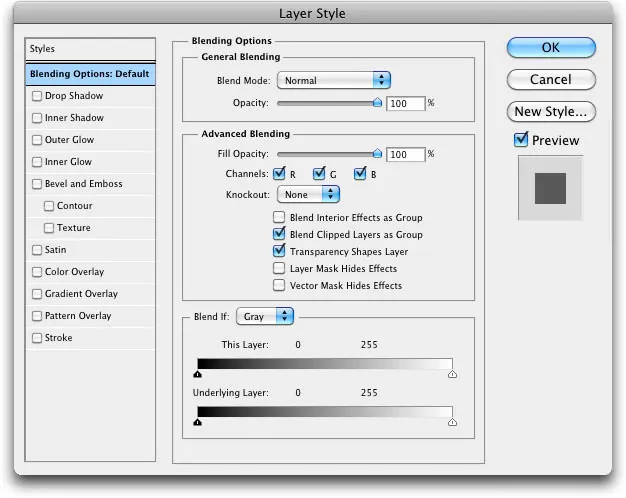
Press on the glow layer that you made in Step 4 to guarantee it is in action.
Within the Layers panel, find the dropdown menu at the top, which is generally set to Normal by default. That is the Blending Mode menu.
Try distinctive blending modes to observe how the glow interacts with the basic image. Typically utilized blending modes for luminescence effects include Soft Light for a delicate glow, Overlay for a more intense and pronounced glow, Linear Dodge for a bright glow and Lighten mode to make sure that only the lighter parts of the glow layer interact with the picture, keeping up the integrity of darker zones.
Regulate the opacity of the glow layer to control the intensity of the impact. Bringing down opacity decreases the glow’s brightness, and expanding it opens up the effect.
If you find the glow too intense in certain zones, include a layer mask by clicking the mask symbol at the bottom of the Layers area. Utilize a soft brush with low opacity to tenderly paint over zones where the glow ought to be diminished or removed.
Polish the glowing effect by modifying both the blending mode and opacity until it coordinates superbly with the rest of the photo.
Step 6: Boost Highlights And Edges
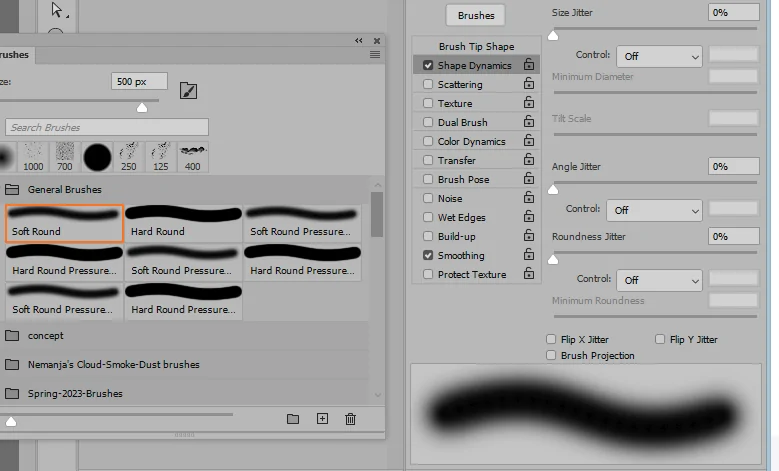
To get more smoothness on the edges of the glowing regions, make a new Layer over the glow layer.
Utilize a soft, brush with low opacity with a bright colour that fits the glow such as light blue, green, or yellow and delicately paint over the glowing zones. That can magnify and blend the light for a smoother transition.
For included softness, you can make a copy of the glow layer and apply a Gaussian Blur to that duplicate. Put the duplicate layer’s Opacity to around 20 to 40%, depending on the quality of the glow, and position it over zones that require a gentler light edge.

On a new layer, you can include small, concentrated highlights or bright spots where you need the luminescence to stand out. Utilize a small soft brush or the Dodge Tool to specifically brighten zones that require more definition. Apply it lightly to maintain the softness of the overall glow while boosting intensity within the focal zones.
In case the edges of the glow still show up too intense, utilize the Feather Tool or apply another layer of Gaussian Blur to further ease the transition. On the other hand, you can duplicate the glow layer, blur it once more, and lower the opacity of the copy to give it an indeed softer spread.
Concentrate on the regions where the glow moves into darker details of the picture. Delicately erasing or masking these transitions helps prevent any harsh lines or impulsive variations in brightness.
Step 7: Refine The Final Composition
Use the Zoom out option to look at the photograph as a whole to evaluate how the glow interacts with the remnant of the image. Inspect if the glow is too sharp or too muted.
Refine the opacity of the glow layers to adjust the intensity of the light. In case the glow feels too overwhelming, decrease the opacity somewhat to merge it more smoothly with the overall composition.
To get a more subtle effect, strive for an opacity range of 30% to 70%, altering based on the required visual outcome.
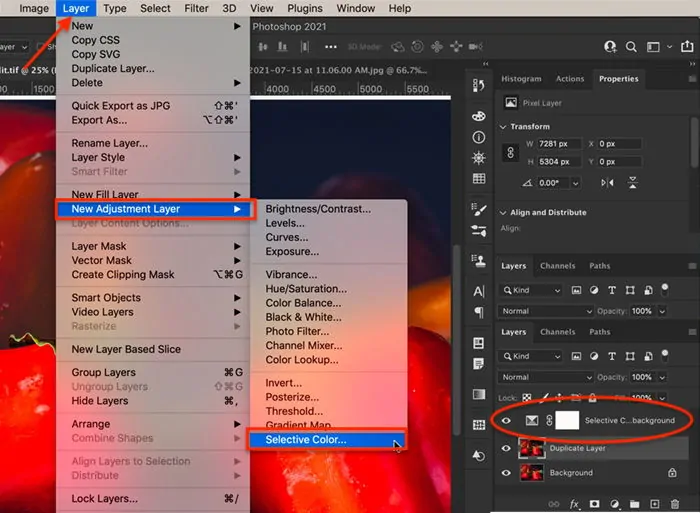
If vital, make little final adjustments to the colour temperature of the glow utilizing the Hue/Saturation or Selective Color adjustment layers. It will confirm that the glow blends nicely with the general colour palette of the picture.
Return to the layer mask and employ a soft brush to tenderly mask zones where the glow is still too assertive, giving a more characteristic fade where the luminescent effect is implied to dissipate.
If you need a particularly intense final touch, include a new layer on top of all the layers. Choose a bright colour, utilize a soft brush having low opacity, and gently paint over the regions requiring a more concentrated final glow. At that point put this layer’s blending mode to Glow or Soft Light.
After being satisfied with the glow effect, export the finalized composition in your desired file format and resolution.
Conclusion:
In conclusion, luminescence effects transform everyday photos into enthralling narratives by giving them a surreal feel and enticing brilliance. This approach significantly increases the visual charm of a composition, which encourages the viewers to delve further into the illustrated content and create innovative themes. It also highlights the inherent beauty of the things around us, making one ponder how unexpected nature could be. Additionally, emphasizing the important details or the main subject in a picture gives the viewer the impression that these things are part of a spellbinding another universe. Adding luminescence is beneficial for a variety of visual content and has long been prevalent in the gaming and entertainment industries as well.
