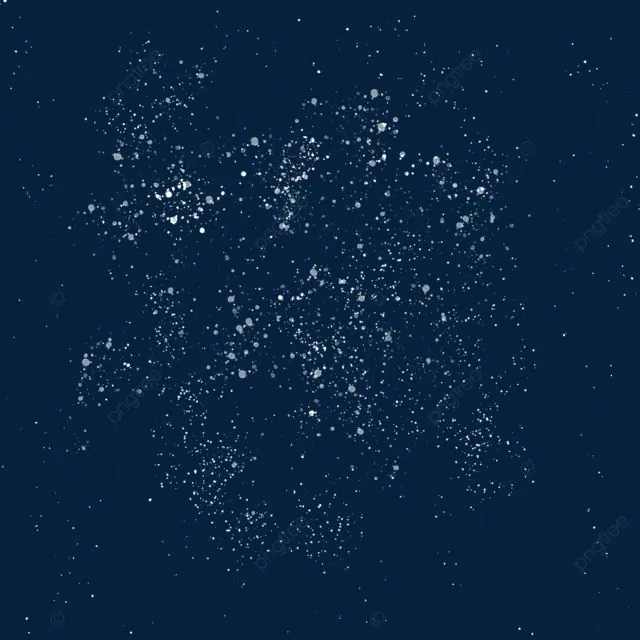
How To Add A Stardust Effect To Images
A stardust effect, when integrated into images, can transform everyday shots into fascinating compositions, adding a glittery, heavenly atmosphere. This image enhancement approach is commonly utilized to upgrade the mood of the image, often highlighting the main subject with a fine glitter splash and fictional aesthetics. The stardust application is particularly useful for image manipulation projects that aim to create wonderful, fantasy-based illustrations that give an otherworldly vibe. Either you opt to embellish the whole image with ethereal sparkles caused by a stardust effect, or you target the specific zones; the heavenly glow caused by these enhancements will always add to the dynamism and vibrancy of the scene. To apply this effect, common yet advanced editing applications like Photoshop can provide a number of tools and features, including varying sparkle brushes, particle textures, opacity adjustments, blending mode alternatives (especially Overlay and Screen), blur tools, layer masks and more; all are dedicated to adding natural-looking stardust that is naturally blended to the chosen image’s environment. The following steps will provide a practical approach to effectively add a stardust effect to your photographs.
Step 1: Setting Up The Workspace

Activate Adobe Photoshop and import the photograph. You need to upgrade it by clicking on File > Open or dragging the photo into the workspace.
Before you proceed to make any edits, make a duplicate of the photo layer by right-clicking the layer within the Layers Panel and choosing Duplicate Layer. Title this layer for simple identification.
That duplicate will act as your base for adding effects, protecting the initial picture in case adjustments ought to be reverted.
To prevent diversions, use the zoom in or out to alter your view so that the key regions of the photograph are centred within the workspace.
Arrange your workspace by closing unnecessary panels and making sure that you’ve got speedy access to the Brush Tool and Layers Panel.
Lock the initial layer to anticipate accidental alterations. It will help keep up a backup if more refinements are required later.
Keep the file in PSD format before continuing to hold the layers for future altering as needed.
Step 2: Creating Glow Effect
Make a duplicate of the working layer to include a glowing base without changing the basic photograph. Right-click on the layer and select Duplicate Layer.
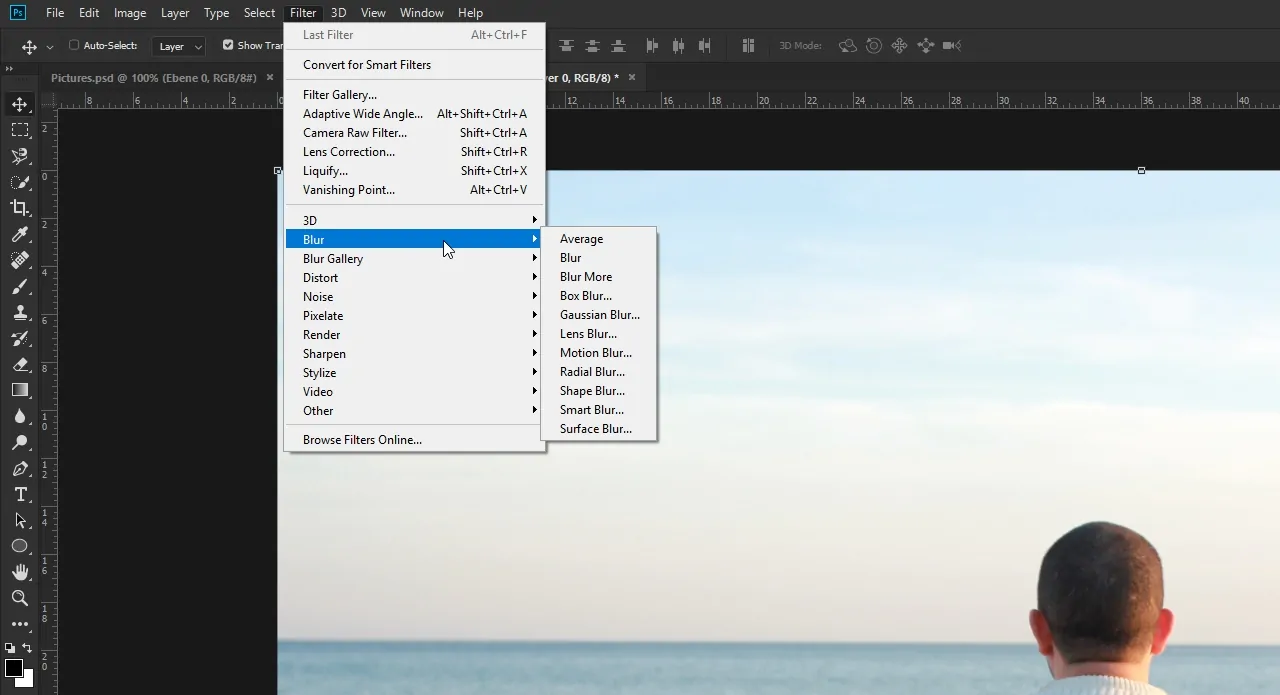
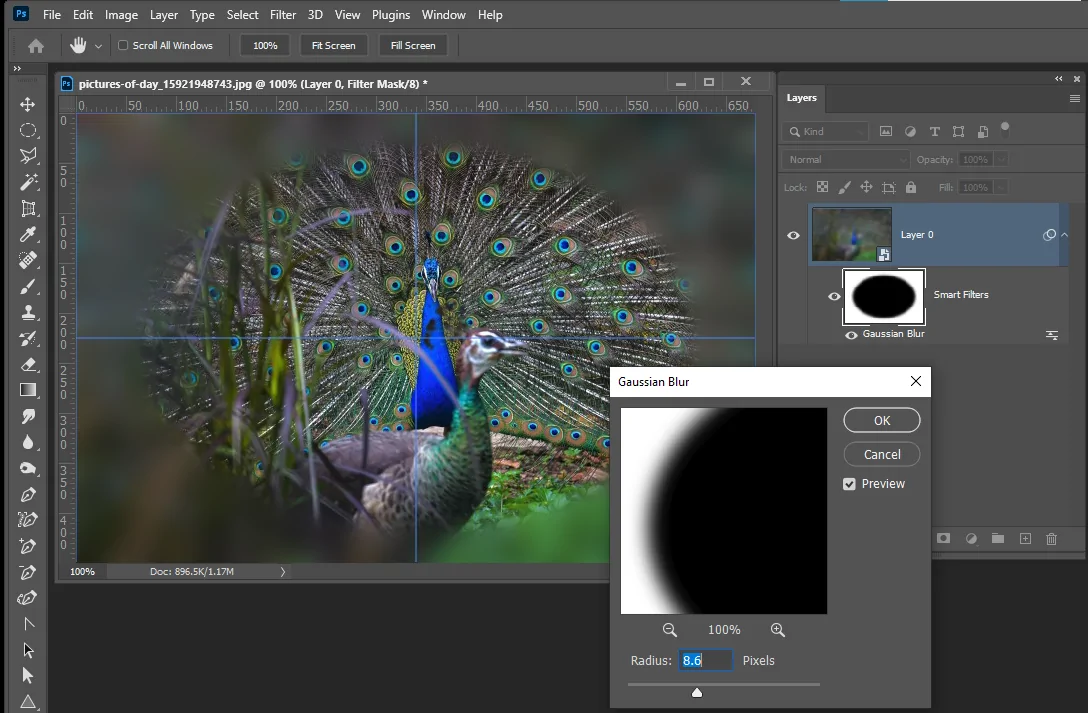
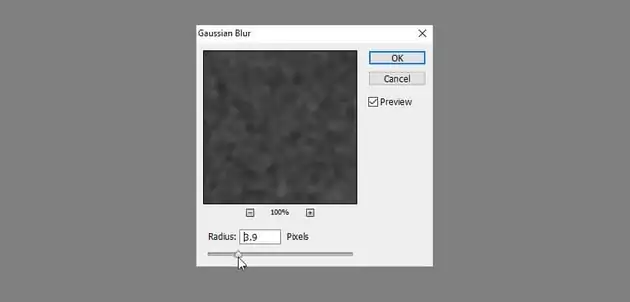
Click on the duplicated layer and proceed to Filter > Blur > Gaussian Blur. Within the pop-up window, put the blur radius to around 10 to 20 pixels, depending on your picture resolution. That will create a delicate glow effect in the picture.
Press Ok to apply the blur. That layer will show up hazy, laying light softly over the subject or scene.
Decrease the opacity of the blurred layer within the Layers zone. Reduce it to around 40 to 60% to keep the shine nuanced and natural, preventing an overexposed appearance.
Play with blending modes such as Soft Light or Overlay within the blending mode dropdown to boost the brightness while holding contrast.
Be sure that the glow complements the photograph. As an excessive intensity can overwhelm subtle elements, so adjust the glow for an incredible yet crisp formation.
That will prepare the picture for the stardust layer, providing a brilliant foundation.
Step 3: Creating A Layer For Stardust Application
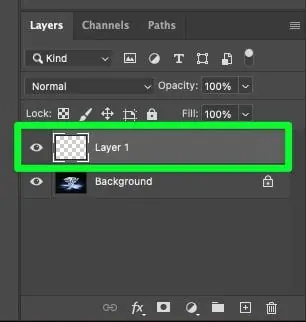
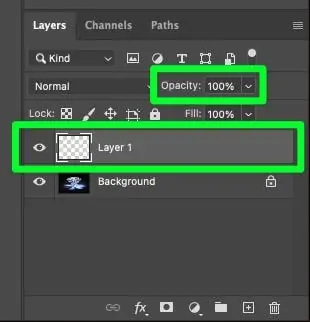
Within the Layers Panel, tap on the New Layer symbol to include a blank layer over the glowing photo. Title this layer as Stardust for the organization.
Confirm that the new layer is active by choosing it before continuing. That layer will contain all the sparkles and effects, keeping the edits isolated from the initial picture.
Specify the new layer’s blending mode to Screen or Overlay. That will guarantee that the sparkles blend consistently into the photograph, improving its brightness without dominating other details.
Select a base colour for the sparkles, usually white or light gold, utilizing the foreground colour picker within the toolbar. Light colours go okay for a natural, bright impact.
Lock the transparency of this layer as required to keep the sparkles preserved inside it.
Once again, save your work as a PSD file to protect changes and layers before proceeding to the successive step.
That will make a designated space to apply and alter the stardust without influencing other components.
Step 4: Modifying The Brush Size And Shape
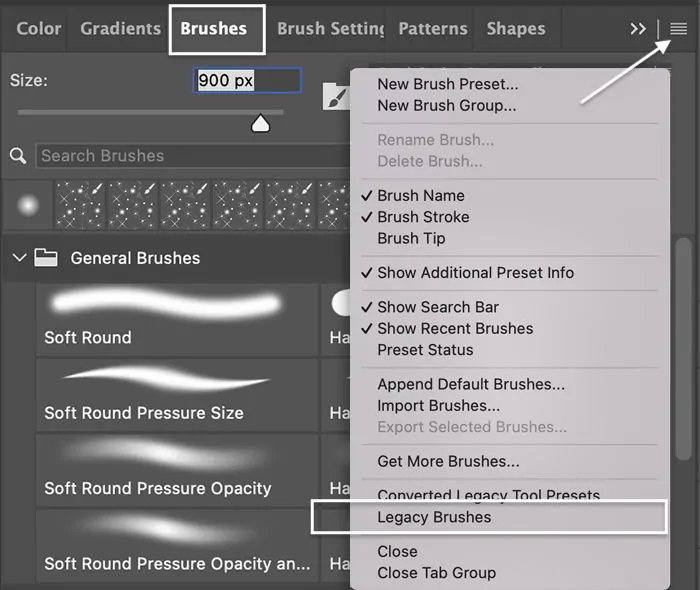
Head to the Brush Tool in the toolbar and activate it to create the stardust effect.
Click on the Window > Brush Settings and start tailoring the brush style to create natural sparkles.
Select a scatter or sparkle-specific brush from the brush preset menu. If your library does not have appropriate brushes, you’ll download sparkle brush presets online and import them through the Import Brushes alternative.
Alter the brush size to correspond to the photo’s measurements. Bigger brushes work sufficiently for wide ranges. Similarly, smaller brushes fit detailed areas.
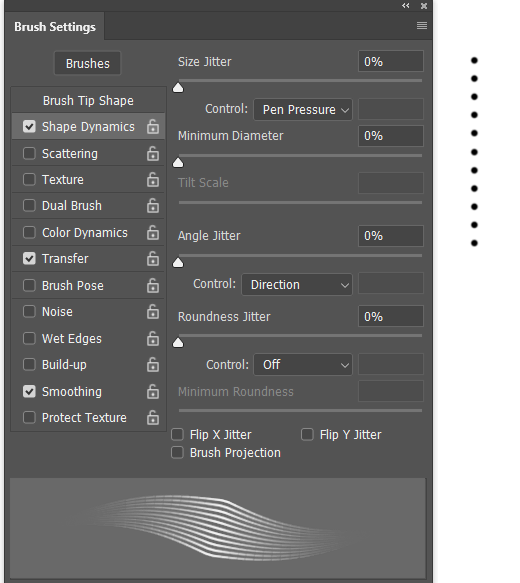
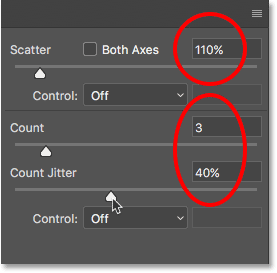
Maximize the scattering value into Brush Settings to be sure that the sparkles are arbitrarily dispersed, making a natural appearance. Activate jitter effects for size and opacity to enhance the depth of the sparkles.
Specify the brush’s opacity and flow around 50% and 70% so that the sparkles blend delicately into the photograph.
That will prepare the tools required to make assorted and arresting stardust designs.
Step 5: Creating Sparkles
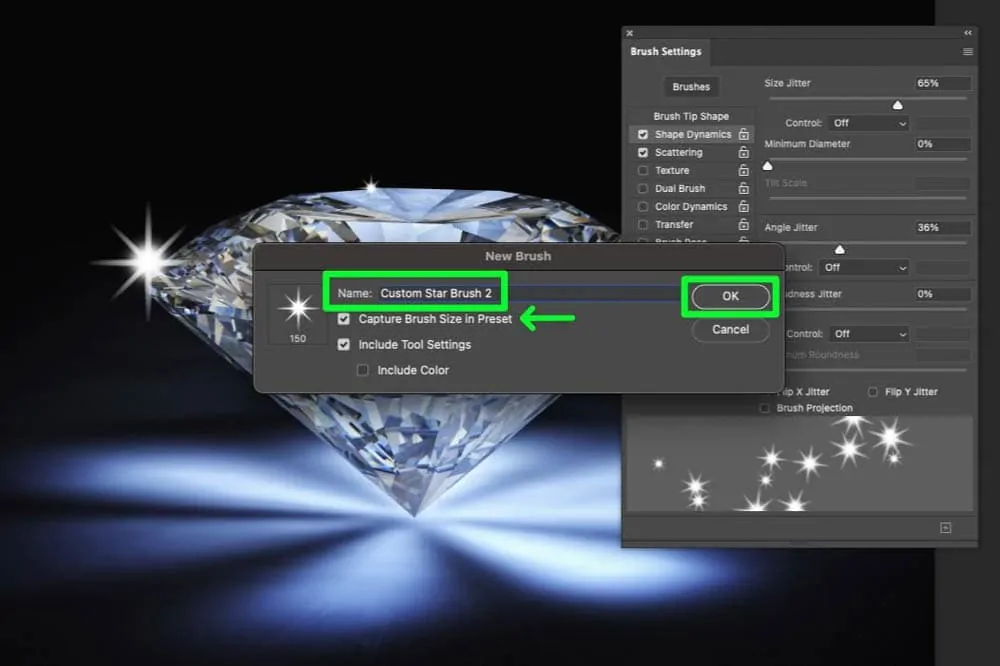
Start painting on the Stardust layer utilizing the sparkle brush you have chosen, focusing on ranges where light naturally strikes or ranges you need to highlight in your picture.
Change the intensity and size of the sparkles by altering the brush size as you perform. That will make a vibrant, multidimensional effect with a medley of sparkle sizes.
Utilize brief, gentle brush strokes to include clusters of sparkles, gradually building them up over the photograph. Prevent painting too intensely in one spot; instead, distribute the sparkles equally to avert overpowering the picture.
Look into including more sparkles in darker regions to upgrade depth and contrast, making a subtle glow around them.
Modify the brush settings on the fly, including opacity and scatter, for changing intensities. That will help create a natural, flowing search for the stardust effect without feeling too stagnant.
Use Zoom in on particular ranges as required to fine-tune details, including sparkle highlights around your subject or background elements.
Step 6: Adjusting Blend Mode And Opacity
After adding the sparkles, proceed to the Layers area and refine the blend by altering the blending mode of the Stardust layer. Put the mode to Screen for light, airy sparkles or Overlay for more apparent highlights with lush colour interactions.
Alter the layer opacity to be sure that the stardust effect is nuanced but discernible. A standard starting point could be around 40 to 60% opacity. You can increment or decrease that per how noticeable you want the sparkles to be within the final image.
In case the effect seems too drastic or harsh, try lessening the opacity further or apply a little blur to the layer by following Filter > Blur > Gaussian Blur. That will smooth out the sparkles and aid them in integrating naturally with the picture.
Try diverse combinations of opacity and blending modes, observing how they influence the lighting and details of the photograph until you accomplish excellent, soft harmony.
Do not be hesitant to try localized opacity settings by employing a layer mask to prevent particular regions of the sparkles more accurately.
That step makes sure that the stardust effect improves the photograph without overwhelming the initial details.
Step 7: Fine Tuning The Composition

Once you are done with the opacity and blending mode settings, you can move on to the final polishes. Begin by inspecting the photograph to make sure the stardust effect is evenly distributed and does not overwhelm critical ranges.
As required, make a duplicate of the Stardust layer to improve the effect in ranges that require more sparkle. You can alter the opacity of the duplicated layer separately to confirm that the glow remains modest.
Add a soft Gaussian Blur using Filter > Blur to the sparkles if they appear overly abrupt or out of put. That could help mellow the edges for a more natural formation.
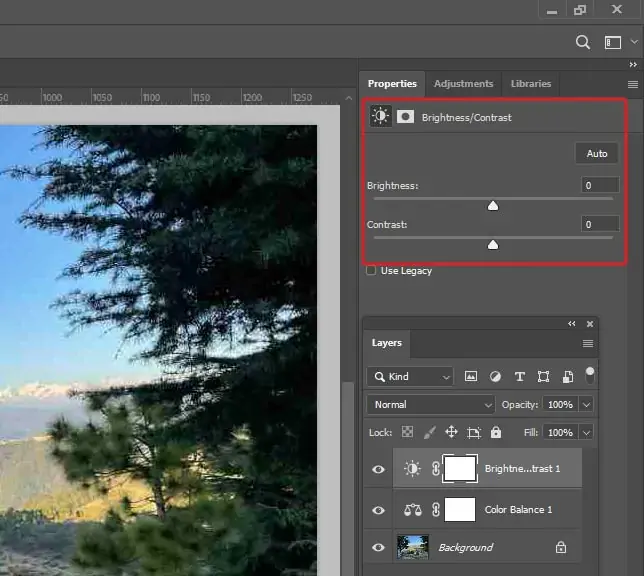
Refine the overall brightness, contrast, and saturation of the photograph to conform to the enhanced climate. Sometimes, modifying the photo’s hue or brightness creates balance with the added stardust impact.
If you want, utilize a layer mask to paint over zones where you might need to diminish the intensity of the sparkles, making sure that certain details stay clear and untainted.
In the end, save the image in a high-quality format, including PNG or JPEG, for final output, protecting the stardust effect alongside the rest of the image’s edits.
After adding these tuning touches, your stardust effect will be groomed and smoothly integrated into the photograph.
Conclusion
To conclude, the application of the stardust effect into a photograph evokes a glowing aura in certain areas while leaving some areas unaffected. This combination of dull versus sparkling spots caught within an image creates a splendid scene charming enough to charm the onlookers. No matter what kind of conditions or settings your photographs possess, this editing effect instantly transforms them into illuminating pieces that are no match to their initial forms. Moreover, depending on the intensity of sparkle you desire in your visuals, you can accordingly maximize or minimize the effect using adaptable tools and techniques offered by your editing software.
