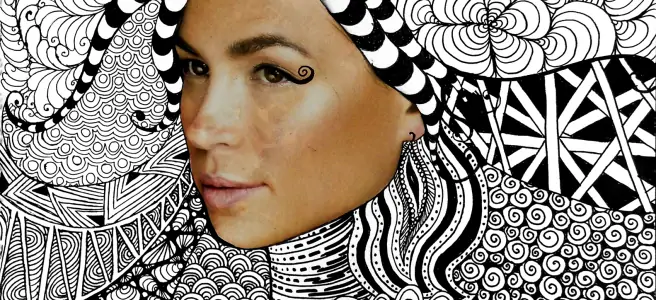
How To Use Zentangle Art In Images
Zentangle refers to a kind of meditation art in which ornate designs are made by repeating patterns. In order to approach drawing as a tool to help individuals focus, de-stress, and discover inner peace, Rick Roberts and Maria Thomas invented it in 2003. Regardless of creative aptitude, anyone can practice Zentangle, and it is not restricted to any one skill level. Books, online courses, and classes are just a few of the many tools available to get rookies started in the field. The Zentangle art approach is vastly employed by digital artists for image creation and enhancement. Creating and adding Zentangle patterns to images not only intensifies their visual aura but also provides the creators with a source of self-satisfaction and accomplishment, which was the original purpose of this art. Various software options are available, including Adobe Photoshop, illustrator, and Procreate, that can simulate hand-drawn Zentangle patterns to integrate into different images and modify their ambiance and narrative.
Step 1: Canvas Settings

Initiate any of the photo editing apps suitable for Zentangle art, like Adobe Photoshop, Illustrator, or Procreate.
After your editing software is opened, import the photo that you want to modify into the software workspace.
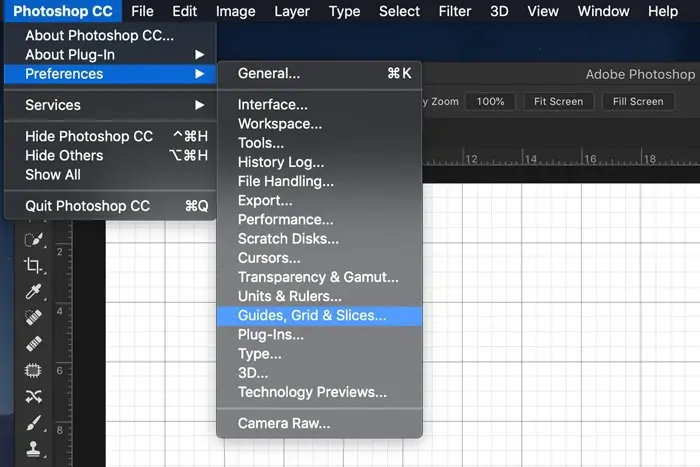
Revise the canvas measurements and resolution to be suitable for your project to preserve quality.
Make a new layer, particularly for Zentangle designs. That permits non-destructive editing, so you’ll be able to effectively alter or remove the designs without influencing the initial photo.
Plan for the fundamental drawing tools, including brushes, pens, and vector paths, according to your program. Adapt these devices to attain the required line quality and fashion.
Get a set of Zentangle designs prepared, either from your own plans or from design libraries. This planning aids in simplifying the process and guarantees you have an assortment of designs from which to select.
Step 2: Critical Zones Separation
Examine your photo and choose which regions you need to upgrade with Zentangle designs. Concentrate on areas that can be enhanced by including detail or creative energy.
Operate guides or grids in your software to help partition the photo into manageable areas. This guarantees that your designs are equally disseminated and well-organized.
Utilize the selection instrument to lay out the ranges where you’ll apply Zentangle designs. You can utilize geometric shapes and natural shapes or take after the normal lines inside the photo.
Spread layer masks to the designated areas. It assists you in drawing inside the particular zones without influencing the remainder of the photo.
Name each segment in case it is essential, particularly in the event that you set to utilize distinctive designs in completely different ranges. That keeps your workflow scheduled and guarantees integration with your plan.
Step 3: The Pattern Choice
Assume the subject and disposition of your photo. Select Zentangle designs that go with the overall impression and improve the visual narrating.
Assemble an assortment of Zentangle designs. You’ll be able to utilize your claim plans, download pattern sets, or refer to Zentangle pattern books and online assets.
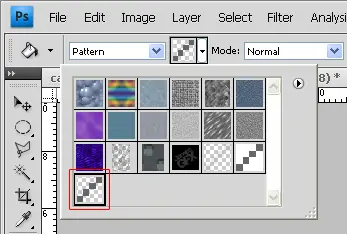
Make a pattern library in your program. That can be a folder or a partitioned layer where you store all the designs you intend to utilize. This management spares time and keeps you focused.
Choose the patterns that shift in complexity and fashion. Uniting basic and complex designs includes profundity and appeal to your plan.
Play with distinctive designs on a separate layer or a copy of your photo. It permits you to see how each design relates to the photo’s components without committing to the final scheme.
Step 4: Covering Areas With Patterns
Unfurl a new layer for each segment you’ll be filling with Zentangle designs. It will keep your work arranged and permit for simple alterations.
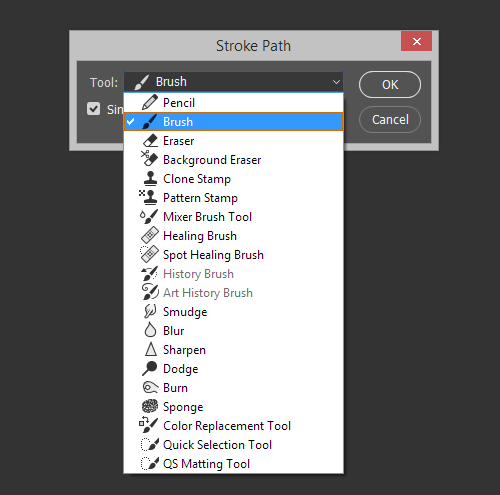
Prefer suitable drawing instruments like brushes, pens, or vector paths. Tailor these tools to reach the specified line quality and fashion for your designs.
Begin filling the defined segments with your chosen Zentangle designs. Center on keeping up reliable, recurring shapes within each section to form a cohesive plan.
Cover one area at a time, guaranteeing each design is well-incorporated with the photograph’s components. It will help keep up proportion and avoid overwhelming the photo with as well as many designs at once.
Utilize tools like the eraser or transform tools to polish up your designs. Be sure each design accommodates well inside its segment and complements the general plan.
Step 5: Blending Modes Settings
Decrease the opacity of your Zentangle design layers to fuse them unpretentiously with the fundamental photo. It guarantees that the designs will improve instead of overwhelming the picture.
Play with distinctive blending modes, considering options like Multiply, Overlay, or Soft Light, to see which one incorporates the patterns best along with your photo. Every mode presents a striking way to consolidate the designs and the photo.
Utilize layer masks and soft brushes to integrate the edges of your designs easily into the image. This makes a natural change and sidesteps harsh lines.
Use gradients or fades to your designs to form them and steadily meld them into the shot. This strategy can include profundity and a more organic touch to the unification.
Coordinate the color of your designs with the tones within the photo utilizing adjustment layers such as Hue/Saturation or Color Balance. It guarantees a compatible color palette over the complete picture.
Step 6: Enhancing Textures And Shading
Include depth and dimension to your Zentangle designs by consolidating shading and highlights. This action supplements the surface and visual interest of your layout.
Try adding texture overlays or brushes to grant your designs a more material formation. This may imitate the feel of conventional Zentangle art and include authenticity in your digital work.
Tune up individual designs inside each segment, paying attention to details like line weight and spacing. The unity of these details upgrades the comprehensive coherence of your plan.
Audit your whole composition and alter patterns as required to get symmetry and visual stream. Make sure that no segment shows up overcrowded or inadequate compared to others.
Reconsider your work from a distance or zoomed-out view and distinguish regions that will require further refinement or alterations.
Step 7: Accomplishing Final Tweaks
Have a thorough look at your completed setup, checking for any irregularities or zones that require refinement in terms of designs, blending, and general arrangement.
Establish the color balance and saturation to guarantee your Zentangle designs conform well with the photograph. Utilize adjustment layers and tools such as Hue/Saturation to create subtle changes.
Look into including extra components like textural overlays, vignettes, or subtle effects to improve the disposition and visual effect of your piece.
Employ the zoom feature to inspect the details and confirm that there are no pixelation or artifact problems, particularly if you are looking forward to printing or displaying the picture in larger sizes.
Finally, export your final image in a high-quality format appropriate for your utilization; you can use JPEG for the web or TIFF for print.
Conclusion
In conclusion, creating the Zentangle designs in your photos is a novel process to transform your drab and uninteresting shots into striking and visually exquisite compositions. This art form is incredibly simple to learn and involves a meditative process that helps you enter a state of flow and positivity, in which you lose all sense of time and become completely absorbed in the enjoyable activity of creating recurring patterns, making yourself contemplate. Ultimately, working on the Zentangle artworks boosts your sense of well-being and gives artistic fruition in the form of incredible final compositions.
