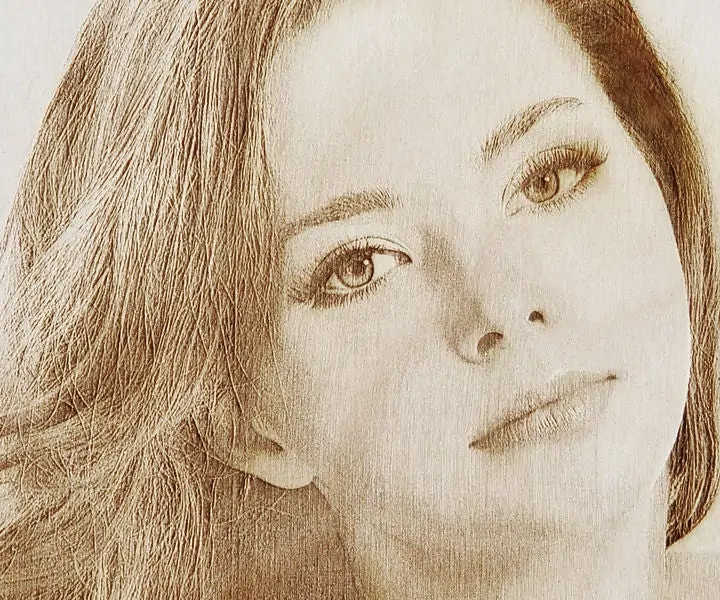
How To Create A Laser Engraving Effect
The traditional laser engraving process creates deep, lasting imprints by vaporizing materials into fumes. The laser beam acts as a scalpel to remove layers from the material’s surface, leaving behind piercing lines. The high heat required for vaporization materials is delivered by the laser’s concentrated, high energy that smacks certain regions. In addition to being utilized for commercial and artistic purposes across numerous industries, digital artists find the laser engraving effect bewitching since it enlightens them to alter their photos into a variety of forms, including typographic outlines, vintage halftones, and pencil sketch effects. Moreover, as image editing software and tools have grown in popularity, it’s now simple and effortless to aspire for the ideal shots with unusual effects like laser-engaging layouts. Techniques like grayscale conversion, texture enhancement, blurring, noising, and many others are indeed valuable to creating unique and distinctive artist effects within images. This blog will proceed with the steps and techniques applied while converting an image into a laser-engraved-like composition.
Step 1: Grayscale Conversion
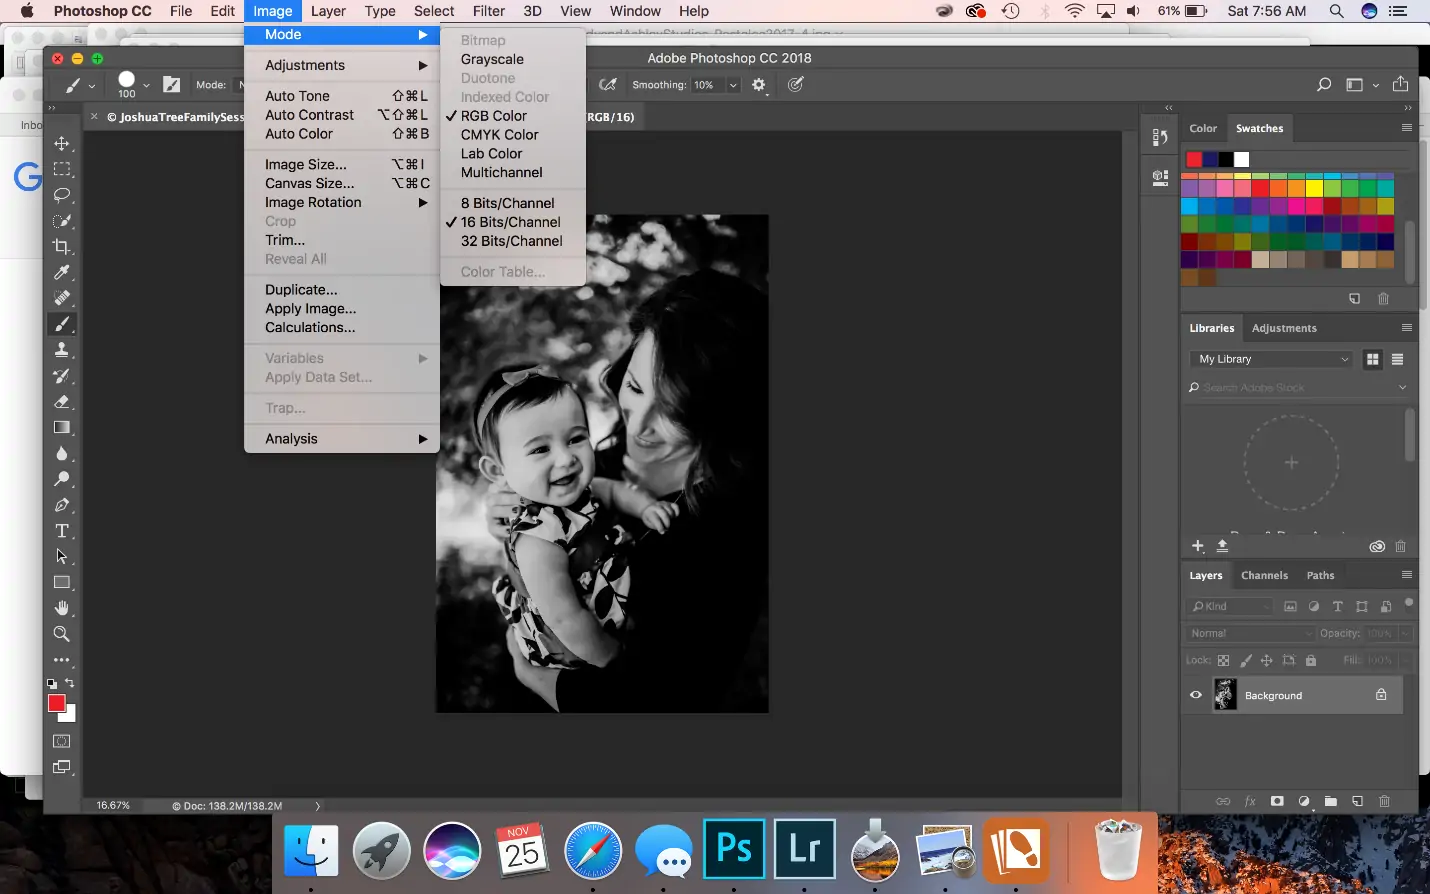
Import your original color picture to your picture editing software, and find an alternative to change the photograph to grayscale. This action deposes color data, focusing exclusively on the light intensity in each pixel.
After changing over to grayscale, utilize the levels or curves adjustment options. Alter the sliders or curves to raise the contrast between the lightest and darkest domains of the picture. This alteration upgrades the visibility of particulars, which is pivotal for accomplishing a realistic engraving impact.
Establish the general brightness of the image to guarantee that subtle elements in both the lighter and darker zones are obvious. This alteration benefits in preparing the picture for the ensuing steps where texture and profundity will be incorporated.
Use the zoom function to examine the details of the picture closely. Execute any vital alterations to guarantee that vital components are distinctive and prepared for the engraving simulation.
Before you continue to edit the image further, save your work to protect these starting enhancements.
Step 2: Blurring The Image
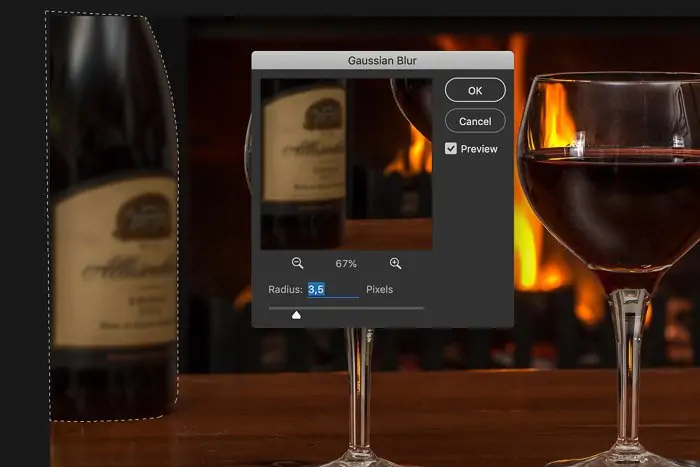
Once the contrast is improved, lay an inconspicuous Gaussian blur onto the grayscale picture. This blur will mellow the edges somewhat, mirroring the natural delicateness regularly seen around engraved lines. Utilize the Gaussian blur filter that is accessible in your editing program.
Put the blur radius to a lower level, typically between 0.5 to 2 pixels, according to the resolution of your shot. It guarantees that the blur impact is slight and does not obscure particulars.
See the picture at 100% zoom to assess the connected blur. Make sure that the blur impact is consistent and does not present undesirable additions or smears. Alter the blur radius if necessary to attain the required level of delicateness.
When spreading Gaussian blur, point to preserve the overall surface of the picture. Do not do outrageous blurring that might cloud fine details or reduce the surface required to recreate the engraved surface.
Preserve your work after including Gaussian blur, preparing the image for further upgrades, and the expansion of engraving lines within the consequent steps.
With Gaussian obscure connected, the photo presently incorporates a relaxed impression that reaches the traits of materials commonly utilized for laser engravings, like metal or wood.
Step 3: Adjusting Noise
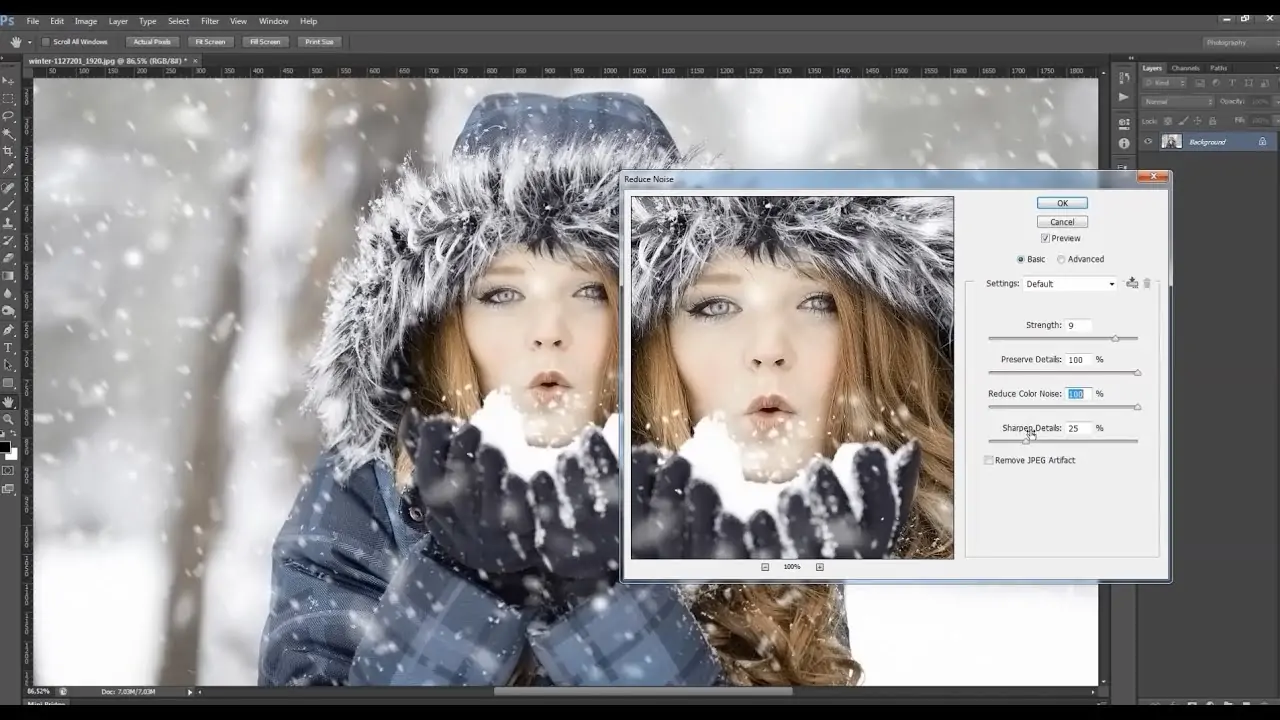
After the Gaussian blur application, a fine portion of noise is present in the grayscale photograph. Utilize the noise filter accessible in your image editing app to reenact the natural surface of the material being engraved, like metal or wood.
Put the noise amount to a smaller value, such as between 1% and 5%, depending on the resolution of your image. This guarantees that the noise impact is unnoticeable and improves the authenticity of the engraving simulation without overwhelming the picture.
Pick the suitable type of noise, including Gaussian or Uniform, based on the specified texture effect. Gaussian noise tends to deliver a more natural surface, whereas uniform noise can make a more organized appearance.
See the image at 100% zoom to assess the bonded noise. Guarantee that the commotion design complements the engraved see and includes a tactile quality to the picture surface.
During the application of noise, strive to preserve symmetry by enhancing texture and protecting the clarity of points of interest. Do not use excessive noise, clouding fine points of interest, or diverting from the general engraved impact.
Save your edits after including the making picture, which is ready for advanced refinement and the expansion of engraved lines within the ensuing steps.
With noise included, the photograph presently shows a finished surface comparable to materials regularly engraved with a laser, setting the stage for the following steps in creating the life-like engraving look.
Step 4: Creating Lines
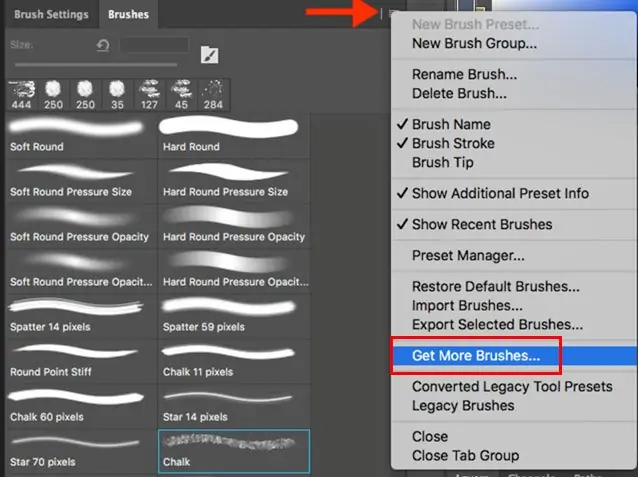
Select a brush tool with a hard edge or a custom-designed brush fitting for making engraved lines.
Alter the brush proportions based on the scale and detail of your photograph. You can create broader strokes using larger brushes, while smaller brushes are perfect for more delicate details and perplexing designs.
Specify the brush opacity to a direct level, around 50% to 70%, so that the engraved lines mix naturally with the basic texture of the picture. This opacity setting permits for progressive buildup of the engraving impact.
Arrange the situation of engraved lines with respect to the composition of your picture. Assume the natural stream and forms of objects inside the picture to make a realistic and cohesive engraved appearance.
Start painting or drawing the engraved lines on the picture surface utilizing the chosen brush tool. Take after the contours and particulars of the objects to improve the 3D formation and profundity of the engraving effect.
Change the pressure or brush size while painting to make variety in line thickness, mirroring the natural varieties noticed in engraved surfaces.
See a zoomed view of your image to catch the connected engraved lines and assess the arrangement, thickness, and general impact of the lines to confirm that they contribute to the specified laser engraving formation.
Step 5: Highlights And Shadows Addition
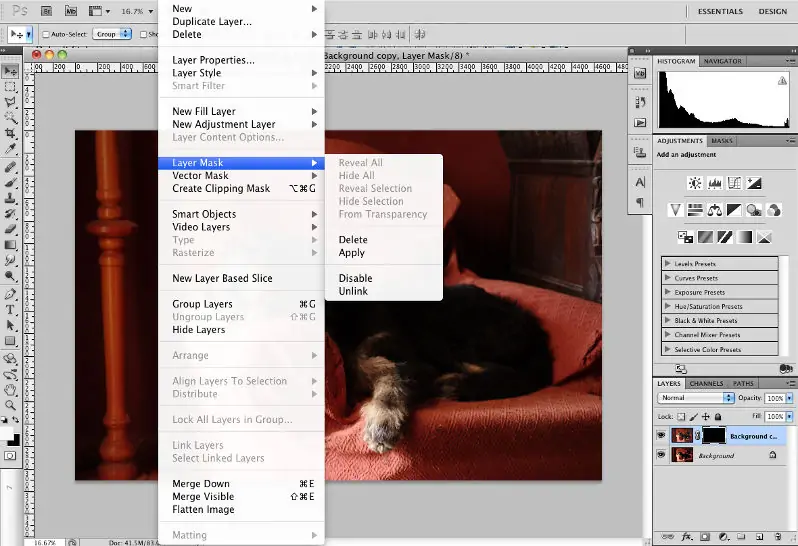
To create depth and dimension within the engraved effect, consider including highlights and shadows specifically.
Fix the direction of light in your picture to see where highlights and shadows ought to be set to exalt the 3D impression.
Utilize a soft brush with decreased opacity to paint white or light grey highlights on zones where light would naturally bounce back from the engraved surface. Work on edges and extended details to reenact light catching on these surfaces.
Harmonize the highlights tenderly, employing a delicate brush or blending tool to mix them with the encompassing zones, making a natural impression of light reflections.
Utilize a delicate brush with decreased opacity to paint black or dark grey shadows in ranges where light would be obstructed or where textures would naturally cast shadows. Attend to recessed spots and edges to form profundity.
Alter the opacity of the layer holding highlights and shadows to direct their vigor. Strive for discreet impacts that upgrade the engraved countenance without overpowering the picture.
Reanalyze the picture and preview the included highlights and shadows at 100% zoom, performing tweaks as needed for a naturalistic and dimensional engraved development.
Step 6: Working On Details
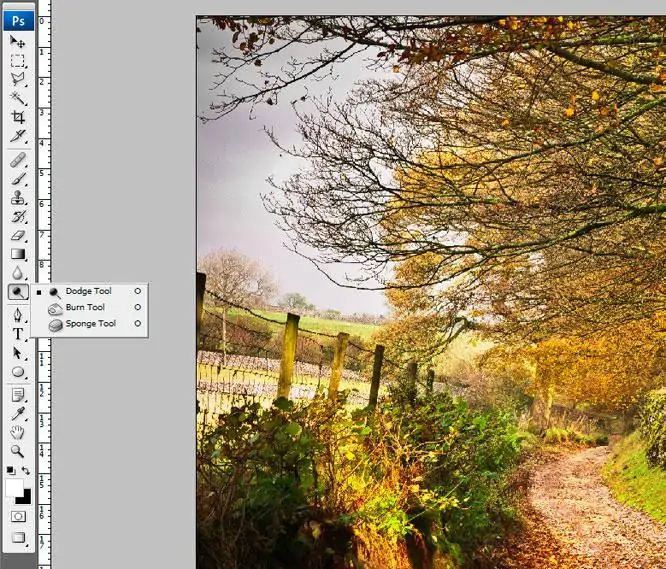
Employ dodge and burn tools or adjustment layers to reset particular regions.
Regulate the general brightness and contrast the picture to make the engraved lines and surfaces show up while keeping up an adapted appearance.
Alter the amount of noise and texture connected earlier to improve the authenticity of the engraved surface. Make sure that the surface goes with the engraved lines without overwhelming them.
Access blending highlights and soft brushes to smooth out any rough moves between various components within the image.
Bring equilibrium in line thickness, texture, and profundity over the whole image. Accomplish any changes that are essential to preserve an even engraved impact.
Evaluate the image at varying zoom levels to assess the generally engraved effect. Make sure that it Promises your desires and looks realistic.
Do conclusive alterations to sharpening, color tones, or any other details to polish the laser engraving effect.
Step 7: Concluding The Adjustments
Conduct any conclusive alterations to temper the impact of laser engraving simulation. This incorporates checking for general adjustments, clarity of details, and guaranteeing the engraved lines and surfaces are noticeable but true to life.
Audit the composition of your photo to guarantee that the engraved effect reconciles with the subject matter and improves its visual offer.
Confirm that the image resolution is appropriate for its planned utilization, whether for digital show or printing.
See the picture at different zoom levels and on distinctive gadgets to affirm that the laser engraving impact keeps up its quality and formation over distinctive settings.
Finally, save a high-resolution adaptation of your final vision in a reasonable file format such as JPEG, PNG, or TIFF to guard the particulars and coherence of the engraving development.
Conclusion:
To sum up, creating a laser engraving effect into your photograph makes it an intricate and antique-looking artwork that is now pleasantly transformed compared to the original. Other than photo editing, this unique approach can also be used in the creation of logos, typographies, and digital illustrations, which all impersonate the realistic and organic impression just like of genuine laser engraving on materials like wood and metals. Besides, the laser engraving effect also acts as many other art imprints, such as minimalist art, vintage effects, pencil sketch art, and many others, which make this technique a comprehensive addition to the field of digital art and design.
