How to Use Cinema4D for 3D Modeling?
Cinema4D is a great way to create 3D models and animations for your game or animation project. Whether you are a seasoned professional or just starting in the industry, finding the information you need to get started is easy.
What is Cinema4D?
Cinema 4D can be described as an animated software platform that assists companies in improving the efficiency of 3D Modeling, animation simulation, and rendering processes by using a single platform. It allows designers to make graphic models, animations, or computer-generated graphics. It also lets you set up workflows for design and processing motion capture data. Businesses can use this integrated software to create geometric shapes, an overall scene, and an orderly view. It permits users to create and modify geometric shapes, create digital assets and test the scenes node system. Furthermore, Cinema 4D provides a range of additional features, including collaboration and data storage management, an activity dashboard, editing images, and many more.
Multi-passes
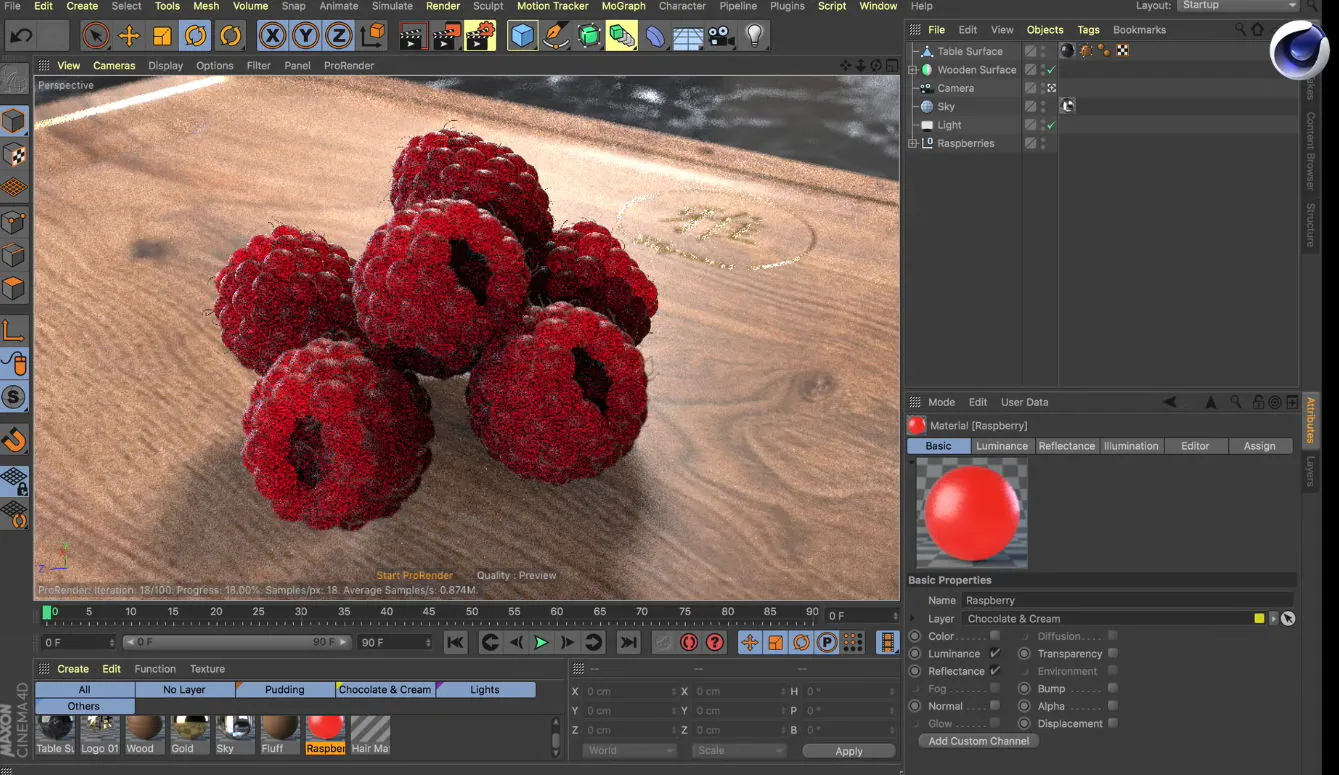
Using multi-passes in Cinema4D for 3D Modeling services is an excellent way to add a little polish to your renders. It allows you to adjust specific elements in your scene. Depending on your workflow, combine the passes with simple compositing. You can also select a different pass for each take.
The multi-passes can be confusing to start with. For example, you could create a pass for every single element in your scene, or you could make a pass for just the objects you’d like to render. Often, the pass will have a slight discrepancy between the two.
One example of multi-signatures is the albedo pass. This pass helps mask off parts of the material. This pass duplicates the built-in alpha channel. Usually, you would only want to use the albedo pass if you have a diffusely reflective surface. If rendering a glass or metal surface, you’ll want to increase your ray depth.
The other example of multi-signatures is a save attribute. This attribute is in the Effect Controls panel. It contains a few checkboxes. It is important to note that the save attribute does not necessarily save to the hard drive.
The Multi-Layer File attribute, folds multiple passes into a single file. This is the best option if you are working on a large project that will be re-rendering frequently.
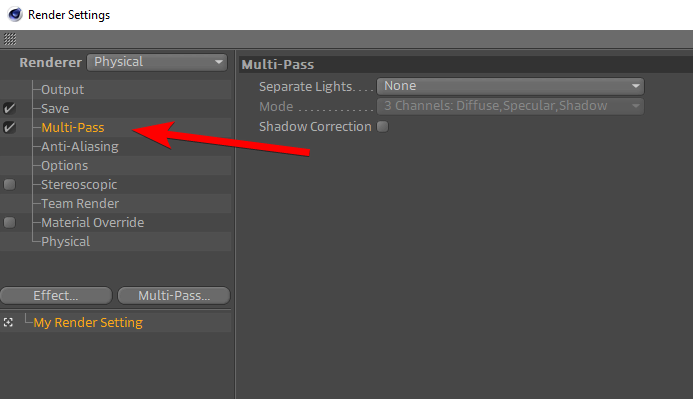
The Multi-Pass tab is located below the save tab. The Multi-Pass tab has the following attributes: Enable Multi-Pass, Multi-Layer File, and Multi-Pass. It is also possible to disable the saving of the Multi-Pass image.
The Multi-Layer File attribute has the following qualities: Check the box next to Multi-Layer File to export a multi-pass image to a single file. It is unnecessary to do this if you are not rendering a multi-passed scene.
The Multi-Pass O’Men’s MARK is smaller than the Multi-Layer File attribute. Unlike the former, this attribute does not blend all of the passes. It’s a small feat of coding, but it is fun to try.
The Multi-Pass option is only available if the Cinema 4D Multi-Pass option is turned on. You can then choose which pass to render for each layer in your scene. The resulting multi-pass image will be a regular one with 5179 pixels high and 3379 pixels wide.
You can also use the Multi-Pass option to bake normal maps from sculpts. This will ensure that your normal maps match your Cinema 4D layers. This will give you the best anti-aliasing possible.
Add image layers
Adding image layers to Cinema4D for 3d Modeling can be done in various ways. You can add new elements to your scene, clone existing features, and even create a seamless background. The first step is to import a reference image. You can use an image from the Cinema4D files or a 3D camera tracker.
You can also use an image to sketch a perspective for a landscape object. You can then copy the thing to a Cinema 4D scene and line it up. You can use the Scale tool to adjust the size of the new image.
The Cinema 4D release 20 introduced node-based materials, which allow you to edit, connect easily, and link textures in multiple channels. You can also use these materials to control lighting.
The Multi-Pass option will enable you to create and render separate passes for different parts of your scene. You can then composite them together. You can add Cinema 4D scene layers to Multi-Pass layers.
You can also use the Display Correction layer to define the color space and display device. You can then set the gamma and other mapping curves to control your images. This is particularly useful if you’re creating a game asset.
You can also use the Extrude Text as Shapes option to export your 3D text layer as an extruded spline object. This will retain the animation of the text layer’s properties. You can then place it on top of a layer stack and choose a blending mode. The Cinema 4D release 20 comes with over 150 nodes, which are searchable by name.

Navigate in C4D
Using Cinema 4D for 3D Modeling is a rapid and easy process. With its simple interface and user-friendly features, it’s no wonder this software is so popular amongst graphic designers and architects. But while it’s easy to start using, it can be challenging to navigate the program. Here are some tips to make navigation easier.
To move objects in Cinema4D, you’ll want to select the point of interest. This function will keep the point of interest centered in the viewport.
Then, you can rotate it around. You can also use Target Weld to select two adjacent vertexes. This function will merge the selected vertex with the adjacent vertex. You can adjust the proximity of the weld to achieve the desired effect. You can also set the weld threshold.
You’ll also want to create and position an object. This can be done by dragging your mouse on the asset. You can also pan the camera with your mouse. You can even use the Dolly function to move the camera in a circular motion.
When you’re ready to render your scene, you’ll need to choose a renderer. Cinema4D offers several options, including Standard, Wireframe, and Box modes. These are simplified representations of your scene. Choosing a renderer can speed up the rendering process.
There are also several keyboard shortcuts to use in Cinema4D. These shortcuts work much like those in 3ds max. The keys will vary by OS and keyboard. You can find an interactive search tool on the Cinema4D website to help you determine which shortcuts are most beneficial for your workflow. You can also create shortcuts to help you navigate the program.
You can also use the Command Line to call up any plugin or function. This is especially helpful if you’re trying to find a specific menu item or tag.
You can also use Cinema4D’s built-in file explorer. This can save you time and effort. Adding a Cinema4D camera to After Effects can also be done by opening an instance of Cinema4D in After Effects and then clicking File > Revert to Saved in C4D.
![Getting Started with CINEMA 4D R15, Part 03: Introduction to Navigation [Video Tutorial] - Cineversity Training and Tools for Cinema 4D](https://it-s.com/wp-content/webp-express/webp-images/uploads/2022/12/getting-started-with-cinema-4d-r15-part-03-intro-1.png.webp)
Creating concept art
Creating concept art with Cinema4D is a great way to learn how to make stunning visuals. The software is easy to use, but it’s also mighty. The toolset is excellent for artists of all skill levels. You can experiment with different contours, shapes, and connections to create various effects. You can also use the native or Octane render engine to get beautiful results. You can also change the settings to produce fantastic outcomes.
The Gnomon Workshop has released a new video training course, Creating Sci-Fi Keyframe Concept Art, using Cinema 4D to illustrate realism. Sebastien Hue recorded the tutorial. It is a five-and-a-half-hour course that covers everything from the 3D software to the keyframe images. You can access the system through an online subscription to the Gnomon Workshop. It costs $490 annually, but you can try it for free.
The tutorials in this course are designed for beginners and advanced users. You can learn how to draw, paint, and animate your characters. You can also learn to composite, texturize, and enhance your creative endeavors. This is an excellent resource for beginners who want to learn how to create visuals for movies and television shows.
You’ll learn from some professional artists known for their ability to create beautiful images in the style of classic animated characters. You’ll also discover the secrets to creating a great workflow. These artists have worked on various projects, from advertisements to sports. They include Omar Aqil (Apple, Nike, Adidas, etc.), Jess Herrera (Herrisaurus, Brrch Squarespace ads, etc.), and Steven Messing (Boardwalk Empire, Prometheus, and more).
These artists and their work inspire you! You’ll also gain a lot of insight into the world of Cinema4D. You’ll find that creating concept art with Cinema4D is an enjoyable experience, and the results are fast. The tips, tricks, and techniques you learn in this course can help you take your artwork to the next level. You’ll learn how to create realistic key frames and enhance your art using the software’s powerful toolset.

Conclusion
Cinema 4D is a top-quality 3D modeling, animation simulation, and rendering software. It’s powerful, a fast toolset that is flexible and reliable allows 3D workflows easier to access. It is more efficient for motion graphics, design AR/MR/VR, VFX, game development, and other types of professional visualization. Cinema 4D produces stunning results when working alone or with a group.
