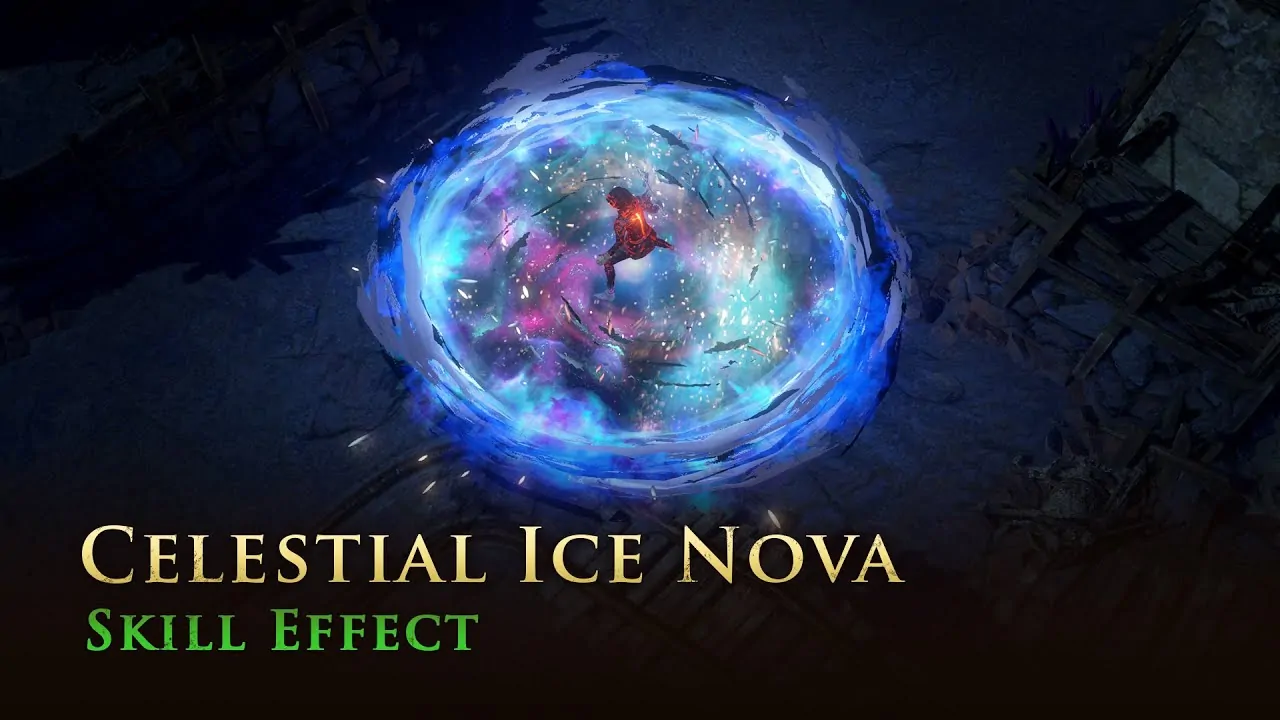
How To Create An Ice Nova Effect
In the natural world around us, we observe the varying ice forms with their distinctive abilities to bend light, creating multiple optical effects and photographic possibilities. The simulation of ice is common in photographs as well. Overall, it presents an impression that is sometimes transparent, opaque, or white. Correspondingly, from the essential addition of an ice theme to visual art and images, various other effects like an Ice Nova are derived to enhance the visual narrative and formation of the compositions. Fantasy and action games such as Dungeon Quest, Dragon Age, The World of Warcraft, The Path of Exile, and many more employ the element of Ice Nova. In most instances, it functions as a cold spell that surrounds the player with an expanding wave of damage. It also exhibits enigma, ice energy, and even sci-fi elements in various settings. Applying the Ice Nova effect to image enhancement is an exceptional approach that recreates striking climates into art, designs and images. The following steps will elaborate further on the enhancement of images using an Ice Nova effect.
Step 1: Choosing The Photograph
Selecting the correct base photograph is significant for creating a realistic and outwardly striking Ice Nova effect. The shot you pick ought to correspond to the effect so that the ultimate result looks natural and well-integrated.
Utilize an image containing high quality and sharp, subtle elements since a low-resolution picture can make the Ice Nova effect pixelated and unrealistic.
Choosing a darker or neutral foundation is most promising because it helps highlight the shining ice explosion. Do not go for excessively bright or cluttered foundations that will decrease visibility.
If you are applying the effect to a character, be sure that they are well-centred or situated dynamically to boost the effect of the Ice Nova burst.
The lighting within the picture ought to correspond to the aimed glow of the Ice Nova. It is essential to alter brightness and shadows to get a realistic integration.
Select a photograph that accommodates the cold, magical, or energetic impression of the Ice Nova effect for the finest results.
Step 2: Setting Up A Separate Layer
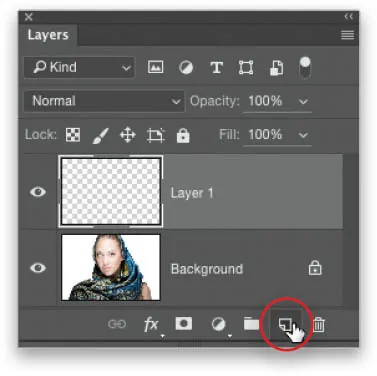
Before you add Ice Nova effects, it is fundamental to work on a separate layer to preserve flexibility and control over alters. Making a new layer guarantees non-destructive editing, permitting alterations without changing the initial photograph.
Load your editing program like Photoshop or GIMP and include a new clear layer over the base picture. That layer will be the base for the Ice Nova effect.
To have better control, make separate layers for distinctive components, like the icy explosion, glow, and extra surfaces. It will permit independent alterations.
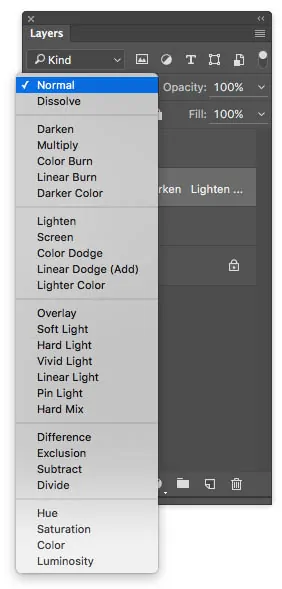
Alter the blending mode of the layer, choosing from options like Screen, Overlay, or Lighten, to guarantee the Ice Nova consistently integrates with the background.
Put the Ice Nova impact layer over the base picture, altering opacity for a natural move.
Lay layer masks to eradicate undesirable parts of the effect easily, making the Ice Nova show up naturally incorporated.
Before you move, save your project in a PSD or layered file to facilitate future alters.
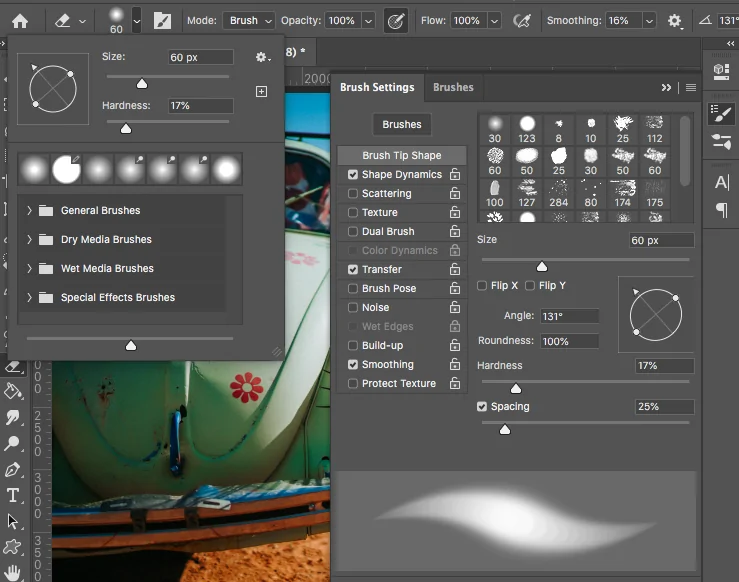
Step 3: Creating Ice Nova Textures
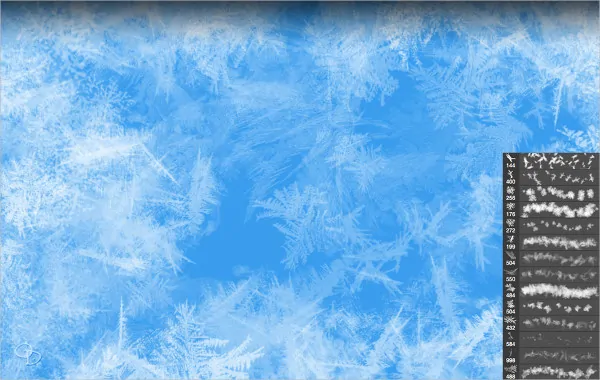
Once you are done setting up the base layer, you can head to create the Ice Nova effect utilizing textures and custom brushes. This phase includes the icy details, making the explosion show up more energetic and visually impressive.
Utilize specialized ice, frost, or explosion brushes provided in Photoshop or GIMP. These brushes aid in making realistic frozen shards, cracks, and foggy cold effects.
Begin with a circular movement to imitate the natural expansion of an Ice Nova. Make the interior bright and detailed while allowing the external edges to blur for smooth energy dispersion.
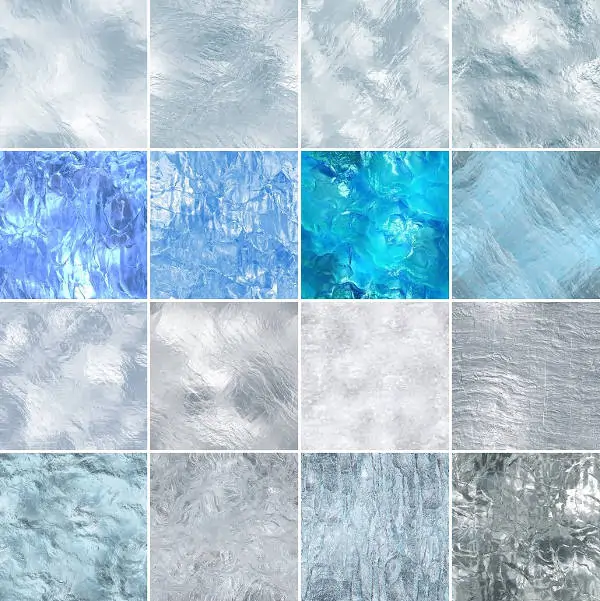
Discover online or make ice surfaces and overlay them utilizing Screen or Lighten blending modes. It is to include realism by consolidating crystalline elements.
Use different layers of ice surfaces and alter opacity levels to make profundity, making the Ice Nova effect more captivating.
Utilize soft erasers and smudge tools to conform harsh edges, guaranteeing a lifelike move between the ice explosion and the foundation.
Though Ice Nova effects are generally blue or white, subtle cyan or violet shades can upgrade the eerie energy effect.
Step 4: Blending Mode And Opacity Settings
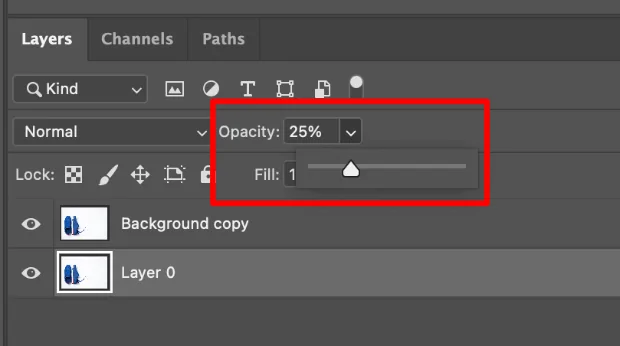
To provide the Ice Nova effect with a natural integration with the base picture, altering blending modes and opacity is vital. These settings will aid in incorporating the icy explosion consistently so that it looks realistic and outwardly flamboyant.
Specify the Ice Nova layer mode as Screen, Overlay, or Lighten. These modes can clear dark zones while improving bright highlights, making the ice effect shine naturally.
On the off chance that the Ice Nova effect is too strong, decrease the opacity by 50 to 85 per cent to form a smooth transition with the foundation.
Add distinctive ice surfaces or components on partitioned layers, each containing its own blending mode. It will include depth and complexity to the effect.
Utilize a delicate eraser with lowered opacity to blur edges, making the Ice Nova effect mix consistently into the environment.
Include a gradient mask or radial blur to grant the effect a more natural, expanding motion, fortifying the burst of cold energy.
Step 5: Applying Blur And Glow
To upgrade the Ice Nova effect and make a natural sense of energy, applying glow and blur strategies is fundamental. These alterations make the icy explosion seem more energetic and captivating.
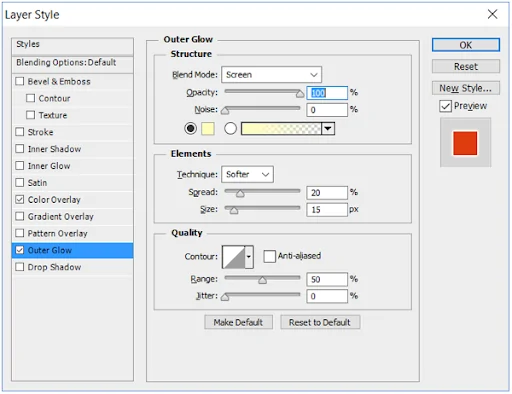
Add an Outer Glow effect in Photoshop’s Layer Styles or manually paint a faint glow around the Ice Nova employing a soft brush. Select white, blue, or cyan for a cold energy formation.
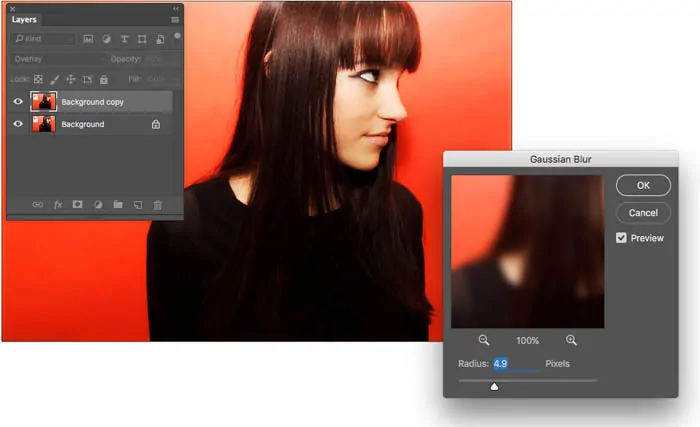
If the Ice Nova edges show up too sharp, utilize Gaussian Blur around 5 to 15 pixels on specific layers to form a misty, brilliant effect. It will help simulate cold air scattering.
Employ Motion Blur in a radial or outward heading to imitate the Ice Nova extending quickly. It will add motion and depth.
Incorporate sharp icy surfaces with delicate glowing edges to form contrast and realism. The shining centre ought to blur into a misty ice effect at the edges.
Include nuanced light streaks or frost particles utilizing brushes or overlays to open up the intensity of the effect.
Step 6: Regulating Colors And Lighting
Altering colours and lighting is basic to enhance the immersiveness of the Ice Nova effect. It will ensure that the icy explosion has the proper contrast, brightness, and glow to pop while incorporating it naturally into the scene.
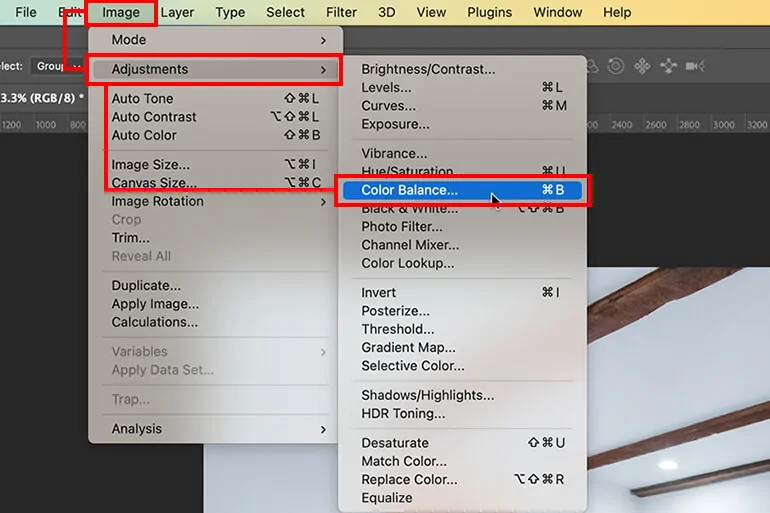
Maximize the blue, cyan, and white tones utilizing the Color Balance or Hue/Saturation tool. It will amplify the cold and mysterious energy effect.
Utilize the Curves or Levels adjustment to illume the Ice Nova effect while developing shadows. It can help make a glowing centre with darker, contrasting external edges.
If your Ice Nova is meant to radiate light, include a nuanced light glow to encompassing zones, like characters or objects, to echo the icy burst realistically.

Add a gradient map integrating white, light blue, and deeper cyan to create the Ice Nova effect and conform more intrinsically.
Utilize a soft brush to manually paint highlights and shadows, highlighting depth and volume. The brightest point ought to be at the centre of the Ice Nova, withering outward.
Step 7: Polishing The Effect
After the Ice Nova effect is completely assembled, the ultimate step is polishing and enhancing the subtle elements to ensure a consistent, high-quality final product. It will include polishing edges, adjusting effects, and making conclusive adjustments for a groomed appearance.
Add layer masks to delete or blur undesirable ranges smoothly. It can help the Ice Nova effect correspond naturally to the picture without severe rims.
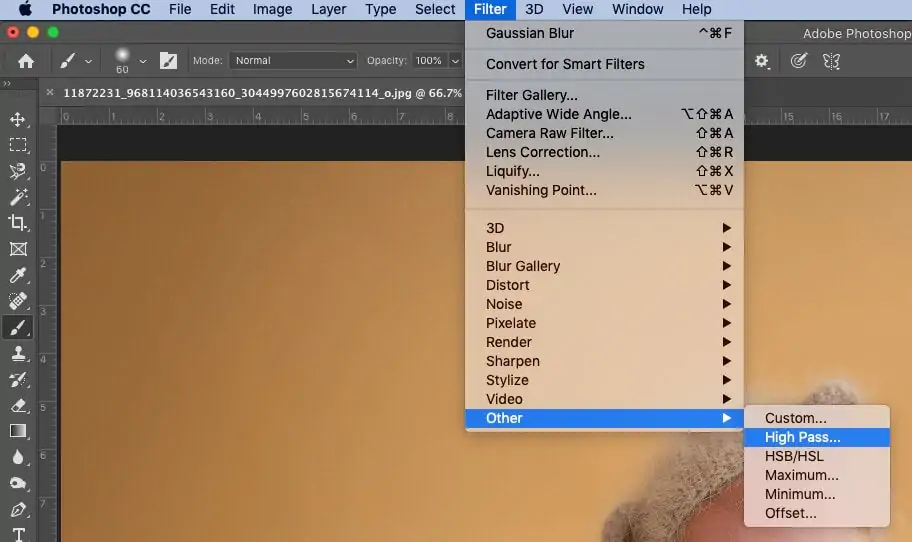
Utilize the Sharpen tool or High Pass filter to upgrade intricate ice surfaces while keeping the outer glow delicate for depth and contrast.
Utilize scatterbrushes or surfaces to make small floating ice shards or fog, strengthening the cold, enchanted climate.
Utilize the zoom-out and recheck whether the Ice Nova effect conforms with the scene. Alter position, size, or intensity as required.
Do any necessary changes to brightness, contrast, and saturation so that the Ice Nova looks striking and natural.
Save the ultimate picture in PNG or TIFF format for the leading quality so that transparency and crisp details stay unchanged.
Conclusion
In summary, the application of an Ice Nova effect introduces a mystic explosion of ice into your photographs. It materializes the incredible gaming scenes into everyday settings, making the subject look like some exquisite gaming character. It also provides a magic aura that holds assertive energies, making the subject look like some otherworldly being. Besides enhancing the main subject, the Ice Nova effect also exalts the overall atmosphere of a photo and brings new life to its mundane environment. Even if the chosen images have existing snow or ice elements, this approach gives them a better definition.
