How To Create A Folk Art Piece
Folk art is the art of the people, as opposed to the professional or privileged work that makes up the majority of art in highly developed cultures. One can broadly define it as the art produced by groups that are part of a developed society but are, due to cultural or geographic factors, largely isolated from the cosmopolitan artistic developments of their era. These groups created unique styles and objects to suit local needs and preferences. Since the artists were usually immediately focused on generating the requirements of existence, the art is frequently characterized as primarily functional or utilitarian, even when its significant categories are clearly not utilitarian, such as the common miniatures created solely for enjoyment. Nonetheless, modern artists are also not unrestrained from the influence of this ancient art form; they often get inspiration from folk art themes to utilize in their digital illustrations by employing recurring, common shapes and forms. It gives them more creative flexibility and eliminates the need for realism while presenting symmetry with the use of patterns and repetition. This blog will provide the step-by-step process to create a folk art piece using potent digital tools like Adobe Illustrator and functional techniques.
Step 1: Assembling The Artboard
Initiate Illustrator and press on File > New to get a new document.
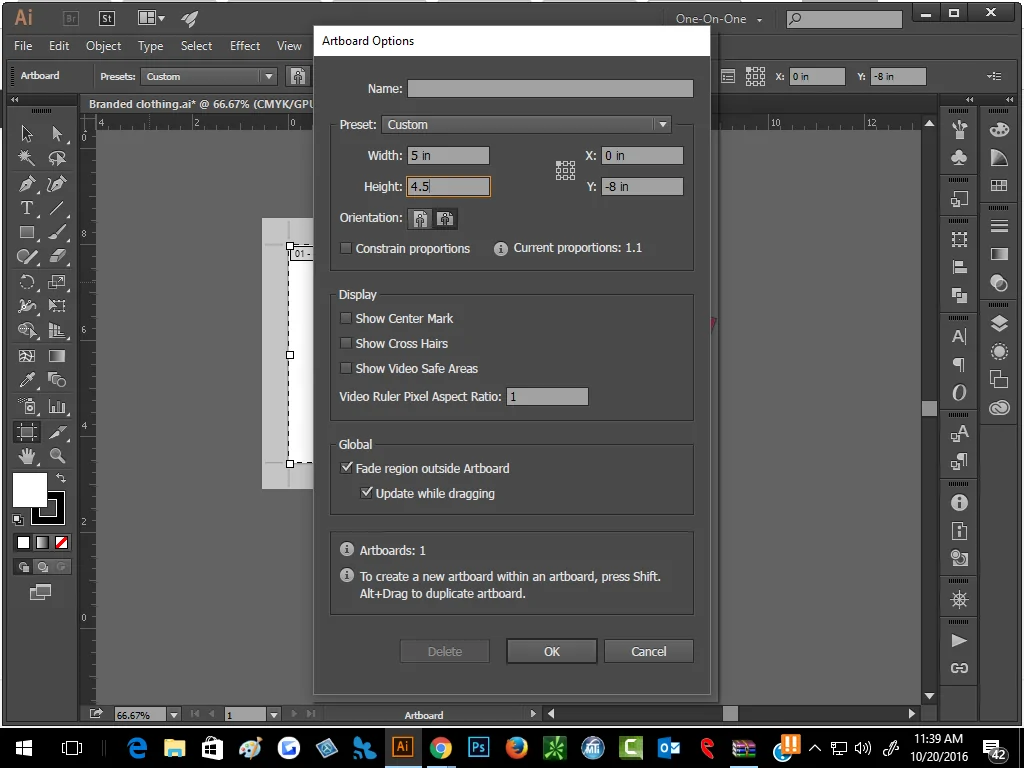
Select a standard size such as 1080×1080 px for Instagram or set custom measurements founded on your artwork’s needs.
Select RGB in case the art is for digital usage or CMYK for print purposes.
Beneath Advanced Options, alter the resolution to 300 PPI (for print) or 72 PPI (for the screen).
Head to View > Show Grid and Snap to Grid for a more effortless arrangement.
Unlock the Layers Panel to keep your components managed as you make them.
Save the document with an appropriate title by taping File > Save As, guaranteeing you can return to it effectively.
This setup confirms an arranged workflow and helps keep up accuracy throughout your folk art composition process.
Step 2: Drawing Basic Shapes
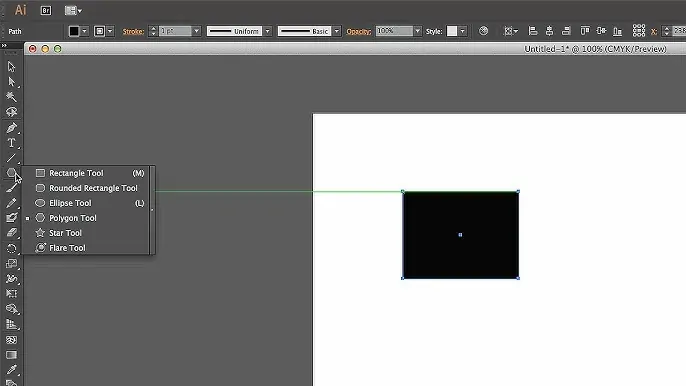
Utilize the Rectangle Tool, Ellipse Tool, or Polygon Tool to form basic shapes such as circles, squares, or triangles.
Press Shift while dragging to preserve proportion or tap Alt/Option to pull from the middle out.
Sketch freeform paths or complicated traces by placing anchor points and modifying curves with the Direct Selection Tool.
Utilize the Pathfinder Tool to combine, subtract, or intersect different shapes to form complex components.
Use Alt/Option + Drag to make duplicate shapes. Utilize the Align Panel to place them symmetrically.
Right-click on the layer and choose Lock Layer to avoid inadvertent adjustments.
Adjust stroke weight and color within the Properties Panel to make distinct traces.
Choose multiple components and tap Ctrl/Cmd + G to gather them, making future alterations simpler.
This step makes sure that your artwork has organized, detailed outlines to construct upon within the following phases.
Step 3: Expanding Symmetry And Repetition Of Shapes
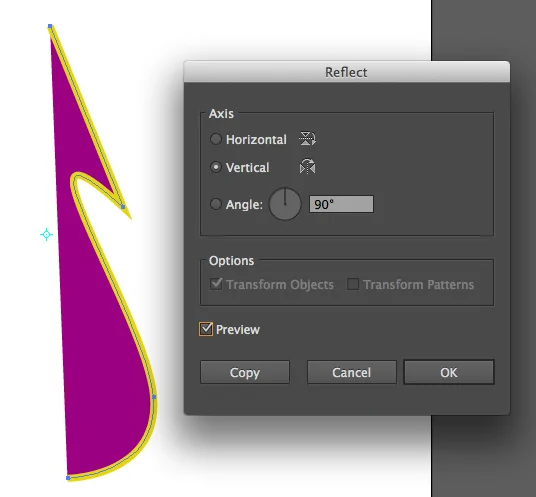
Choose an element, use O for the Reflect Tool, press on a point to reflect around, and select Vertical or Horizontal reflection for consonance.
Utilize the Rotate Tool (R). Select the object, tap a center point, and fix a rotation point to replicate and rotate patterns.
Once done with setting the angle, tap Ctrl/Cmd + D over and over to create a circular design of repeated components.
Proceed to Window > Transform and input proper rotation, scale, or position values for symmetrical arrangement.
Utilize Horizontal/Vertical Align choices beneath Window > Align to guarantee components are superbly adjusted.
Choose your plan and go to Object > Pattern > Make to create rehashed themes inside the work of art.
Empower Smart Guides below View > Smart Guides to snap components into position as you duplicate and turn.
This step guarantees proportional arrangement and smooth repetition that are elementary for folk art’s aesthetic equilibrium.
Step 4: Filling Radiant Colors
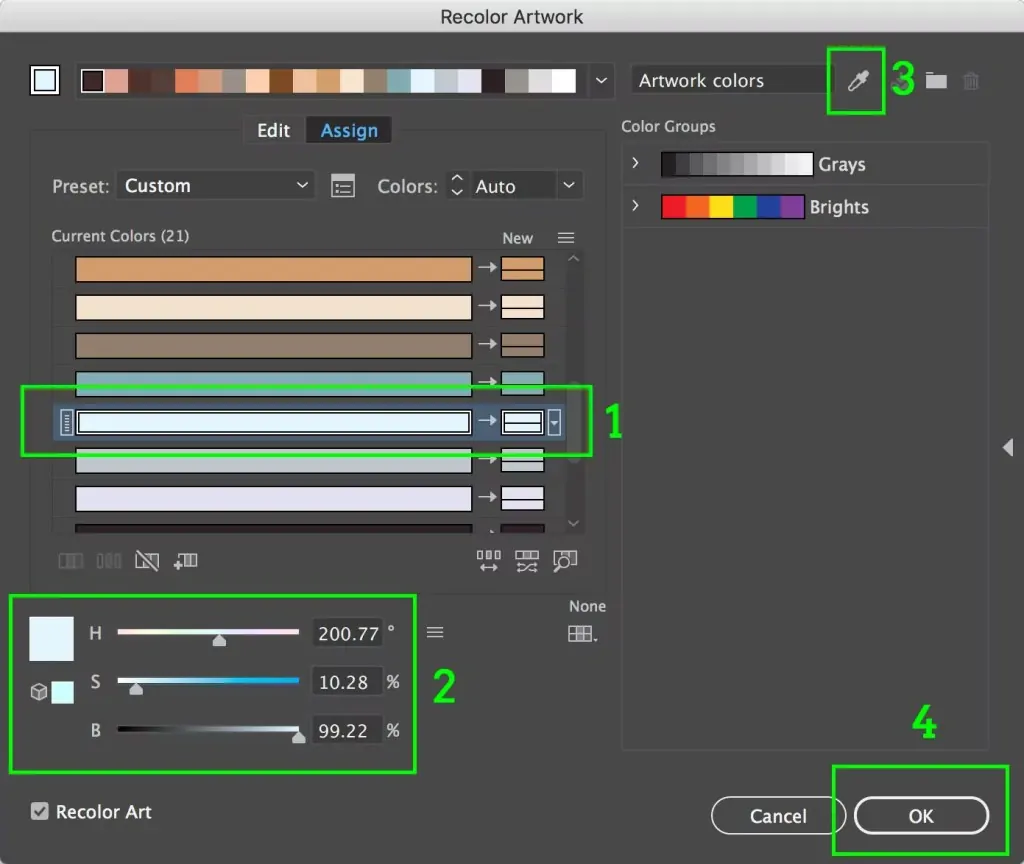
Head to Window > Color or utilize the Swatches Panel to get to predefined colors and gradients.
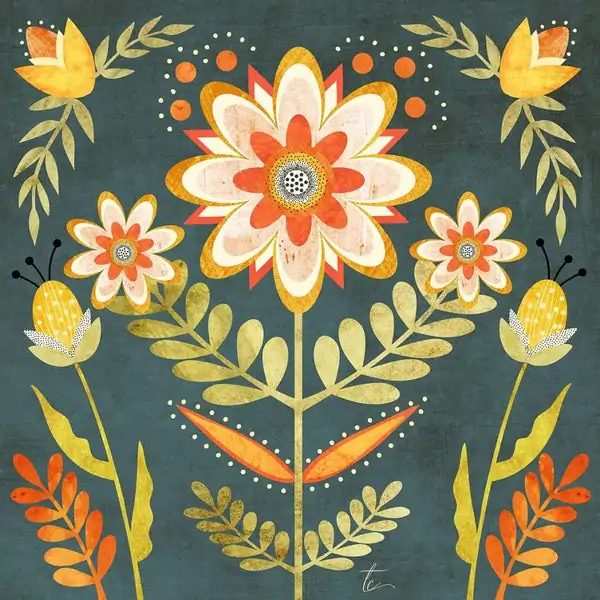
Folk art usually uses radiant and striking colors. Choose essential hues such as red, yellow, blue, and green for a conventional appearance.
Choose a component, press the Fill Box within the toolbar, and select your desired color. Utilize the Eyedropper Tool (I) if you would like to test colors from other objects.
Choose the component, then tap on the Gradient Tool. Alter the gradient’s angle, color stops, and sort to make a wealthy visual impact.
Within the Gradient Panel, tap the sliders to adjust or include new color stops. You can save these custom gradients for reuse.
Within the Swatches Panel, make and apply global colors so any alter mirrors over all instances.
Utilize the Transparency Panel to alter opacity or blend modes to layer colors powerfully without overpowering the design.
This step guarantees your work of art epitomizes the strength of folk composition, capturing its conventional energy with a present-day twist.
Step 5: Including Patterns And Surfaces
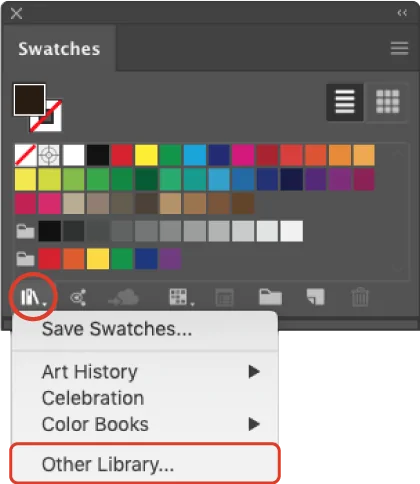
Head to Window > Swatches and tap the Swatch Library Menu to analyze pre-built designs or make your own.
Choose an object or design; at that point, go to Object > Pattern > Make. Alter tile type, spacing, and scaling for explicit reiteration.
Choose the shape or object, tap the Fill Box, and select a pattern from the Swatches zone to fill it with a repeating design.
Import texture files or utilize Illustrator’s Effect > Texture alternatives to mimic a handcrafted impression.
Double-click the pattern-filled component to scale or re-arrange the design without influencing the shape’s dimensions.
Utilize the Transparency Panel to incorporate textures and patterns gently through blending modes like Multiply and Overlay.
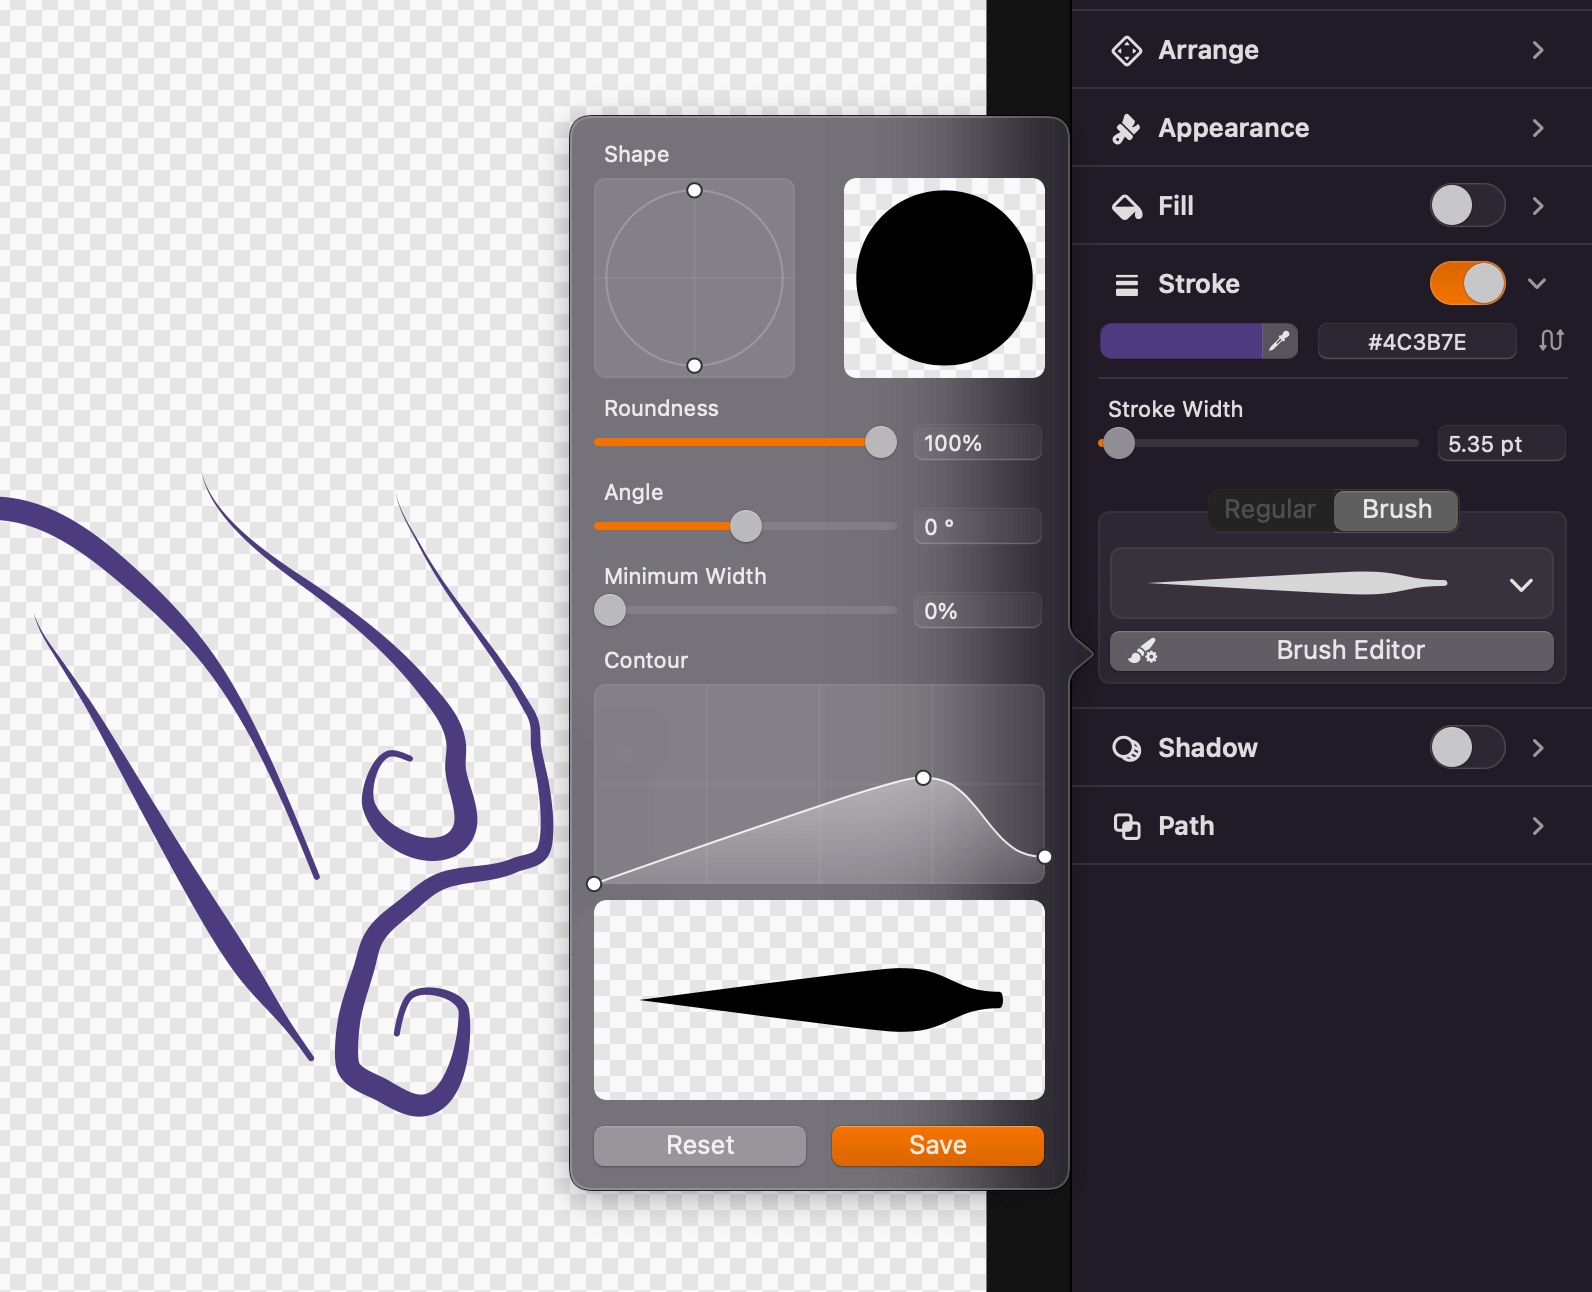
Utilize the Brush Tool with surface brushes to emulate hand-drawn elements for a natural feel.
This step improves your folk piece by including profundity, richness, and hand-made realness through patterns and textures.
Step 6: Using Decorative Symbols
Consider typical symbols and designs particular to the folk art fashion you’re imitating, like floral designs, creatures, or geometric forms.
Draw perplexing shapes and themes by placing anchor points along your craved way. Utilize curves and lines to make fluid, organic plans.
Choose from Illustrator’s default brushes or assemble custom brushes to include embellishing lines and details. This will help imitate hand-painted or handcrafted impacts.
Unite or subtract crossing shapes to get unique motifs. This tool helps fine-tune complex plans instantly.
Press Alt/Option while dragging to duplicate themes, and utilize the Rotate Tool to put them in a design or arrangement.
Choose different components and tap Ctrl/Cmd + G to gather them for simpler movement and altering.
Guarantee all themes are equitably spaced and adjusted for a balanced appearance by utilizing choices within the Align Panel.
This step incorporates fundamental cultural and artistic subtle elements, enhancing your folk art project and securing authenticity.
Step 7: The Final Touches
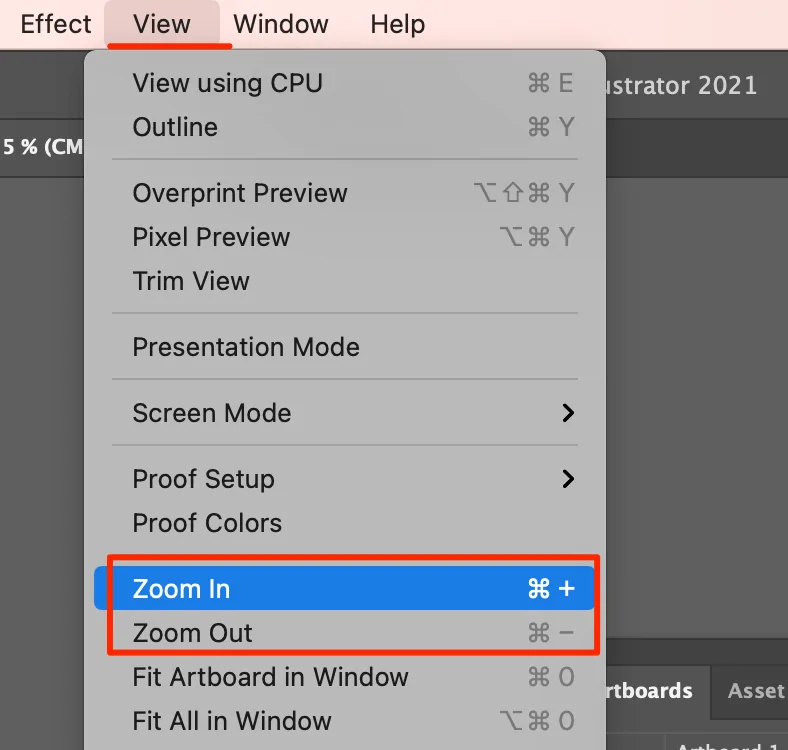
Use Zoom in and out to examine all components for harmony and alignment. Accomplish any essential alterations to guarantee a unified design.
Polish shapes and paths by clicking on individual anchor points to alter bends and angles for accuracy.
Make sure that all colors are steady. Utilize the Swatches Panel to replace colors globally if required.
Apply any final effects, such as shadows or highlights, utilizing Effect > Stylize choices for included profundity.
Frequently save your document as an Illustrator file (.ai) to protect layers and alters.
Move to File > Export > Export As to pick your required format. Also, choose fitting settings for resolution and quality.
Keep a duplicate in a different format, such as a PDF, for simple sharing or printing.
With fine tuning and exporting your work of art, you make your digital folk art ready for manifestation or distribution, guaranteeing it holds its dynamic quality and elaborate details.
Conclusion
Finally, as we look at the traits of ancient folk art, it is clear that it was produced by self-taught artists, who typically used natural objects to make art that featured personal or regional themes. There aren’t many folk art traits that apply to all of the artworks. Nonetheless, a general feature of folk art could be that its producers are independent and might not be considered artists by professional standards. Correspondingly, their intrinsic quality of originality allows all artists, regardless of their level of recognition, to develop their own artistic markers and inspire their unique artistic expression.
