How To Create A Pour Painting Effect
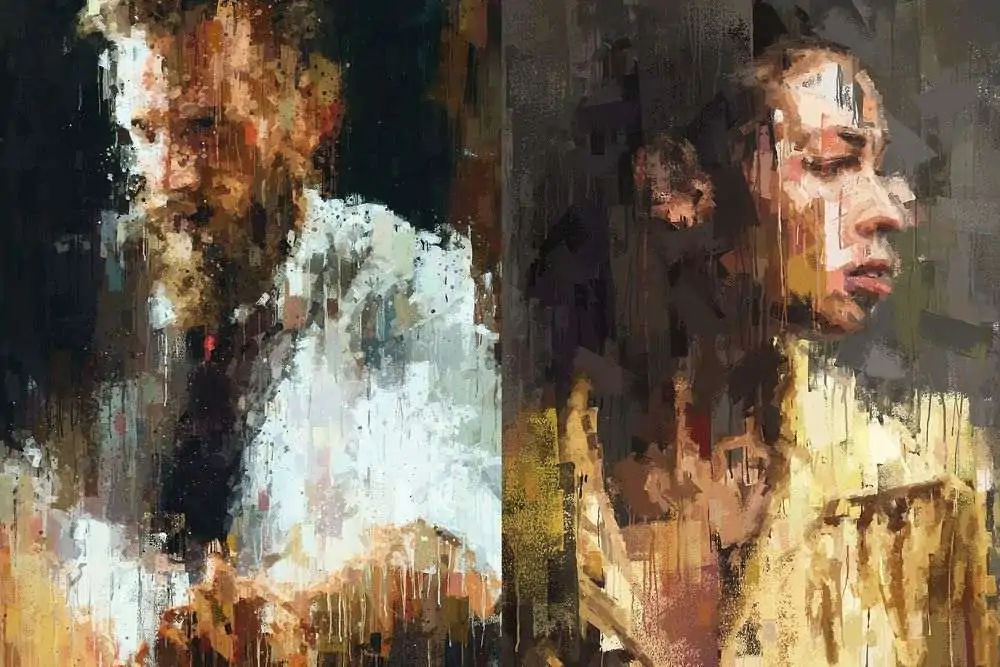
Pour painting art is a creative approach to getting unexpected artistic outcomes. It involves an art technique that does not require brushes or knives; instead, directly pouring fluid paints straight onto the canvas and tilting it to move the paint around. With this method, artists can add color to pools, puddles, and patterns resembling marble. As a result, perfectly equal, glossy, and flawless paint film is produced by pouring. Considering its ability to enable artists to produce rapid paintings with striking, stylish effects, pour painting artform is especially well-liked by newcomers. It makes art invention attainable for everyone, even one lacking expertise but having the enthusiasm to create something that pleases and stuns them as well as others. Moreover, the abstract and spontaneous nature of pour paintings is also employed as an editing approach to enhance or create images that look comparable to an actual pour painting. You just need to bear a meticulous mastery in using digital tools and techniques as highlighted below, and you can create a fascinating pour painting effect.
Step 1: Preparing The Texture
Within the starting of your image enhancement with a pour painting effect, you have to construct or access a relevant texture.
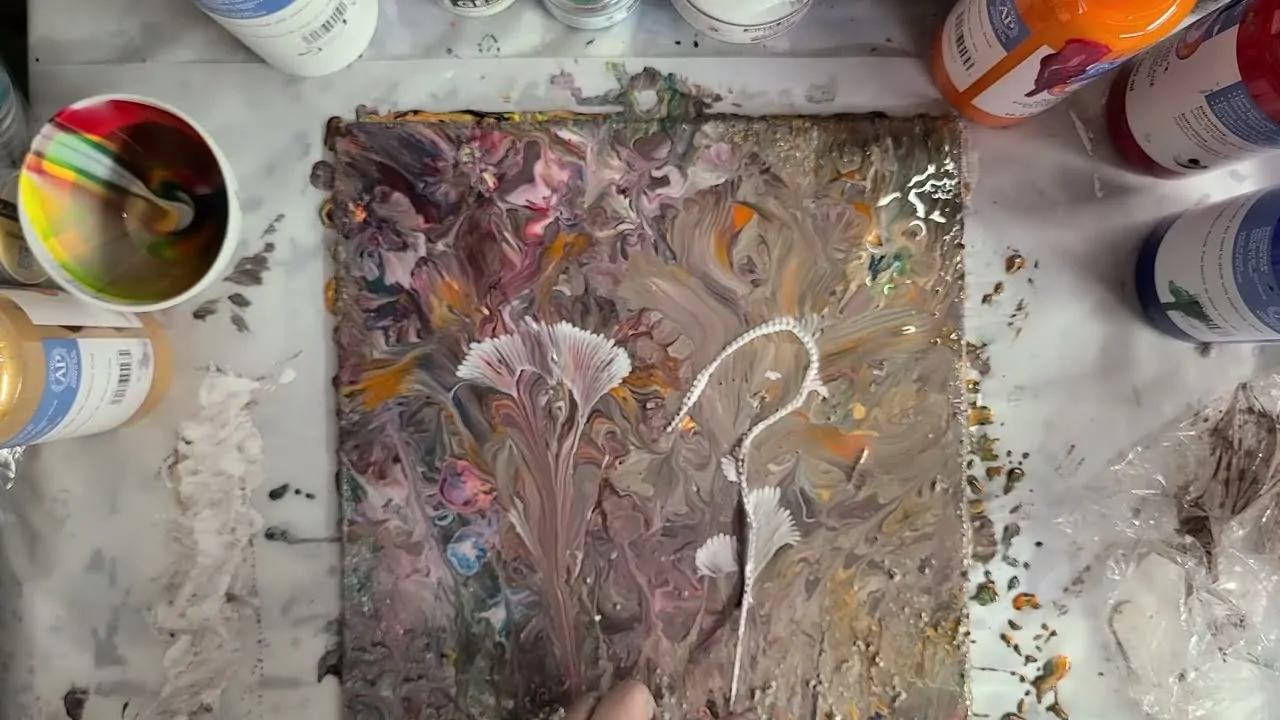
You can make a physical pour painting by blending acrylic paints with a pouring medium, letting the colors stream onto a canvas. After it gets dry, you will have to photograph it in a high resolution.
On the other hand, seek free or premium pour art textures on stages such as Unsplash, Pexels, or Shutterstock.
In case you are photographing your own composition or downloading a surface, be sure that the resolution is high and sufficient to preserve quality when overlaying your picture.
Open the texture iamge in Photoshop or comparative software for cropping out undesirable parts or improve colors with the help of the Hue/Saturation tool.
To bypass solid backgrounds in your surface, consider utilizing a magic wand or lasso feature to cut out the primary fluid design and preserve it as a PNG with transparency.
Keep your surfaces well- managed by documenting them clearly and keeping them in a designated folder for speedy access amid your project.
Step 2: Arranging The Workspace
Head to your file explorer and find the prepared pour painting surface. Reconfirm that it is in high resolution for ideal results.
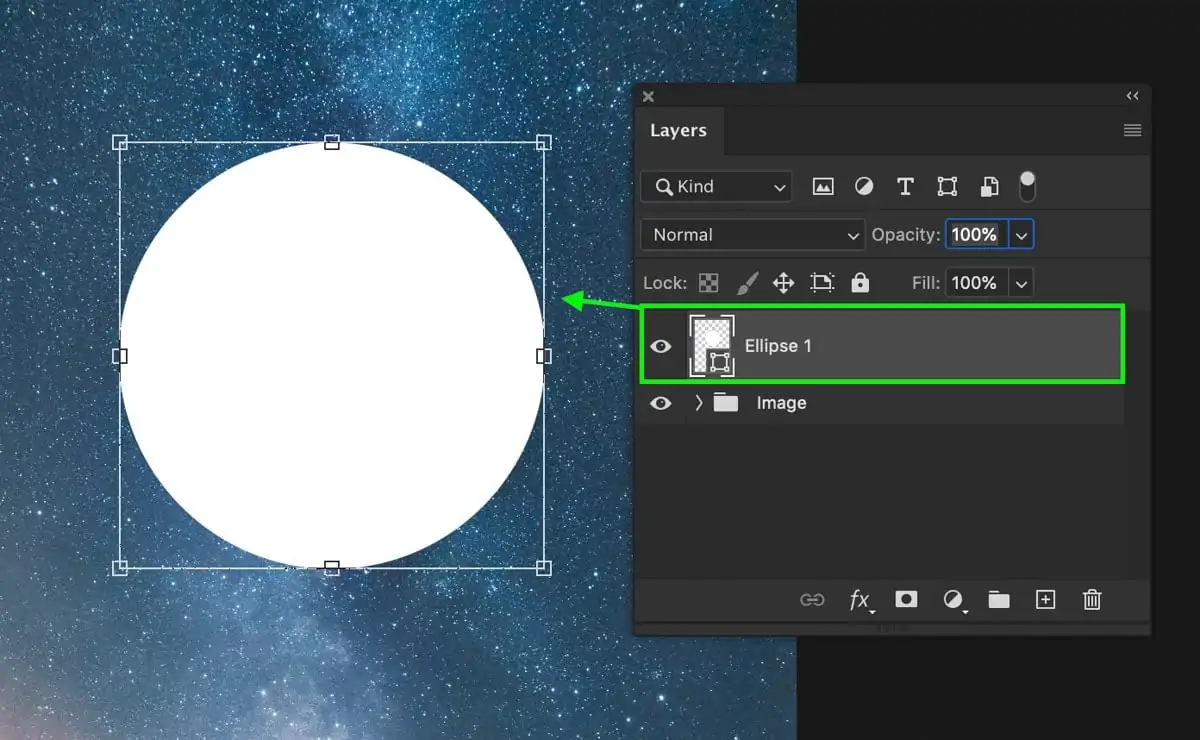
Press and drag the texture file into the existing Photoshop workspace, where your base picture is already available. That move will automatically make a new layer for the texture.
Utilize the Move Tool to alter the placement of the texture layer. Put it above the image you need to enhance.
In case the texture does not accommodate the canvas size, use Ctrl + T to start the transform handles. Hold the Shift key and drag it to resize while holding the aspect ratio.
Recheck that the texture layer is over the base picture layer within the Layers zone, for it is supposed to be visible and affect the picture.
Save your progress by reaching File > Save As and selecting the PSD format to keep the layers unharmed for future alters.
Step 3: Blend Mode Adjustments
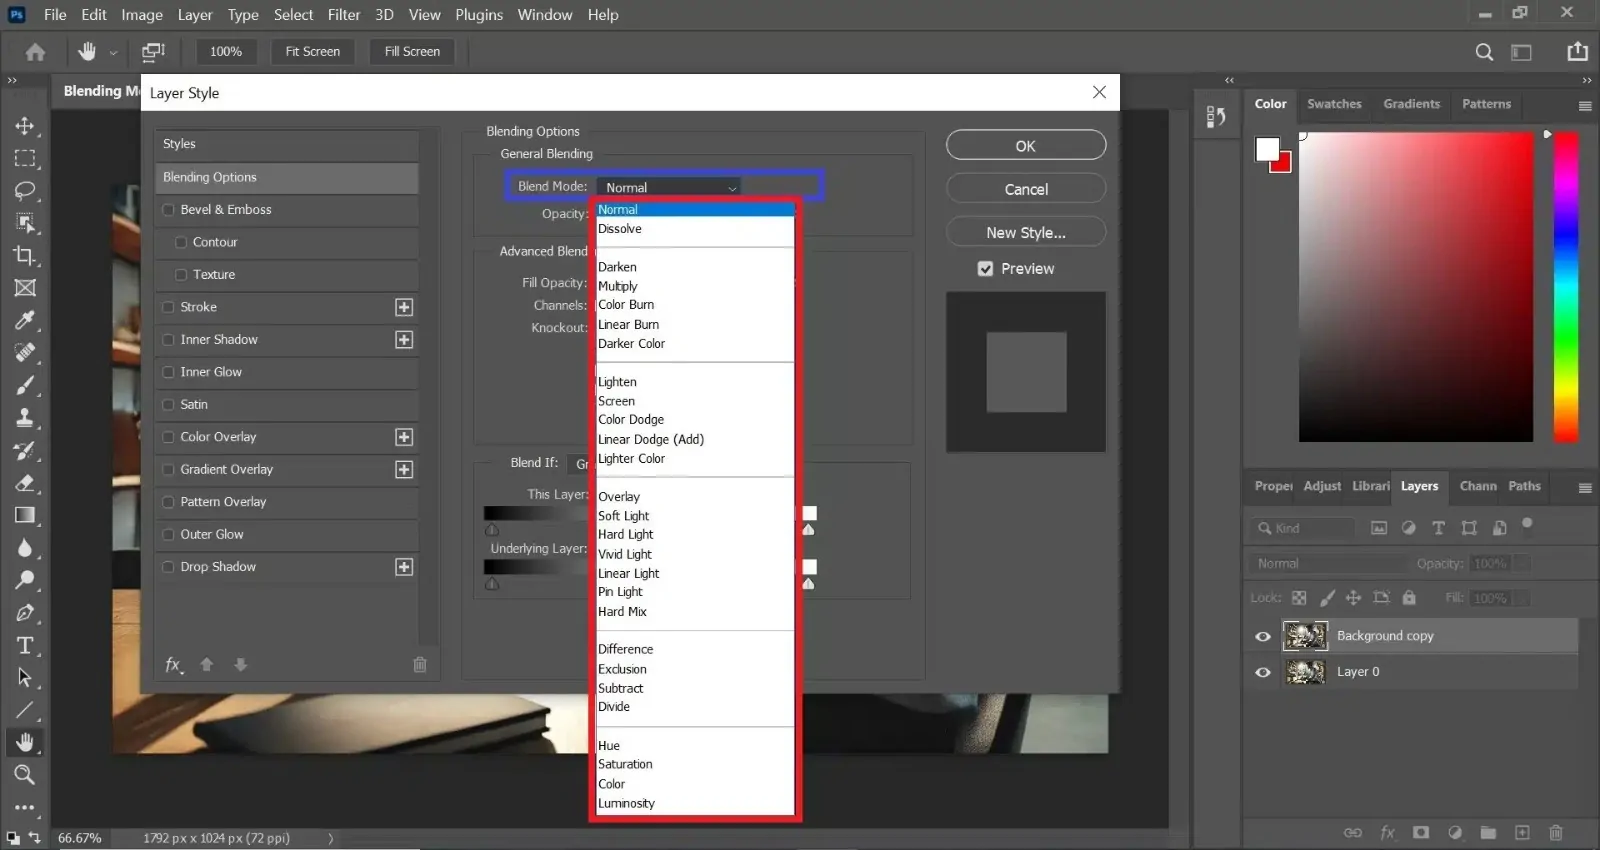
Within the Layers panel, tap on the layer containing the pour painting surface to guarantee it is functional for alterations.
At the top of the Layers panel, you will witness a drop-down menu that usually shows Normal. That menu takes hold of how the texture communicates with the fundamental image.
Press on the drop-down menu and go through the alternatives. Typical modes to try could be Overlay, Soft Light, and Multiply. Every mode alters the texture’s dealings with the base picture particularly. For instance Overlay mode improves contrast, whereas Soft Light gives a gentler impact.
Once done with choosing a blending mode, alter the Opacity slider next to the blending mode menu. Bringing down the opacity can make the texture more subtle, letting the base image appear through.
Persistently review how the changes influence your general arrangement. Flip the visibility of the surface layer on and off to correspond to the impacts.
After you are done with the blending mode and opacity, lock in your selections. This plans the picture for further alterations within the following steps.
Step 4: Masking Unnecessary Zones

With the surface layer chosen, press the Add Layer Mask symbol at the foot of the Layers panel. It will include a white mask thumbnail following the texture layer, permitting selective visibility.
Select the Brush Tool from the toolbar. Ensure the foreground color is assigned to black, which can repress regions of the texture when painted over.
Put the brush size agreeing to the range you need to mask. Utilize a soft, circular brush for smooth moves. You can alter its Hardness and Opacity within the alternatives bar for better control.
Gradually paint over zones of the surface you need to cover up or reveal. In case you incidentally remove too much, change the foreground color to white and paint over the range once more to get it back.
Use the Zoom-in option on the picture for detailed work around rims or complex parts of your picture.
As essential, utilize the Gaussian Blur filter on the mask to hush the edges, making a more merged and natural impression. Alter as required to attain the specified impact.
Step 5: Colors And Lighting Enhancement
Within the Layers panel, press on the texture layer to be sure you are altering the right layer. It permits you to form color and lighting alterations particular to the pour painting impact.
Move to the Layers menu and select New Adjustment Layer. Use choices like Hue/Saturation, Brightness/Contrast, or Curves to alter the look of the texture.
Within the Hue/Saturation dialog box, drive the sliders to alter the colors within the surface. That will improve or quiet colors to adequately complement the base picture.
Utilize the Brightness/Contrast alteration to make the surface lighter or darker. Expanding contrast can allow the surface to be highlighted against the base photograph.
Unlock the Curves adjustment to make more particular modifications. Press on the curve line and drag it to alter highlights, midtones, and shadows, giving you detailed control over the general tonal range.
On the off chance that you need the adjustments to influence only the texture layer, right-click on the adjustment layer and specify the Create Clipping Mask feature. That limits the adjustments to just the layer underneath it, keeping up the initial look of the base image.
Step 6: Performing Final Tweaks
Use Zoom out to see the whole picture and survey how the pour painting impact incorporates with the base photograph. Scrutinize for any ranges that might require more blending or alteration.
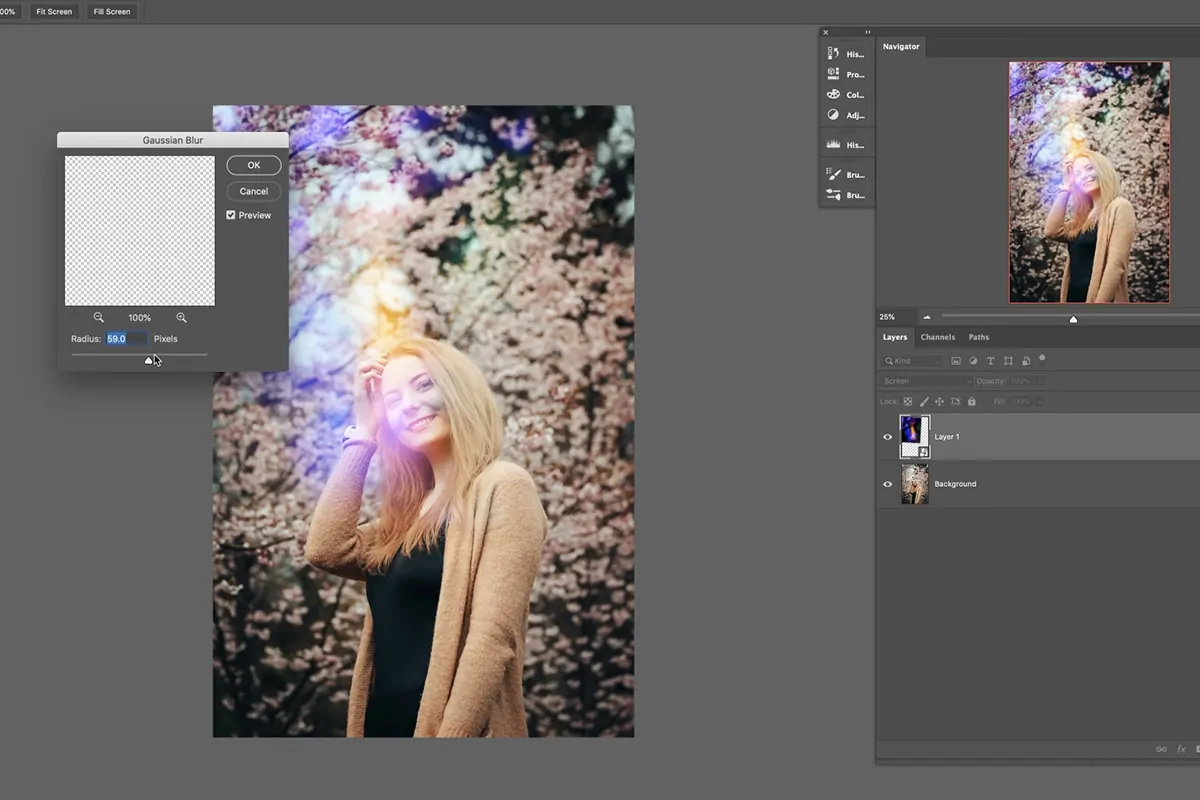
If you find the surface shows up too sharp, choose the texture layer and go to Filter > Blur > Gaussian Blur. Alter the radius slider to make a milder look that blends way better with the basic picture.
Look into adding a new Adjustment Layer, like Levels or Exposure, to tune the general lighting. Accomplish subtle alterations to highlight particulars or alter the temperament of the picture.
On the off chance that fundamental, apply a slight sharpening impact. Choose the whole picture by pressing Ctrl + A or Cmd + A. At that point, go to Filter > Sharpen > Unsharp Mask and alter the sliders to improve details without exaggerating them.
Move to File > Save As to save your altered picture within the wanted format, like JPEG or PNG for web use, or keep it as a PSD file for future altering.
In case you intend to share the final composition online or print it, follow File > Export > Export As. Select the suitable settings for your expected utilization, guaranteeing ideal quality while keeping file size manageable.
Conclusion
In conclusion, everyone of any skill level can enjoy creating art with paint pouring. It makes no difference if you have experience or are a novice when learning this technique. It is an incredible technique that only requires the right tools and a little submission of control. In fact, the more flaws there are in this work, the greater its merits. Applying the paint-pouring effect to photos is quite simple and extremely captivating. Digital tools enable you to replicate the same effects in multiple compositions, unlike actual pour painting, which somehow fails to enable you to make the same project twice.
