

How to import and render Gaussian Splats in Blender Octane
Importing advanced 3D capture data into a rendering pipeline often frustrates artists who try to import and render Gaussian Splats in Blender Octane for the first time. A scene that looks clean in a splat viewer or reconstruction software does not always work the same way inside Blender. Files may load as dense point clouds, splats may appear invisible in the viewport, or Octane may fail to recognize the dataset correctly. Instead of focusing on lighting or animation, artists often spend hours fixing file format issues, plugin settings, and GPU rendering errors.
Another challenge appears when working with high-density Gaussian splat datasets. Most scans contain millions of splats, which quickly consume GPU memory and slow down viewport performance. If the workflow is not configured correctly, artists may see broken scale, incorrect scene orientation, transparency artifacts, or unstable Octane renders. These technical problems interrupt production and make it difficult for VFX artists, developers, and 3D creators to integrate splat scenes into real projects.
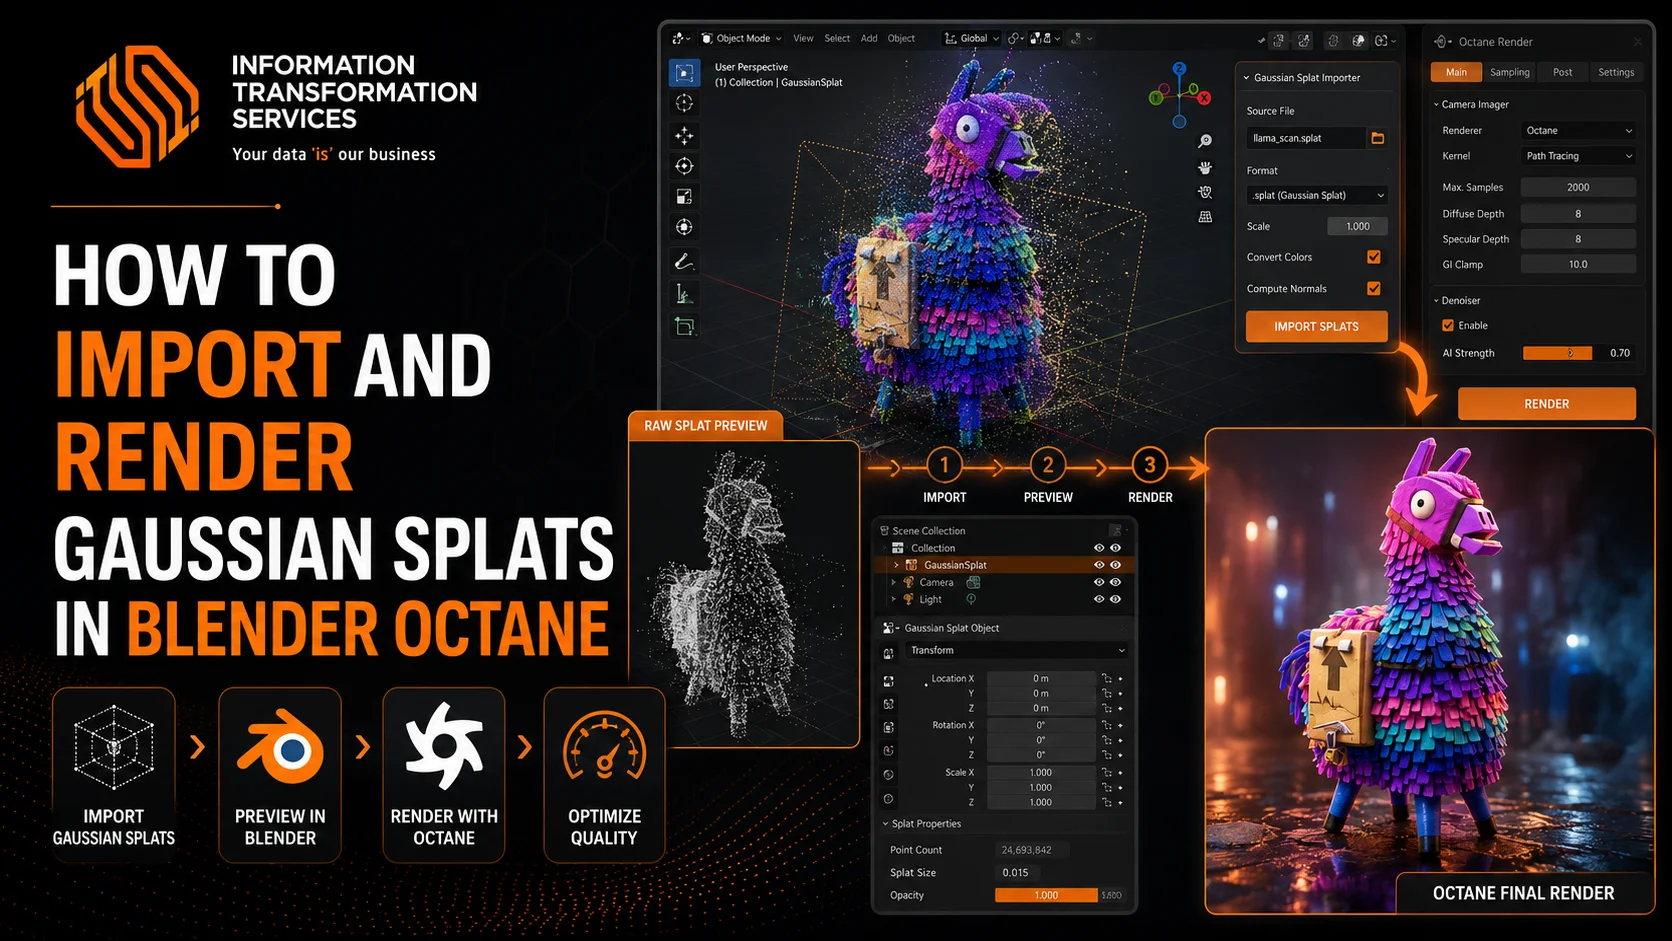
This guide explains how to import and render Gaussian Splats in Blender Octane using a clear and practical workflow. You will learn how to prepare splat files, import them correctly into Blender, convert them for Octane rendering, and optimize the scene for smooth performance. By following this process, you can turn raw Gaussian splat data into a fully rendered scene ready for lighting, animation, and high-quality output.
Step 1: Configure Blender for Octane Rendering
To configure Blender for Octane rendering, first open Blender and create a clean workspace by clicking File → New → General from the top menu. Next, go to the Properties panel on the right side and select the Render Properties tab (camera icon). In the Render Engine dropdown, change the engine from Cycles or Eevee to OctaneRender. Once Octane is active, open Edit → Preferences, navigate to the System section, and enable your NVIDIA GPU under CUDA or RTX devices to activate GPU acceleration for the Octane rendering pipeline. Finally, return to the main interface and save the configuration by clicking File → Defaults → Save Startup File so Blender automatically loads the Octane GPU rendering environment when working with Gaussian splat scenes.
Step 2: Install the Gaussian Splatting Import Addon in Blender
To import Gaussian splat datasets, you first need to install a Gaussian splatting importer addon in Blender. Start by downloading a compatible Gaussian Splat Blender addon (.zip) from the developer repository or plugin source. After downloading the file, open Blender and go to the top menu, then click Edit → Preferences. In the Preferences window, select the Add-ons tab from the left panel. Next, click the Install… button located in the top-right corner of the window and navigate to the downloaded addon .zip file. Select the file and click Install Add-on. Once the installation completes, enable the addon by checking the activation checkbox next to the addon name. After activation, Blender will register the Gaussian Splat importer tools, which allow you to load PLY Gaussian splat datasets directly into the scene. Finally, close the Preferences window to apply the changes and continue with the Gaussian splat import workflow.
Step 3: Import the Gaussian Splat (.PLY) File into the Blender Scene
After installing the Gaussian splat addon, you can import the splat dataset into your Blender scene. Start by opening Blender and navigating to the top menu. Click File → Import, then select the Gaussian Splat (.PLY) Importer provided by the addon. In the file browser window, locate your Gaussian splat .ply dataset generated from a reconstruction tool or photogrammetry pipeline. Select the file and click Import Gaussian Splats to load the dataset into the scene. Once the import finishes, Blender will create a splat object or point-cloud representation in the viewport. You may need to adjust the scene scale or camera position by pressing Numpad 0 to switch to the camera view and Shift + Middle Mouse Button to navigate the scene. This step loads the Gaussian splat geometry and radiance data into Blender so it can be prepared for rendering in Octane.
Step 4: Convert the Imported Splats for Octane Rendering
After importing the Gaussian splat .ply dataset, you need to prepare it so OctaneRender can process the splats correctly. First, select the imported splat object in the Outliner panel or directly in the 3D viewport. With the object selected, open the Object Data Properties panel on the right side. If the Gaussian splat addon provides a Splat Rendering or Point Cloud settings panel, enable the Octane compatibility option or the Octane geometry conversion setting available in the addon interface.
Next, open the Octane Object Properties tab and enable Octane Geometry Node Support if it appears. This allows Octane to recognize the imported splats as renderable geometry instead of a simple point cloud. If the splats appear too dense in the viewport, adjust the splat radius or scale parameter in the addon settings to optimize visualization.
Finally, switch the viewport shading to Rendered Mode by clicking the Viewport Shading icon at the top-right of the viewport and selecting Rendered. Blender will now use the Octane GPU rendering engine to display the Gaussian splats, allowing you to verify that the splat dataset renders correctly before setting up lighting and materials.
Step 5: Configure Octane Node Graph for Gaussian Splat Shading
After the Gaussian splats are recognized as Octane-compatible geometry, open the Octane Node Editor to configure the shading pipeline. Start by switching one of your workspace panels to the Octane Node Editor. You can do this by clicking the editor type dropdown in the top-left corner of a panel and selecting Octane Node Editor.
Next, select the imported Gaussian splat object in the 3D Viewport or Outliner so the node graph corresponds to the correct object. In the node editor, create a new material by clicking New Material or pressing Shift + A → Octane → Materials → Universal Material. This will generate the base shading node used by Octane’s spectral rendering system.
Now connect the splat color attributes to the material. Add an Octane Vertex Attribute Node by pressing Shift + A → Octane → Attributes → Vertex Attribute. In the attribute name field, enter the color attribute used by the splat dataset (commonly rgb, color, or albedo, depending on the dataset export). Connect the output of this node to the Albedo input of the Universal Material.
To control splat transparency and density, add another Vertex Attribute Node and reference the opacity attribute stored in the PLY dataset. Connect this output to the Opacity input of the material. This step ensures Octane respects the per-splat transparency values that are essential for realistic radiance reconstruction.
After setting the node connections, assign the material to the splat object in the Material Properties panel. Switch the viewport to Rendered Mode again so Octane updates the preview. At this point, the Gaussian splats should display with their correct color, opacity, and volumetric appearance inside the Octane rendering pipeline. This confirms that the splat shading system is correctly configured and ready for lighting and environment setup in the next stage of the workflow.
Step 6: Configure HDRI Lighting and Octane Path Tracing Kernel
After setting up the Octane material and node graph for the Gaussian splats, the next step is configuring the lighting and render kernel so Octane can correctly illuminate the splat scene. Start by opening the Render Properties panel on the right side of the Blender interface and scrolling to the Octane Kernel Settings section. In the Kernel Type dropdown, select Path Tracing, because this kernel provides accurate global illumination and works best for rendering dense Gaussian splat datasets.
Next, configure the Max Samples value depending on your GPU performance. For viewport previews, set the value between 200 and 500 samples to maintain smooth interaction. For final rendering, increase this value to 2000 samples or higher to remove noise from the splat shading and radiance reconstruction. You should also enable Adaptive Sampling if available, which allows Octane to optimize sampling across high-detail areas of the splat scene.
Now set up environment lighting using an HDRI map. Go to the World Properties panel, then click Use Nodes if the world shader is not already active. Add an Octane Environment Texture node by pressing Shift + A → Octane → Environment → Texture Environment. Load an HDRI image file by clicking the image slot inside the node and selecting an HDR environment map from your storage.
Connect the Texture Environment node to the Octane World Output node. This HDRI will provide realistic ambient lighting and reflections for the Gaussian splats. If the scene appears too bright or washed out, reduce the Power or Exposure value inside the HDRI node to balance the lighting intensity.
Finally, return to the Viewport Rendered Mode and rotate the environment lighting if necessary by adjusting the rotation parameters in the HDRI node. This allows you to control the direction of light hitting the splat scene and helps achieve a more cinematic lighting setup before adding cameras or animation in the next stage of the pipeline.
Step 7: Configure Camera and Depth-of-Field for Gaussian Splat Scenes
Once the lighting and Octane kernel are configured, the next step is setting up the camera system so you can properly frame and render the Gaussian splat scene. Start by adding a camera if your scene does not already contain one. From the top menu, click Add → Camera, or press Shift + A → Camera. After adding the camera, press Numpad 0 to switch the viewport to Camera View.
To position the camera quickly, enable Lock Camera to View. Open the right-side viewport panel by pressing N, go to the View tab, and enable Lock Camera to View. Now navigate the scene using the Middle Mouse Button, Shift + Middle Mouse Button, and the mouse scroll wheel. As you move in the viewport, Blender automatically updates the camera position, allowing you to frame the Gaussian splat environment accurately.
Next, configure the camera lens settings. Select the camera object, open the Camera Properties panel, and adjust the Focal Length parameter. For cinematic shots of splat environments, artists commonly use focal lengths between 24mm and 50mm, depending on the desired field of view. Lower values create wide environment shots, while higher values produce more focused framing.
To enable Depth of Field (DOF) for more realistic rendering, scroll to the Depth of Field section in the Camera Properties panel and enable the Depth of Field checkbox. In the Focus Object field, select a point of interest in your splat scene, such as a mesh object or an empty placed near the subject. Then adjust the F-Stop value to control blur intensity. Lower values, such as 0.5 – 1.8, create stronger background blur, which helps separate the subject from dense splat environments
Step 8: Optimize GPU Memory and Splat Density for Large Gaussian Splat Scenes
When working with Gaussian splat datasets, performance quickly becomes a bottleneck because many scenes contain millions of splats. Without optimization, Blender may slow down, the viewport may freeze, or Octane may run out of GPU VRAM during rendering. To prevent these issues, you need to optimize the splat scene before starting the final render.
Start by selecting the Gaussian splat object in the Outliner or directly in the 3D Viewport. Then open the Object Data Properties or the addon panel that controls the splat settings. Most Gaussian splat addons provide parameters such as Splat Radius, Density Multiplier, or Display Percentage. Reduce the viewport display percentage to something like 25%–50% so Blender only displays a portion of the splats while you work. This significantly improves navigation performance in the viewport without affecting the final render.
Next, open the Octane Settings inside the Render Properties panel and review your GPU memory usage. If the splat dataset is extremely large, enable Out-of-Core Memory in Octane. This option allows Octane to use system RAM when GPU VRAM becomes full, preventing render crashes when loading dense splat scenes.
You should also optimize render kernel settings. Lower the GI Clamp value to reduce fireflies and noise produced by very bright splats. Additionally, enabling Adaptive Sampling helps Octane focus render samples on important areas instead of wasting GPU cycles on uniform region
Step 9: Configure Octane Render Output and AOV Passes
After optimizing the Gaussian splat scene for GPU performance, the next step is configuring the final render output settings inside the Octane rendering pipeline. Start by opening the Output Properties panel on the right side of the Blender interface (printer icon). Set the Render Resolution depending on your final output requirement. For most cinematic splat renders, common settings include 1920×1080 for HD, 3840×2160 for 4K, or higher resolutions if the splat dataset contains enough visual detail.
Next, navigate to the Octane Render Passes (AOV) section inside the Render Properties panel. AOV stands for Arbitrary Output Variables, which allows you to export multiple render layers used later in compositing workflows. Click Add Render Pass and enable commonly used passes such as Beauty Pass, Diffuse, Reflection, Emission, Z-Depth, and Object Layer ID. These passes are especially useful when integrating Gaussian splat renders into professional compositing pipelines in software like Nuke or After Effects.
After configuring the render passes, set the output file format. Go back to the Output Properties panel, scroll to the File Format dropdown, and select OpenEXR Multilayer. This format stores all enabled AOV passes inside a single high-dynamic-range file, which preserves lighting data and color precision for post-production adjustments.
Step 10: Troubleshoot Common Gaussian Splat Rendering Issues in Blender Octane
After starting the render, you may encounter several technical issues when trying to import and render Gaussian Splats in Blender Octane. These problems usually occur because of incorrect attribute mapping, scale mismatches, or Octane render configuration conflicts. Fixing these issues quickly requires checking a few critical parts of the pipeline.
One common problem is when the Gaussian splats appear invisible or extremely small in the viewport. To resolve this, select the splat object and open the Object Properties panel. Check the Object Scale values and increase them if the imported dataset appears too small. Many Gaussian splat datasets are exported using different unit scales, so you may need to scale the object by 10x or 100x, depending on the reconstruction tool used.
Another frequent issue is black or missing colors in the render. This typically happens when the PLY vertex attributes are not mapped correctly in the Octane node graph. Open the Octane Node Editor, verify that the Vertex Attribute node is referencing the correct attribute names, such as rgb, color, or albedo, and confirm that the node is connected to the Albedo input of the Universal Material. If the attribute name is incorrect, Octane cannot read the splat color data.
You may also encounter transparency artifacts or flickering splats during rendering. This often occurs when the opacity attribute is not properly connected in the node graph. To fix this, add another Vertex Attribute node, enter the correct opacity field name (commonly opacity or alpha), and connect it to the Opacity input of the material. This ensures that Octane respects the Gaussian splat transparency stored in the dataset.
Another issue appears when the viewport becomes extremely slow or the render crashes due to GPU memory limits. In this situation, open the Octane Render Settings and enable Out-of-Core Memory so Octane can temporarily use system RAM when VRAM is full. You can also reduce the viewport splat display percentage inside the Gaussian splat addon settings to improve interaction performance.
Finally, if the background appears solid black, open the World Properties panel and confirm that an HDRI environment texture is connected to the Octane Environment node. Without an environment light, Octane may render the splat scene without proper illumination.
Once these troubleshooting steps are applied, most Gaussian splat rendering issues can be resolved quickly. At this stage, your scene should render correctly in Octane, allowing you to produce clean, high-quality Gaussian splat visuals ready for compositing or animation output.
Step 11: Export the Final Gaussian Splat Render
To export the final render, open the Output Properties panel in Blender and choose a save location in the Output folder field. Next, set the File Format to OpenEXR Multilayer, which allows Blender and Octane to export high-dynamic-range images along with multiple render passes in a single file.
After that, confirm that your Octane AOV render passes (such as Beauty, Diffuse, Reflection, and Z-Depth) are enabled in the Octane Render Passes section. These passes are useful for compositing and color grading later.
Finally, start the render by pressing F12 or clicking Render → Render Image. If you are rendering a camera animation, choose Render → Render Animation. Blender will process the Gaussian splat scene using the Octane GPU rendering pipeline and save the final EXR output to the selected folder.
Step 12: Integrate the Gaussian Splat Render into a Compositing Pipeline
After exporting the final OpenEXR multilayer render, the next step is integrating the Gaussian splat render into a compositing workflow. Open your compositing software, such as Nuke, After Effects, or Fusion, then import the EXR file that was exported from Blender Octane. Because the file contains multiple AOV passes, the compositing software will automatically detect layers like Beauty, Diffuse, Reflection, and Z-Depth.
Start by loading the Beauty pass as the base layer of your composition. Then add other passes, such as Diffuse or Reflection, if you want to adjust lighting intensity or reflections without re-rendering the scene. For depth-based effects, use the Z-Depth pass to create atmospheric fog, depth blur, or distance-based color grading.
You can also apply color correction, exposure adjustments, and cinematic grading to improve the final look of the Gaussian splat render. Because the render is stored in a high-dynamic-range EXR format, it retains more lighting data, making it easier to push highlights or recover shadow details during post-production. Once the compositing adjustments are complete, export the final frame or video sequence in the required delivery format such as PNG, ProRes, or MP4, for presentation or integration into a larger VFX project.
Conclusion:
Working with Gaussian Splats in Blender Octane can seem challenging at first, especially when handling large datasets, complex PLY files, or dense point clouds. By following a structured workflow—configuring Blender for Octane, installing the Gaussian splatting addon, importing and converting splats, setting up materials and lighting, optimizing GPU performance, and exporting properly, you can achieve professional-quality renders efficiently.
Mapping vertex attributes correctly, configuring Octane node graphs, and setting up HDRI lighting ensure the splats display accurate color, transparency, and volumetric detail. Optimizing splat density and GPU memory usage prevents crashes and allows smooth viewport previews, making even high-density scans manageable.
After exporting the EXR render, you can integrate it into compositing software for color grading, depth-of-field effects, and post-production adjustments without re-rendering. This workflow lets VFX artists, 3D developers, and environment creators transform raw splat datasets into cinematic, fully rendered scenes ready for animation, visualization, or production.
By mastering these steps, you can confidently work with point-based 3D scenes in Blender Octane and take full advantage of Gaussian splatting technology for high-quality visual results.