
How To Use Color Editing Techniques In Your Images
Color editing in images is a terrific procedure for adjusting or manipulating colors as a means to provide photographs with elegant appearances while also fixing color-related challenges. You can produce a lively, fascinating, and consistent appearance in your pictures by using the proper color combinations and tone changes. In such wise, color editing can benefit you in both cases: ensuring the correctness of colors in your photographs and creating a distinctive look for your images. Color editing inspires notions of applying unusual color palettes, surreal effects, or decorative filters to generate intriguing visuals in images through various color treatments. Color editing can be carried out using several software applications, most prominently Adobe Photoshop, Lightroom, or GIMP, which offer a range of tools and features notably designed for manipulating colors. These tools entail adjustment layers, color balance, hue/saturation, curves, selective color adjustments, and many others.
Step 1: Understand Color Theory
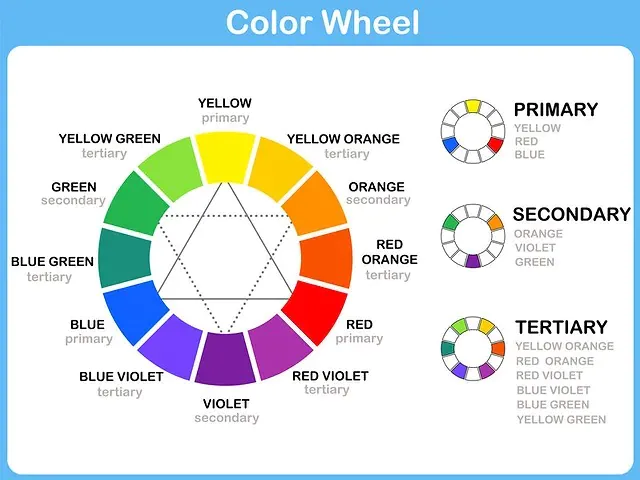
Understanding color theory forms the foundation of how colors interact and evoke emotions in visual compositions. Familiarize yourself with concepts such as the color wheel, primary, secondary, and tertiary colors, and color harmonies. Learn about warm and cool colors and their impact on the mood of an image. Color psychology will also aid you in making informed decisions about the emotional impact you want to convey through your color edits. This knowledge will be a valuable tool in guiding your color editing process and allow you to create harmonious and visually appealing images.
Step 2: Choose the Right Editing Software
Selecting the right editing software is crucial for effective color editing. Opt for professional-grade software like Adobe Photoshop, Lightroom, or GIMP, as they offer a wide range of color manipulation features and advanced editing capabilities. These software options provide intuitive interfaces and a plethora of tools that enable precise control over color edits. Consider your preferences when choosing editing software.
Photoshop is a versatile option suitable for intricate editing tasks, while Lightroom focuses on streamlining the editing workflow for photographers. GIMP is a free and open-source alternative that still offers many powerful features. Familiarize yourself with the tools and features of your chosen software, such as adjustment layers, color balance, curves, and selective color adjustments. With the right software and adequate knowledge, you’ll be well-equipped to explore the endless possibilities of color editing.
Step 3: Import and Organize Your Images
Managing your images is crucial for a smooth and organized color editing workflow. Follow these steps to import and organize your images effectively:
Create a dedicated folder: Create a folder on your computer’s hard drive or external storage for the images you want to edit. This folder will be your central location for storing and accessing your photos.
Import images into your editing software: Launch your chosen editing software and use the import function to bring your images into the program. You can typically find this option in the File menu or through a dedicated import button.
Create subfolders or collections: Consider creating subfolders or collections within your primary folder to categorize your images further. This step is beneficial for many images or if you want to group them based on specific projects.
Apply descriptive file names: Giving your image files descriptive names that indicate their subject or content is beneficial. This practice makes it easier to locate specific images later on.
Use metadata and keywords: Take advantage of your editing software’s metadata and keyword tagging features. Add relevant information such as date, location, and keywords to help you quickly search for specific images in the future.
Step 4: Adjust White Balance
White balance is crucial in color editing, ensuring accurate color representation in your images. Follow these steps to adjust the white balance effectively:
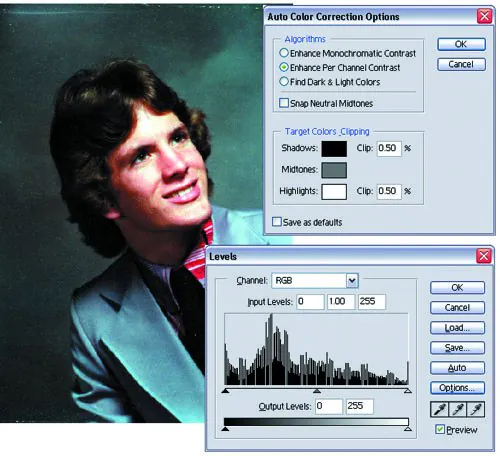
Understand white balance: White balance is the light source’s color temperature during image capture. Different lighting conditions, such as daylight, shade, or artificial light, can introduce color casts to your images.
Use auto white balance (AWB) as a starting point: Most editing software offers an automatic white balance feature. Begin by applying AWB to your image and assess the result. This setting aims to neutralize color casts automatically, but it may not always produce the desired outcome.
Manually adjust white balance: If the AWB doesn’t produce satisfactory results, manually adjust the white balance using temperature and tint sliders. Temperature controls the warmth or coolness of the image, while tint adjusts the green or magenta color cast.
Use a reference point: If possible, use a neutral reference point in your image, such as a gray card or an area that should appear neutral, to guide your white balance adjustments. So you achieve more accurate and consistent results.
Fine-tune the adjustments: Assess the overall color appearance of your image and make minor adjustments as needed. Pay attention to the impact on different elements and ensure a natural and visually pleasing result.
Step 5: Make Global Color Adjustments
Global color adjustments allow you to manipulate the overall color appearance of your image. Here’s how to make effective global color adjustments:
Color balance: Use the color balance tool to fine-tune the balance between the primary colors – red, green, and blue. Adjusting these sliders can help you achieve the desired color tones and correct any color imbalances in your image.
Hue/Saturation: The hue/saturation tool enables you to selectively adjust the hue, saturation, and lightness of specific colors or the entire image. Experiment with these settings to enhance or desaturate specific colors, creating a more vibrant or muted look.
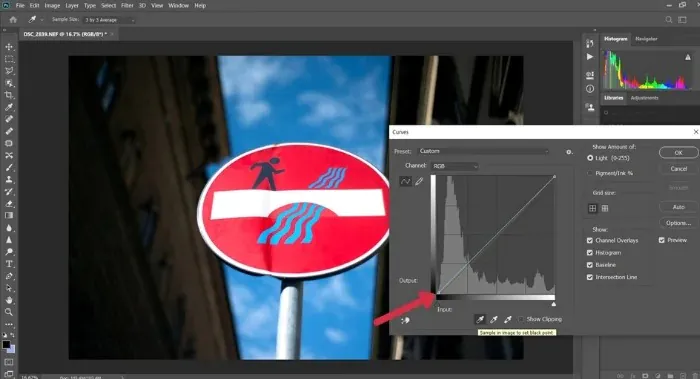
Curves adjustment: Curves allow precise control over an image’s tonal range and contrast. Use the curves tool to adjust the highlights, mid-tones, and shadows individually, enhancing the overall contrast and tonal balance.
Vibrance: The vibrance tool is handy for boosting the intensity of colors without oversaturating skin tones or already vibrant areas. Increase the vibrance slider to make colors pop while maintaining a natural appearance.
Exposure and contrast: Fine-tune the exposure and contrast of your image to ensure a balanced tonal range. Adjust the exposure to control overall brightness, and modify contrast to increase or decrease the distinction between light and dark areas.
Step 6: Apply Selective Color Adjustments
Selective color adjustments allow you to target specific elements within your image and modify their colors individually. Follow these steps to apply selective color adjustments effectively:
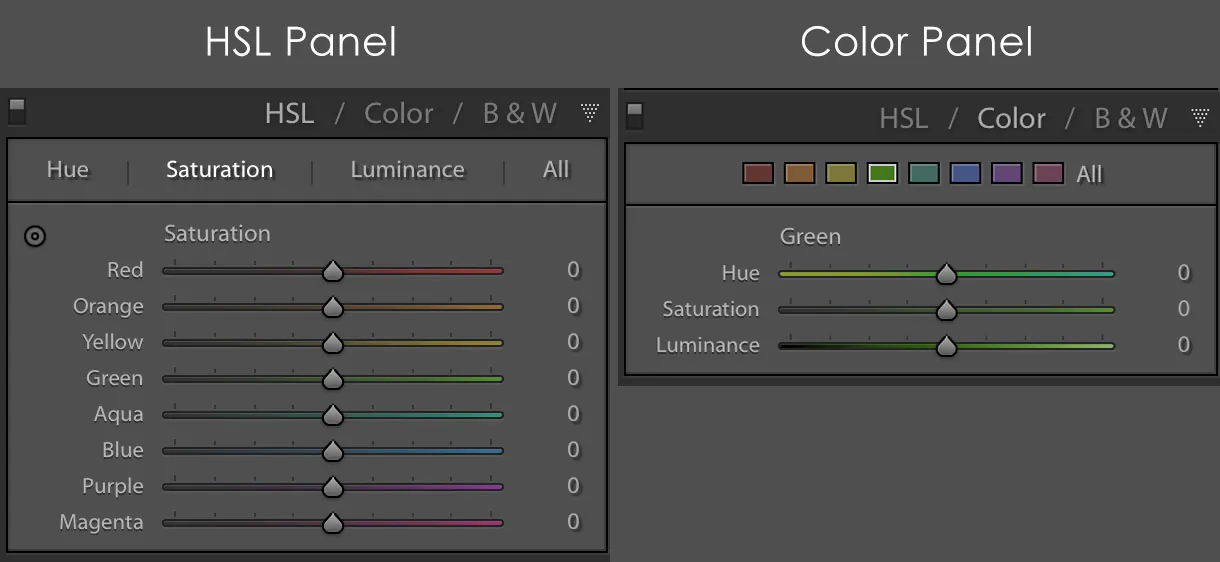
Select the target area: Use masks, selection tools, or adjustment brushes to isolate the area you want to adjust, like a specific object, a particular region, or even the entire image.
Adjust hue, saturation, and luminance: Once the target area is selected, manipulate the hue, saturation, and luminance of the chosen colors. Increase or decrease the hue to change the color, adjust the saturation to make the colors more or less vibrant, and modify the luminance to lighten or darken the selected colors.
Refine the selection: Use techniques such as feathering or refining edges to ensure smooth transitions between the adjusted area and the rest of the image. Also, explore different blending modes to achieve unique effects and color interactions.
Multiple adjustments and layering: You can apply selective color adjustments by using adjustment layers or duplicating the layers with different adjustments. That precisely controls each element’s color appearance.
Step 7: Explore Creative Color Grading
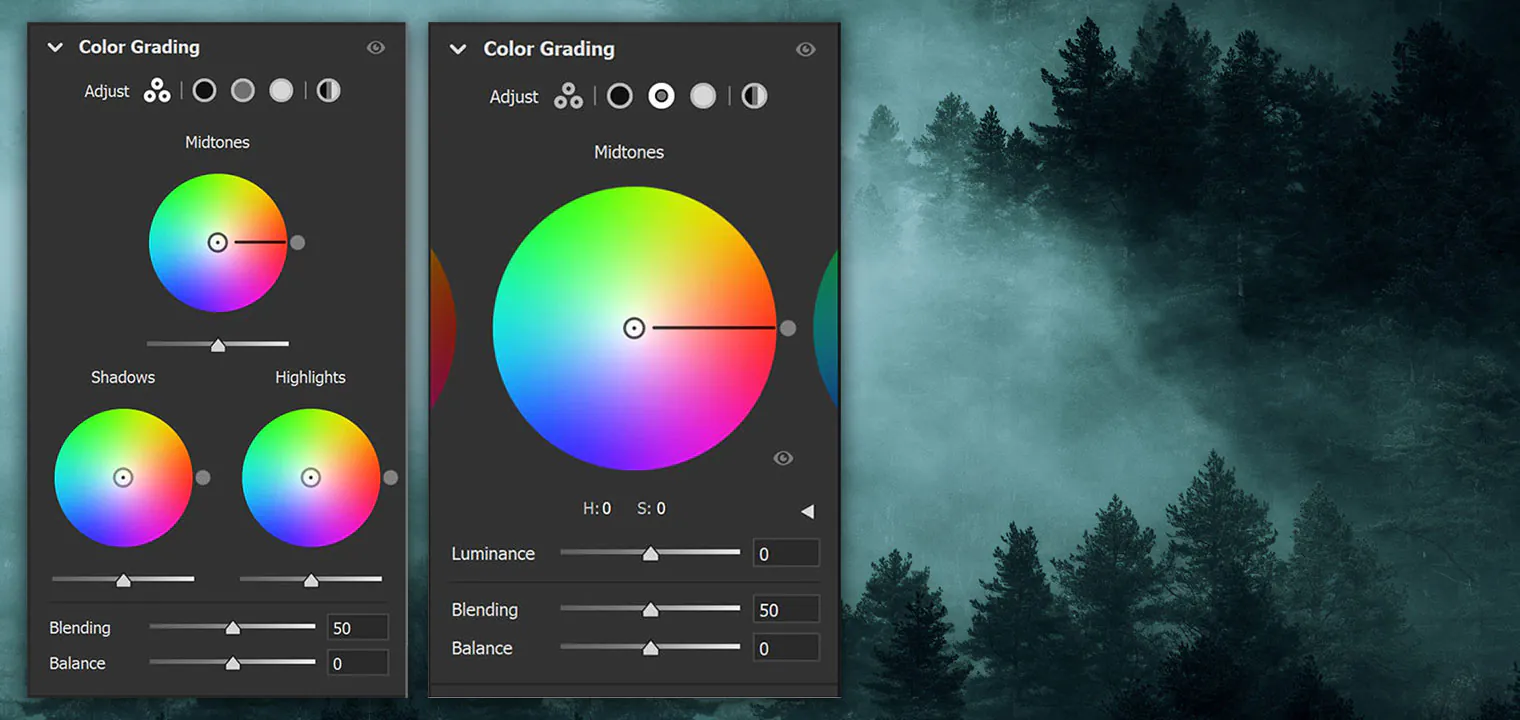
Color grading is an exciting process that allows you to establish a consistent visual style or mood across your images. Follow these steps to explore creative color grading:
Establish a reference image: Choose or create an image representing the desired mood or style you want to achieve.
Utilize presets or lookup tables (LUTs): Experiment with different presets or LUTs provided by editing software to find those that align with your reference image or desired style.
Adjust individual color channels: Fine-tune color tones of specific areas within the image using tools like color balance, curves, or selective color adjustments.
Split toning: Add different colors to highlights and shadows to create a unique and artistic look. Experiment with various color combinations.
Maintain consistency: Strive for a cohesive look across a series of images by considering factors like contrast, saturation, and overall color tones.
You can enhance your images with depth, emotion, and a distinct visual style through creative color grading, leaving a lasting impression.
Step 8: Export and Save
After fine-tuning your color edits and refining the details like opacity adjustment, blending modes, edges, textures, etc, you can now export and save your images.
Choose the appropriate file format based on your intended use, such as JPEG for web or TIFF for printing.
Set the desired resolution, considering the output requirements. Higher resolutions are ideal for printing, while lower resolutions work well for web or social media sharing.
Configure color profiles to maintain color accuracy. Use sRGB for web use or Adobe RGB for printing.
Save a high-quality copy of your edited image for future reference or further editing.
Add metadata and copyright information to protect your work and provide relevant details.
Conclusion:
Color editing covers many techniques that can correct almost all the color defects in your images and give them a harmoniously toned look. By learning the essential color editing techniques and adjustments, you can bring unconventional and unusual impressions to your pictures, making them more noticeable than ordinary images. Remember to achieve an equilibrium between attaining the intended visual effect and keeping that the modified image still seems natural and realistic when undertaking color editing. It is also vital to consider the purpose of the image that undergoes color editing, whether it is meant for print or digital display, as different mediums have distinct color profiles and needs.
