
How To Use Bezier Curves In Images
To escalate the vitality of images, bezier curves highlight the zones that include curves or structures such as bending paths. These curves are administered and created with a set of control points that determine the shape and appearance of these curves. A bezier curve smoothly manipulates and boosts the appearance of paths, structures, and curves within an image or design from the initial to the final control point. In image editing and computer graphics, this technique is valuable in raising the efficiency of digital drawing tools, giving the creator superior control over the contours present within an image or computer design. This mathematical foundation superbly refines an image’s essential components in a geometrically overpowering yet easy-to-use way. Moreover, the widespread application of bezier curves is growing above static images towards animations and motion graphics, making them an inevitable tool in digital aesthetics. This blog article will focus on the fundamental steps that can create exquisite images with the integration of bezier curves.
Step 1: Activating the Bezier Curve Tool
Open your photo editing program on your device and move to the suitable options for picture upload, like clicking the desktop symbol or getting to it through the start menu.
Following, import the picture you propose to work on. Continue to the “File” menu, select “Open,” and choose the picture file from your PC.
Get to know the toolbar interior of the software’s interface. Get to the symbol or option related to the Bezier curve highlight, frequently represented as a pen or curve sign.
Confirm that the Bezier tool is chosen inside the toolbar. That ensures you are all set to start making and manipulating Bezier curves in your photograph.
Per your software highlights, you can experiment with additional options or settings related to the Bezier tool, such as changing stroke properties or setting the bend type.
Step 2: Evaluating the Suitable Positions
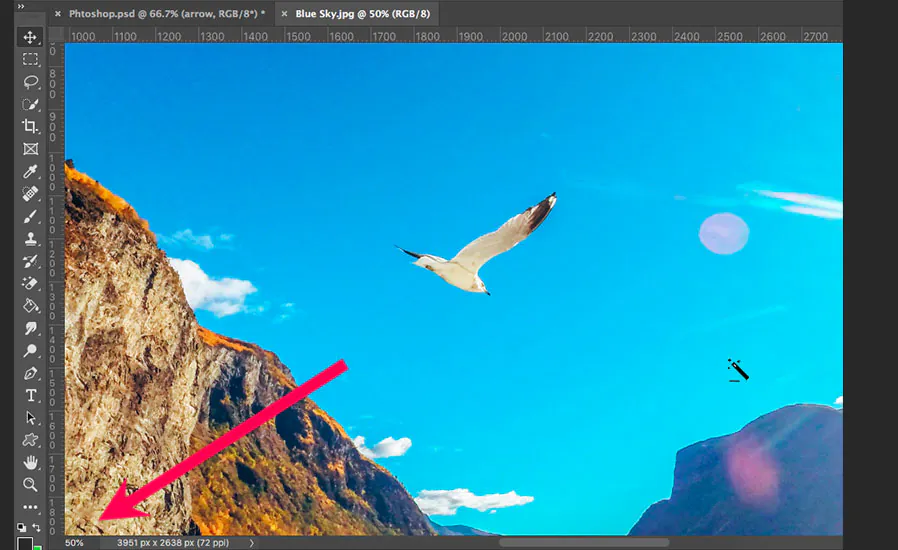
When the Bezier tool is active, consider zooming in for a closer see utilizing the zoom tool or shortcut keys.
This way, you can check more exact situations of control points, mainly when working on complex components.
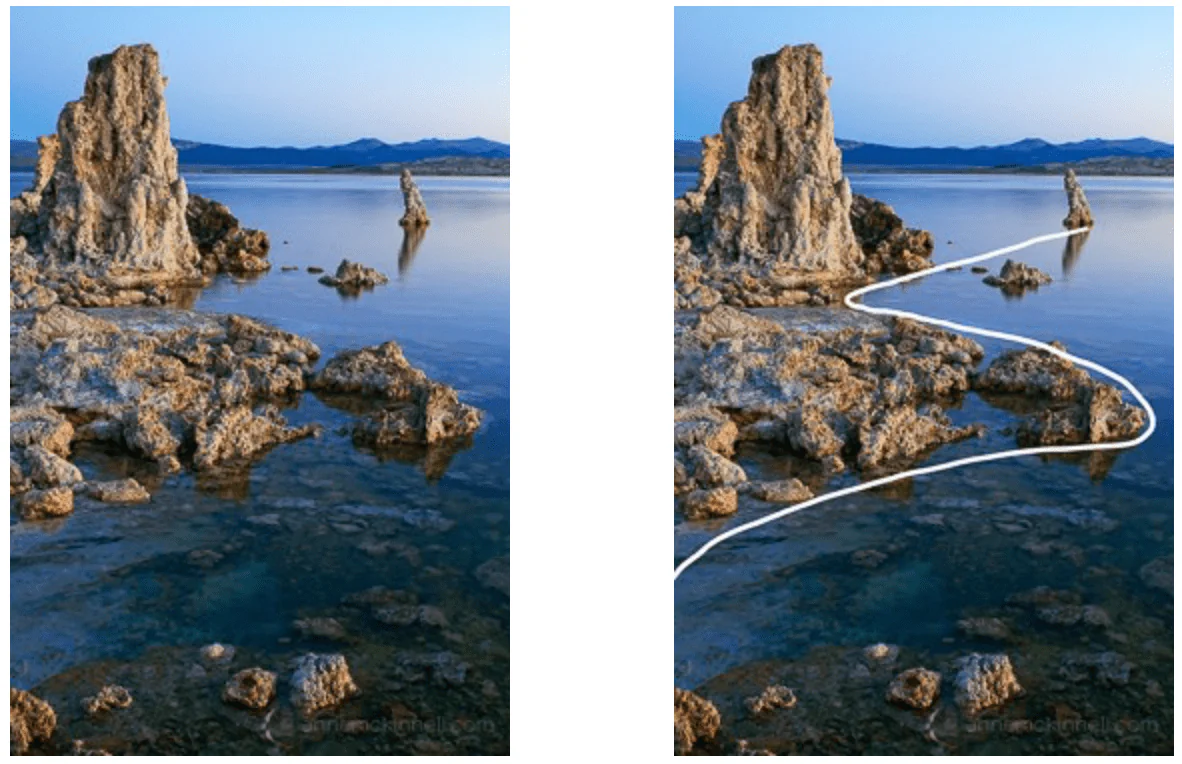
Put your cursor at the initial point on your photo where the Bezier curve will go. Click to put the first control point, starting the curve.
Advance the cursor to the endpoint where the curve ought to end. Tap at this area, affecting the initial line fragment by control handles.
Examine the line forming and begin setting the curve. Drag the control handles to alter the shape as required.
If your plan requires more complexity, consider including extra control points along the crucial path. Tap at vital points and alter their handles as needed.
Continue to optimize the curve by altering control handles and including or moving control points until the required shape is accomplished.
Finalize the curve by clicking at the final endpoint.
Step 3: Working on Control Points
Take a minute to assess the starting Bezier curve and its arrangement with your design. Distinguish zones that will require advance alteration.
Ponder zooming in further for complex designs or small specifications to bring exact control point arrangement.
Tap on individual control points along the curve to enact them for alteration. This step schedules you for distilling particular segments of the curve.
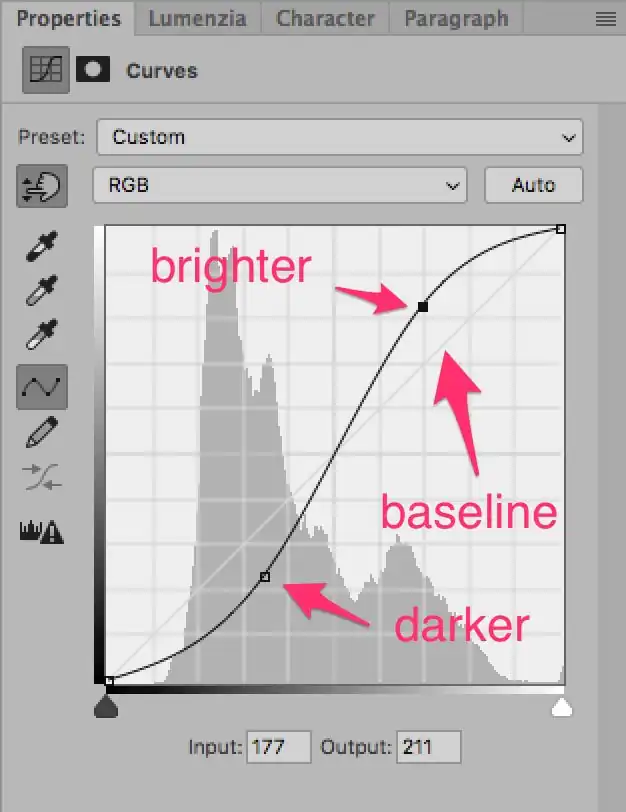
Adjust the control handles for each chosen point to refine the curve’s shape. Try using distinctive handle positions to attain the required curvature.
Give concern to the moves between control points. Smooth out any unexpected changes in curvature by tuning the handles appropriately.
Set up a steady stream all through the curve. Concentrate on a cohesive design by altering control points to comply with the general style.
Culminate the curve by including or eliminating control points as required. That gives extra adaptability in forming the curve to coordinate your inventive vision.
Step 4: Maximizing the Curves Intricacy
Analyze the current complexity of your Bezier curve. Evaluate whether extra control points are required for complex details or if rearrangements are mandated for a tidied design.
Determine particular zones along the curve where extra control points seem to improve detail. Deliberately put new points to refine areas that require more complexity.
If the curve is excessively complex, consider dropping excessive control points. Streamline the curve to preserve a harmonious and outwardly engaging design.
Keep a balanced curvature throughout the whole path. Alter control handles and recently included points to adjust the flow of the curve.
Test with distinctive arrangements of control points to discover the ideal balance between complexity and simplicity. Try combinations to decide the foremost outwardly satisfying result.
On the off chance that your design incorporates numerous curves, keep consistency in specifying across all of them.
Step back and audit how integrating extra complexity impacts the general plan. Confirm that each alteration contributes definitely to the picture.
Step 5: Including Stroke and Fill Techniques
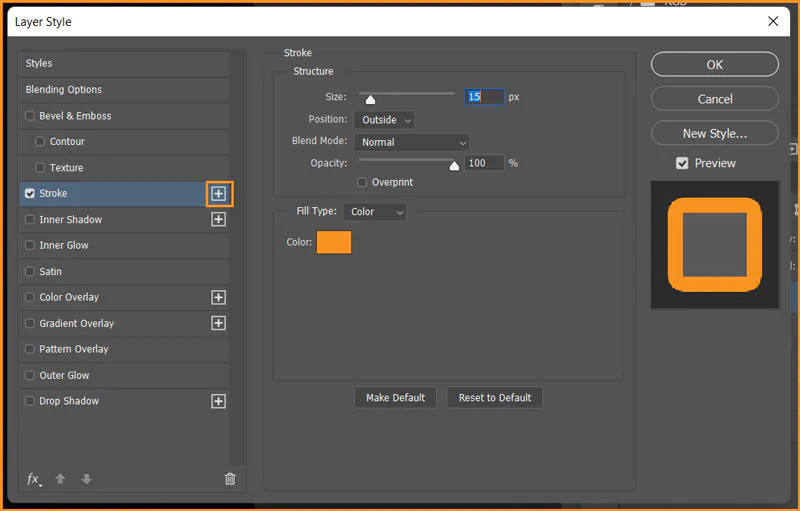
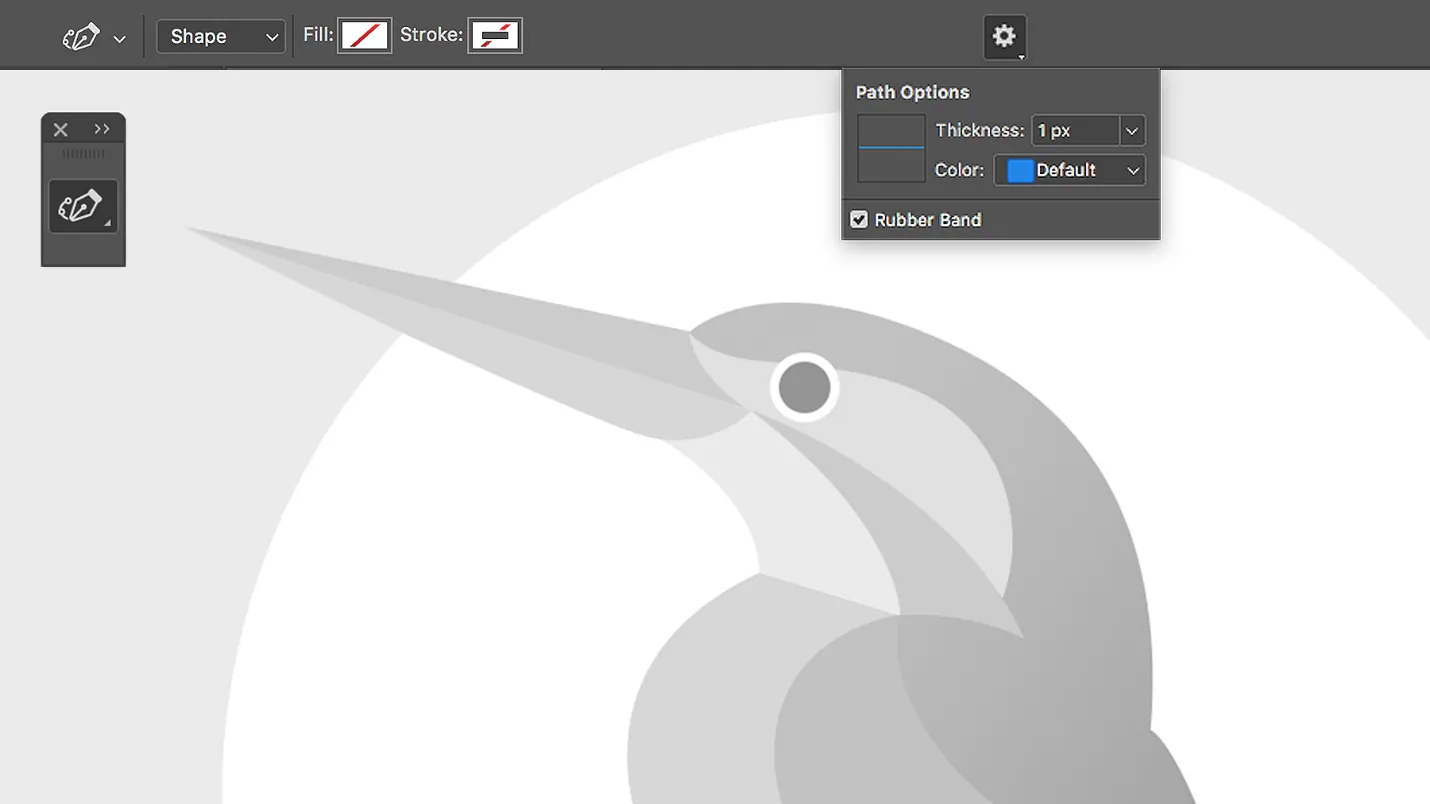
Inspect your software’s toolbar or menu to find choices related to stroke and fill settings for your Bezier curve.
Reconfirm that the Bezier curve is chosen before continuing with the stroke and fill setting so that your changes work particularly to the aimed curve.
Alter the thickness of the curve’s stroke, concurring with your ideal inclinations. Thicker strokes can include accentuation, whereas more slender strokes make a more fragile appearance.
Some programs enable you to select diverse stroke styles, such as dashed or dotted lines. Test with these choices to include elaborate components to your bend.
If your layout requires a filled shape, select a fill color for the insides of the Bezier curve. This step is cherished when making closed shapes with the Bezier tool.
See into the stroke and fill’s transparency settings based on your plan. Altering transparency can make unpretentious impacts and mix the curve consistently into the photo.
After you finish the stroke and fill settings, save your work or apply the changes to the image.
Step 6: Maximizing the Number of Curves
Assess your project and recognize regions where different Bezier curves might upgrade complexity and detail.
Check that the Bezier tool is chosen in your software’s toolbar, geared up for creating extra curves.
Recognize key starting points for new curves. These points may connect with existing bends or present completely new design components.
Press at each identified starting point to put beginning control points for the new Bezier curves.
Adjust the control handles for each new bend to set up the specified curvature. Make smooth moves between bends for a cohesive plan.
Pay consideration to the connection points between numerous curves. Alter control points and handles to preserve a consistent stream between individual curves.
If your plan calls for overlapping curves, deliberately position control points to attain the required visual effect.
Step back and audit how incorporating different Bezier curves contributes to the composition.
Step 7: Checking Overall Consistency
Audit each Bezier curve independently to verify that it sets with your design idea. Examine the particular details and alterations made to each bend.
Confirm that the stroke thickness, fill options, and other elaborate components are steady over each Bezier curve in your composition.
Look at the ranges where diverse curves meet or overlap. Assure smooth moves by altering control points and handles at these essential points.
If you’ve connected colors or transparency settings to your curves, affirm that these components are steady throughout the composition. This step keeps up a cohesive visual appearance.
If any specific Bezier curve stands out or requires advanced refinement, go back and alter individual bends to upgrade general concordance.
Zoom or see your image at full size to see how all Bezier curves link with the total design.
Consider making global alterations that influence all Bezier curves in one go. That might incorporate changes to stroke properties, general size, or other shared characteristics.
Execute a last comprehensive review of the complete Bezier curve composition. Guarantee that each bend contributes beneficially to the overall image and adjusts with your inventive destinations.
Step 8: The Final Auditing
Conclude your editing and composing process with any last-minute alterations to individual control points, handles, or, in general, bends to guarantee they comply with your inventive notion.
Audit the Bezier curves for symmetry, altering control points if essential for an adjusted and concordant appearance.
Affirm that the proportions and scaling of the Bezier curves are in concordance with the rest of the picture, making alterations as required.
Focus on the edges of the Bezier curves, guaranteeing smooth transitions where they meet other components within the photograph.
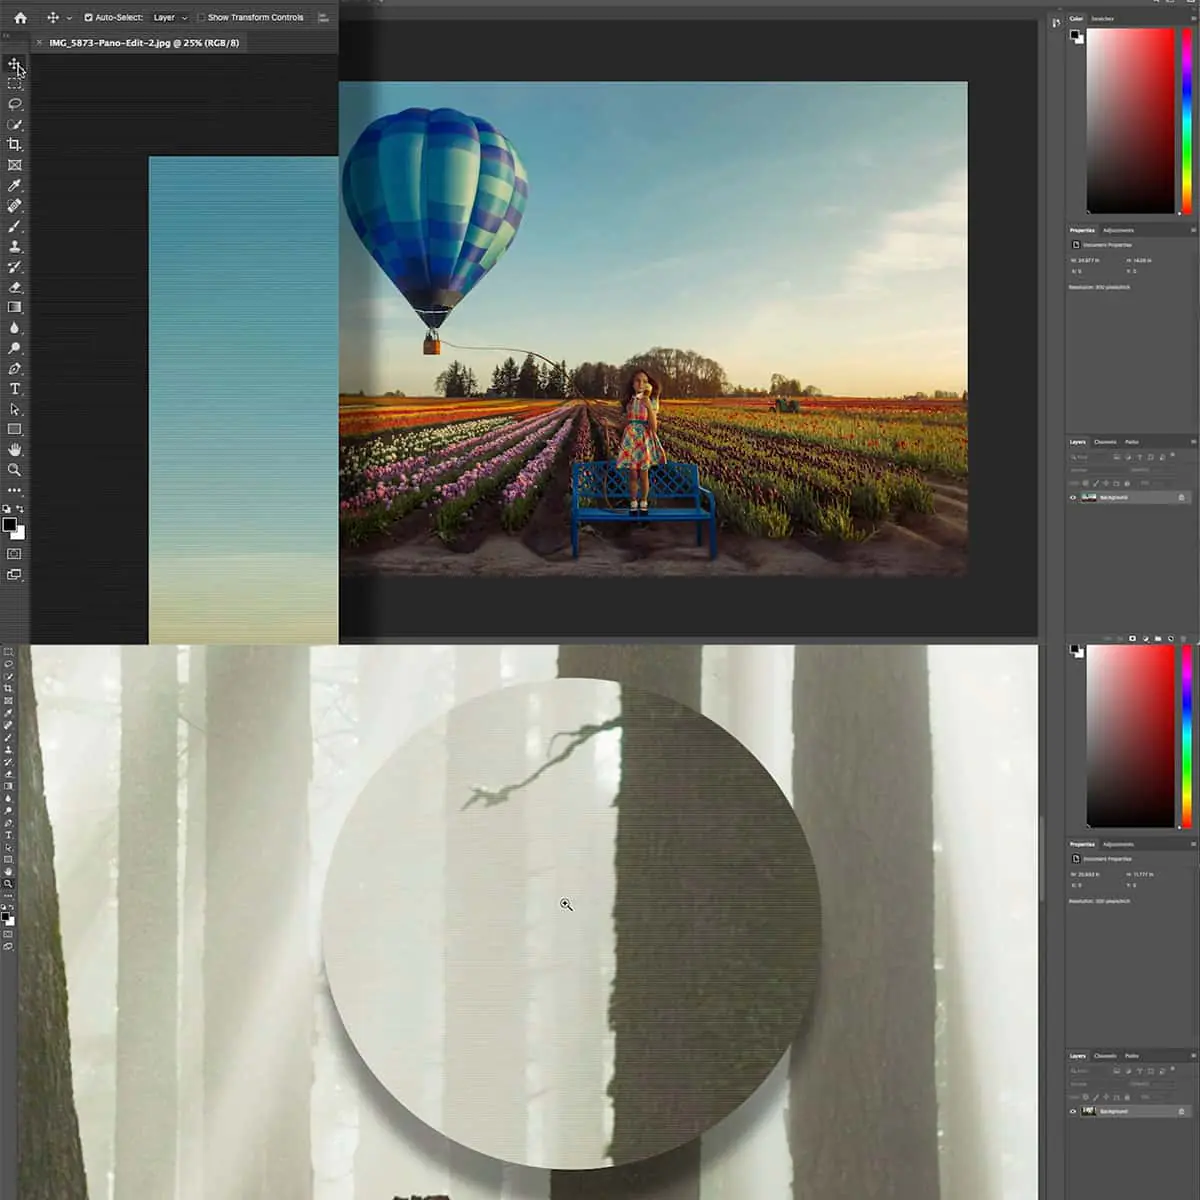
Utilize optimization highlights in your software to enrich general performance, such as flattening layers or blending shapes.
Play with different backgrounds to evaluate how the Bezier curves coordinate with different settings.
Ensuring you are fulfilled with the refined Bezier bends and general design, saving your work, and securing your progress for future refinements.
Conclusion
In short, working with bezier curves is a simple task; nonetheless, you need to be cautious about details and overall design precision. You can follow the steps and techniques addressed in the above session to smoothly traverse the elaborateness of bezier curves and their accurate inclusion into your images. Though it is essential to contemplate whether you create a few simple curves or numerous, your consistency and consonance carry the quality and integrity of the final design. Additionally, before sharing or exhibiting your ultimate composition, you should consider feedback; refreshing your work with a fresh opinion can lead to more than expected outcomes.
