How To Create Kinetic Art In Adobe After Effects
Characterized by art in motion, kinetic art, a 20th-century art movement, paved the way for operating the notion of time as a vital component in artwork. At that time, the artwork specific to kinetic art included moveable or rotational elements. Per its modern definition, any artwork that incorporates motion or necessitates viewer movement to experience the intended effect fully is considered kinetic art. It relates to either the motion that is actually present in visual art or the guise of motion offered by any of the tangibly static compositions. With the growing recognition of kinetic art styles in contemporary times, this approach is becoming feasible for image modification and improvement, just like many other visual art disciplines. Techniques like texture enhancement, scaling options, and transitioning tools, which are essential features of advanced image editing applications, are employed to elaborate images with vibrant kinetic appearances. This blog article includes the steps and inventive strategies for including kinetic art effects in an image.
Step 1: Get to know your workspace

Start Adobe After Effects on your computer by finding the application icon and double-clicking to start the program.
Upon opening, you will be welcomed by the After Effects workspace, which is comprised of panels like Project, Composition, and Timeline. Get yourself acquainted with these features for productive navigation.
If you don’t have After Effects downloaded, you can download and install it from the authorized Adobe site. Obey the installation instructions given in the setup process.
Confirm that your PC meets the framework necessities for After Effects. This information is accessible on the Adobe site and guarantees optimal performance and efficiency.
After Effects is effectively set up, you’re prepared to begin making kinetic art by bringing in your photo and utilizing the different tools and highlights inside the application.
Step 2: Start up a new composition

To start your kinetic art project, move to the menu and select Composition > New Composition. This activity prompts a dialog box where you’ll be able to characterize the composition settings.
Within the Composition Settings dialog, tune the parameters such as the width, height, duration, and frame rate per your project prerequisites. Naming your composition is also advisable.
Check that the backdrop color and other settings comply with your creative idea. You can alter these settings afterward if required.
Tap “OK” to affirm and make your new composition. The After Effects workspace will presently show your composition within the Timeline and Composition panels.
The new composition is the canvas for your kinetic art. It builds up the dimensions and duration inside which you’ll work. Feel free to return to the composition settings anytime through the Composition menu if alterations are essential.
After creating your composition, you’re now prepared to continue to the following steps.
Step 3: Integrate the image into the new composition
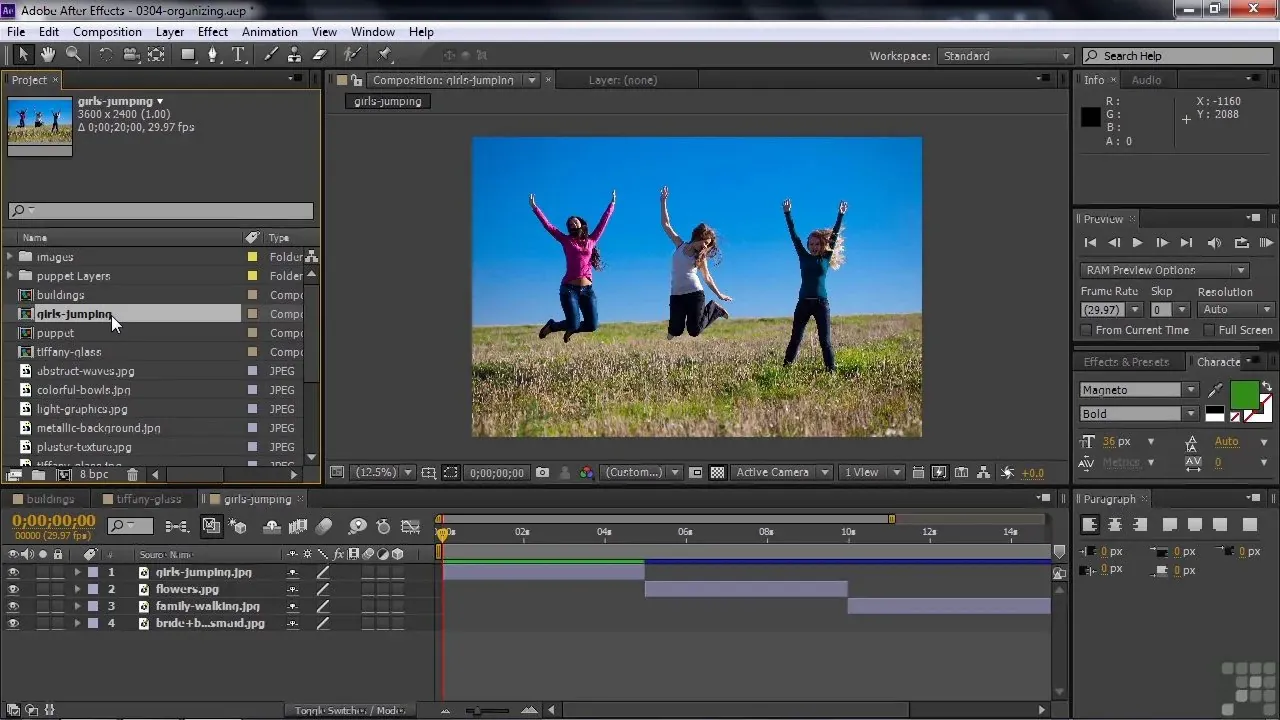
Once the new composition is in action, find your image record within the Project panel.
Draw your image from the Project panel to the Timeline board. Put it onto the timeline to set it inside your composition.
The image layer will show up within the timeline, and you’ll be able to see its duration corresponding to the composition length.
You can trim the image layer’s duration by pulling its endpoints within the timeline and adapting it to fit your preferred animation duration.
Get the know-how of the layer controls within the timeline, such as the eyeball icon visibility and the stopwatch symbol for including keyframes to animate properties. These controls are fundamental to the animation process.
At this point, your photo file is incorporated into the composition, all set for the introduction of kinetic components within the consequent steps.
Step 4: Set up the keyframes
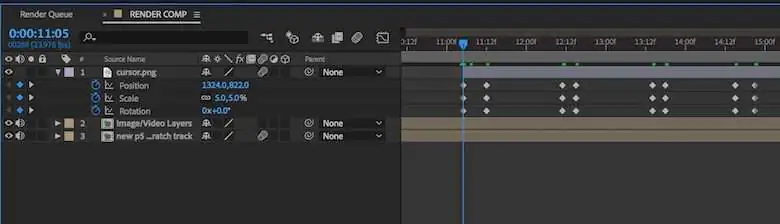
Click on the image layer within the Timeline panel to activate it for editing or modifications.
Use the Transform settings like Position, Scale, Rotation, and Opacity to present motion. Confirm that the playhead is at the beginning point of the timeline.
Prepare your initial keyframes for the chosen properties by clicking the stopwatch icon found near each property. This activity marks the starting state of the image.
Take the playhead to a distinctive point within the timeline, according to when you need the motion to alter. Alter the properties accordingly, setting new keyframes. After Effects can automatically make the animation across the keyframes.
Redo this process as required to form a dynamic sequence. For example, in case you need the image to move across the screen, set keyframes for the Position property at diverse focuses in time.
Play with different combinations of keyframes on distinctive properties to attain the required kinetic effect. You can touch up and alter the timing later for a smoother movement.
Step 5: Experiment with creative effects
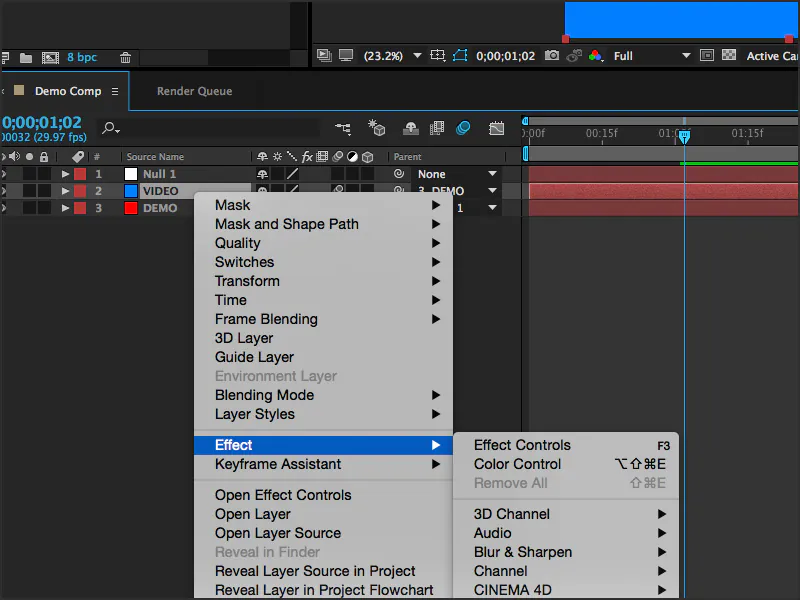
Find the Effects & Presets panel on the right side of the After Effects interface. This panel offers an array of effects that can upgrade your kinetic art’s motion and visual offer.
Click on the image layer within the timeline, and after that, browse the Effects & Presets panel for impacts that suit your inventive vision. For instance, consider utilizing blur effects, glows, or distortions to include gripping flow.
Bring the chosen effect onto your picture layer within the timeline. This activity integrates the effect, and you can customize its parameters by tweaking settings within the Effect Controls panel.
Try different effects to see how they are associated with the overall kinetic atmosphere of your composition. Be cautious of not overloading the image with effects for a balanced and visually satisfying result.
The Effects & Presets panel may be a productive resource, and by prudently applying effects, you can increase the effect of your kinetic art, making it more exciting and energetic.
Step 6: Tweak the timing

For exact control over the timing and facilitating your animations, utilize the Graph Editor.
Select the layer you need to alter within the Timeline panel and press the U key to uncover the keyframes.
Right-click on a keyframe and select “Keyframe Assistant” to get to alternatives like “Easy Ease In” or “Easy Ease Out.” These alternatives smooth the movement and make it more natural.
Open the Graph Editor by tabing on the Graph Editor button within the timeline or selecting Window > Graph Editor.
Within the Graph Editor, you’ll control the speed and acceleration of your animations by modifying the curves.
Try using distinctive curve shapes to attain the required pace for your kinetic art. A smoother move between keyframes usually emerges as a more proficient and engaging animation.
Step 7: Evaluate the ultimate artwork
To finalize your kinetic art, it’s pivotal to see the composition to verify that everything looks as expected. Press the spacebar to start a playback inside the After Effects interface.
Audit the animation and make any fundamental alterations. If you find any issues or regions for enhancement, go back to the individual steps to polish your composition.
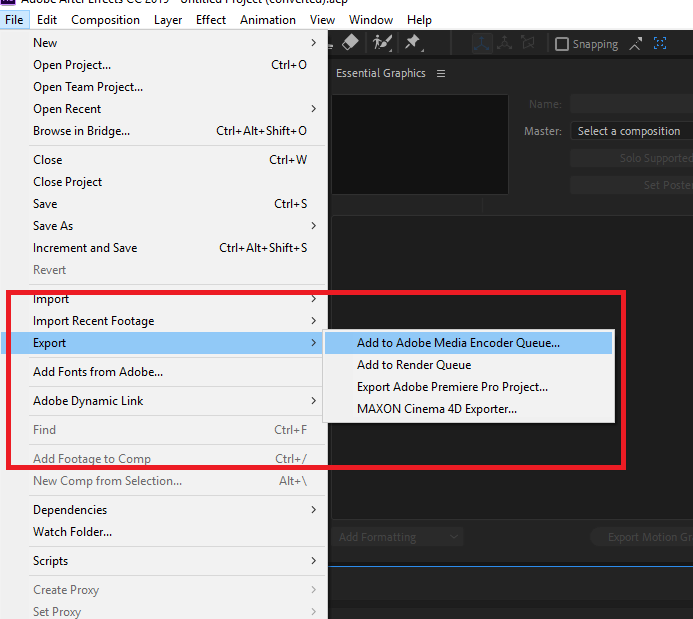
Once you are pleased with the result, it’s time to send out your kinetic art. Go to File > Export > Add to Adobe Media Encoder Queue. That opens Adobe Media Encoder, where you can select the export options.
In Adobe Media Encoder, select your exported file’s specified format and settings, like a standard video format, or customize the settings based on your discretions.
Tap the “Start Queue” button to start the exporting. After Effects will render your composition, and the exported file will be saved to your indicated location.
Your kinetic art is presently ready to be shared or coordinated into other projects.
This last step wraps up the process, which empowers you to grandstand your energetic and outwardly engaging kinetic art to your viewers.
Conclusion
To conclude, kinetic art transforms static shots into thriving and in-action compositions that can stir dull emotions, making viewers more interested than in still photographs. It is integrateable into various kinds of compositions, and even within photography, it aesthetically conforms to multiple genres. Furthermore, it encapsulates different visual art techniques like optical illusions, surrealism, and anamorphism, thus verifying itself as a multifarious and immersive approach covering significant and broad image enhancement aspects. The illusion of motion ranging from slow to rapid effects can vividly boost the outcomes of the kinetic art included in the compositions.
