How To Make Anaglyph Images in GIMP
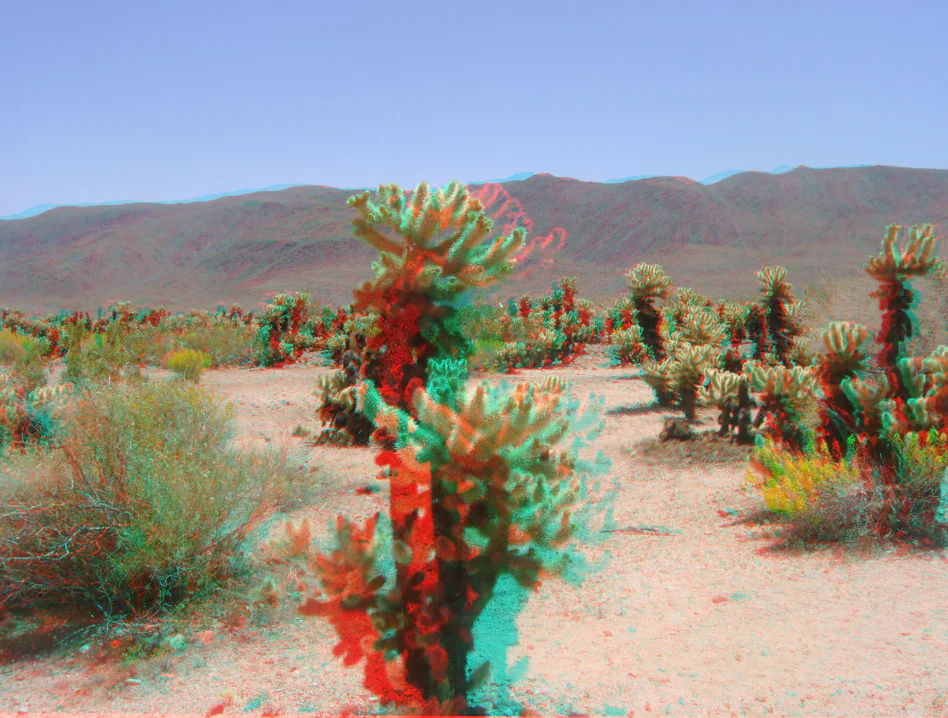
The stereoscopic anaglyph images are made by incorporating two slightly shifted photos on top of each other. These images have a reminiscent charm of early 3D photographs and vintage 3d movies. They are also helpful for educational purposes while demonstrating students’ stereoscopic photography theories with the concept of depth and perception. Without using costly 3d equipment, you can experience a 3d effect just by using cyan-red glasses to see anaglyph images and enjoy yourself. With red and cyan color fringing anaglyph technology presents a retro 3D imagery that shows an illusion of depth, pleasing to both old and new audiences. To make anaglyph images, you need suitable image editing software. You can choose Gimp, which has a user-friendly interface and tools that help you in a smooth process of making anaglyph images. You can get creative with alternative 3D approaches like red-cyan, red-green, or red-blue anaglyphs. Furthermore, considering open-source software Gimp is available to anyone to explore enthralling anaglyph graphics.
Prepare Your Images:
Preparing your images for creating an anaglyph requires careful consideration to ensure a successful 3D effect. Here are the key points to keep in mind:
Capture Two Perspectives: Take two images of the same subject from slightly different angles to simulate the left and right eye views.
Match Composition: Ensure both images have similar framing and alignment to avoid visual discrepancies when combined.
Adjust Exposure: Make sure the exposure settings are consistent in both images to prevent variations in brightness and contrast.
Resolution and Quality: Use high-resolution images with good clarity to maintain the quality of the final anaglyph.
Consider 3D Depth: Choose a subject with depth or dimensionality to enhance the 3D effect.
Image Format: Use standard image formats like JPEG or PNG for compatibility with image editing software.
Following these points can create a solid foundation for generating impressive anaglyph images.
Open GIMP and Load Images:
When opening GIMP and loading images for creating an anaglyph, follow these steps:
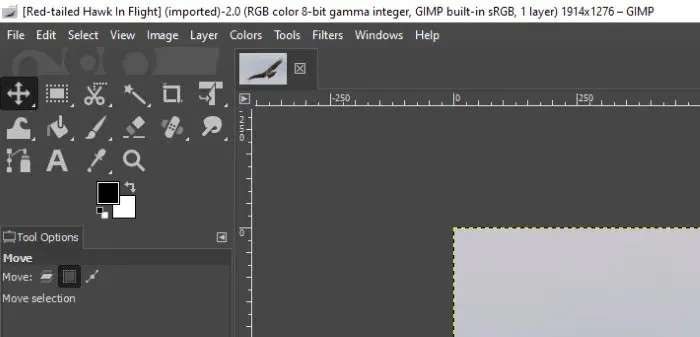
Start the GIMP application on your computer.
Go to the “File” menu and select “Open as Layers” from the dropdown. Navigate to the folder where you saved the two images and pick them.
Arrange the two images in the workspace to ensure they are adequately aligned. Use the “Move” tool (shortcut: M) to adjust their positions, matching common features.
Organize the layers in the Layers panel so that the left eye image is on top (the active layer).
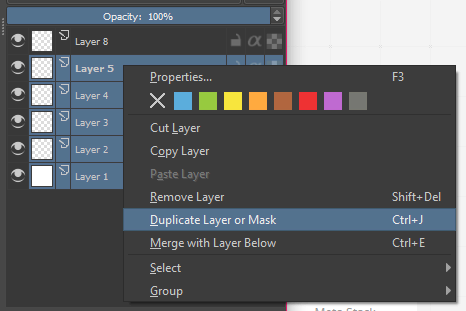
Right-click on the top layer and select “Duplicate Layer.” That creates a copy of the right-eye image.
Proceed with the following steps to separate and recompose the color channels to generate the anaglyph effect.
Align the Images:
Aligning the images ensures that corresponding features in the left and right eye images are in the correct positions, resulting in a seamless 3D effect. Here are the points to align the images:
Select the “Move” tool (shortcut: M) from the GIMP toolbox.
Identify prominent features in both images that can be used as reference points for alignment.
Zoom in on the images to better view the details for precise alignment.
Click and drag the top image (right eye) to align it with the bottom image (left eye) using the reference points.
Ensure there is no visible gap or overlap between the two images.
Temporarily reduce the top layer’s opacity to see through it, helping with accurate alignment.
Create Duplicate Layers:
Creating duplicate layers is critical to work independently with the left and right eye images before combining them for the 3D effect. Here are the steps to create duplicate layers:
Click on the top layer in the Layers panel, representing the right-eye image.
Right-click on the top layer and choose “Duplicate Layer” from the context menu.
After duplicating, you have two identical layers, one for each eye view.
The duplicate layers ensure the original left and right eye images remain untouched for future adjustments or comparisons.
With the duplicate layers in place, you can separate and recompose the color channels to achieve the anaglyph effect for 3D viewing.
Separate Color Channels:
After creating duplicate layers for the left and right eye images in GIMP, the next step is to separate the color channels of the right eye image. Anaglyph images use specific color channels to create the 3D effect. Here’s how to separate the color channels:
Select the Top Layer: Click on the top layer in the Layers panel, representing the right-eye image.
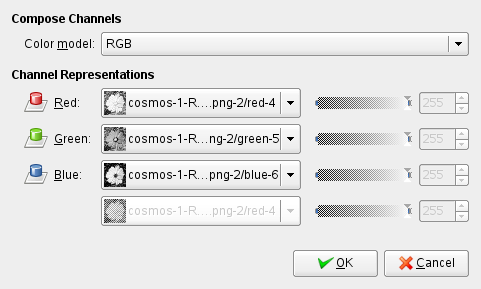
Separate Color Channels: Go to the “Colors” menu and choose “Components” and then “Decompose.”
Decompose Settings: In the pop-up window, select “RGB” and click “OK.” This action separates the right eye image into red, green, and blue channels.
Recompose the Image: The next step involves recomposing the right eye image, combining the red channel with the left eye image to create the final anaglyph effect.
Recompose the Right Eye Image:
After separating the color channels of the right eye image in GIMP, the next step is to recompose the image to create the anaglyph effect. Here’s how to do it:
In the Layers panel, click on the top layer (right-eye image) to select it.
Go to the “Colors” menu and choose “Components,” and then “Recompose.”
Select the red channel from the right eye image in the pop-up window and click “OK.”
GIMP will now merge the red channel from the right eye image with the green and blue channels from the left eye image, combining them to create the anaglyph effect.
Depending on the colors of your original images, you may need to fine-tune the colors to achieve the best 3D effect.
After recomposing the right eye image, you will have the final anaglyph image, which can be saved and viewed using red-cyan 3D glasses.
Merge the Layers:
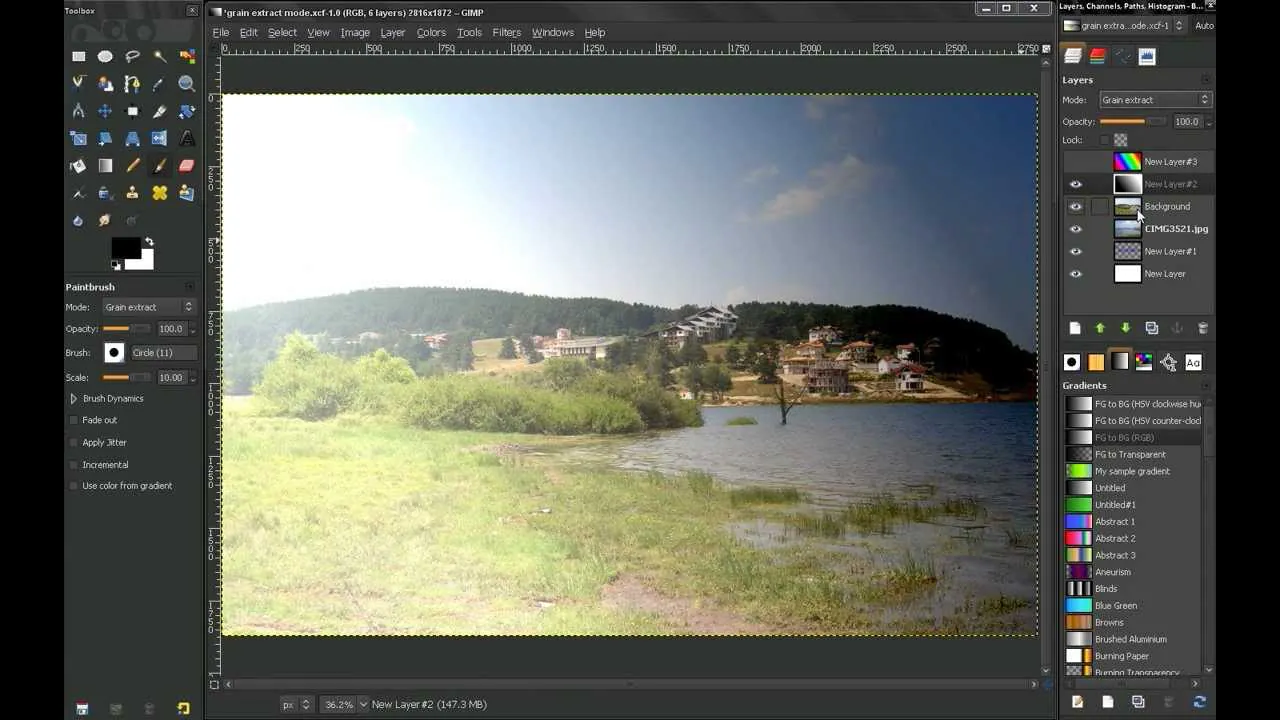
After recomposing the right eye image and preparing both photos for the anaglyph effect in GIMP, the next step is to merge the layers to create the final anaglyph image. Here’s how to do it:
Click on the top layer (right-eye image) in the Layers panel to select it.
After selecting the right eye image layer, change its layer mode from “Normal” to “Grain Merge.”
The “Grain Merge” mode combines the two layers, effectively merging the red channel from the right eye image with the green and blue channels from the left eye image, creating the anaglyph effect.
Check the merged image for any color discrepancies or alignment issues. Make adjustments using GIMP tools like color balance, brightness contrast, or curves.
Once satisfied with the anaglyph, you can go for final optimizations.
Adjust Colors:
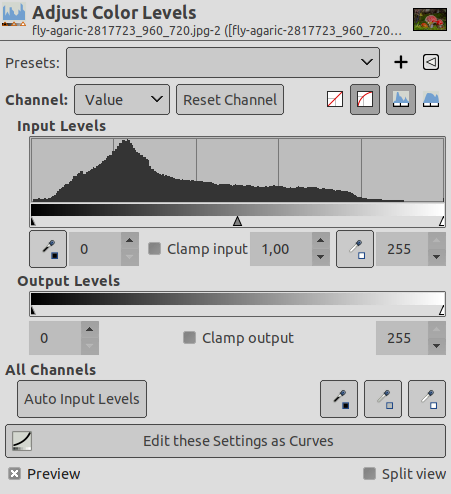
After merging the layers and creating the anaglyph image in GIMP, you may need to adjust the colors to enhance the 3D effect and improve overall visual quality. Here’s how to adjust colors in the anaglyph:
Select the Merged Layer: Make sure the merged layer (anaglyph image) is selected in the Layers panel.
Use Color Adjustment Tools: GIMP offers various color adjustment tools to fine-tune the colors. These include “Colors,” “Brightness-Contrast,” “Curves,” “Levels,” and more.
Experiment and Observe: Experiment with different adjustments to find the best balance of colors. Pay attention to how changes affect the overall 3D effect and image quality.
Avoid Extreme Changes: Avoid over-saturate colors or extreme adjustments, as they can negatively impact the final anaglyph.
Save the Final Image: Once satisfied with the adjustments, save the anaglyph image in a standard format like JPEG or PNG.
Adjusting the colors allows you to optimize the anaglyph image for the best possible 3D viewing experience.
Save the Anaglyph Image:
After creating and adjusting the anaglyph image in GIMP, it’s time to save the final 3D image for viewing with red-cyan 3D glasses or sharing with others.
Ensure that the merged anaglyph layer is selected as the active layer.
Crop or resize before saving the image to remove unnecessary borders or adjust the dimensions.
From the GIMP menu, choose “File” and then “Export As.”
Select a common image format like JPEG or PNG from the format options.
Enter a file name for the anaglyph image and choose the folder where you want to save it.
Finally, click the “Export” button and save the anaglyph image.
The anaglyph image is now ready for use. To view it in 3D, use red-cyan 3D glasses, allowing you to experience the depth and immersion of the final result.
View the Anaglyph Image:

To view the anaglyph image you created in GIMP:
Wear the red-cyan 3D glasses with the red lens over your left eye and the cyan lens over your right eye.
Open the saved anaglyph image in any image viewer or photo software that supports the chosen file format (JPEG or PNG).
Look at the anaglyph image on your screen while keeping both eyes open.
As you focus on the image, your brain will process the offset colors through the 3D glasses, creating the illusion of depth. Objects in the image will appear to pop out, giving a sense of three-dimensionality.
Enjoy the 3D experience of your anaglyph image with the help of the red-cyan 3D glasses!
Conclusion
In conclusion, the charming appeal of anaglyph images is undeniable because of their ease of accessibility; with just a pair of cyan-red glasses, you can immerse yourself in a 3D world. Other than entertainment, these images are significant for scientific visualization, architecture, and medical modeling. However, their most crucial use is learning stereoscopic with an illustration in education. Anaglyph images are an exciting adventure with excellent editing software like Gimp, which can accurately align offset images to create eye-catching anaglyphs.
