How To Create A Vortex Effect In An Image
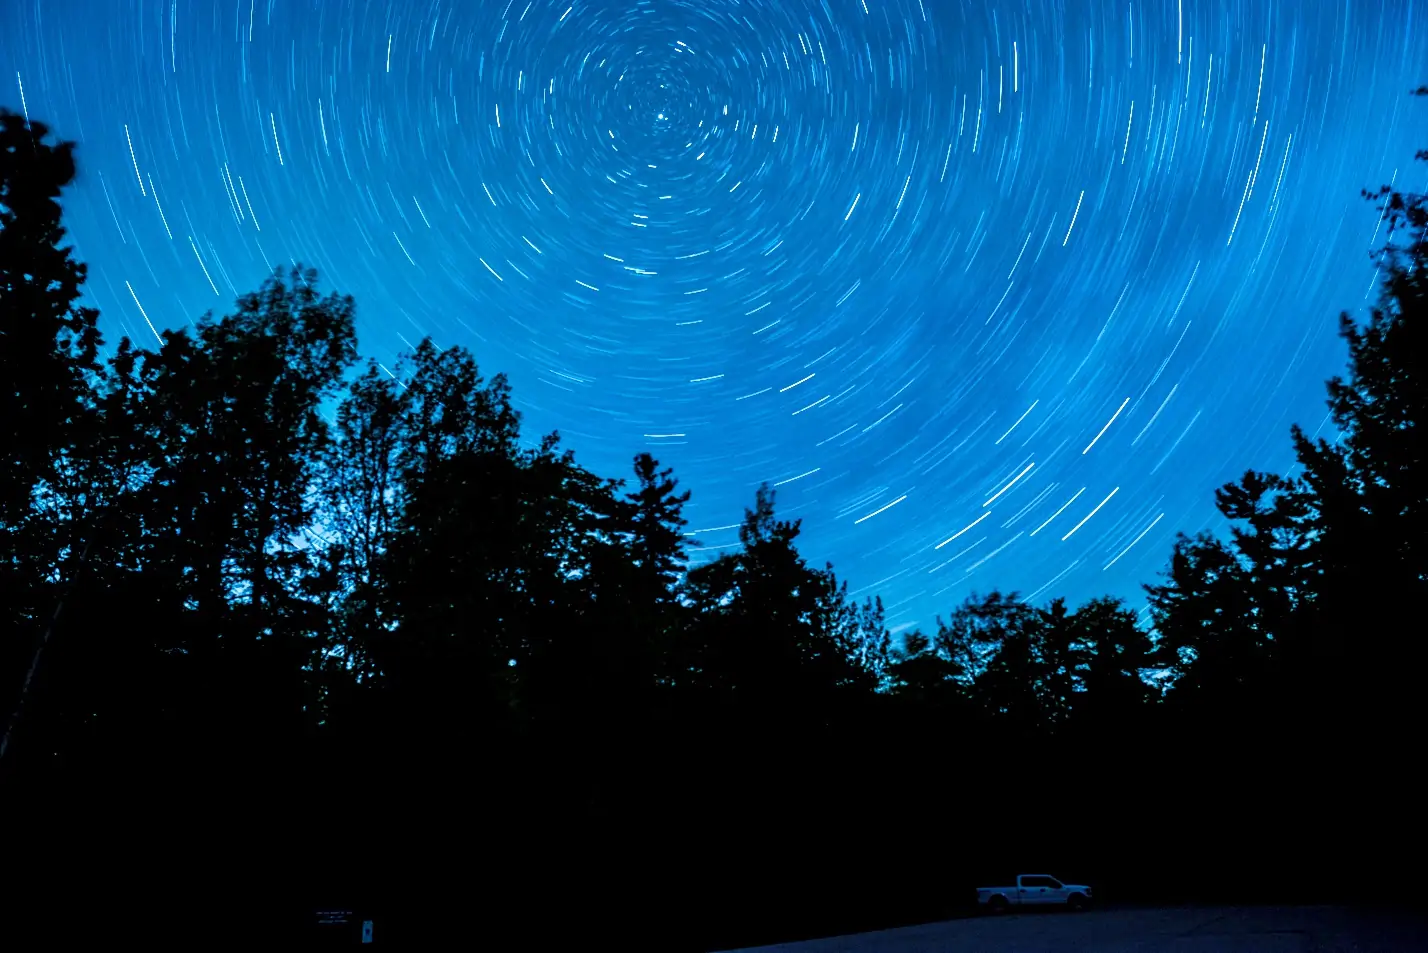
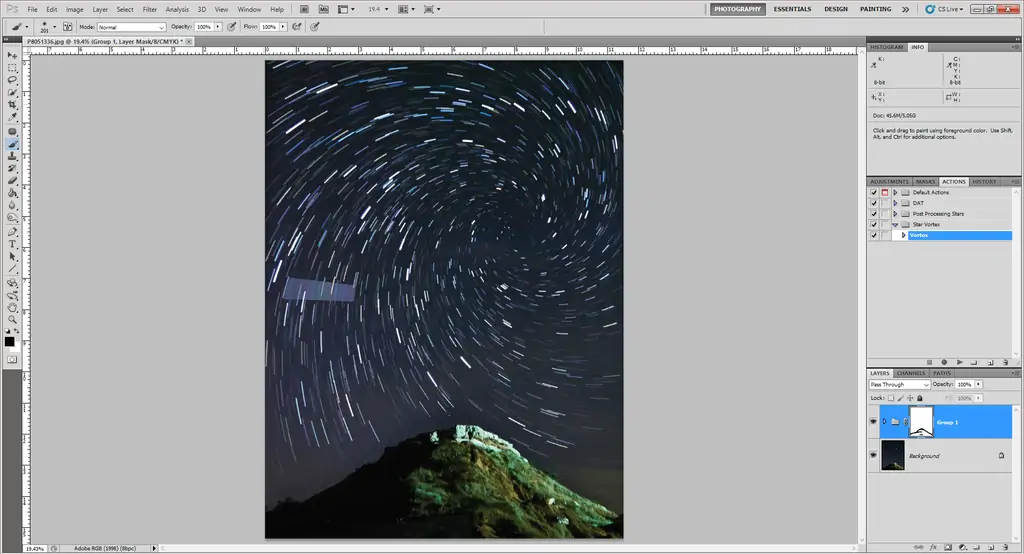
Vortex patterns depict swirling or twisting designs assembled by the stir of elements within the image framing. Vortex phenomena can also be witnessed naturally, such as when capturing images of swirling clouds or flowing waters. Also, phenomenal vortex effects can be deliberately created via specific camera movement or editing approaches. Vortexes implant liveliness and significance to your photographs by arousing a feeling of activity, depth, and stir. The engaging swirling patterns within a vortex inherently attract the viewer’s gaze toward the center of the whirlpool. Using various image editing techniques, you can edit your images and transform them into vortex effects, emphasizing a focus on distinctive zones of the shot. Eminent strategies involve focal point selection, using distortion tools, using layers and layer masks, and, at last, blending for smoother integration of whirls into the chosen image. The following blog will discuss how to use these strategies to create a vortex effect in an image that gives the appearance of a natural swirl observed in a starry and cloudy sky.
Step 1: Selecting A Photograph
Selecting the proper photograph is pivotal for making a compelling vortex effect. Begin by choosing a photo with components that best accommodate whirling designs.
Look for images with energetic compositions, such as scenes with flowing water, clouds, or foliage. Search for solid focal points or intriguing shapes that can serve as the center of the vortex.
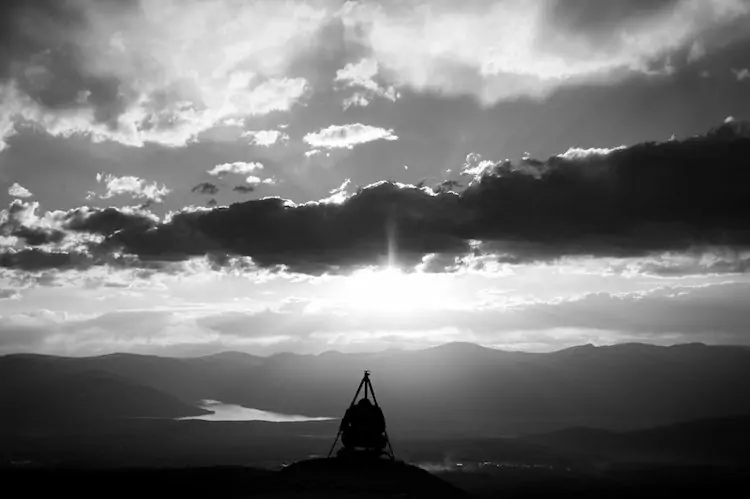
Consider the lighting and contrast within the image, as these components can enrich the vortex effect’s effect.
Furthermore, the general disposition and climate of the photograph should be considered, as the vortex impact can add a sense of dramatization or vitality.
Be beyond any doubt the specified result and how the vortex impact will complement the subject matter. Eventually, selecting the right picture establishes a fruitful vortex effect, guaranteeing that it improves the overall composition and enchants the viewer’s engagement.
Step 2: Preparing The Photograph
After you choose your image, you can prepare it for the vortex effect. Start by evaluating its general quality and composition.
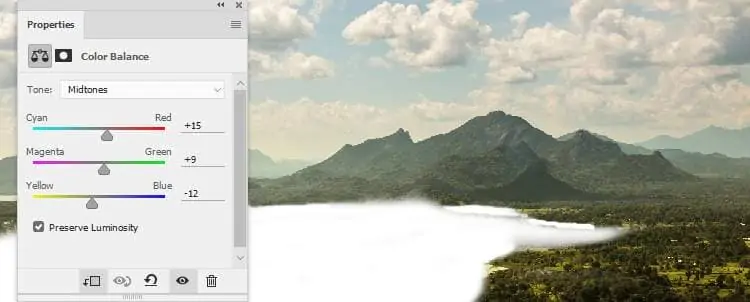
Alter the exposure, contrast, and color balance as required to guarantee that the picture is well-balanced and outwardly engaging. This step is primarily useful for optimizing the base image before the vortex effect is applied.
Another is to consider any particular components inside the image that you just need to highlight or enhance with the vortex impact. Take note of the central point or hub around which the swirling designs will transmit. It’s important to distinguish this center point early on because it will direct the situation and direction of the vortex effect.
Finally, fundamental edits or alterations should be made to the image to eliminate diversions or flaws that will subvert the general effect of the vortex effect. By planning your image thoughtfully, you’ll make a factual foundation for the ensuing steps within the process so that the ultimate result is dazzling and cohesive.
Step 3: Defining Central Points
Recognizing the center point is pivotal for making a balanced and outwardly engaging vortex impact. Begin by analyzing your image to decide the central point or central axis around which the whirling designs will transmit.
Seek for prominent components such as a subject, object, or common feature that can anchor the vortex.
Once you’ve recognized the centerpoint, check it or mentally note its position inside the composition. Consider the composition and surroundings of the photo to ensure that the chosen center point complies with your imaginative vision for the vortex impact.
Keep sure that the center point will direct the arrangement and course of the whirling designs, so it’s fundamental to select wisely.
Alternate the image’s composition as essential or make minor modifications to ensure that the center point is conspicuous and well-defined.
By precisely determining the center point, you’ll lay the basis for making a glamorous vortex impact that improves the overall composition of your photo.
Step 4: Creating Image Replica
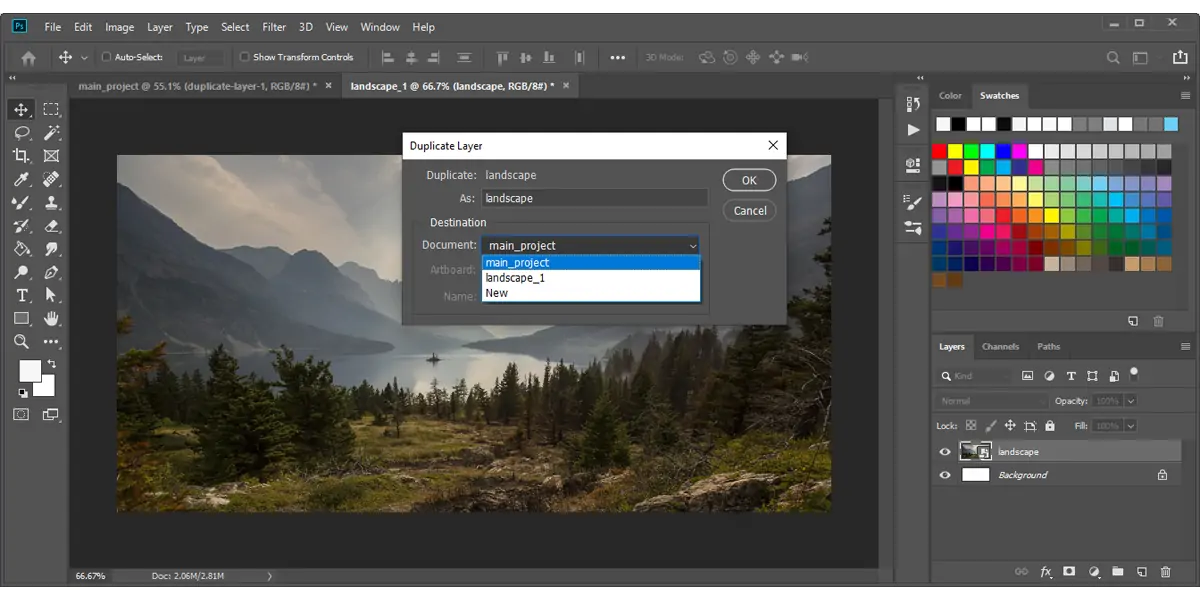
In this step, you have to create a new layer to apply the vortex effect. To do this, copy the initial picture layer to protect it and work non-destructively.
With the copied layer chosen, you have a blank canvas to apply the vortex effect. This new layer serves as an isolated substance from the first image, permitting you to make adjustments and try without modifying the fundamental content.
Making a separate layer, too, gives flexibility in fine-tuning the vortex impact and blending it consistently with the first image. It empowers you to adjust the darkness, blending mode, and other settings to attain the required result.
Working on a separate layer lets you effortlessly compare the vortex effect with the initial image and adjust as required. A steady approach provides full command over the editing, resulting in a polished and professional-looking final product.
Step 5: Creating Vortex Patterns
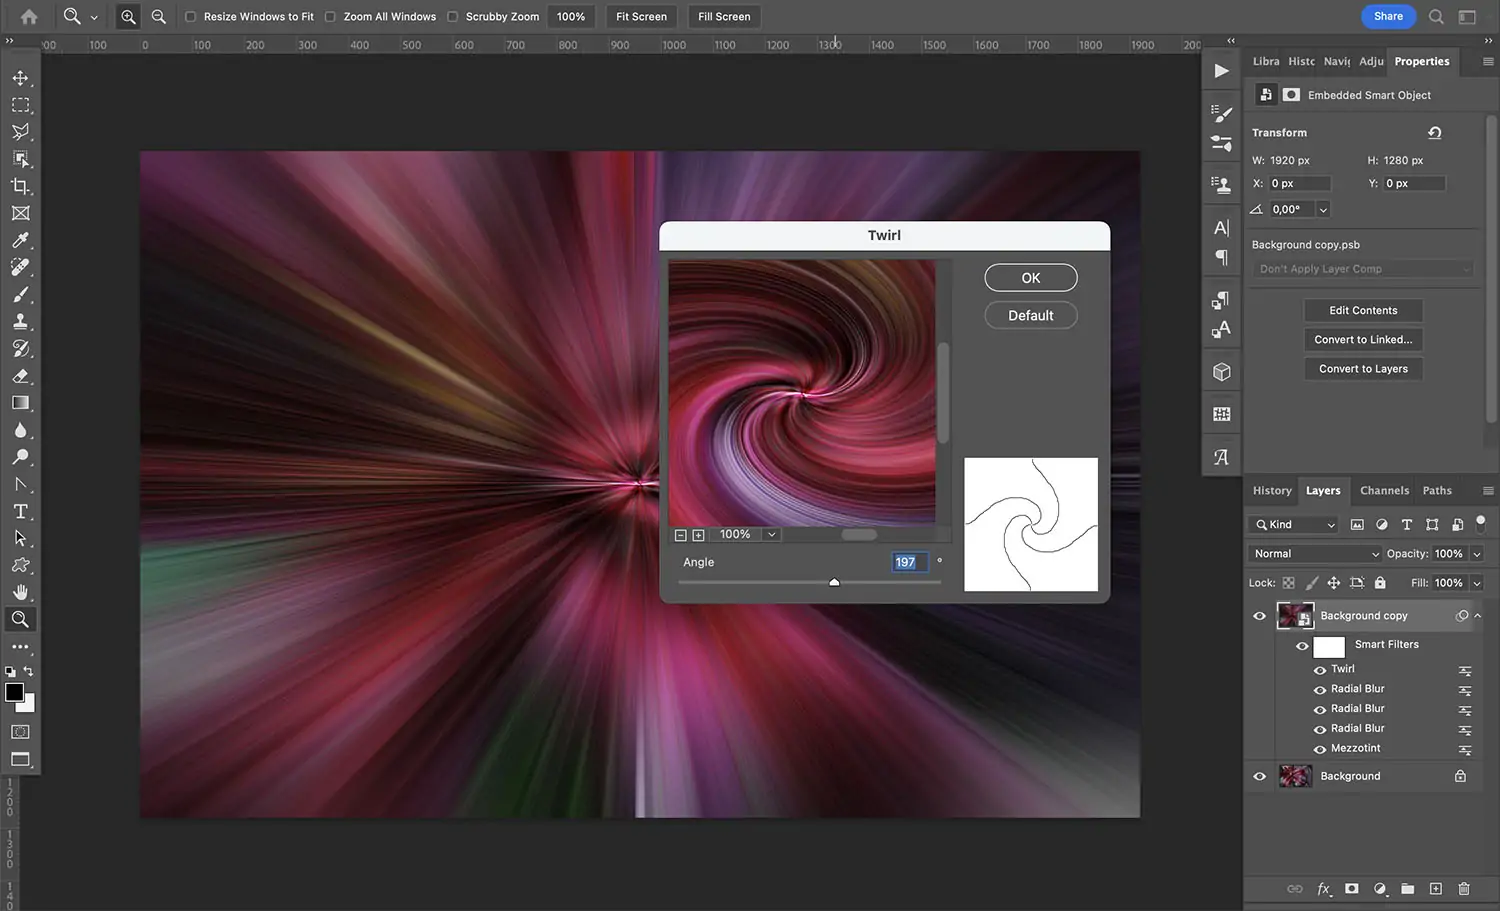
To make swirling designs around the identified center point, begin producing the vortex impact with editing tools like warp or liquefy. Play with brush sizes, pressure levels, and distortion settings till getting the required vortex effect.
Start by applying delicate, fluid movements to shape the whirling designs slowly. Begin from the centerpoint and work outward, following the characteristic flow of the image’s components. Watch over the overall composition and confirm that the vortex effect complements the existing visual components.
Intermittently step back and evaluate the vortex effect’s progress. Make adjustments as required to refine the swirling’s shape, intensity, and heading. Opt for a proportional and concordant result that upgrades the overall composition of the picture.
Be confident in your experimentation and attempt different strategies to achieve the specified effect. The key is to preserve a cohesive and visually thrilling vortex that draws the viewer’s attention and includes excitement in the image.
Step 6: Polishing Up The Effect
To polish up and fine-tune the initial vortex appearance, carefully assess the swirling patterns and their interaction with the encompassing elements within the image. Search for regions where modifications are required to enhance the overall effect and cohesiveness of the vortex effect.
Focus on smoothing out any unpleasant edges or irregularities within the whirling patterns. Utilize editing options like brushes or blending modes to blend the vortex consistently with the rest of the image. Be keen on every detail and strive for a superlative and professional-looking result.
Try different settings and strategies to attain the specified level of intensity, shape, and direction for the vortex effect. Be quiet and take your time to ensure that every angle of the vortex improves the overall composition of the image.
Frequently review your progress and make alterations as required to achieve the specified visual effect. By honing the vortex effect with accuracy and attention to detail, you’ll create an exquisite experience for the viewer.
Step 7: Blending And Opacity Modification

After the vortex effect is done, incorporate it consistently with the initial photograph. Start by setting the opacity of the vortex layer to control its visibility and blending with the basic image. Play with diverse opacity levels to discover the ideal balance between the vortex effect and the initial substance.
Following, explore blending modes for further refinement of the integration of the vortex with the image. Modes such as overlay, soft light, or screen can help upgrade the vortex effect’s radiance and contrast while protecting the fundamental picture’s points of interest.
Tune the positioning and scale of the vortex as required to ensure that it enhances instead of overpowering the overall composition. Check out how the vortex interacts with the central points and visual components of the picture, making alterations till it looks harmonized.
Go through the integrated image as a whole, checking for any last changes or refinements. Once you’re delighted with the result, save your work and make it ready to exhibit your fascinating vortex-enhanced photo to the world.
Conclusion:
Overall, the vortex effect proposes aesthetic experimentation for image editors and digital artists, driving reality into imaginary worlds. It also adds a surreal atmosphere, which boosts the images’ story-telling characteristics. Including vortexes, you can incorporate a glimmer of trill and charisma into images, enriching their dynamism and vitality. Vortex effect illustrations can arouse emotions and flash interest, which draws the viewers into the bewitching unity of light and shadow. Equivalent to the brushstrokes an artist applies on a material canvas, these vortex forms are also signs of artistic manifestation, echoing the creator’s imagination and ingenuity.
