How To Create A Glaze Effect
Glazing refers to the opaque coat on the paintings after previous layers are dried up. It gives a nuanced and glossy finishing touch to the artwork, thus enhancing its visual temptation. Glazes are typically used in oil paintings as a single final coat, but they can also be put on top of one another to give an artwork an impression of depth and brightness while shielding the paint and enhancing its color. Alongside concrete artworks, this approach is particularly recognized in digital paintings and images. Different digital techniques implant images with a glazed look, making them look shinier, gleaming, and more polished. The glazing effect can enrich colors and highlights, offering the image a lustrous and dreamy impression. In addition, the glazing technique can rub out spots and imperfections in the images. As a photo retouching technique, it can minimize the visibility of fine lines, blemishes, and rough textures. This blog article will continue with the practical phases involved in giving the images a layer of glazing and supplementing their appeal.
Step 1: Image Loading
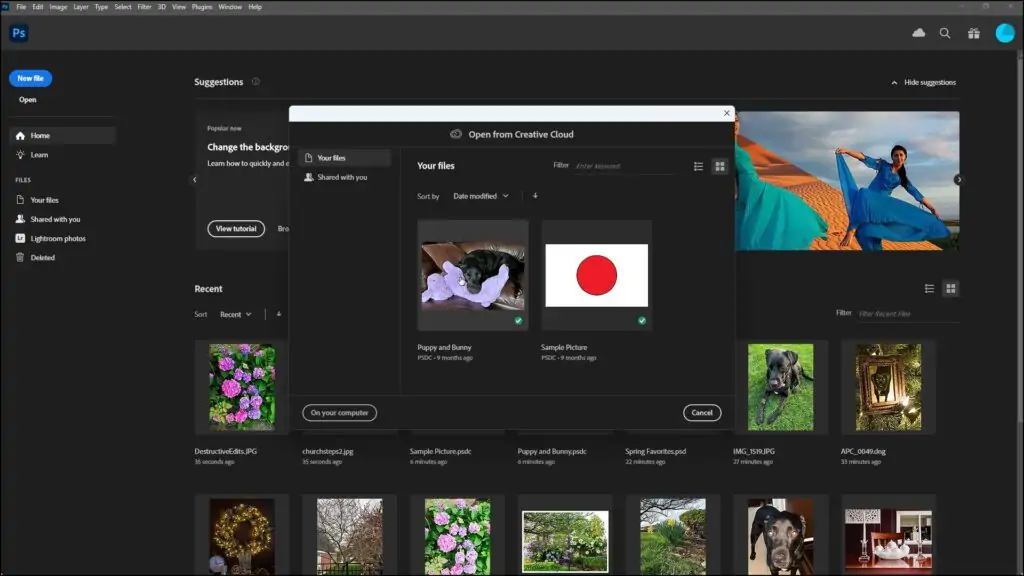
To start applying a glazing effect to your image, launch Adobe Photoshop and open the specified photo file. You’ll do this by selecting “File” from the menu bar, then choosing “Open” and getting to the area of your image file. Alternatively, you’ll drag and drop the picture straightforwardly into the Photoshop workspace.
Once the image file is loaded, take a minute to evaluate its composition, lighting, and overall quality. Consider the zones you’ll need to upgrade or alter to attain the desired glaze impact. Having a clear vision of the ultimate result is fundamental before continuing to the next steps.
Observing this initial step sets the stage for the glazing process, preparing the picture for ensuing adjustments and enhancements. With the photo opened in Photoshop, you can continue with the ensuing steps to form a captivating and polished glaze that raises the visual appeal of your image.
Step 2: Image Duplication
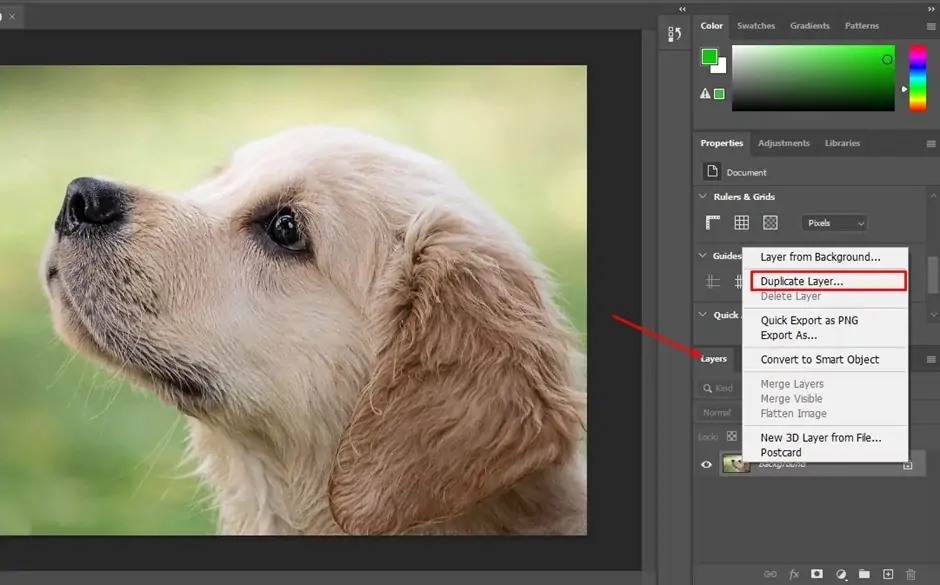
Create a copy of your initial photograph. This duplication lets you work nondestructively, preserving the integrity of the initial picture while making alterations on an isolated layer.
Find the Layers panel to duplicate the image, which is found on the right side of the Photoshop workspace. Right-click on the Background layer containing your original picture, and select “Copy Layer” from the dropdown menu. Then again, you’ll drag the Background layer to the “Create a New Layer” symbol at the bottom of the Layers panel.
After the image is duplicated, you’ll see a new layer over the initial within the Layers panel. This copied layer replicates the first image, giving a canvas for applying the glazing effect without affecting the basic image data. With the copied layer now created, you’re ready to continue the following steps in polishing and improving your photo with the glaze effect.
Step 3: Using Blur Filter
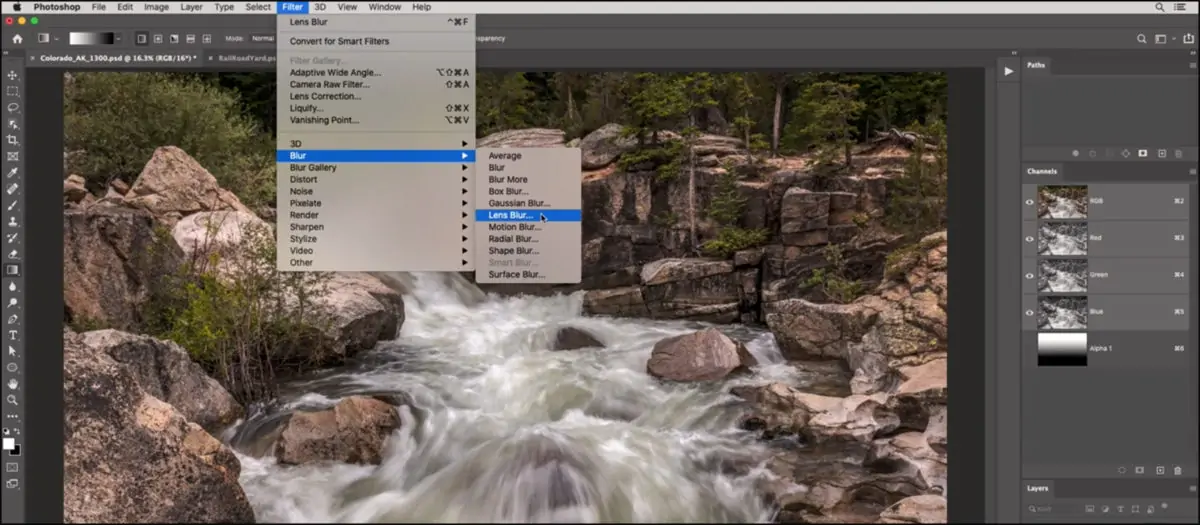
In this step, a glaze effect is created in Adobe Photoshop by applying a blur filter to relax subtle elements and improve the general smoothness of the picture.
Before you apply a blur filter, guarantee that the copied layer is chosen within the Layers panel. At that point, navigate to the “Filter” menu found at the top of the Photoshop workspace. From the dropdown menu, tab on”Blur,” and after that, select “Gaussian Blur.”
You will see a dialog box prompting you to alter the radius of the blur impact. The radius decides the level of blur added to the image, with higher values resulting in more pronounced blurring. Try using distinctive radius settings to get the required level of softness while maintaining adequate clarity within the image details.
After altering the obscure sweep, press “Ok” to apply the Gaussian Blur filter to the copied layer. You’ll take note that the image gets to be discernibly smoother, with fine details and ease of changing degrees depending on the chosen blur radius.
Step 4: Levels Adjustment
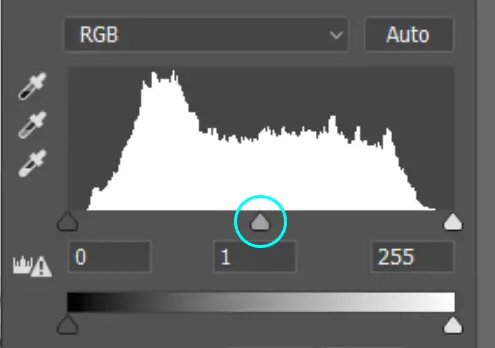
To alter the levels, ensure that the copied layer is still chosen within the Layers panel. Then, go to the “Image” menu at the top of the Photoshop workspace and select “Adjustments,” followed by “Levels.”
A levels adjustment dialog box will appear, showing a histogram corresponding to the distribution of tonal values within the picture. You’ll see three sliders underneath the histogram: The dark point slider is on the left, the white point slider is on the right, and the midtone slider is within the middle.
Drag the black point slider to the right to alter the shadows, making them darker and more abundant. So also, drag the white point slider to the left to set the highlights, making them brighter and more intense. Use the midtone slider to fine-tune the general tonal balance of the image.
As you make alterations, watch the changes within the image preview to guarantee that you accomplish the specified contrast and brightness levels. Once done, tap “Ok” to apply the Levels alteration to the copied layer. This alteration elevates the overall tonal range of the image, further refining its appearance and preparing it for the glazing effect.
Step 5: Applying Layer Masking
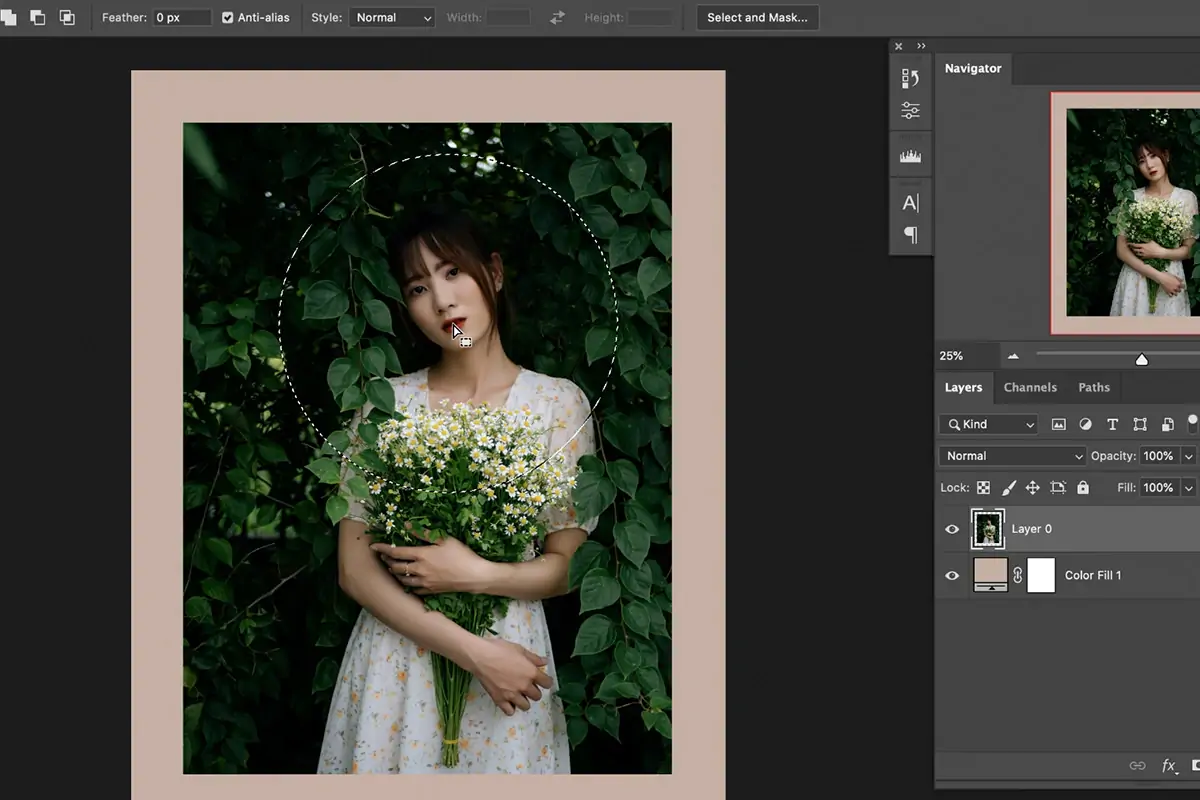
After operating the levels to improve contrast and brightness, add a layer mask to the copied layer. That layer mask will permit you to selectively apply the glaze to particular regions of the image while protecting others.
To include a layer mask, guarantee that the duplicated layer is chosen within the Layers panel. At that point, press on the “Add Layer Mask” symbol at the foot of the Layers board. That will make a white layer mask thumbnail another to the layer’s thumbnail within the Layers panel.
With the layer mask chosen, click on the Brush tool or use the shortcut key B to select and paint over the regions of the picture where you need to apply or remove the glaze effect. Set the closer view color to dark to conceal parts of the coat or white to reveal them. Use a soft brush with changing opacity to get smooth moves and blend the effect consistently into the photo.
Step 6: Using Brush Tool
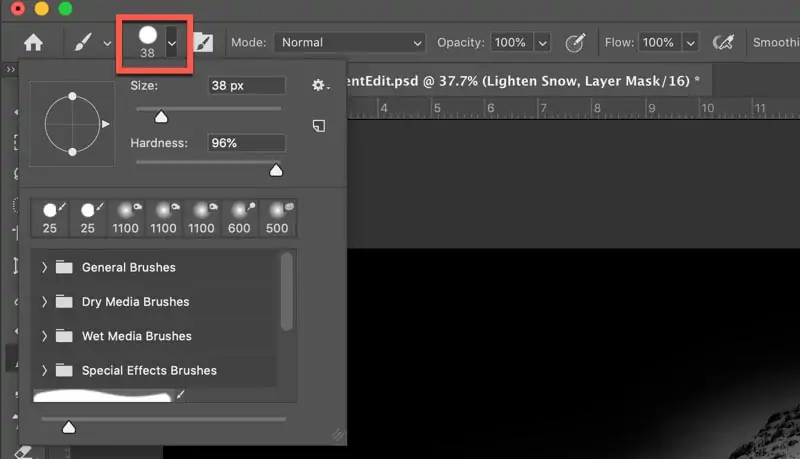
Utilize the Brush tool on the layer mask to polish the application of the blaze effect, checking that it amplifies the image’s general appearance while keeping up control over its intensity and dispersion.
Pick the Brush tool from the toolbar or press the shortcut key “B.” make sure that the layer mask thumbnail is chosen within the Layers board.
Set the foreground color to black to conceal parts of the glaze or white to uncover them. Alter the brush measurement, hardness, and murkiness settings as required for exact control over the brush strokes.
Paint over the ranges of the photograph where you need to alter the intensity of the glaze. You can utilize varying brush opacity to slowly blend the effect, making smooth moves between glazed and non-glazed regions.
Deliberately paint over the image, attending to details and avoiding ranges where you do not need the glazing effect added.
Step 7: Tuning The Opacity

Within the last step of making a glaze effect using Adobe Photoshop, you’ll fine-tune the intensity of the effect by altering the opacity of the copied layer.
Confirm that the copied layer with the glazing effect is chosen within the Layers panel. Find the opacity slider, depicted by a percentage value, at the top of the Layers panel.
Press and drag the opacity slider to alter the opacity of the copied layer. Diminishing the opacity will make the glazing effect more transparent, permitting more of the initial image to appear through. Expanding the opacity will heighten the glazing effect, making it more noticeable.
You can watch the changes in real time on the image preview as you alter the opacity. Make the adjustments that best enhance the image’s appearance while preserving a natural and polished appearance.
On attaining a satisfactory opacity level, you’ve completed the glaze effect’s final step. Your image now gloats with a shiny and polished appearance, all set to inspire viewers with its professional-quality wrap-up.
Conclusion:
To sum up, adding a glaze effect to an image leads to increased depth and dimension. It can make the image more visually adorable and give it an adequate quality. After going through this editing approach, the photographs could have a more spirited and pristine look in contrast to their earliest imprint. The image mutation induced by the glazing effect is too persuasive. You can use this strategy for various photos, including personal or professional projects. Eventually, the glazing effect can amplify the visual consequence of the images, leaving an enduring tread on viewers.
