How To Create A Paper Mache Effect
Paper mache is a kind of paper craft that can be accomplished on a minimum budget. Using recycled resources and household equipment, this activity is a great way to start kids becoming ecologically conscious. It is usually liked by kids as young as five years old and could be just as interesting for adults or professional artists. In paper mache, a structure’s exterior is covered with layers of paper or paste to give the sculpture depth and dimension. Almost anything may serve as a paper mache base. It makes it possible to assemble a sturdy and lightweight sculpture out of plastic bottles, balloons, old cardboard, or even empty shoe boxes. The paper mache item can be thoroughly painted and glazed later for enhanced aesthetics and durability. This craft has various significant applications, including the preparation of sculptures, props, masks, academic art projects, etc. The paper mache-inspired effect is also employed in digital art and image enhancement to provide images with a handmade and crafted appearance. The following steps of this blog are going to go through creating the unique-looking paper mache effect to amplify the looks of the digital images or artworks.
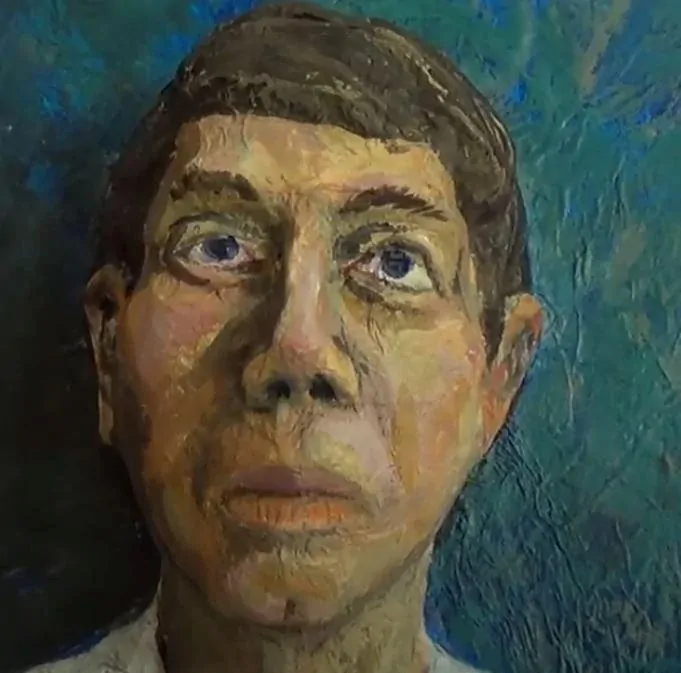
Step 1: The Base Photo Selection
The first step in applying the paper mache effect is to select a suitable photograph.
Choose a proper picture that contains precise details and powerful contrast for better texturing.
Usually, portraits, objects, or abstract plans function sufficiently to achieve that effect.
Initiate a potent image enhancement program like Photoshop or any other, head to File, click Open, and pick your picture.
Make sure that the picture is in high resolution for superior detailing.
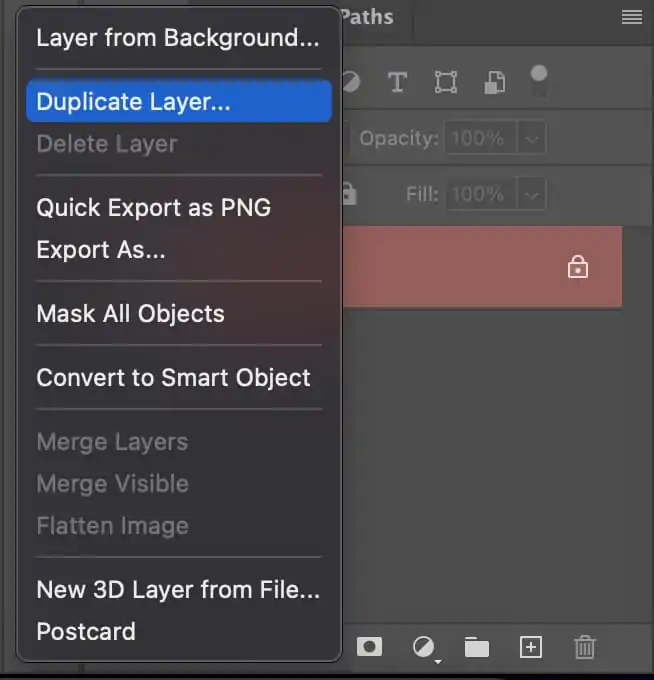
Make a duplicate of the background layer by tapping on Ctrl + J, keeping the initial picture unchanged for adjustments afterwards.
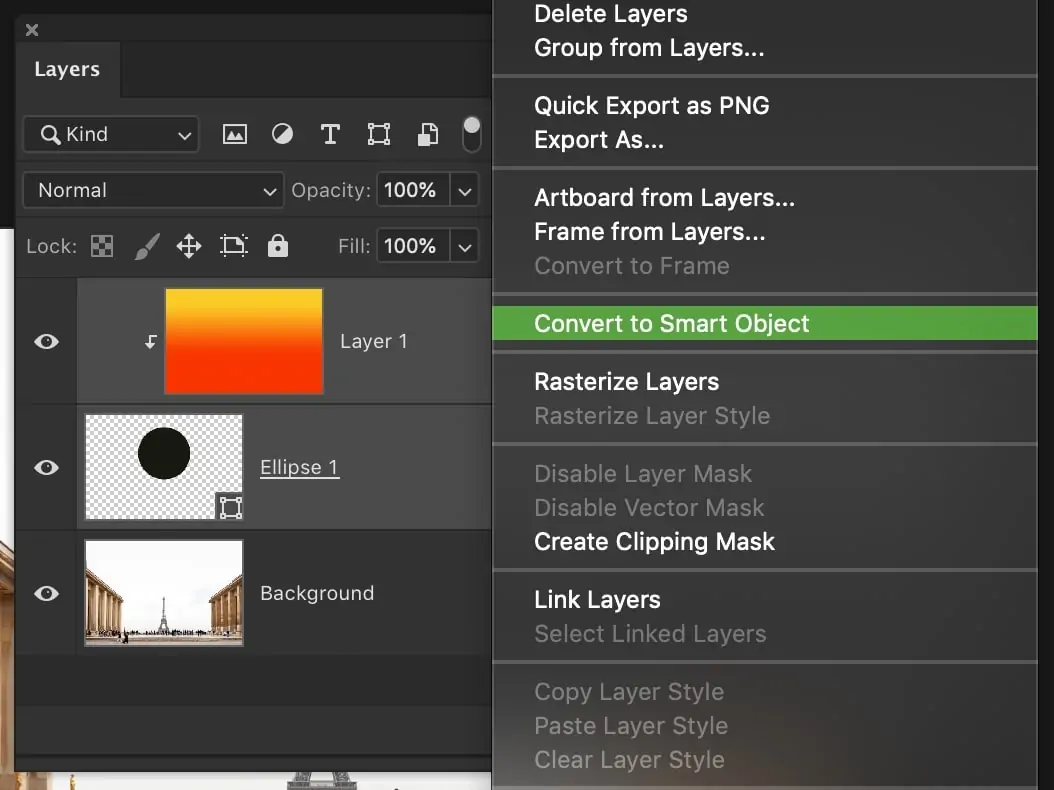
To facilitate non-destructive testing, right-click on the duplicated layer and click on the Convert to Smart Object option.
To get rid of unnecessary components, utilize the Crop Tool for those parts. Be sure that the main subject is framed sufficiently to get an adapted composition.
![]()
After finalizing the base image selection and making initial tweaks, you can now move on to apply the paper mache texture within the following step.
Step 2: Texture Layer Composition
Include a texture layer to get a realistic paper mache effect imitating the rugged, handmade surface.
You can either search for realistic paper mache effect textures online or capture images of genuine paper mache.
Select a surface that contains obvious pleats, layers, and profundity for realness.
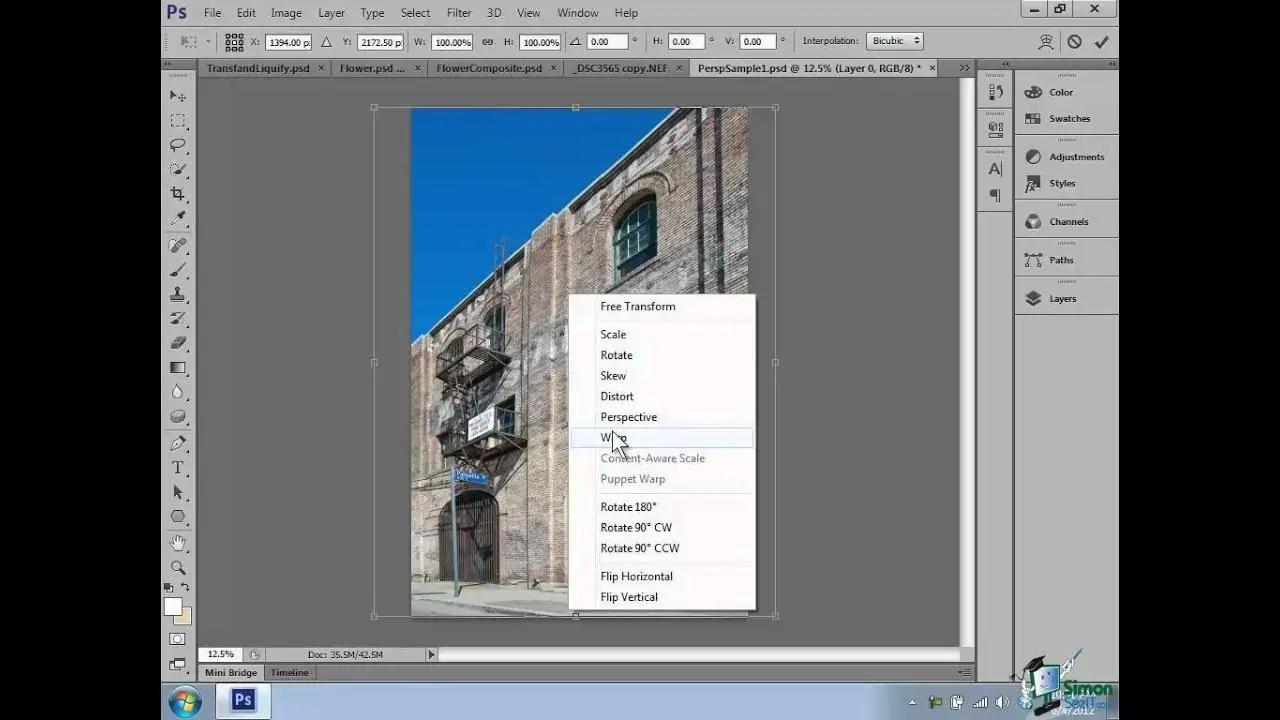
After preparing the texture, import it into your software’s workspace and drag and position it appropriately onto your image.
Activate the Free Transform tool using Ctrl + T, and alter the size to help texture completely wrap the photograph.
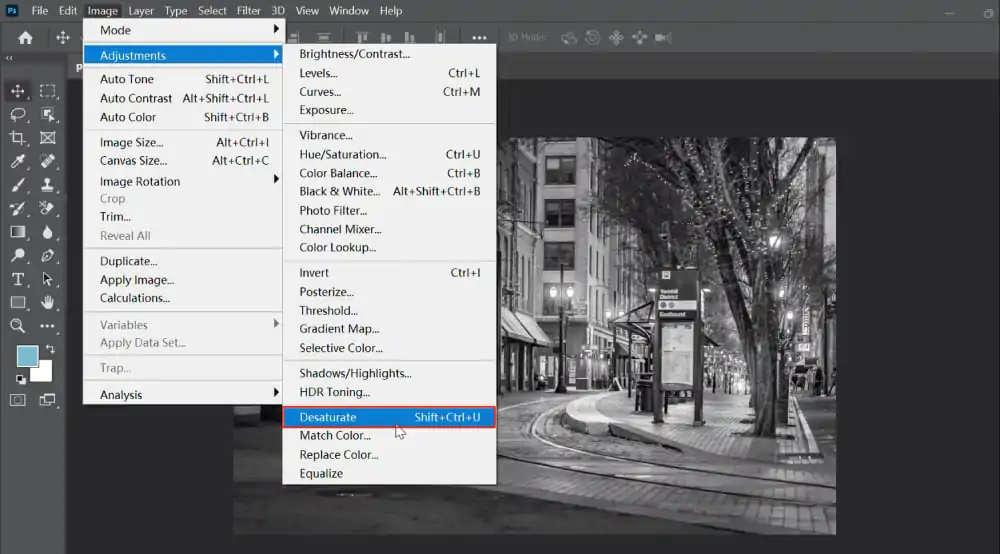
Move to the Image, select Adjustments, and pick Desaturate to provide the texture with a desaturated impression. It will make the smooth blend and avoid presenting any undesirable tints.
Utilize the Image option and click Adjustments, then Levels or Curves to upgrade contrast and details. That will result in a surface effect that is more articulated and discernible.
After the texture is prepared, the other phase is about blending it naturally with the photograph.
Step 3: Blending The Texture Layer
After the texture is properly set over your photograph, it is time to blend it consistently to attain a realistic effect.
Click on the surface layer within the Layers panel, click on the Blending Mode dropdown and select a proper option.
You can select the Multiply mode to darken the picture, Overlay to upgrade contrast, and the Soft Light mode to attain a more nuanced integration.
Decrease the opacity value by around 40 to 70 per cent to ease the effect, yet consider the photo’s composition.
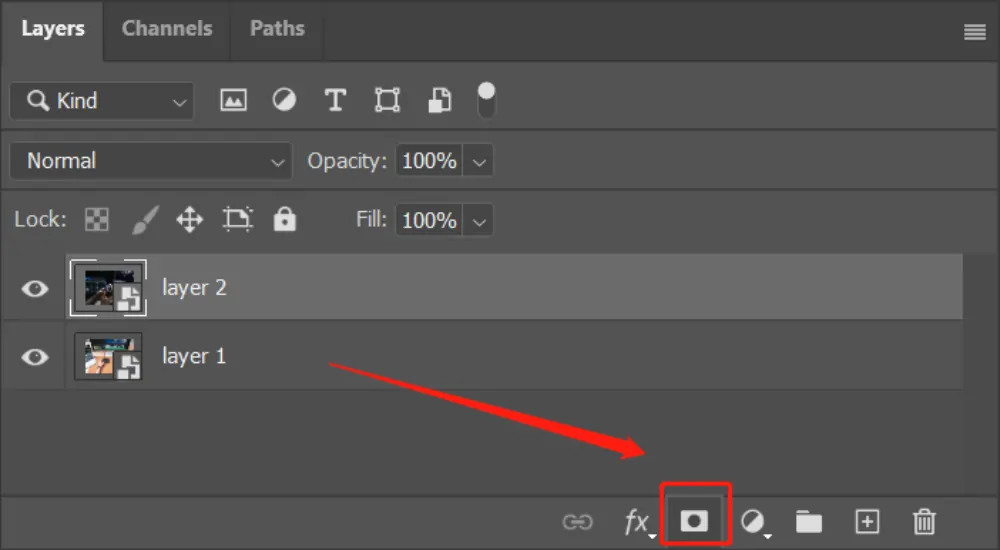
Locate the Add Layer Mask symbol at the bottom of the Layers panel. Utilize a delicate round brush with black to delete texture from ranges where it is too assertive.
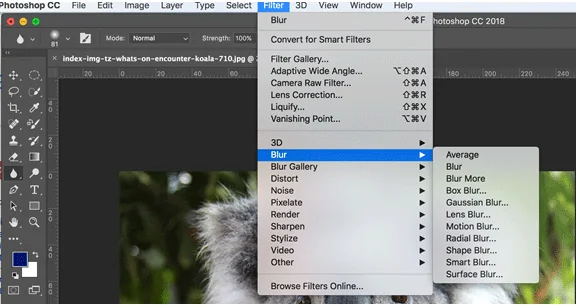
Look into using a minute Gaussian blur to ease the edges if it looks too harsh.
Head to Filter, click on Blur, and choose Gaussian Blur, setting the radius to around 1 to 3px.

If you find the texture looking intense, set the Brightness/Contrast by visiting the Image, clicking Adjustments, and then Brightness/Contrast.
Minimize the Brightness narrowly and expand the Contrast for a proportional formation.
Step 4: Including Depth With Embossing
Furthermore, to enrich the paper mache effect, you have to form a raised, three-dimensional impression utilizing embossing strategies.
Activate the paper mache surface layer within the Layers panel, then click on the option Convert to Smart Object, allowing non-destructive editing.
Move on to the layer styles alternative and select Bevel & Emboss. Choose the Inner Bevel style, size around 5 to 15px, depth 100 to 300 per cent, and softly make the edges smooth.
Beneath the Shading, alter the Angle and Altitude to conform to the photo’s light source.
Expand the opacity of the Highlight Mode Opacity for a more powerful shine.
Utilize a Displacement Map to make the surface cover around subtle elements in a natural.
Change over the base picture to grayscale and add Gaussian Blur.
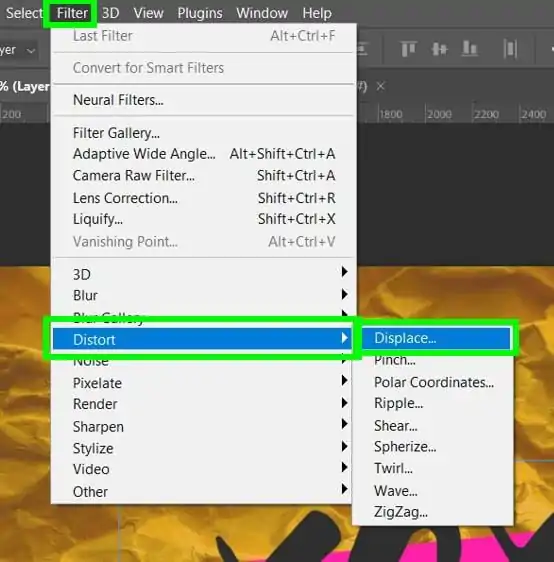
Proceed to Filter, click Distort, choose Displace, load the saved file, and alter intensity.
To maximize the level of depth, apply Drop Shadow to the Layer Styles.
Utilize the Dodge and Burn tools to manually upgrade light and shadow.
At the end of this step, your photograph will feature a realistic, handmade, sculpted appearance.
Step 5: Working On The Edges
To get a more realistic paper mache effect, you will have to create rugged, torn, or irregular edges that imitate natural paper layering.
Tap on the primary photo layer to activate it and access the Add Layer Mask option. Using maks, you can eradicate edges in a non-destructive manner.
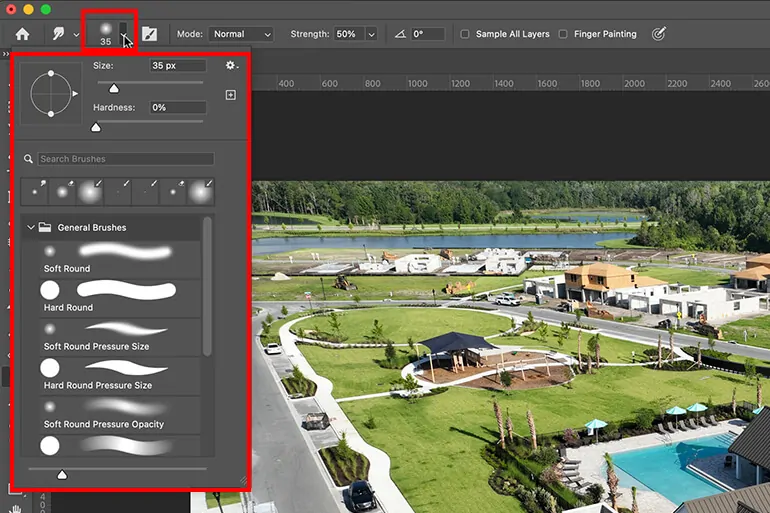
Move to the Brush Tool, unlock its settings, and select a coarse, grunge, or torn paper brush. Alter the Size and Opacity to get a natural impression.
Specify the brush in black colour and paint along the edges to form an uneven, torn-paper impact.
In case you erase too much, swap the brush to white and paint the details back.
Head to the Smudge Tool and utilize a low-strength setting of almost 10 to 20 per cent.
Carry along the edges to somewhat distort them for a more handcrafted formation.
Proceed to the Filter Gallery, locate Brush Strokes, and then click Rough Pastels.
Modify the length and relief of the stroke to apply a papery texture to the boundaries.
Use the Zoom in feature and confirm that the edges integrate naturally with the surface. Alter the opacity or mask on the details as required.
Step 6: Revising Colors And Shadows
To enhance the realism of the paper mache effect, polish the tints and include shadows for depth till reaching to make a natural, handcrafted build.
Press on the Adjustment Layer symbol at the foot of the Layers panel and choose Hue/Saturation, decreasing the saturation for a hushed, paper-like style.
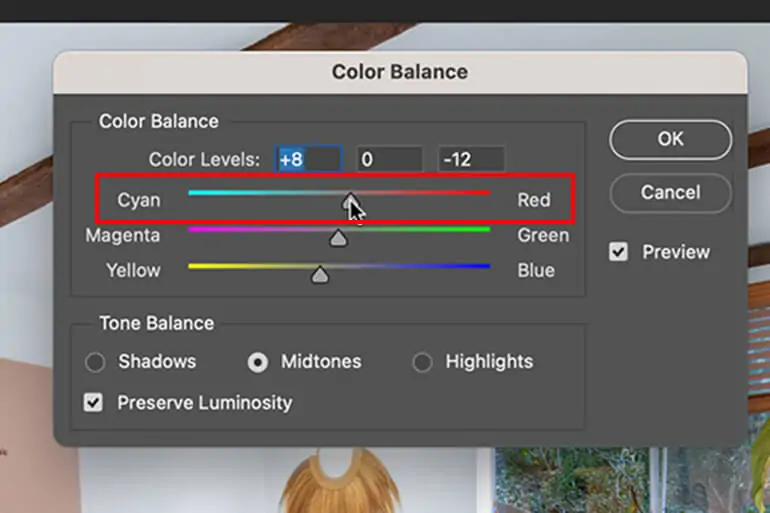
After that, click on the Color Balance and shift it towards warmer tones for an aged appearance or cooler tones to make it look like a new white paper.
Move on to the Curves and alter the highlights and shadows to enhance depth.
Make a new layer, fill it with a light beige or off-white tint, and specify the Blending Mode to Multiply.
Minimize the Opacity to approximately 20 to 30 per cent for a nuanced ancient paper look.
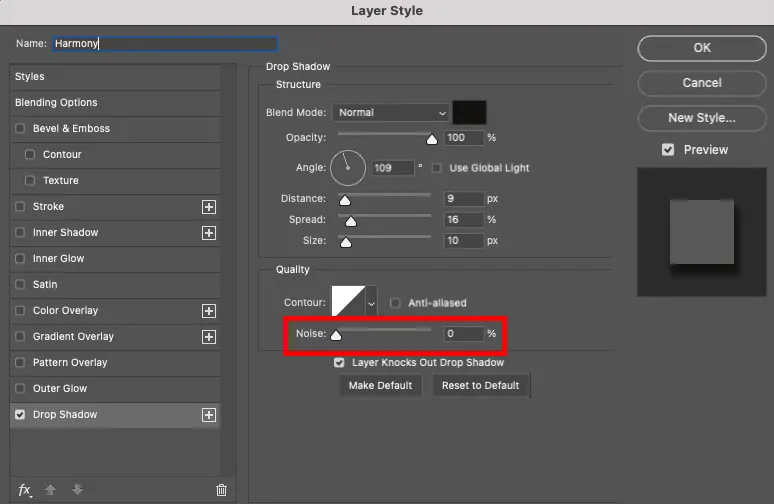
Include a Drop Shadow on the surface layer by proceeding to Layer and clicking on Layer Style and Drop Shadow.
Alter the Angle to harmonize with the lighting in your picture. Also, increment Distance and Spread for a genuine paper-lift impact.
Utilize the Burn Tool with a low Exposure of around 10 to 20 per cent to darken paper folds and rims.
Activate the Dodge Tool to add highlights and gently brighten lifted zones of the paper. It will make the paper seem layered and sculpted.
Utilize a grunge or sponge brush of low opacity, around 15 to 30 per cent, to include slight colour varieties.
It will mirror the handmade, irregular colouring of genuine paper mache.
Step 7: The Final Adjustments
The final step is to refine the effect to guarantee a clean and realistic final look before exporting it.
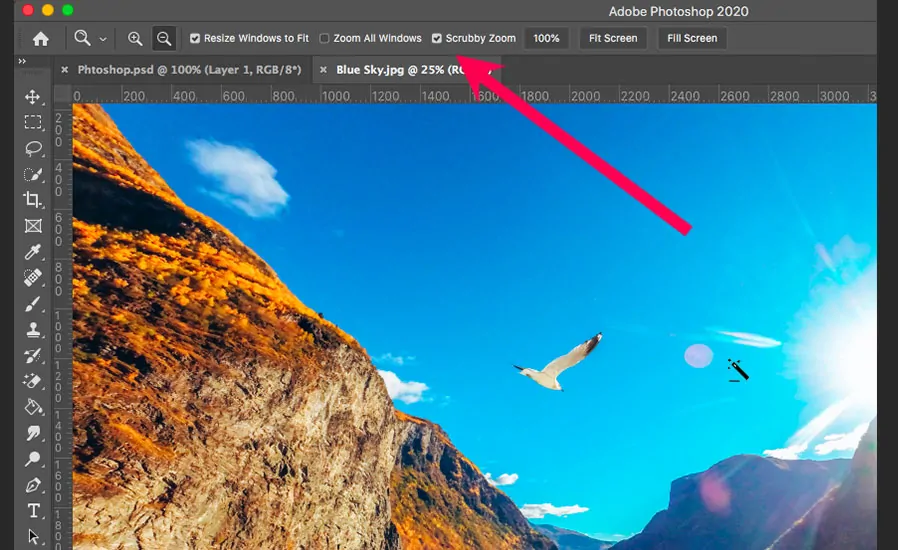
Audit the image using the Zoom in to scan for overlapping textures, unpleasant edges, or unlikely blending.
As required, alter the Opacity or Blending Mode of the texture layer.
Utilize the Eraser Tool, choosing a soft brush to polish the regions that seem too harsh.
In case a few regions are still too sharp or fake, employ a Gaussian Blur containing a 1-3px radius to ease the effect.
On the other hand, if the image looks too dull, utilize Unsharp Mask to get back subtle elements.
To enhance the impression of a handmade texture effect, head to Filter and select Noise, then Add Noise of 1 to 3 per cent.
Utilize Levels or Curves to be sure that the highlights and shadows are modified. Bypass excessively bright zones that might diminish the realistic paper impact.
Include a Gradient Map or Photo Filter for a warmer or vintage appearance. Set Hue/Saturation if the colours look excessively artificial.
If you opt for web use, export it as JPEG or PNG with a high resolution. Likewise, to get a printout, you will save it as a TIFF to preserve maximum quality.
Finally, your paper mache effect is concluded, and your picture is prepared to be shared or printed.
Conclusion
In brief, the paper mache effect is eccentric yet a remarkable addition to the field of image enhancement. It adds a crafted and handmade touch to your images, making them look like tangible art that goes through detailed efforts and prolonged time duration. The main trait of paper mache art is a deviation from the usual spotless and immaculate aesthetics of conventional visual art. Whether handmade or digitally mimicked, it often emphasizes realism, which is a blend of perfection and imperfection. Also, it offers the images a 3D element by highlighting the shadows and highlights, further adding to their natural appeal.
