How To Use The Selective Adjustment Tool In Lightroom
Lightroom is a widely used photo editing software that exhibits a range of powerful tools to enhance your photographs. One such tool is the selective adjustment tool, which allows you to precisely adjust specific parts of your image rather than the entire photo. The selective adjustment tool is a game-changer for photographers who want to highlight the details in specific parts of their images. By creating an adjustment mask around the area you want to adjust, you can apply the desired changes to only that part of the image, leaving the rest of the photo untouched. This feature is helpful if you want to emphasize some aspects of your image, such as brightening up a subject’s face or enhancing the color of the sky. The selective adjustment tool is also handy for correcting exposure or color imbalances in specific areas of your photo without altering the rest of the image. In the following sections, we will provide step-by-step instructions on effectively using the selective adjustment tool in Lightroom.
Step 1: Open Your Photo in Lightroom and Select the Develop Module
The first step in using the selective adjustment tool in Lightroom is to open your photo in the software and select the Develop module. The Develop module is where you can adjust your photos using various tools, including the selective adjustment tool. To open the Develop module, click on the Develop module icon in the top right-hand corner of the Lightroom interface. Alternatively, press the D key on your keyboard to access the Develop module. Once you are in the Develop module, you can use the selective adjustment tool to adjust specific parts of your image precisely.
Step 2: Identify the Area You Want to Adjust Using the Selective Adjustment Tool
The second step in using the selective adjustment tool in Lightroom is to identify the area you want to adjust. That could be a person’s face, the sky, or any other part of the image that needs to be emphasized or corrected. The selective adjustment tool allows you to precisely adjust specific parts of your image rather than the entire photo. That is particularly useful when highlighting the details in specific parts of your image or correcting exposure or color imbalances in specific areas. Once you have identified the area you want to adjust, you can use the selective adjustment tool in Lightroom.
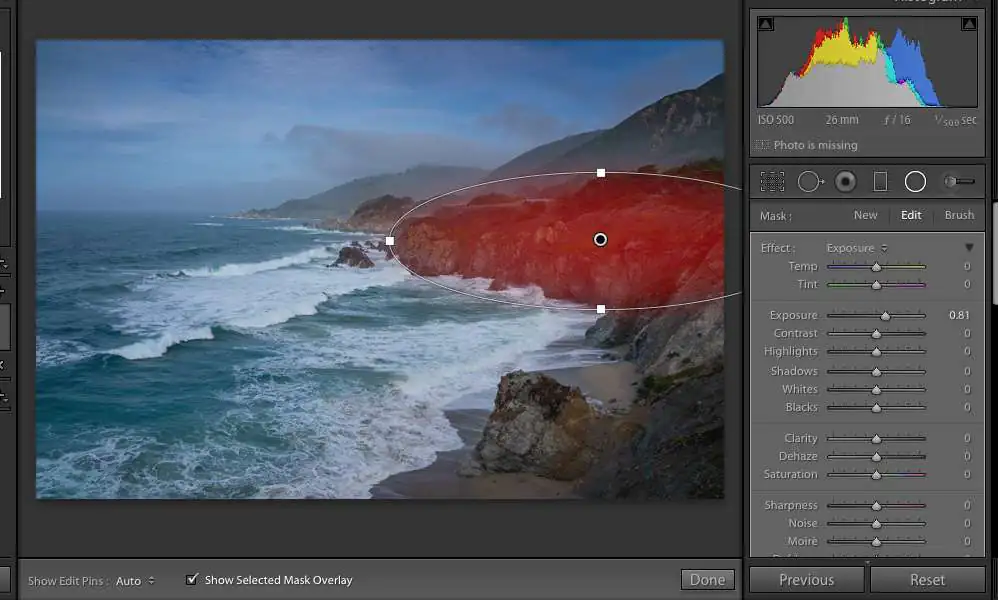
Step 3: Click on the Adjustment Brush Icon or Press the K Key to Activate the Tool
The third step in using the selective adjustment tool in Lightroom is to click on the Adjustment Brush icon or press the K key on your keyboard to activate the tool. The Adjustment Brush tool is located on the right-hand side of the Develop module and is represented by an icon that looks like a brush. When you click on the icon or press the K key, the tool becomes active, and you can start using it to adjust your photo. The Adjustment Brush tool allows you to paint over specific parts of your image and apply adjustments to the areas you have selected. Once you have activated the Adjustment Brush tool, you can use the selective adjustment tool in Lightroom.
Step 4: Adjust the Size and Feather of the Brush
The fourth step in using the selective adjustment tool in Lightroom is to adjust the size and feather of the brush. The size of the brush determines how large the brush is when you paint over your image, while the feather determines the softness of the brush edge. Use the Size slider on the Develop module’s right-hand side to adjust the brush size. To adjust the feather of the brush, use the Feather slider located just below the Size slider. Choosing the right brush size and feather settings is essential to ensure that you make precise adjustments to the area you want to adjust. Once you have adjusted the brush size and feather, you can use the selective adjustment tool in Lightroom.
Step 5: Choose the Type of Adjustment You Want to Make
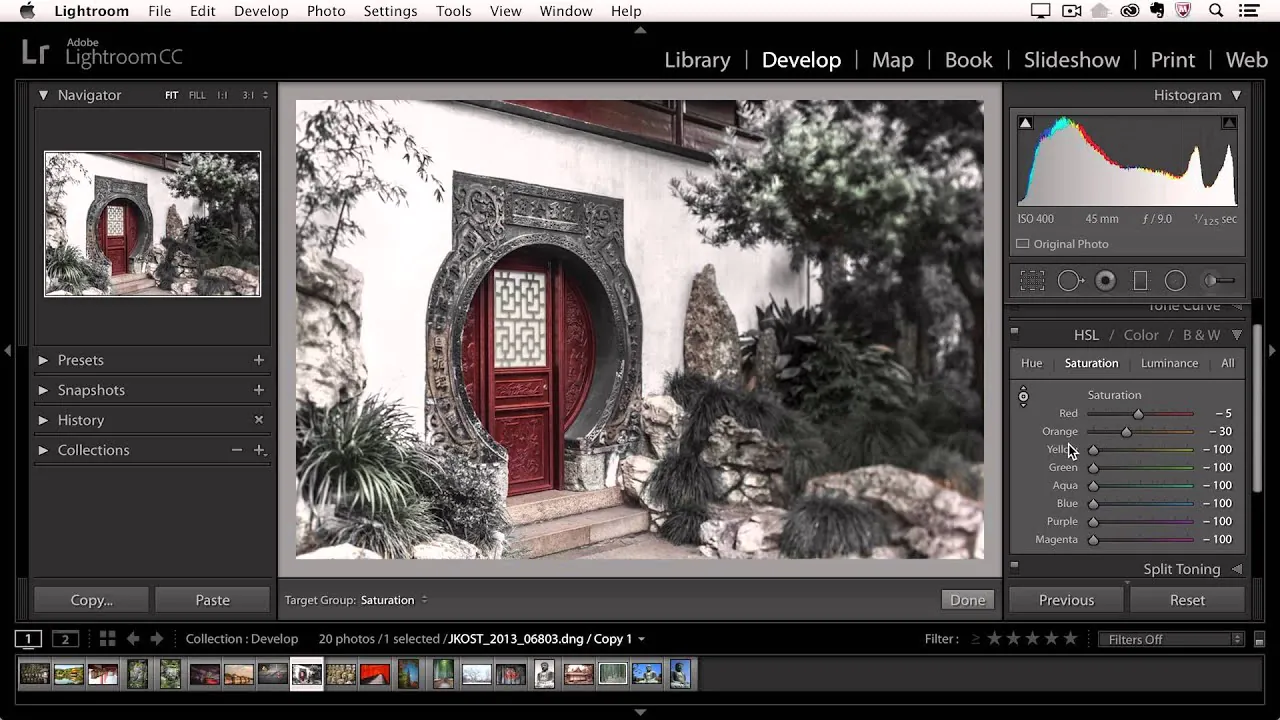
The fifth step in using the selective adjustment tool in Lightroom is choosing the type of adjustment you want. You can make several adjustments using the selective adjustment tool, including exposure, contrast, saturation, clarity, sharpness, and more. To choose the type of adjustment you want to make, click on the dropdown menu below the Brush panel on the right-hand side of the Develop module. From there, you can choose the type of adjustment you want and adjust the settings accordingly. It’s essential to choose the right type of adjustment for the area you want to adjust and to make adjustments in moderation to avoid over-editing your photo. Once you have chosen the type of adjustment you want, you can use the selective adjustment tool in Lightroom.
Step 6: Paint Over the Area You Want to Adjust
The sixth step in using the selective adjustment tool in Lightroom is to paint over the area you want to adjust. To do this, click and drag your mouse over the area you want to adjust. You’ll notice that the area you paint over is highlighted with a red overlay, indicating that the adjustment will affect it. If you need to adjust the size or position of the area you have painted over, you can do so by using the brush size and feather sliders or by clicking and dragging the pins that appear on your image. Once you have painted over the area you want to adjust, you can use the selective adjustment tool in Lightroom.
Step 7: Refine Your Adjustment
Refining your adjustment is the seventh step in using Lightroom’s selective adjustment tool. Once you have painted over the area you want to adjust, you can refine your adjustment using the various sliders and controls available in the Develop module. For example, if you are making an exposure adjustment, you can use the Exposure slider to adjust the brightness of the area you have painted over. If you are making a clarity adjustment, you can use the Clarity slider to adjust the sharpness and texture of the area you have painted over. It’s essential to refine your adjustment carefully and make adjustments in moderation to avoid over-editing your photo. Once you are happy with your adjustment, you can use the selective adjustment tool in Lightroom.
Step 8: Save Your Adjustments
The eighth and final step in using the selective adjustment tool in Lightroom is to save your adjustments. Once you are happy with the adjustments you have made using the selective adjustment tool, you can save your changes by clicking on the “Done” button in the Develop module’s lower-right corner. That will apply the adjustments you have made to your photo and save them to the Lightroom catalog. If you need to make further adjustments later on, you can always make additional changes using the selective adjustment tool. It’s essential to save your adjustments before moving on to another photo or closing Lightroom to ensure your changes are recovered. Congratulations, you have successfully learned how to use the selective adjustment tool in Lightroom!
Some Additional Information For Using the Selective Adjustment Tool in Lightroom:
Keyboard shortcuts: Using keyboard shortcuts can save you much time using the selective adjustment tool. For example, you can press the “O” key to toggle the overlay on and off, the “M” key to switch between brush and gradient tools, and the “E” key to quickly access the adjustment brush settings.
Use the Range Mask: The Range Mask is a powerful tool that allows you to refine your adjustment by targeting specific colors or luminance values in the area you have painted over. To use the Range Mask, click on the “Range Mask” dropdown menu located in the Brush panel, and choose either “Color” or “Luminance”. Then, use the eyedropper tool to select the color or luminance range you want to target, and adjust the sliders to fine-tune your selection.
Use multiple adjustments: You can use the selective adjustment tool to adjust to different areas of your photo. Create a new adjustment by clicking the “New” button in the Brush panel, and paint over the area you want to adjust. You can then choose a different type of adjustment and repeat the process as many times as you like.
Be subtle: When using the selective adjustment tool, it’s important to be subtle and avoid over-editing your photo. Minor adjustments can make a big difference, so start with a light touch and gradually maximize the intensity of your adjustments as needed.
Experiment and have fun: The selective adjustment tool is powerful and can help you create stunning, unique photos. Feel free to experiment with different adjustments and techniques to see what works best for your photos. Have fun, and enjoy the creative process!
By following these tips and using the selective adjustment tool effectively, you can level up your Lightroom editing skills and create beautiful, professional-looking photos.
Conclusion
In conclusion, the selective adjustment tool in Lightroom is a dynamic and versatile tool that can help you take your photo editing skills to the next level. By following the step-by-step guide and using the tips and techniques outlined above, you can create stunning, unique photos that stand out from the crowd.
