How To Use Layers In GIMP
GIMP, which stands for GNU Image Manipulation Program, is a popular open-source image editing software that offers enormous tools for editing and creating images. One of the most robust features of GIMP is its layer setting, which allows users to create complex compositions by stacking multiple layers on top of each other. A layer in GIMP is essentially a transparent sheet containing different elements of an image, such as shapes, text, or other graphics. Adding multiple layers allows users to create various effects, such as blending two images, adding text to an image, or creating a collage. Using layers in GIMP can be a little overwhelming for beginners, but once you understand the basics, it becomes an essential tool for editing and creating images. This tutorial covers the fundamentals of using layers in GIMP, including creating a new layer, adjusting its position and opacity, and applying various layer effects.
Step 1: Understanding Layers in GIMP

Before you can start using layers in GIMP, it’s essential to consider what they are and how they work. Layers are essentially independent “sheets” of content stacked on top of each other to generate the final image. Each layer can contain different elements, such as text, shapes, or images, and can be edited and manipulated separately from the other layers. Using layers, you can create complex compositions and apply effects to specific elements of your image without affecting the rest of the composition. In GIMP, you can create and manage layers using the Layers panel, which allows you to add, delete, duplicate, and reorder layers as needed.
Step 2: Creating and Managing Layers in GIMP
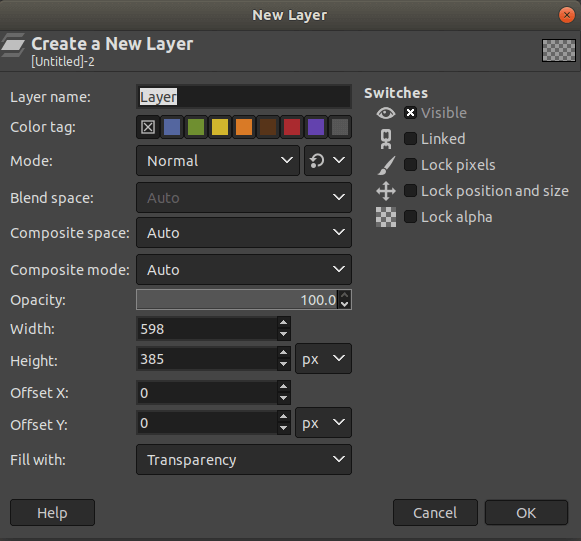
To create a new layer in GIMP, choose Layer > New Layer from the menu bar or click the New Layer option in the Layers panel. You can then name the layer and choose its size and position. Layers can be positioned above or below other layers by dragging them in the Layers panel.
To edit a layer, select it in the Layers panel and use the various tools and filters in GIMP. You can adjust a layer’s opacity and blending mode to control its interaction with other layers.
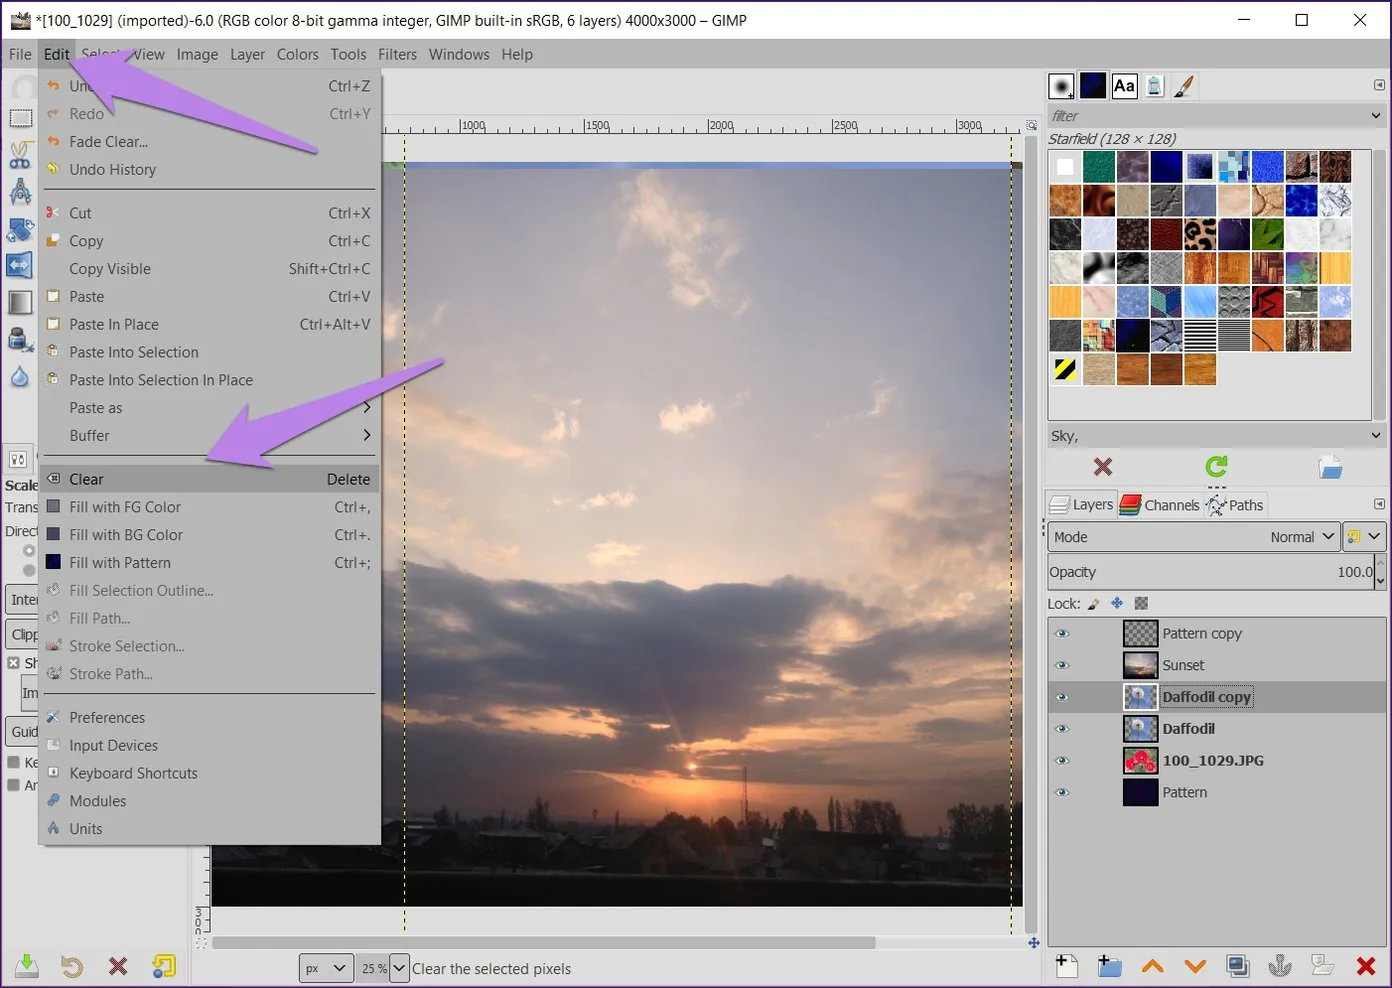
To delete a layer, select it in the Layers panel and click the Delete Layer option. To duplicate a layer, select it and choose Layer > Duplicate Layer from the menu bar.
By managing your layers effectively, you can create complex compositions and easily change specific elements without affecting the rest of your image.
Step 3: Using Layer Masks in GIMP
Layer masks help you hide or reveal parts of a layer without actually deleting them. That is useful for creating non-destructive edits to your image. Select the desired layer in the Layers panel to add a layer mask and choose Layer > Mask > Add Layer Mask. You can then choose the type of mask you want to add, such as a white or black mask.
To edit a layer mask, select it in the Layers panel and use the Paintbrush tool or other editing tools to modify the mask. White areas of the mask reveal the layer, while black areas will hide it. Gray areas will partially reveal the layer.
Using layer masks, you can create complex compositions and apply effects to specific parts of your image without affecting the rest of the composition. You can also easily change your edits by modifying the mask rather than redo the entire edit.
Step 4: Using Layer Opacity and Blending Modes in GIMP
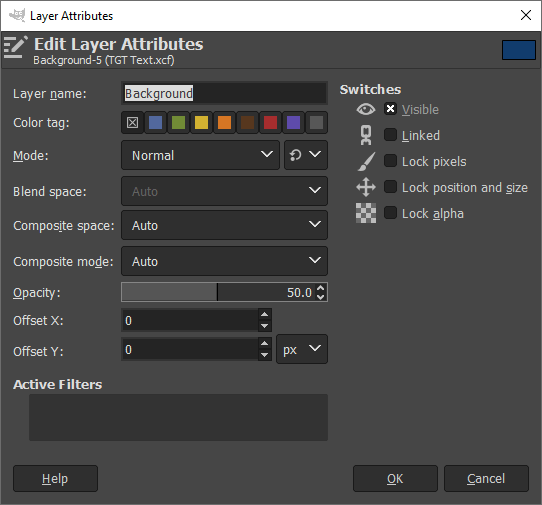
Layer opacity allows you to control the transparency of a layer. To adjust the opacity, select the desired layer in the Layers panel and use the Opacity slider to set the opacity level. Lowering the opacity of a layer will make it more transparent while increasing the opacity will make it more opaque.
Blending modes allow you to control how a layer interacts with the layers below it. To set a blending mode, select the desired layer in the Layers panel and choose the desired blending mode from the Mode dropdown menu. Some popular blending modes include Multiply, Overlay, and Screen.
Using layer opacity and blending modes, you can create exciting effects and control your layers’ interaction. For example, the Multiply blending mode can create a darkening effect, while the Screen blending mode can create a lightening effect.
Step 5: Grouping Layers in GIMP
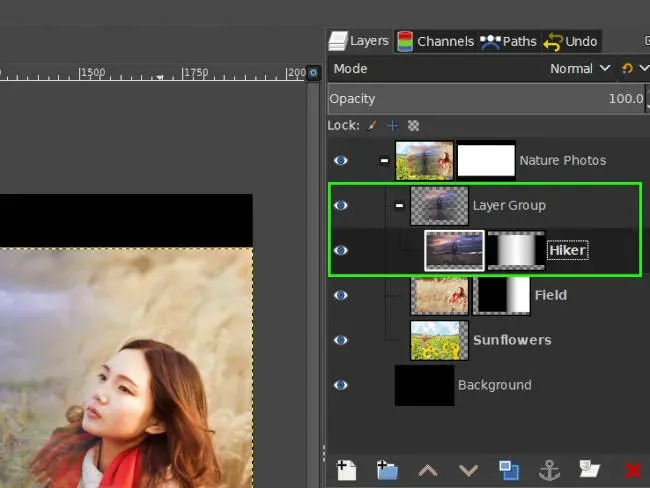
Grouping layers allows you to organize your layers and make editing and management more effortless. To group layers, select the layers you opt to group in the Layers panel and choose Layer > New Layer Group from the menu bar. You can then name the group and move the layers into the group by dragging them into the group folder in the Layers panel.
To edit a layer group, select it in the Layers panel and use the various editing tools in GIMP. You can also add layer masks or adjust the opacity and blending modes of the entire group.
By grouping layers, you can keep your Layers panel organized and easily make changes to specific groups of layers. That is particularly useful when working with complex compositions that contain many layers.
Step 6: Using Layer Effects in GIMP
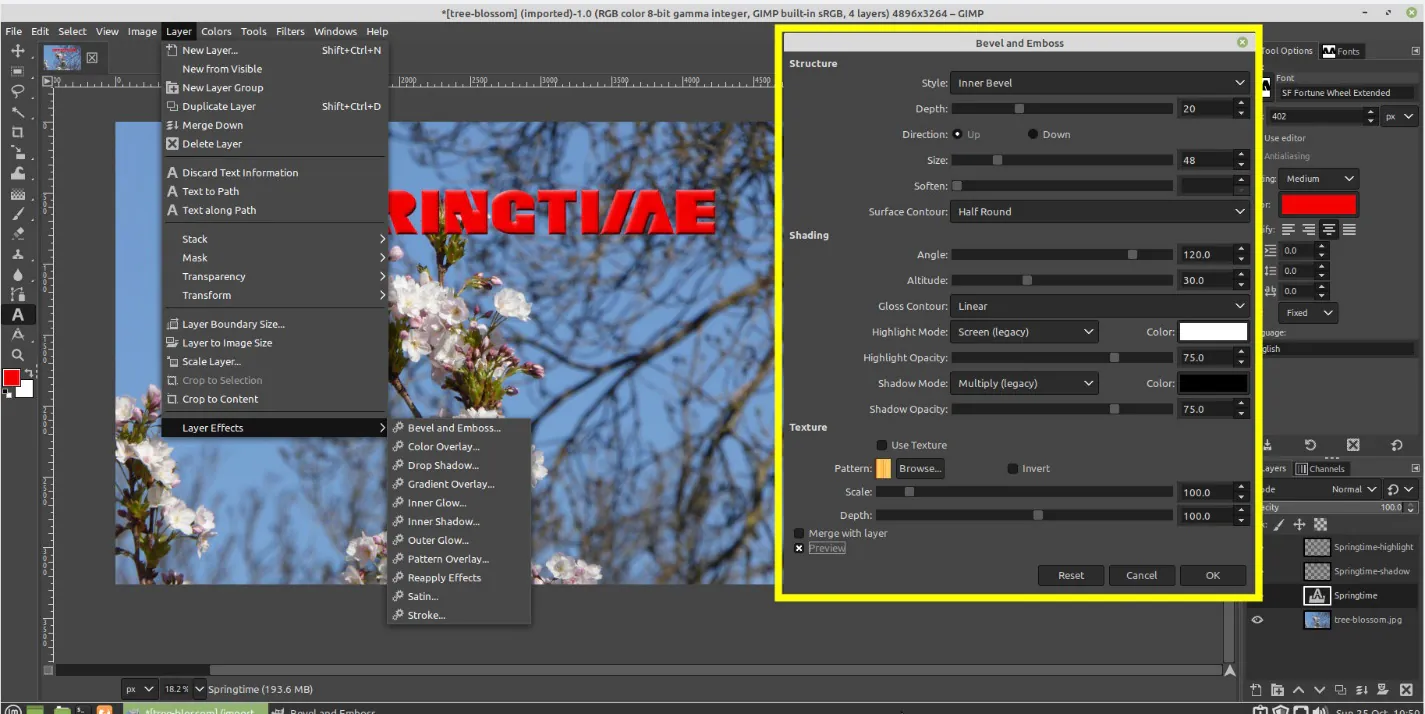
Layer effects allow you to apply special effects to a layer, such as drop shadows, glows, and bevels. Select the desired layer in the Layers panel to apply a layer effect, and choose Layer > Layer Effects from the menu bar. You can then choose the desired effect and customize the settings.
GIMP offers a variety of layer effects, including drop shadows, inner shadows, bevels, and outer glows. You can customize the settings of each effect to create a unique look for your framework.
Using layer effects, you can add depth and dimension to your composition and create exciting effects. For example, adding a drop shadow to a layer can create a sense of depth, while adding an outer glow can create a halo effect.
Step 7: Using Layer Styles in GIMP
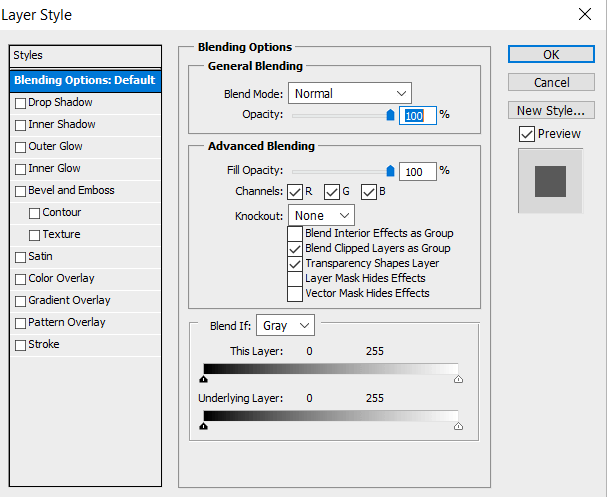
Layer styles allow you to apply a combination of effects and adjustments to a layer with just one click. Select the desired layer in the Layers panel to apply a layer style and choose Layer > Layer Style > Drop Shadow or other style from the menu bar. You can then customize the settings to fit your needs.
GIMP offers a variety of layer styles, including Bevels, Shadows, Glows, and Strokes. You can customize the settings of each style to create a unique look.
Using layer styles, you can apply multiple effects and adjustments to your layers with just one click, saving you time and effort. To create even more complex compositions, you can combine layer styles with other editing techniques, such as layer masks and blending modes.
Step 8: Exporting Your Layers in GIMP
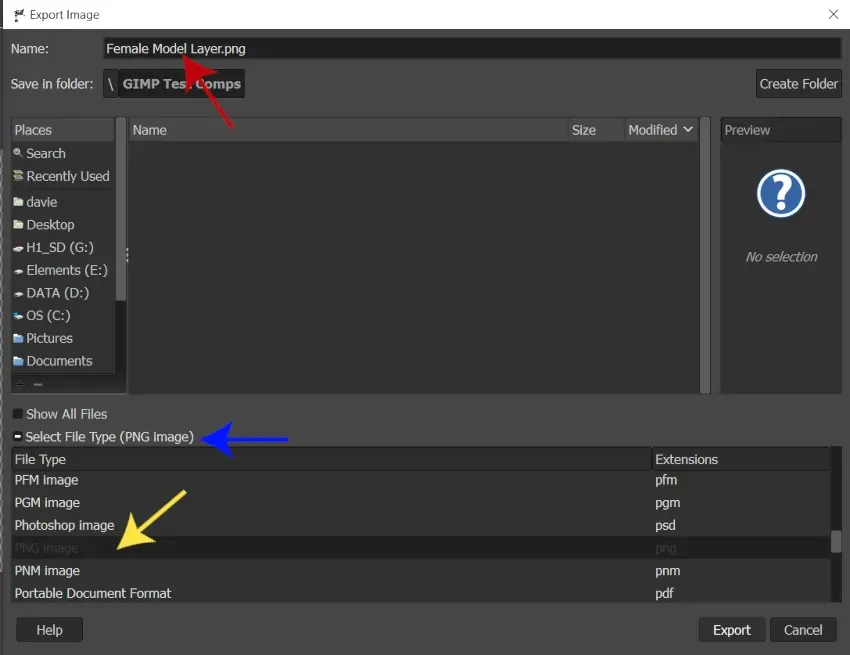
Once you have finished editing your layers in GIMP, you can export your composition as a single image or as separate layers. To export your composition as separate layers, choose File > Export As from the menu bar and choose the desired file format, such as PNG or TIFF. You can then choose the Export as Layers option to export each layer as a segregated file.
Exporting your layers as separate files allows you to use them in other programs or edit them further in GIMP. It also helps you to easily share your composition with others who may want to edit individual layers.
Following are some additional techniques you can use when working with layers in GIMP:
Adjustment Layers:
GIMP doesn’t have actual adjustment layers like other image editors, but you can simulate them using layer masks and adjustment tools. Start with creating a new layer and filling it with a solid color, then apply the desired adjustment tool, such as Levels or Curves. Finally, add a layer mask to the adjustment layer and paint on the mask to selectively apply the adjustment to specific areas of the image.
Layer Masks:
Layer masks are a powerful tool for non-destructively editing your layers. Select the desired layer in the Layers panel to add a layer mask and choose Layer > Mask > Add Layer Mask. You can then use the paintbrush or other tools to paint on the mask, revealing or hiding parts of the layer.
Clipping Masks:
Clipping masks allow you to apply a layer or adjustment to only the layer directly below it. Select the layer you want as the mask and choose Layer > Create Clipping Mask from the menu bar to create it. Any layer below the mask layer will be clipped to its shape.
Smart Objects:
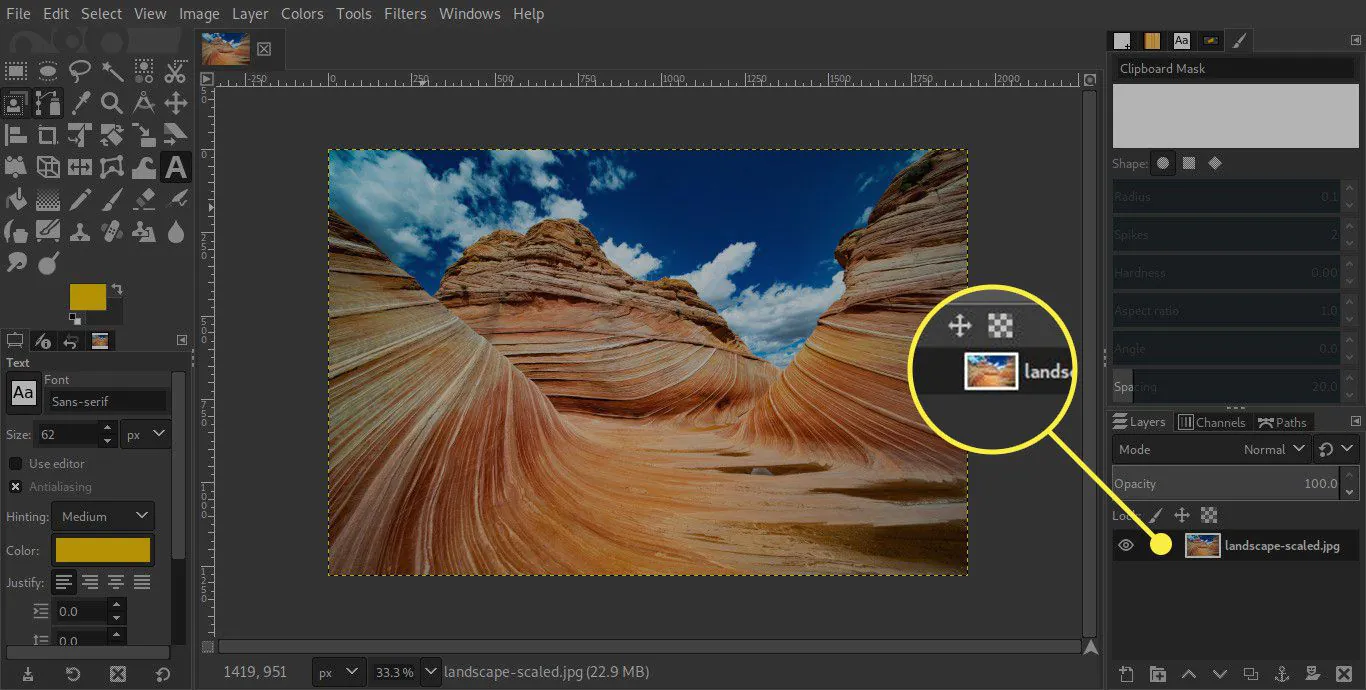
GIMP doesn’t have true smart objects like other image editors, but you can simulate them using linked layers. Select the desired layer in the Layers panel to create a linked layer, and choose Layer > Link Layers from the menu bar. You can then duplicate the linked layer, and any alterations you make to the original will be reflected in the duplicates.
These additional techniques can help you create even more complex and dynamic compositions in GIMP.
Conclusion:
Layers are an essential tool for creating complex compositions in GIMP. Using layers, you can easily make non-destructive edits, create interesting effects, and organize your composition. GIMP offers a variety of tools and features for working with layers, including layer masks, opacity and blending modes, layer effects, and layer styles. By mastering these tools, you can create stunning compositions that are sure to impress.
