How To Use Subsurface Scattering In Portrait Retouching
Subsurface scattering is an efficient technique in editing digital images and graphics that replicates the effect of scattered light rays after they scatter within a texture or subsurface. Particularly in portrait retouching, it can create soft glowing effects while manipulating the shot, making it likely look more natural than it seems with harsh camera flash and photography light effects. Subsurface scattering can also correct skin imperfections in portraits like blemishes, redness, or uneven tones, creating a soft and gentle look. It can remove dullness or boredom from the subject and make it look more vibrant and fresh. That results in a rhythmic and likable composition that enriches the subject’s natural beauty, unlike giving an artificial look, which often happens with traditional or apparent retouching edits or filters. To add an excellent subsurface scattering effect to your images, you can use particular strategies, and your visuals will be transformed into flawless splendor, embodying beauty and aesthetic lure up to natural and lifelike looks. This blog contains a step-by-step approach to using subsurface scattering in portrait retouching, which can improve your editing skills.
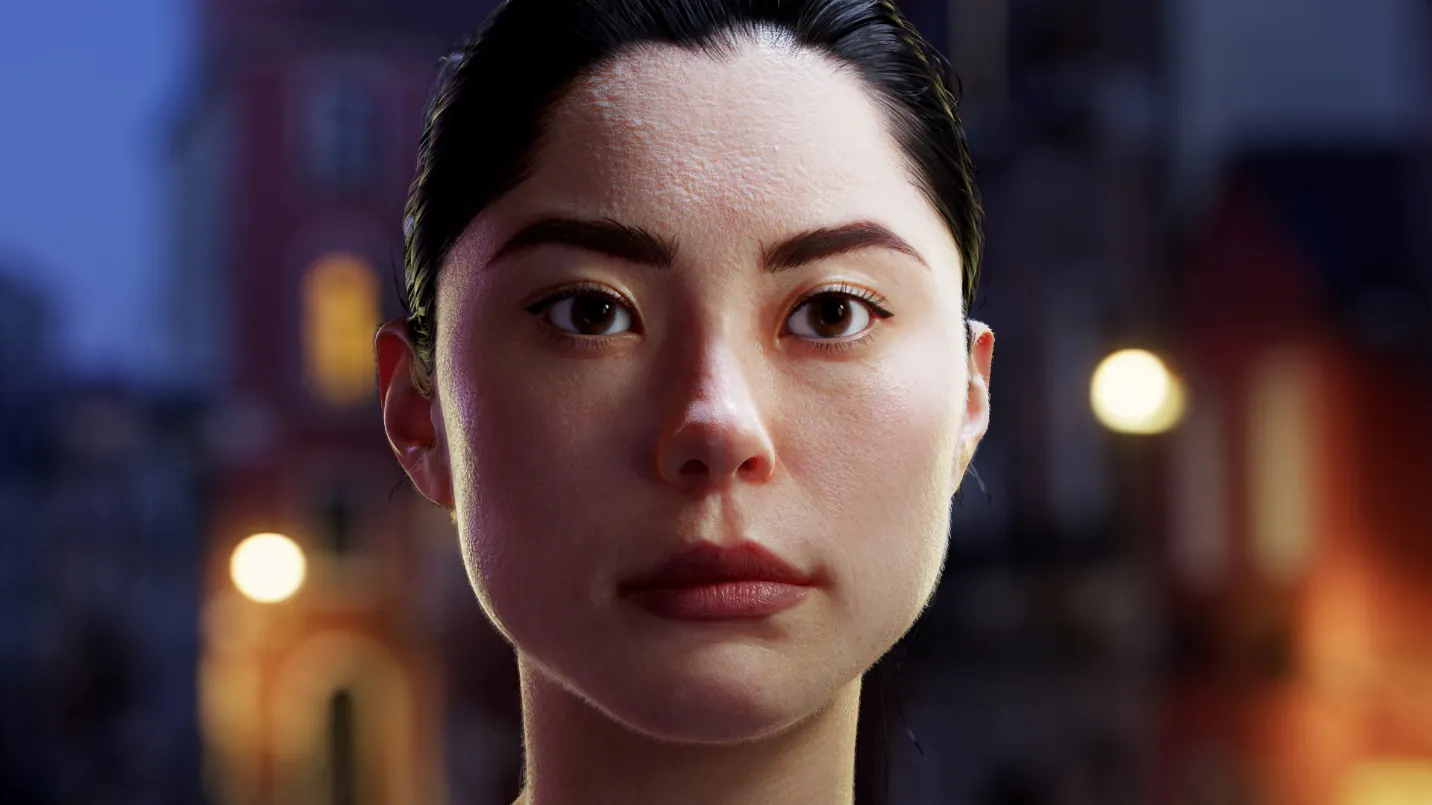
Step 1: The Portrait Preparation
The initial step in utilizing subsurface scattering in portrait retouching is to make the photograph ready. This beginning stage sets the base for modifying, ensuring an amended source photo.
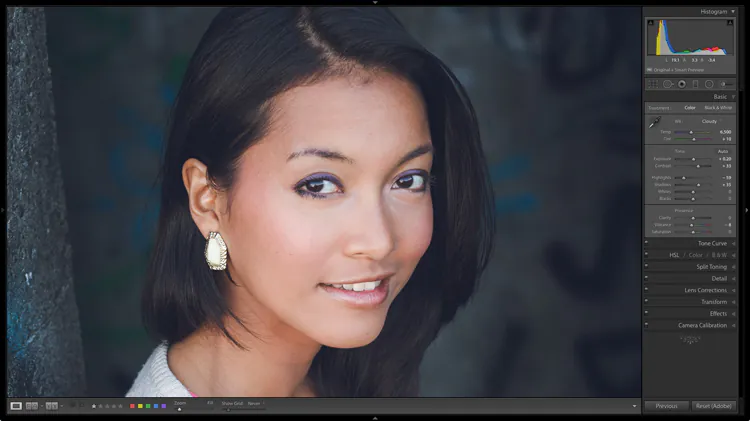
Start by opening your portrait in your favored picture editing software, like Adobe Photoshop or Lightroom. Once the picture is opened, explore any defects, exposure mess, or color imbalances requiring rectification.
Make the essential alterations to improve the image’s quality in general. Common alterations are tweaking exposure settings, tending to color temperature, and adjusting contrast and brightness.
Attending to any imperfections at this phase, you set a well-prepared picture and provide the best beginning point for the subsurface scattering effect, prompting a well-polished last representation.
Step 2: Creating the Image Copy
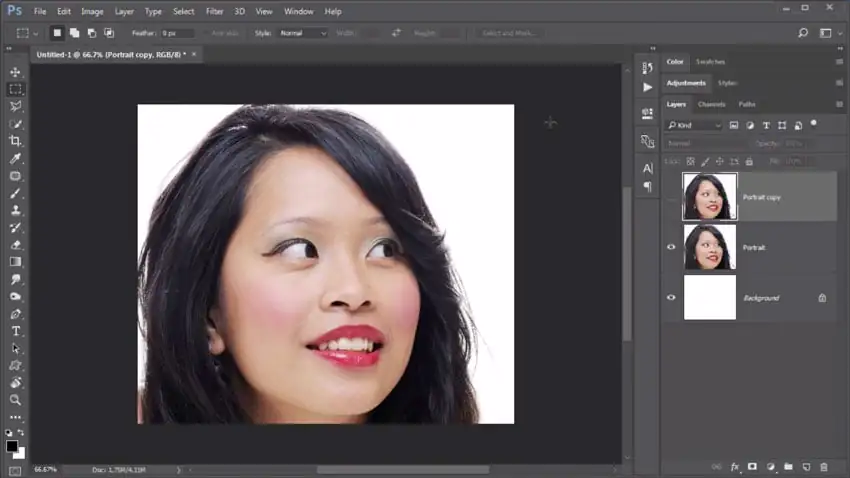
Find the Layer panel or similar alternatives in your editing program. Move down to the “Duplicate Layer” or “New Layer” button and click it. It will develop an identical copy of the source image as a standalone layer.
Layer duplication provides you with a separate base other than the original image to maintain the original’s authenticity. Moreover, it is a non-destructive editing method that extends versatility in your retouching activity.
In this layer, you’ll make alterations, integrate different effects, and try diverse retouching methods without causing irreversible changes. If you’re not content with the outcomes, you’ll return to the untouched layer and create another copy.
As you can see, the initial and copied layers are side by side; you can easily compare the changes you make during the modifying process. This comparative analysis helps observe the effects of your alterations.
Step 3: Adding the Blur Effect
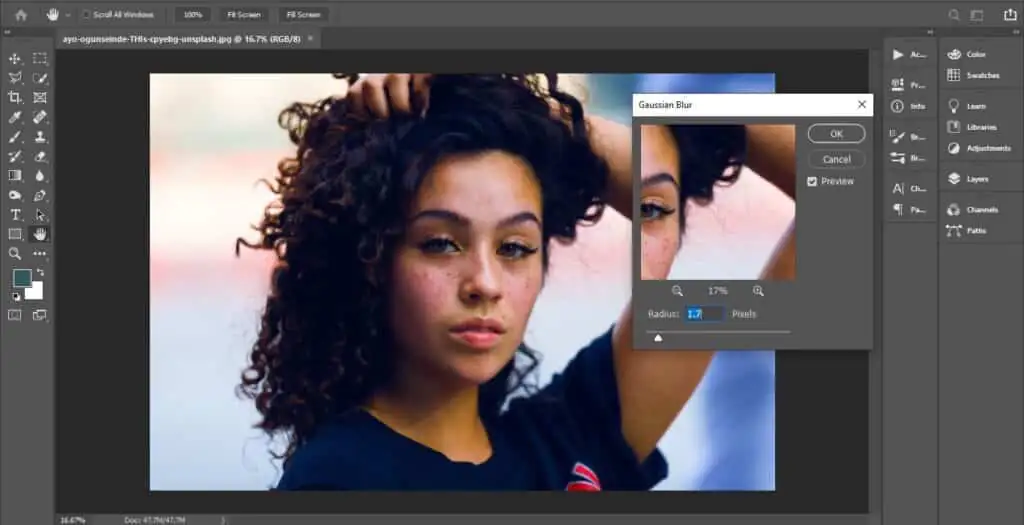
In this step, you’ll add a Gaussian blur to the copied layer. This blurring strategy mellows the portrait, recreating the impact of light scattering within the skin, which could be a key component of subsurface scattering. So, begin with selecting the duplicate image layer.
Get to the Gaussian Blur Filter in your software. You’ll find it within the “Filter” menu or beneath the “Blur” submenu. Select the filter, and you will access further settings.
Manage the intensity of blurriness using the radius option. At first, set a low radius around 5–10 pixels, and keep adjusting it as per your image resolutions and the softness you want in the effect.
Use the preview option to check the effect of the Gaussian blur on the picture. Examine how it influences skin texture and lighting. You can tweak the blur until you obtain a natural radiance.
After getting a perfect Gaussian blur, include it in the copied layer. It will soften the complete picture, laying the framework for recreating subsurface diffusing.
For a non-destructive approach, work on a separate layer to alter or evacuate the Gaussian blur impact if required without changing the initial picture.
Step 4: Using the Mask Tool
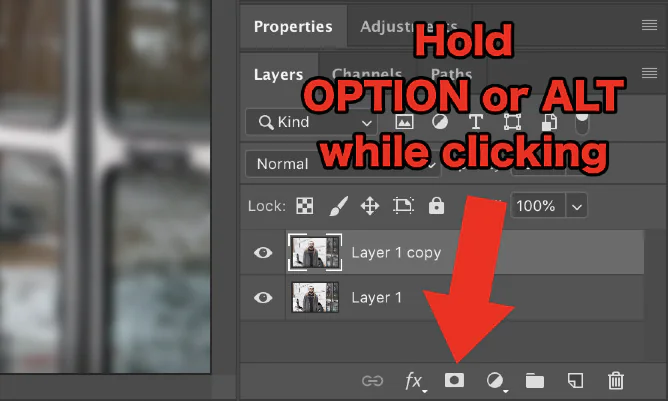
Select your duplicate layer modified with Gaussian blur for the selective application of blurring effects.
After selecting the duplicate layer, you must head to the layer mask icon, which you can see at the bottom of the layer panel.
Tap on the layer mask icon, and you will see that it will add a layer mask to the layer. At first, the layer mask appears white, making the full Gaussian blur effect noticeable.
The layer mask is set to the entire layer by default; for selective masking, you need to select a soft, low-opacity brush to use on the mask.
To hide the effect from a particular region, choose a black color for your brush tool and paint those areas of your image.
If you want any areas to recover where you painted to hide the blur effect, you can switch back to the white brush to rediscover the effect.
Keep manipulating the masking, switching between white and black brush to hide or reveal the effect; once you are satisfied, move on to the next step of portrait retouching with subsurface scattering.
Step 5: Selectively Brushing Subsurface Scattering Effect
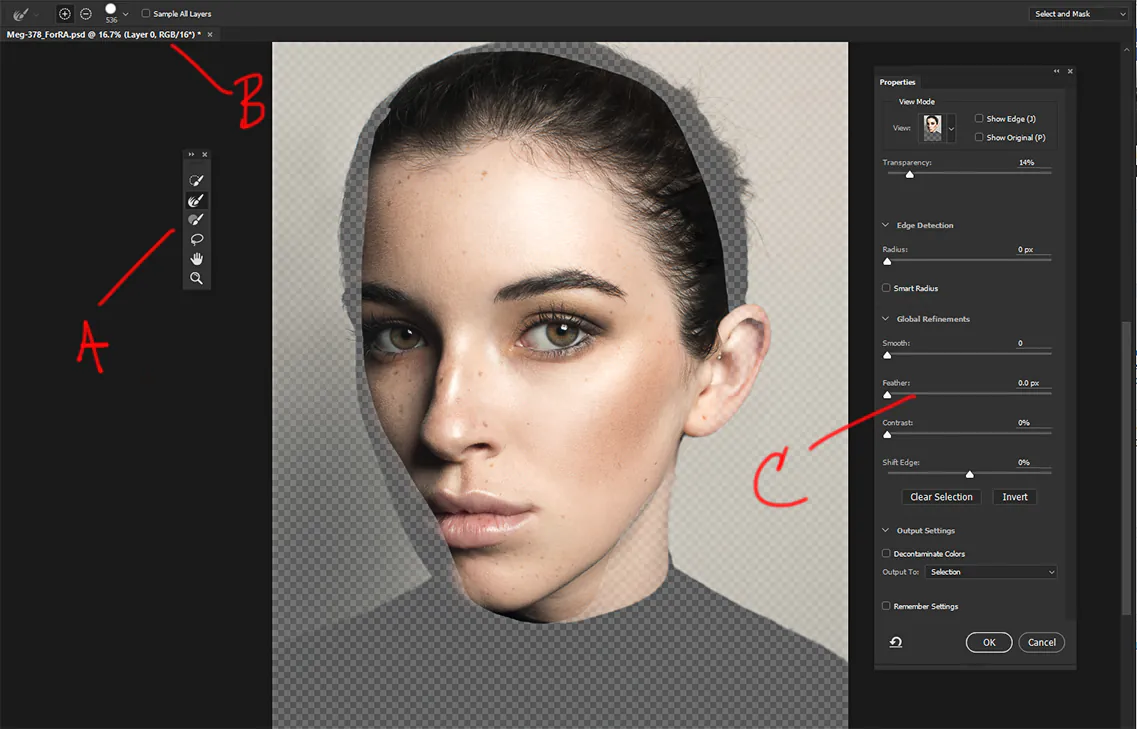
Access the soft brush within your image editing software. Soft brushes have feathered edges, which make the smoother shifts between the effect and the initial image. Alter the brush measure based on the zone you’re working on.
To control the layer mask, set your brush in a dark color. Stroking with black on the layer mask will cover up or decrease the effect, revealing the main image underneath.
Start painting the areas of your portrait where you aim to introduce the subsurface scattering effect, like the cheeks, forehead, and nose. It will add a diffused glow to the skin due to light scattering.
Employ a lower opacity brush, almost 10–20%, to gradually put forward the effect. The steady application makes the effect look more genuine without causing overdone outcomes.
Concentrate on the transition between zones with and without effects to blend gently and avoid harsh or visible boundaries between them.
Keep using the preview option for the image while you apply the effect. Tune the brush opacity, toggle between black and white, and fine-tune the effect to attain the desired extent of realism.
Note the direction and intensity of the light source in your portrait and make the effect more evident on the side of the face that gets the most light, as that is typically where subsurface scattering is most prominent in real life.
Step 6: Manipulating the Transparency
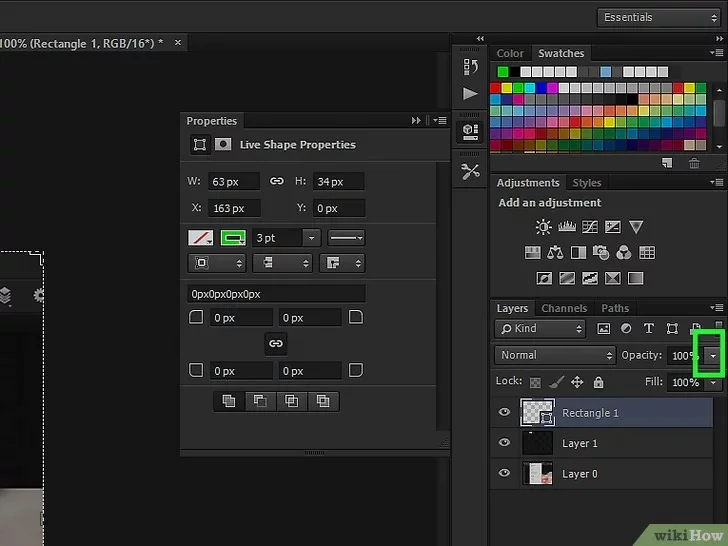
Select the layer you finished working on in step 5 and hit the opacity slider or any similar option around the duplicated layer. Now, you must carefully adjust the intensity of your subsurface scattering effect.
Start by minimizing the opacity by 20 to 30% around the layer. And slowly approach the suitable percentage, which varies according to the desired look.
During opacity manipulation, preview the image and try attaining soft, subtle lighting to look natural and enhance the portrait without looking too artificial.
Adjust the opacity gradually, increasing it slightly if the effect is too subtle or decreasing it if it seems too obvious. The ideal amount of opacity will depend on the specific image and visual impact you want to get.
Consider the subject’s skin type, aging factor, and lighting surroundings when adapting opacity; younger subjects have smoother skin, and the subtle effects will be best, while older subjects should have slightly bolder effects.
Emphasize striking a harmony between improving the portrait’s appearance through subsurface scattering and too intense lighting display.
By the end of step 6, your composition with subsurface scattering effects is all set for a final glance and tweaks.
Step 7: Final Check and Tweaks
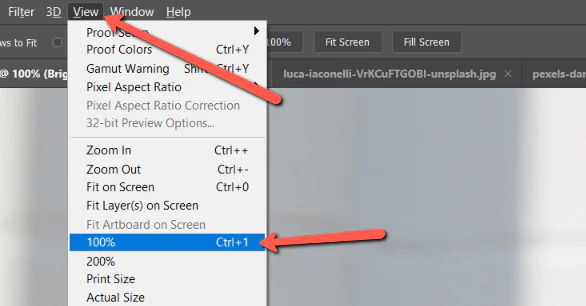
Take a zoom-in view of the image to observe it and identify fine details or other significant flaws that may have appeared in the retouching process.
Inquire into the transitions between zones with and without the subsurface scattering effect. Make sure those transitions are smoother and undetectable and merge immaculately into the original image.
Use a soft brush with a low opacity and a color set to black or white on the layer mask to make precise touch-ups. You can further refine the areas where the effect is applied or reveal some of the original skin texture where necessary.
Select a soft brush of low opacity and in black or white. Use it on the layer mask to make delicate revisions. Also, polish the areas where the effect is applied or divulge some of the original skin texture if needed.
In this final step, you should make concluding color tweaks, making skin tones and the overall look error-free and pleasing to the eye.

After you are delighted with the final result, save your edited image in a format suitable for your purposeful use.
As a final check, compare the edited photo with the original. It confirms that the improvements will accumulate and ensure the portrait holds its imperative persona.
Conclusion
Subsurface scattering application in portrait retouching boosts visual appreciation and makes photographs lively and exciting. It gives the subject’s skin a natural glow, exhibiting youthfulness and aesthetic softness. This technique can retouch the skin’s surface and imperfections while increasing its appearance. Unlike rapid beauty filters and effects, it does not just superficially smooth out the skin completely; it maintains a symphony between skin texture and softness. By mimicking the interaction of light with the skin, SSS lets you supervise the lighting effects according to age and skin type, resulting in a beneficial outcome that can assist photographers and photo editors.
