How To Use Ambient Occlusion In Photoshop
Ambient occlusion centers on the shading and rendering aspects of images that elevate the realism of lighting effects. It can redirect the effect of ambient or indirect light on the objects within the image. By evaluating the proximity of pixels within an image, ambient occlusion determines the intensity of indirect light that can pass through them. In the regions where things are next to each other or in spaces, it is likely to have less ambient light, leading to darker regions, yet spacious and exposed places will be more luminous. By generating plausible shading and depth variations in 2D images and graphics, ambient occlusion can make them sound more three-dimensional and more aesthetically inviting. There are various software tools out there for creating ambient occlusion effects, but particularly for digital images, Photoshop is the most preferred option. This blog post will further elaborate on the steps used in the process of using ambient occlusion effects in your images using Photoshop.
Step 1: Set your project specifications and image settings
Before moving to the ambient occlusion process, install and open Adobe Photoshop on your PC.
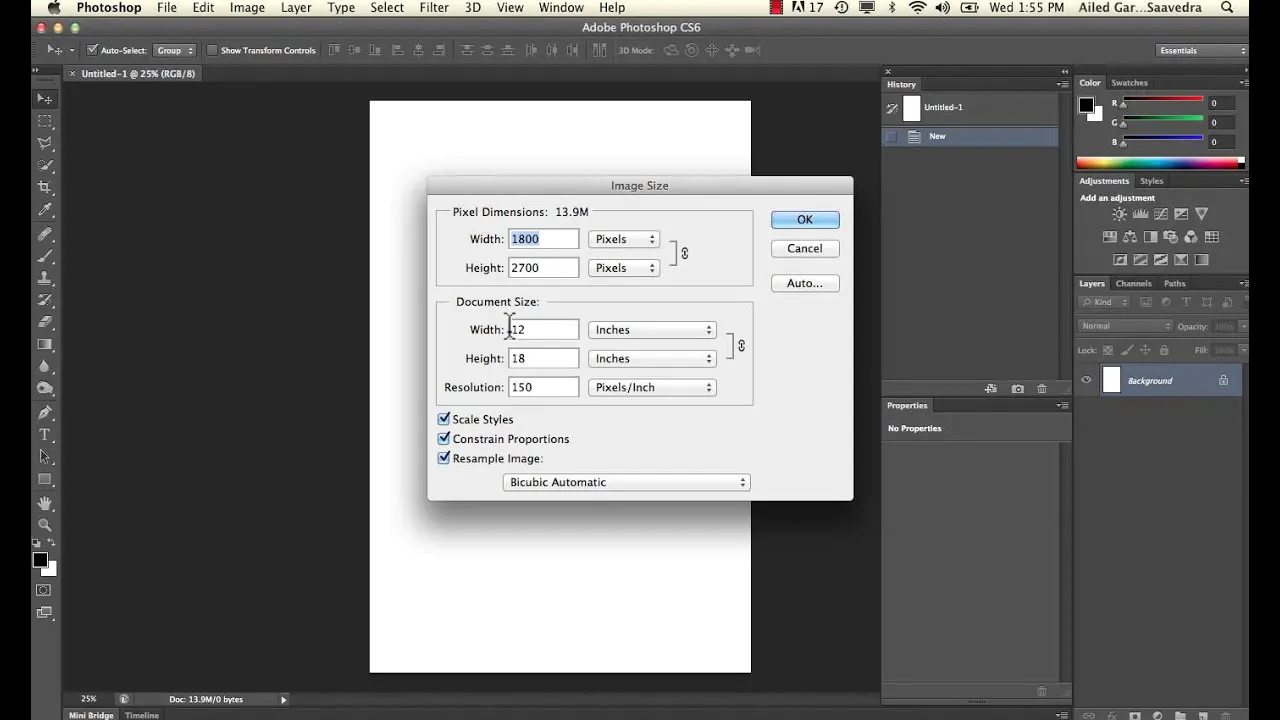
After launching your software, look for the File menu, then click the New option, and adjust your required dimensions, resolution, and color mode for your project.
After specifying your project, you must import the image you want to manipulate by selecting the File menu and then Open. Browse your files to locate the image file you need to work on and tap Open.
Reconsider resizing, cropping, or minor tweaks to brightness and contrast. Utilize Photoshop’s different tools and commands for these edits.
Go to File, select Save or Save As, and indicate a location on your computer to keep the project record.
Step 2: Create a spare copy of the source image
After image choice and preparation, duplicate your photo to openly control it without affecting the original.
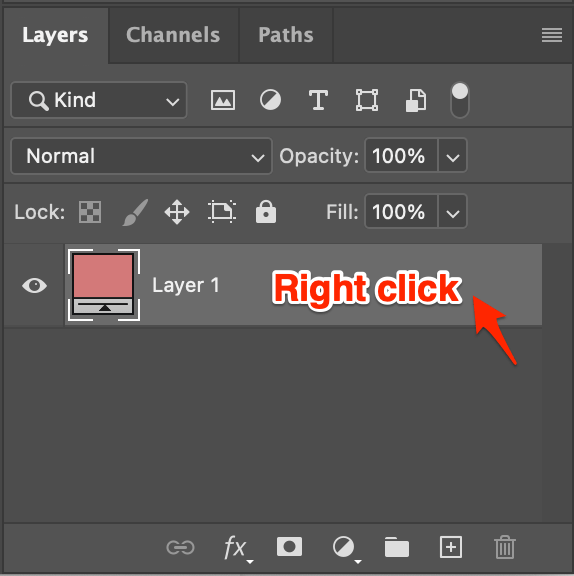
To copy the image, look for the layer menu on the right of your Photoshop workspace. This menu shows all the layers inside your photograph.
Recognize the layer that contains your image. You will find it labeled as Background, as you have opened a single picture.
Select the background layer to create a copy of it. On the other hand, use shortcut keys like Ctrl+J for Windows and Cmd+J for Mac. These key shortcuts will immediately duplicate the chosen layer.
Consider renaming the duplicate layer using a more expressive title. Tab on the duplicated layer’s title, select “Layer Properties,” and designate a significant title, such as “Image Copy.”
After creating and renaming your duplicate layer, you’ll find two identical layers within your Layers menu.
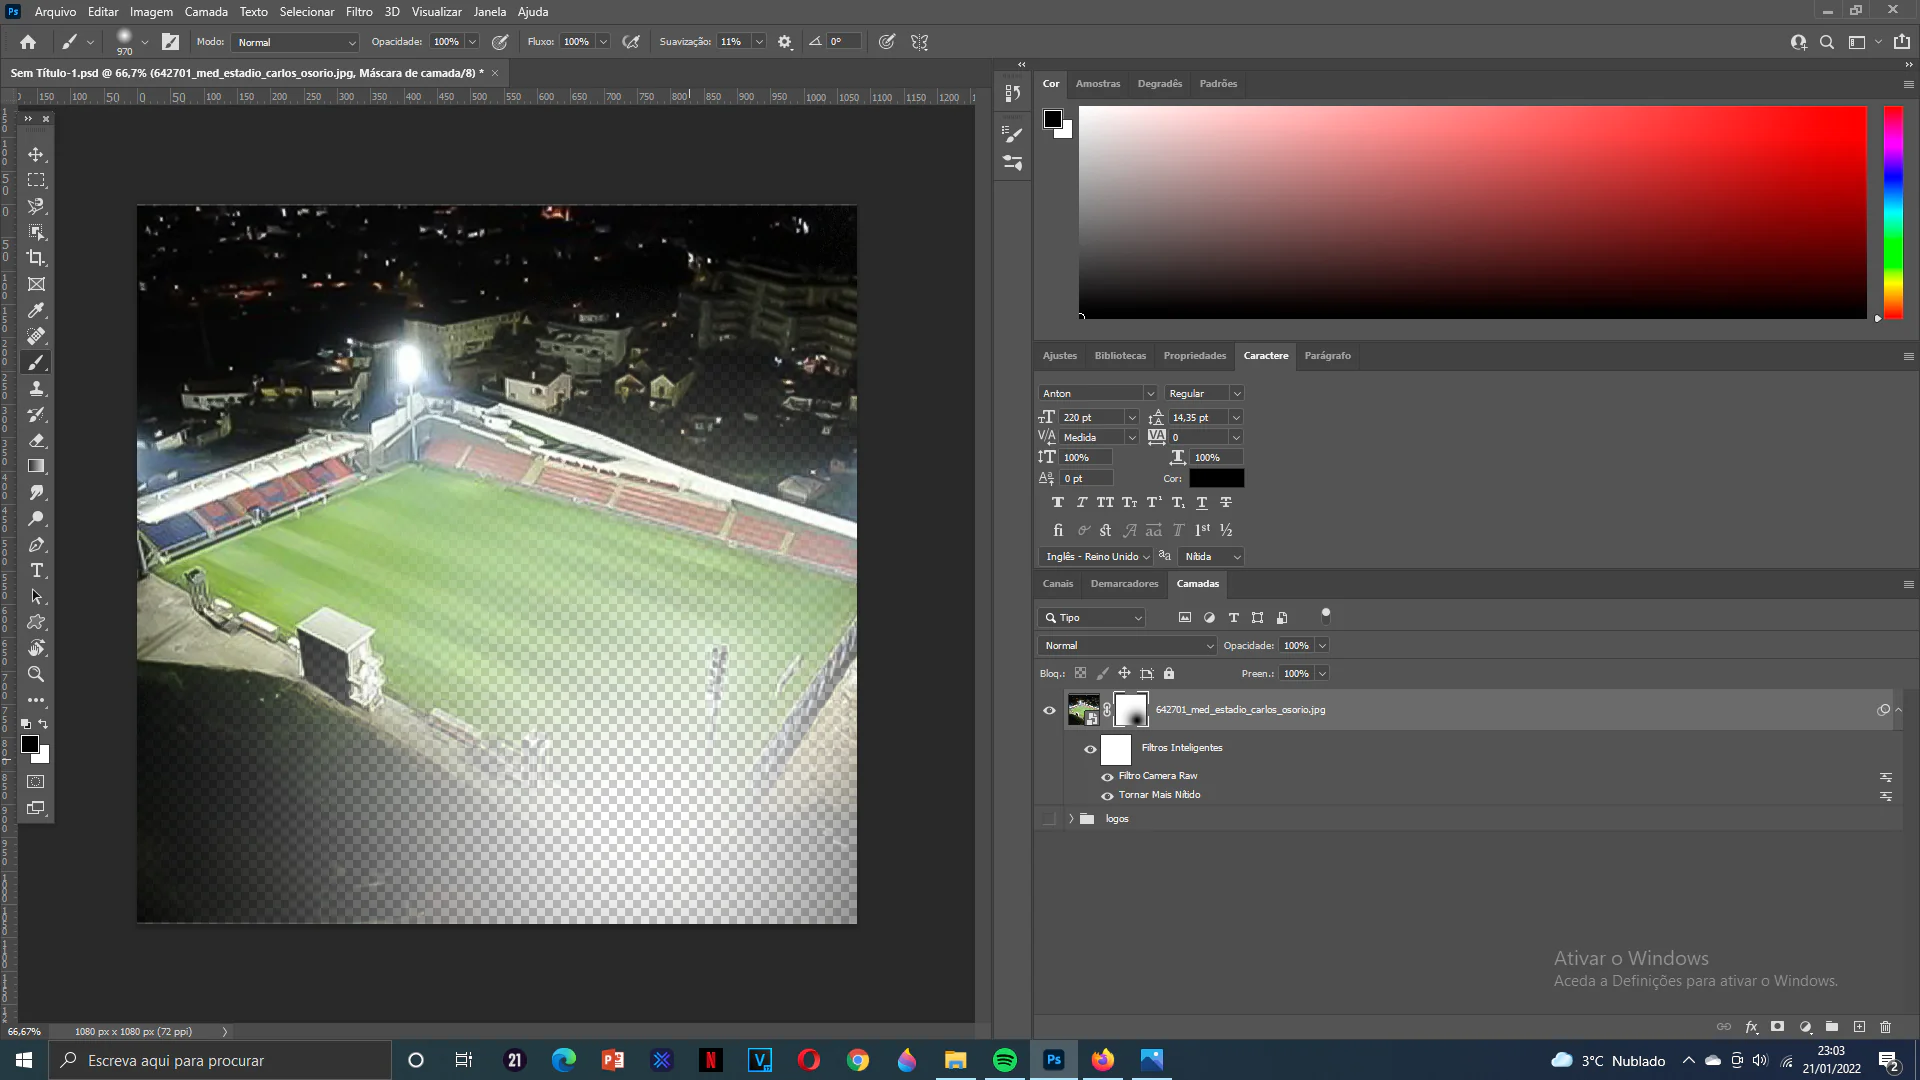
Step 3: Convert the duplicate layer to Smart Object
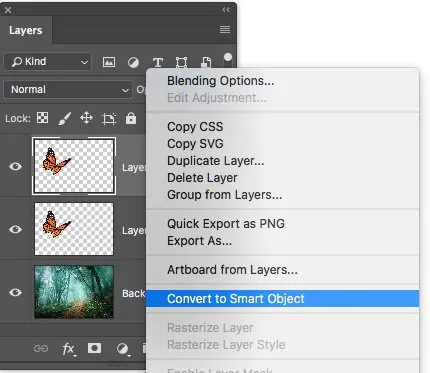
For nondestructive editing, you should convert your duplicate image into Smart Object. Firstly, select the image duplicate layer in your layer panel.
Afterward, head to the “Layer” option at the top bar of the Photoshop workspace. Clicking on it will make a dropdown menu appear to select “Smart Object” and then”Convert to Smart Object.”
Next, you’ll find a small square icon in the layer’s thumbnail of the Layer panel as the layer has been changed into Smart Object.
Converting to Smart Object is a vital phase for the ambient occlusion procedure since it permits you to form changes to the layer without forever modifying the image data.
You’ll effortlessly alter the applied filters and settings by double-clicking on the Smart Object layer within the Layers menu, opening it as a separate layer.
Remember to save your settings after converting to Smart Object to ensure your progress is saved.
Step 4: Incorporate ambient occlusion effects
After creating your Smart Object layer, move to the filter application process. It will bring profoundness and naturalism to your image.
Select the Smart Object layer from your layer panel. That is the layer to apply detailed ambient occlusion adjustments.
Now, you have to locate the Filter menu, which you can find in the top menu bar of your software.
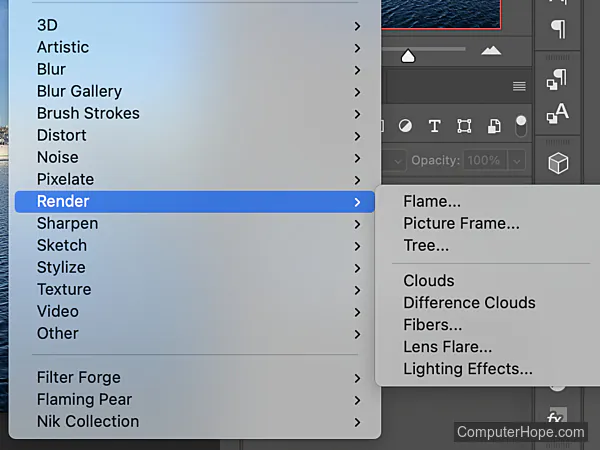
From the filter categories, find “Render” and press on it to get to rendering filters. Inside this submenu, you’ll discover the different filters that can create Ambient Occlusion effects. Try Lens Blur and Blur Gallery options to manipulate shadows and shading effects.

Set different filter parameters to control the quality, intensity, and radius of the effect. Test with these settings to get the required level of ambient occlusion in your picture.
Pay attention to the preview option within the dialog box to assess the results of the filter in real time. Here, you can make rapid adjustments and observe how the ambient occlusion effect transforms your image.
After finalizing the settings, click “OK” to insert the ambient occlusion filter into the Smart Object layer. At the end of this step, you will witness a significant transformation in your image.
Step 5: Amend the blending settings
In this step, you have to alter the blending mode of the Smart Object layer to “Multiply.” Modifying the blend mode makes a difference by upgrading the authenticity and depth of your effect.
Within the Layers panel, confirm that the Smart Object layer with the ambient occlusion filter is chosen.
Find the “Blend Mode” dropdown menu, which is present at the top of the Layers panel. You will see it’s set to “Normal” by default.
Tap on the dropdown menu, and from the list of blend modes, choose “Multiply.” This blend mode darkens the primary colors, making it perfect for coordination between shadows and the shading effects of the ambient occlusion filter.
Lower the opacity to diminish the strength of the effect or enhance it for a more articulated result.
Take a minute to evaluate how the ambient occlusion impact currently communicates with your image. Here again, keep in mind to save your settings to guarantee that your hard work is protected.
Step 6: Apply a layer mask to the ambient occlusion
To selectively apply the ambient occlusion effect to different regions of your image, consider adding a mask to the Smart Object layer with ambient occlusion.
Select the Smart Object layer containing the ambient occlusion filter and move to the bottom region of the layer panel, where you will see the icon of a rectangle shape with a circle inside. This icon is to add a layer mask.
Select the layer mask icon and the layer you selected earlier will be activated for masking.
Typically, the layer mask color is white by default, resulting in an evident ambient occlusion effect. Use the color swatches found in the layer panel and toggle the mask color to black while selecting a soft brush.
Utilize the black brush to stroke onto the regions you want to hide or dim the ambient occlusion. For instance, go for areas with intense shading or wherever you like to preserve the already-present lighting.
If, inadvertently, you masked too much of the effect or would like to let it out in particular areas, alter the brush color back to white and apply color over those patches to resume the ambient occlusion.
Keep perfecting the layer mask to get a harmonious ambient occlusion in your composition and save your progress.
Step 7: Examine and readjust the final effect
Reselect the Smart Object layer with the ambient occlusion you adjusted in Step 6 and start working on it to polish your composition.
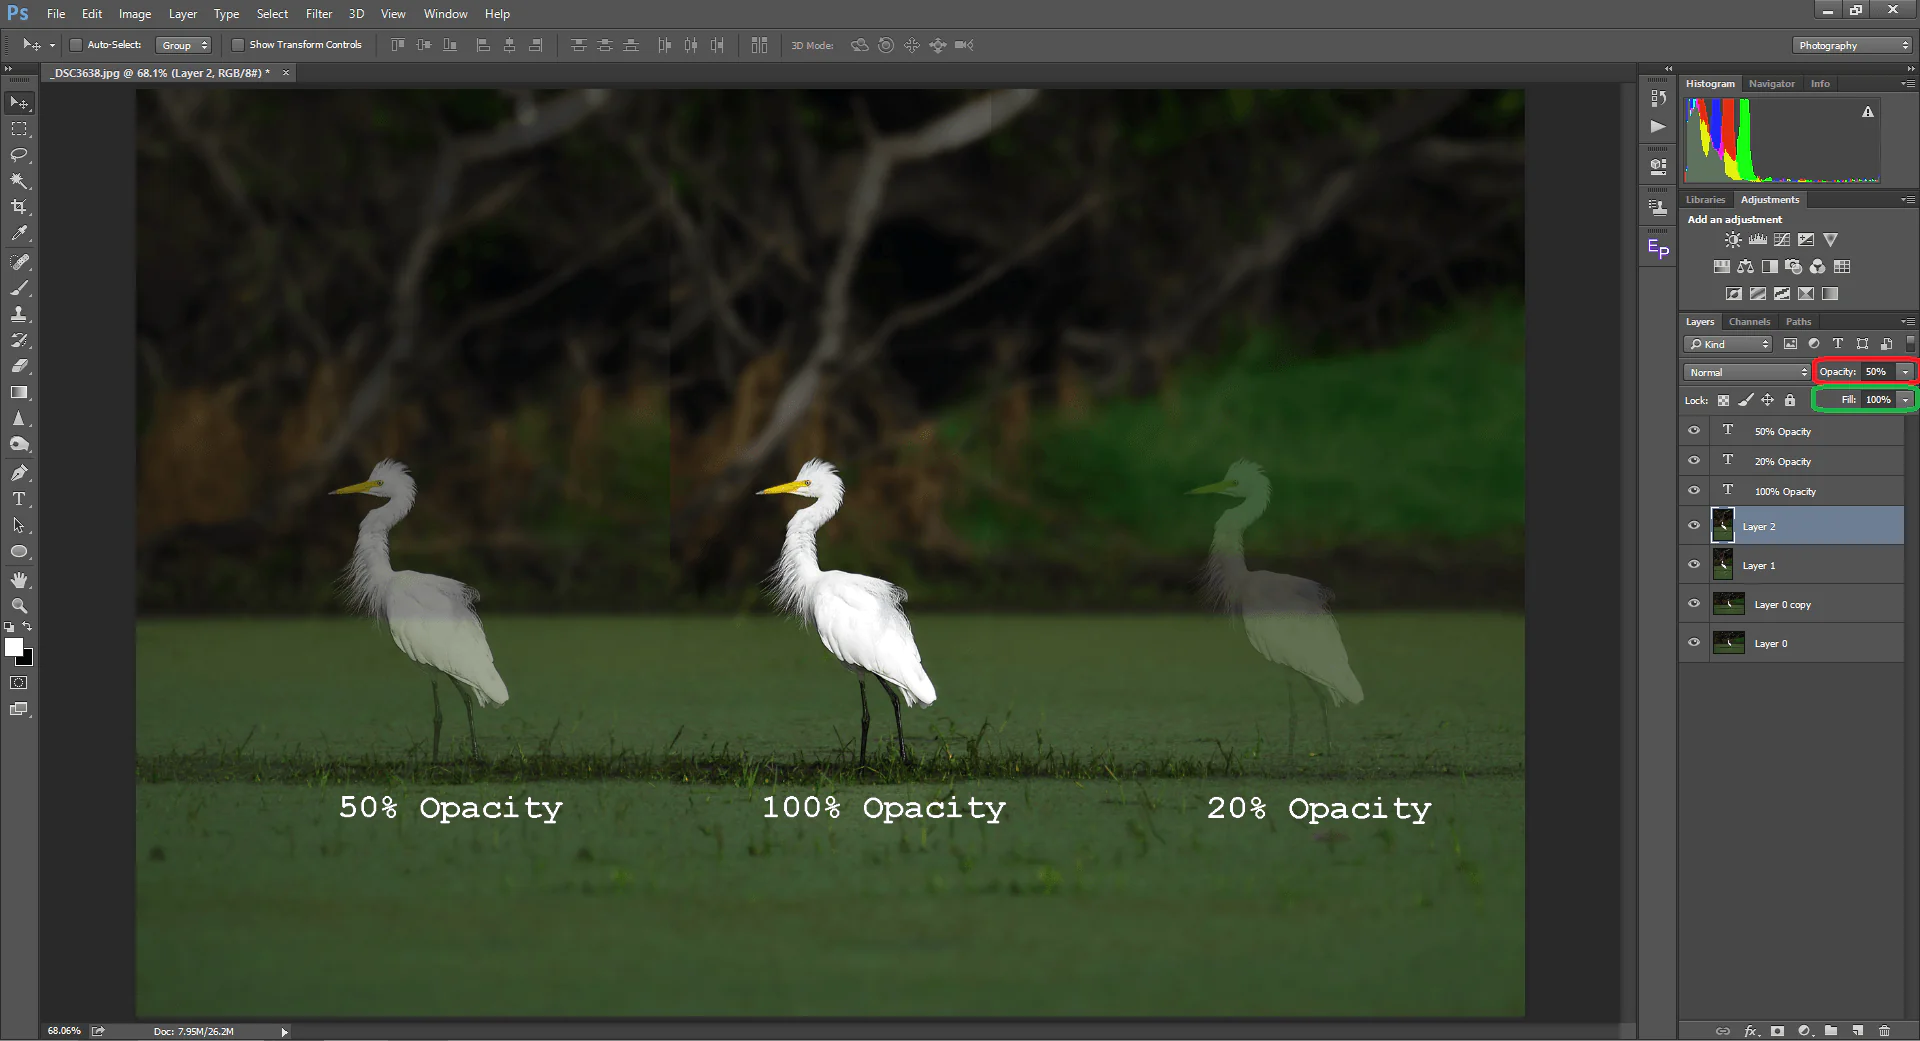
Locate the opacity slider, which is typically next to the layer name, and you will see the opacity of your underprocess layer is set to 100, which means the ambient occlusion is at 100% intensity.
Select and drag the opacity slider to decrease its value, creating a less prominent yet realistic effect.
When you set the opacity, carefully observe your image to detect the correct value at which the ambient occlusion effect fits into the scene without dominating it with a natural incorporation.
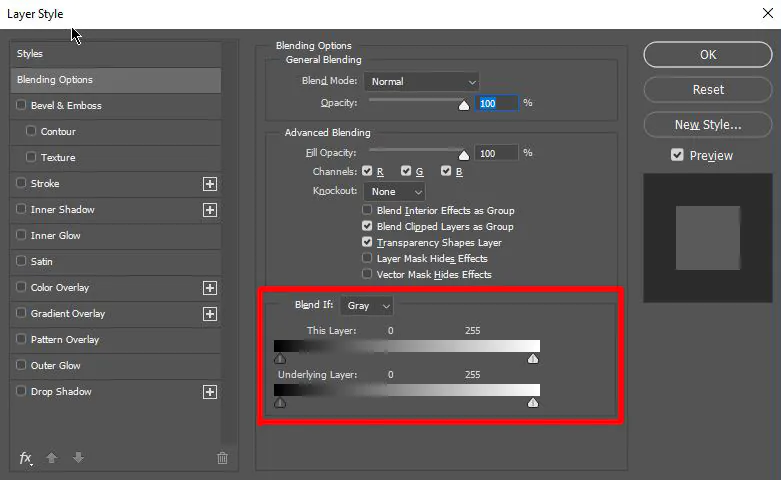
Click “Blending Options,” and in the Layer Style dialog, select the “Blend If” sliders to examine how the effect operates with the primary photograph.
Regulate the opacity and the mask concurrently to get a consistent integration of the ambient occlusion effect.
Step 8: Set the required format and save
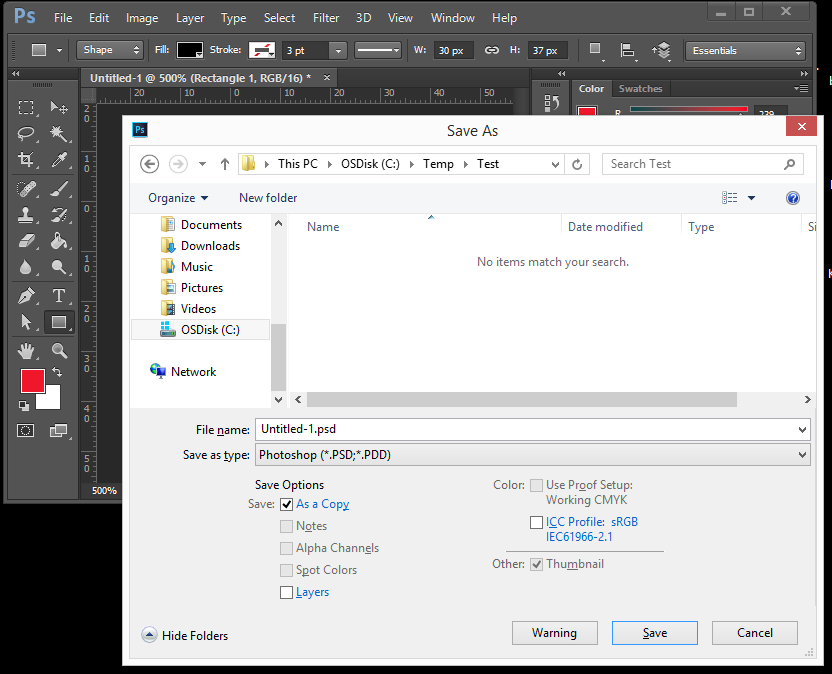
Take your time to thoroughly evaluate your final image from different perspectives, ensuring the visual authenticity of the ambient occlusion effect.
Navigate to the “File” menu and tap the saving option “Save As.” After that, you must assign a location on your computer, decide the file format, and label the image with a suitable name.
Choose an optimal file format as per your purpose of use. Standard formats like JPEG are fit for web sharing, TIFF for professional printing, and PSD to incorporate all layers while retaining editing functionality.
If you opt for JPEG, you can manipulate compression and quality adjustments. Improved quality settings bring about superior image quality yet larger file sizes.
At last, head to the Save option to save your image with the applied ambient occlusion effect featuring your creative tweaks.
Conclusion
In brief, ambient occlusion can reshape or enhance the lighting aspects of your images in a very natural way. By manipulating shading and shadows, you can magnify realism and create the semblance of 3D in your flat images. It concentrates on shadowing induced by objects’ nearness instead of explicitly imitating reflected light and its shadow-casting aspect. This approach is meaningful for attaining genuine lighting and complexity in shots. However, when using ambient occlusion, it’s critical to maintain consistency between amplifying the visual spirit of your graphics and creating any artificial effects.
