How To Add A Moire Effect To A Photograph
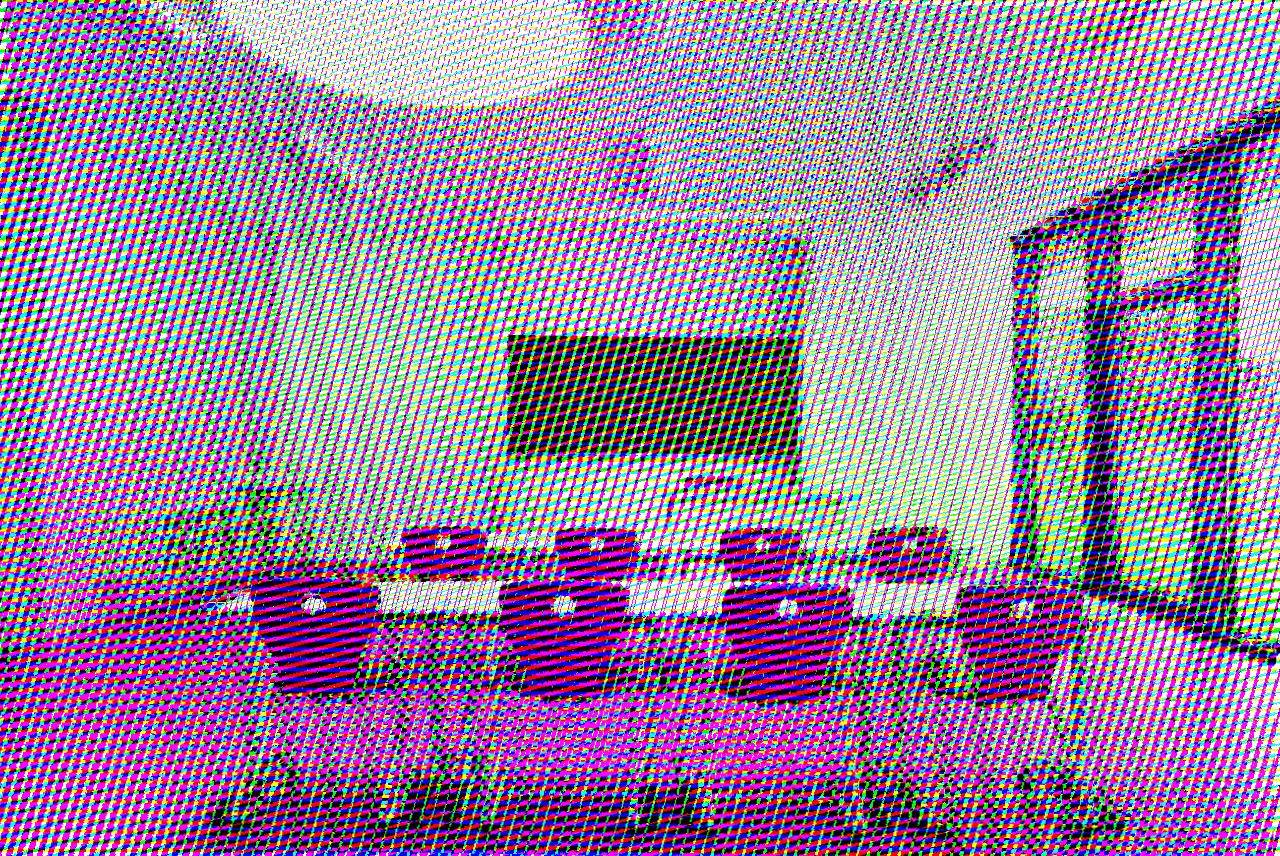
The moire effect is brought about by the juxtaposition of patterns like lines, dots, or similar shapes. This phenomenon often happens in images with patterns or grids, causing distortions, color shifts, and the illusion of motion. Typically, the editors strive to remove unintentional interference of pixel grids with the grids in the scene of images to be captured to enhance clarity and remove distortions. Nevertheless, with the expansion of novel photography and image manipulation approaches, this effect is now recognized as a unique attribute for increasing image visual charm and fascinating viewers. Moiré designs convey the image’s activity and energy by simulating wavering lines, gleaming surfaces, or convoluted overlays of form and colors. This energetic element can permeate the photo with a sense of life and vitality not often found in static pictures. Furthermore, those pictures ooze an atmosphere of enigma and puzzle that seem distinct and challenging. This blog article includes a practical step-by-step approach for adding the moire effect to your photographs and achieving an outwardly pleasing composition.
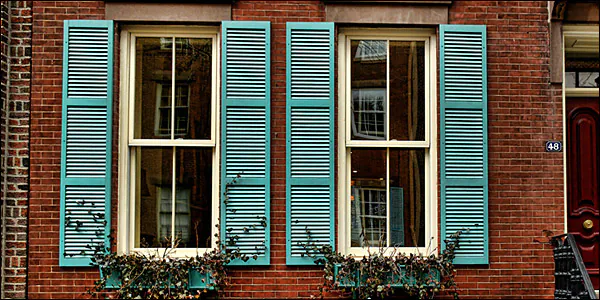
Step 1: Pick up a well-textured and distinctively patterned image
The initial step to adding a moire effect to an image is creating the foundation or selecting a photograph on which you can apply adjustments related to the moire effect.
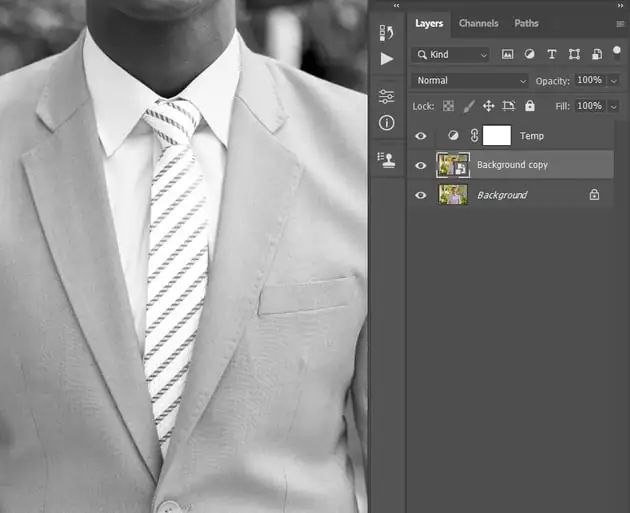
During image choice, focus on the subject and its original patterns or textures. Pick a shot that includes a subject with distinct, consistent patterns or textures. You can select apparel with fine grids, textured surfaces like brick walls, or any other photo of intricate geometric shapes.
Moreover, it’s critical to consider the visual outcome you want to attain via your moiré effect. So, choose the image that matches your notion. For example, choose a pattern with high contrast and a precise frequency if you wish for an arresting and energetic moire effect. Contrarily, consider an image with a more low-key and less obvious pattern for a more subtle effect.
Remember that moire can augment or distort the original image, so your choice should suit your artistic purpose. The success of your editing process depends on picking the right source photograph.
Step 2: Create a copy layer of your chosen image for nondestructive editing
This step involves copying your chosen image to spare a copy for you to perform creative experiments with, ensuring that the original remains intact. It also prevents any irreparable changes that may occur during the editing process.
Start your choice of image editing software. Editing applications like Adobe Photoshop or GIMP are the best choices for moire effect production.
Load the image you selected in step 1 and go to the “Layers” menu. In the Layers panel, locate and select the layer containing your image.
Click on the layer, or go to the Layers menu and select the copy layer option. This function creates a copy of your original image layer, allowing you to work on it separately.
To maintain the organization of your workspace, think about renaming the duplicate layer to “Moire Effect Layer” or any other label that aids you in recognizing its purpose.
Step 3: Add variations in patterns using scaling and rotating techniques
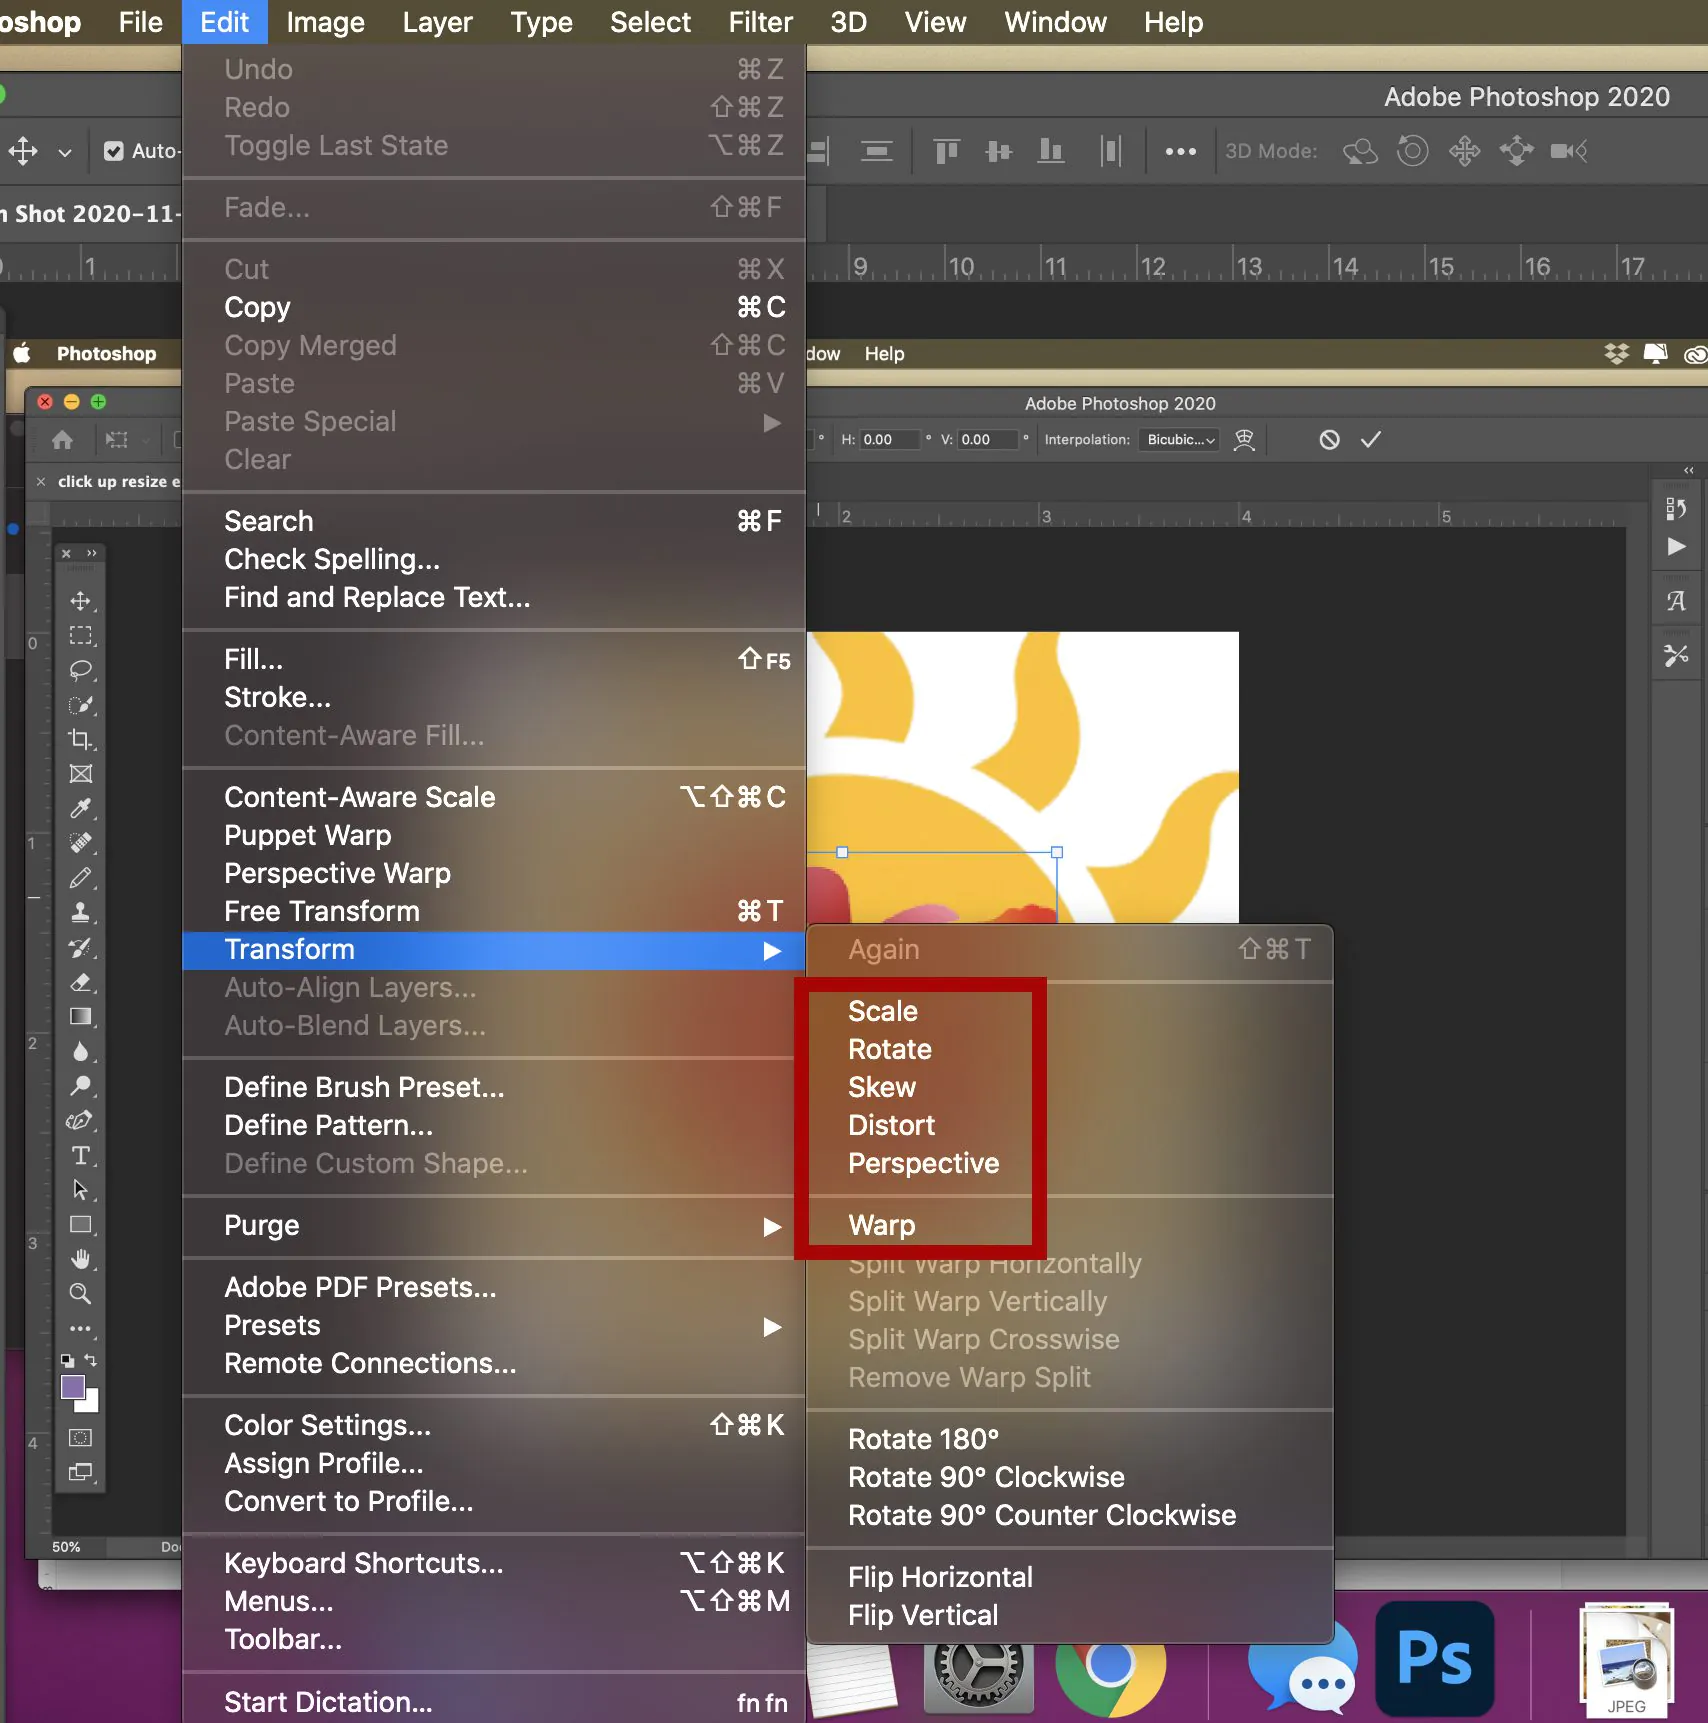
When you scale or rotate the duplicate layer, that causes intentional distortions in the patterns, paving the way for a moiré effect to appear as you advance.
Start by selecting the duplicate layer you created in step 2. In this layer, you will be making modifications to create the moire effect.
You can scale up or down the duplicate layer or rotate it a bit based on the creative effect you want. Scaling will influence the distance between the patterns, and rotating can alter the patterns’ orientation.
Scale the duplicate layer: Scale your duplicate image using the transformation tools in your software. These tools let you manipulate the layer’s size while preserving its proportions. Play with different scales to gain your desired kind of pattern variation.
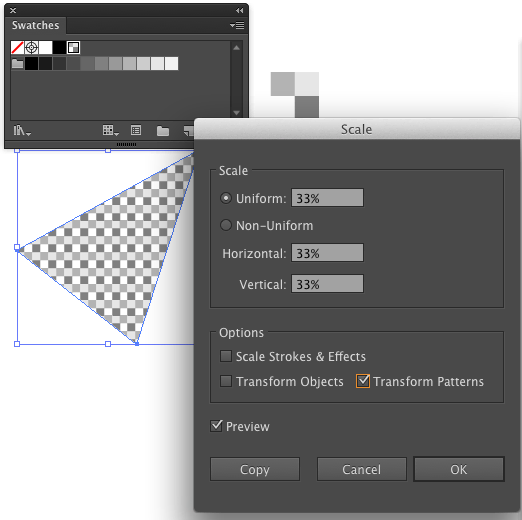
Rotate the duplicate layer: To rotate the duplicate layer, use the software’s rotation tools to shift the duplicate layer a few degrees. The degree of rotation can be minute or more evident per your artistic ideas.

Step 4: Overlap the duplicate image over the original for distortive interference
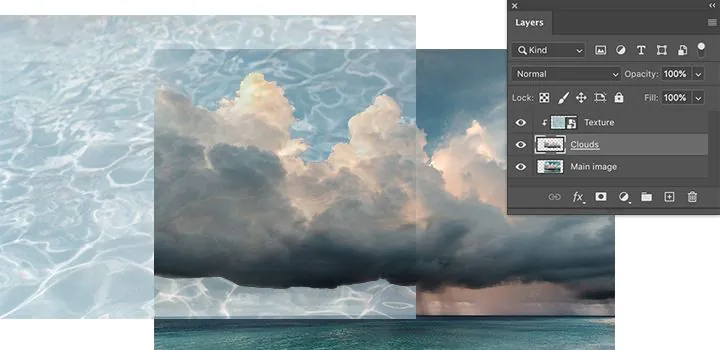
In this step, you will need to overlay the duplicate, edited layer over the original photo.
After the cloned, edited layer is all set, cautiously place it above the original image layer. Try your best to line up the patterns on the duplicate layer as closely as possible with the patterns on the original image. The moiré effect is highly dependent on this association.
In the layer panel of your editing software, you can try different blending modes for the duplicate layer to strengthen the commerce across patterns further. Standard blending choices for moiré effects include “Overlay” and “Soft Light. Such modes substantially influence the interaction among designs.
Once you are done with overlapping layers, you can observe and accommodate the opacity of the duplicated layer.
Step 5: Adjust the transparency of your Moire effect photograph
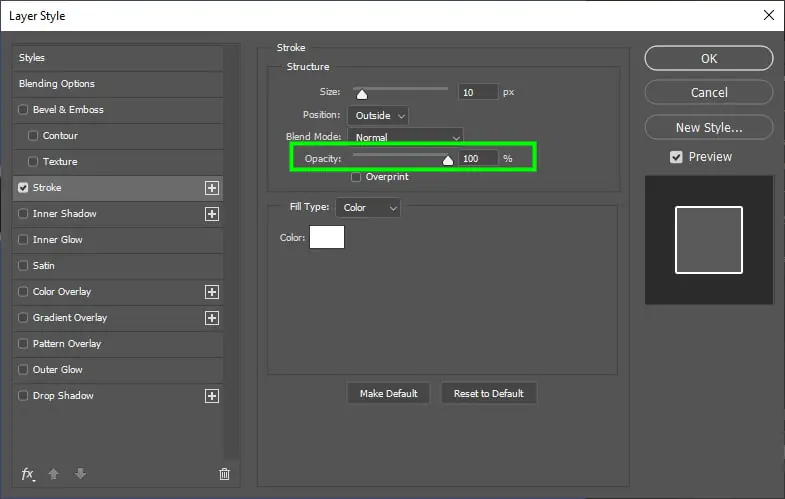
Step 5 to create a moiré effect for your photo is about tuning the transparency of the duplicated layer, which can improve the enthusiasm of the moiré effect.
With the duplicate layer covering the original image, you should now manage the might of the moiré effect. You can set the opacity of the duplicate layer using a slider or percentage values.
Adjust the opacity to determine the suited balance between subtlety and intensity in the moire effect. Lower the opacity if you want the moiré effect to be more subtle; conversely, amplify the opacity for a more dominant influence. Keep trying different values of opacity to make the desired display.
Be bold to test and retry when editing the opacity; observe the effect on the image and make any necessary improvements. The iteration ameliorates the moire effect until it fits your creative vision.
Step 6: Tune up your composition and try inventive adjustments

Take a careful peek at the photo with the moire effect applied, taking notice of each pattern, distortion, and texture that has shown up. Inspect how these elements contribute to the overall charisma of the image.
Think about your original creative intention while contemplating if the moire effect fits with how you initially envisioned your final composition. Determine whether the effect enhances or detracts from the message or atmosphere you intend to spread.
Consider applying a texture overlay to the image if you want to elaborate your effect further. It can include profoundness and mystification of the patterns boosting their visual concussion.
Apply brushes and masking techniques to selectively enrich or minimize the moire effect in specific image areas. This degree of control aids you in orienting the viewer’s attention to pivotal elements.
Perform color adaptations to create a distinctive color palette that supplements the moire effect and gives your images a particular aptitude.
Keep in mind that the delicate tuning process is iterative, so don’t waver to go back and forth, testing with diverse strategies, tools, and alterations until you accomplish the required result.
Step 7: Export the image and assign a catchy title for your project
Start by carefully assessing the image with the moiré effect to scan for any imperfections or areas that remain unattended and need further adjustment.
Ahead of exporting the image, it is essential to save your project in its original format, like PSD for Photoshop. That maintains all layers and adjustments so that you can quickly review and refine the image later.
Once you are pleased with the result, proceed with exporting the image. Elect the appropriate file format, resolution, quality, and color profile aspects. Choosing the format and settings may depend on how you plan to use the image, whether for sharing on the web or for printing.
Entitle the exported file with an eloquent name that reflects its contents and the moiré effect applied. Assort your files appropriately into relevant folders to maintain a standardized workflow.
Keep a backup of project files and exported images so that you can review and edit the moiré effect or restore images in the event of accidental data loss.
After you’ve exported and structured your image, you can publish it as social media posts, on the web, or in your creative projects.
Conclusion
The moire effect, which has always been considered a hurdle for image clarity and aesthetics, is getting the status of special effects for images. It spotlights the raw beauty found in the spirit of distortions, blurriness, and other imperfections. The sight of dynamics and vigor is another charm of moire effect photos, which excites the dullness and remakes it into vibrancy. However, it would be best if you had the know-how of the reciprocation of the sensor pixel grid and the pattern found in the scene. It will assist you when you make your deliberate moire effect after you determine the original occurrence of this process.
