How To Use Polar Coordinates In An Image
Polar coordinates improve images by introducing radial symmetry, which aids in creating natural modifications that produce revolving patterns, resulting in artistic circular effects. They can streamline the rotational or aligned arrangement of elements in an image, thus presenting a more natural style in the visuals. Making angles with a radial effect gets further direct with polar coordinates, permitting the development of exciting and attractive color moves. In scenarios where curved perspectives require correction, polar coordinates deliver a functional structure, enabling precise adaptations for a more genuine appearance. Inevitably, polar coordinates open assorted inventive possibilities, inviting editors to play with distinctive twists, ripples, and whirls. That encourages creative experimentation, contributing to intriguing outcomes in image modification and expanding the expressive potential of graphic layouts and visual media. This blog post will further address the steps to follow if you want to efficiently adapt this creative strategy to your images and boost their visual value and viewer attention span.
Step 1: Select the source photograph
Begin by choosing a high-quality image that adjusts along with your inventive vision and targets for the editing process.
Consider the picture’s substance, structure, and visual components, confirming that they complement the specified outcomes of utilizing polar coordinates.
Assess the lighting conditions within the image, seeking well-lit scenes with adequate contrast to improve the effectiveness of the ensuing altering steps.
Distinguish central focuses or zones inside the image that will prosper from circular or radial alterations utilizing polar coordinates.
Search for patterns, curves, or objects that can be emphasized or improved by applying polar coordinate strategies.
Consider the general subject or message you wish to communicate with the altered photo, guaranteeing that your choices align with the expected visual effect.
Finally, ensure that the image editing software you choose supports and works well with polar coordinate alterations by being entirely sure of its capabilities.
Step 2: Explore the particulars of transforming into polar coordinates
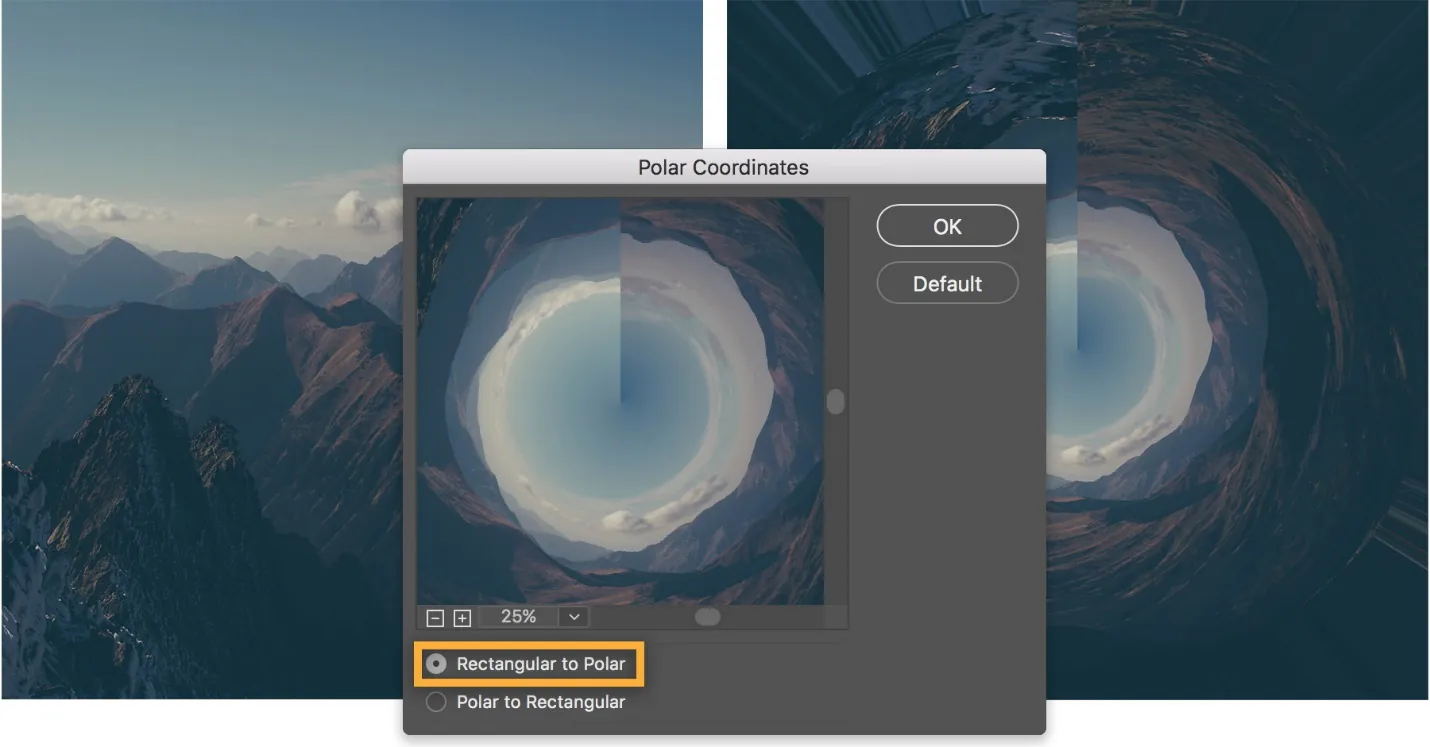
After deciding on your photograph, explore the minute details of changing Cartesian coordinates to polar coordinates utilizing tools like the “Polar Coordinates” filter or function accessible in your chosen editing program.
Investigate the functionality and choices given by the polar coordinates tool, which may vary over software platforms like Adobe Photoshop, GIMP, CorelDRAW, or others.
Learn the move from Cartesian to polar coordinates, recognizing that tools such as “Polar to Rectangular” or “Rectangular to Polar” transformations may be accessible depending on the program.
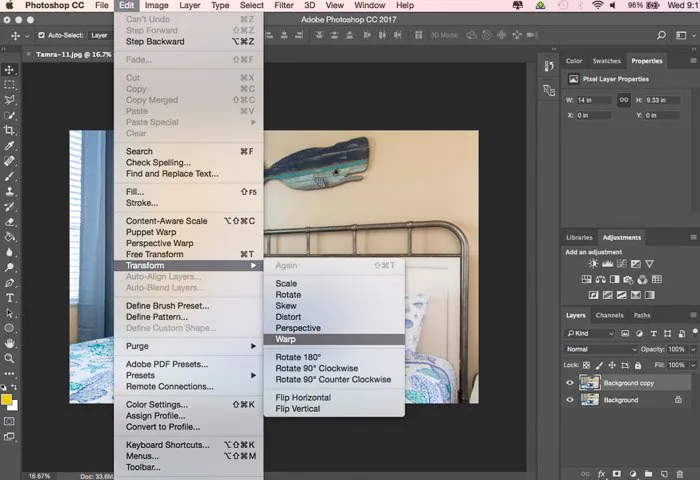
Try using circular transformation tools beneath the “Distort” or “Transform” menu to apply the polar coordinate changes to your picture.
Employ the “Polar Gradients” tool to apply radial gradients, including a remarkable visual measurement, to your photograph. This tool is found in gradient or fill settings.
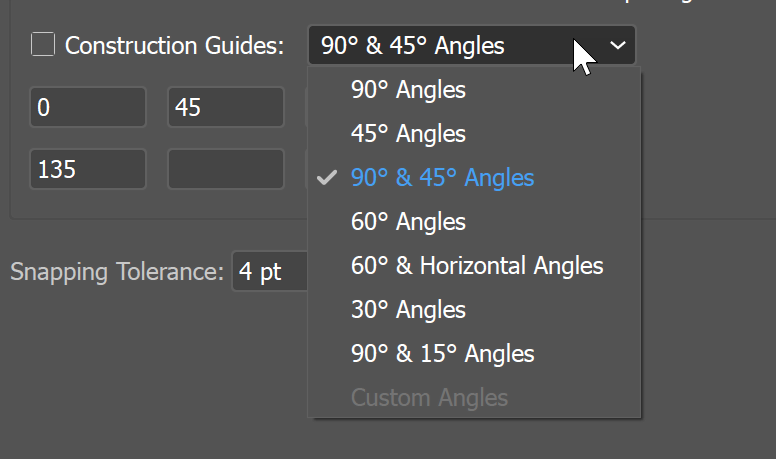
Tune your circular transformations utilizing tools like “Rotate” or “Angle Adjustment,” ensuring exact adjustments for the specified visual effect.
Look for tools like “Ellipse Selection” or “Circular Crop” to center on particular circular components inside your picture.
Step 3:Experiment with radial symmetry tools
Look into the radial symmetry tools accessible in your chosen editing program.
Try applying highlights such as “Symmetry” or “Mirror” tools along the radial axis to form stable and concordant designs.
If accessible, consider employing a devoted “Radial Symmetry” tool, rearranging the process by automatically replicating edits over numerous axes.
Dabble with regulating the angle of symmetry and the number of radial lines to get varied impacts, deepening your understanding of spiral symmetry.
Utilize tools like “Copy” or “Copy/Paste” along with radial symmetry alterations to replicate changes throughout the image easily.
Observe how radial symmetry can lift intricate designs, mandalas, or circular designs inside your picture.
Pay consideration to any software-specific highlights that help refine symmetry, ensuring consistent integration of radial alterations.
Grasp the inventive possibilities of radial symmetry, and be prepared to fine-tune your alters for exceptional results.
Step 4: Play with rotation functions
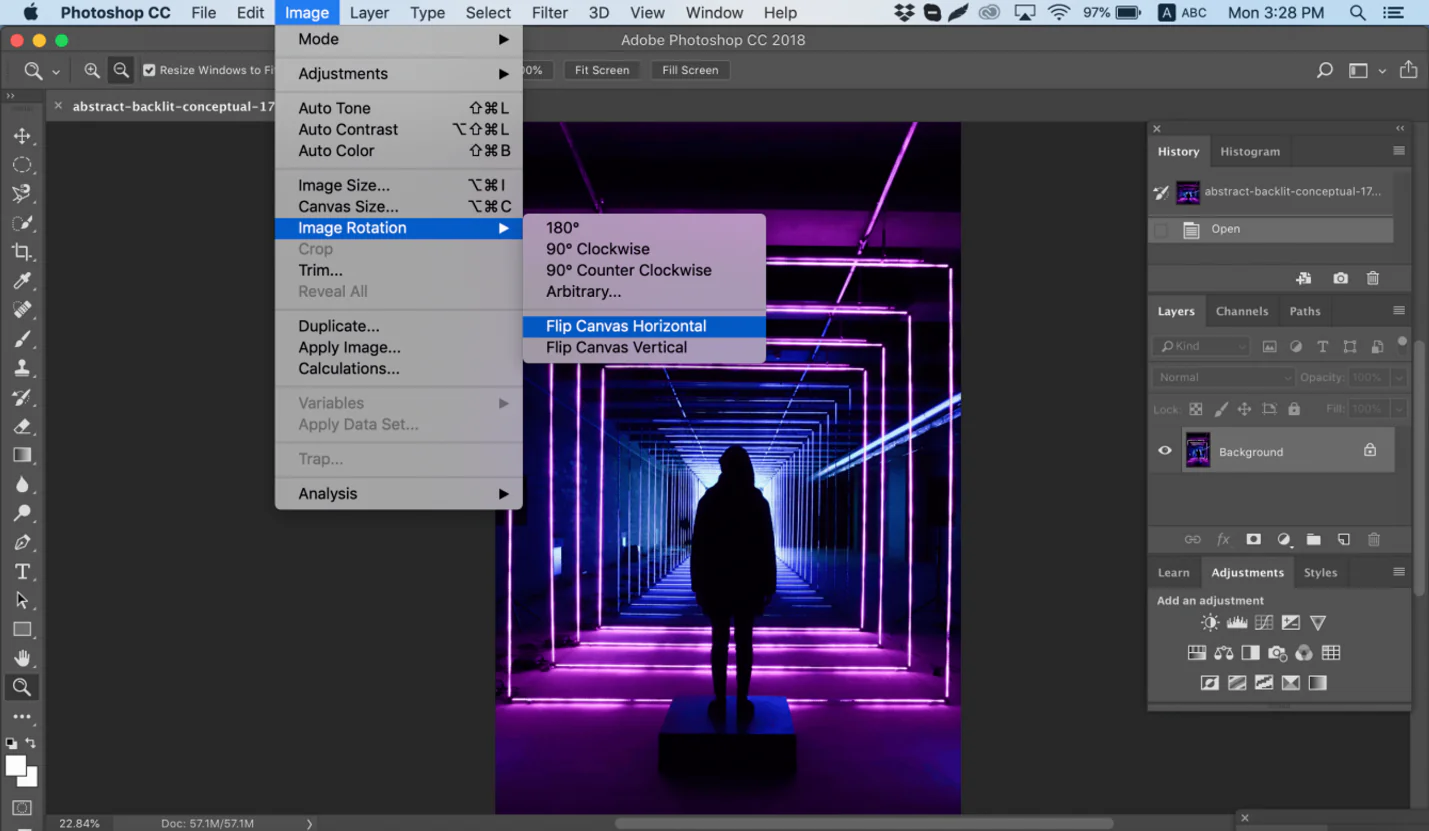
After understanding radial symmetry, continue to explore the rotation options inside your image program.
Seek out highlights such as “Rotate” or “Angle Adjustment” tools that permit you to present energetic rotational impacts to your image.
Start testing with diverse rotation angles to get how this feature can bring an energetic and enthusiastic quality to your visuals.
Utilize the rotation tools to apply energetic effects to particular components inside your picture, upgrading their visual effects.
Consider combining rotation with polar coordinates for more complex and layered transformations, depending on your inventive vision.
Utilize tweaking options to ensure precise alterations, permitting you to attain the required level of dynamism in your photo.
If your program lets it, explore animation highlights to present fascinating rotational impacts over time.
Adopt an incremental approach, testing with distinctive rotation settings, and hone your alterations until you accomplish the required energetic result.
Step 5: Explore gradient tool options

Move to the gradient tools of your editing application to present captivating polar gradients.
Check out features such as “Gradient Fill” or “Color Gradients” to get to settings that permit you to apply radial gradients to your image.
Try using diverse gradients, like radial and circular gradients, to monitor their effect on your picture.
Fine-tune the gradient colors, regarding variations in hue, saturation, and brightness, to get the specified visual appearance.
Utilize the gradient tool specifically on particular components inside your picture to improve their eminence and create depth.
Try integrating gradient effects with polar coordinates to make more complex and compelling changes.
If available, explore the transparency settings inside the gradient tool for smooth shifts between colors.
Routinely audit the effects of your gradient adjustments and refine them iteratively until you accomplish captivating polar gradients that complement your overall plan.
Step 6: Try circular cropping tools
Switch to the circular crop function for accurate and proficient edits.
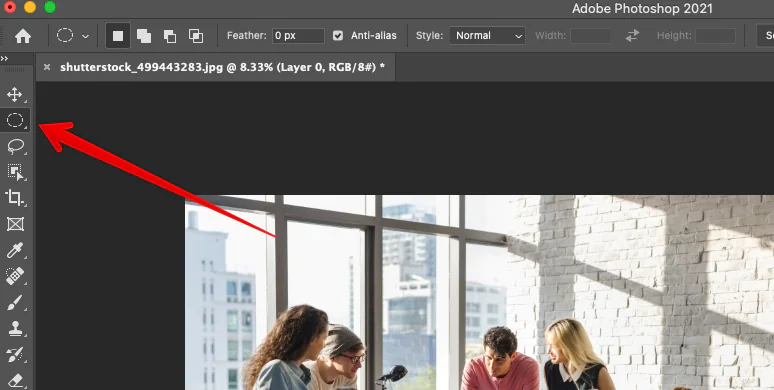
Discover tools such as “Elliptical Marquee” or “Circular Crop” that permit you to create circular selections or define a circular editing zone.
Utilize the circular selection tool to highlight and emphasize specific elements you like within your image.
Refine the circular crop to typify the required components while excluding pointless points of interest from the composition.
See the circular crop and make iterative alterations to attain the ideal composition, considering the visual effect you proposed to form.
Take advantage of any software-specific highlights related to circular cropping, such as feathering or boundary alterations, for consistent integration.
Evaluate how circular cropping interacts with previous transformations, producing a cohesive and concordant image.
Spare your progress and survey the image to affirm that the circular editing improves the central focus and contributes to the required visual account.
Step 7: Regulate the geometric distortions in your composition
Advance to the tools committed to geometric distortion control and discover tools like “Distort,” “Warp,” or “Mesh Transformation” for absolutely controlled geometric distortions.
Get how the distortion tool works by distinguishing key points of alteration that impact the geometric structure of your image.
Utilize the distortion tool wisely, applying controlled alterations to particular ranges to attain the required visual effect.
Try different distortion styles, like bulging, squeezing, or twisting, to investigate creative outcomes.
Perfect your distortions for nuance and accuracy, guaranteeing that the composition remains visually engaging and cohesive.
Think about the geometric distortions’ association with previous changes for smooth integration into the general image.
Reserve your work continuously throughout the process, allowing you to reverse or compare versions as required amid the distortion control stage.
Step 8: Include suitable visual effects and refine
Head to the creative effects tools inside your software to test with an assortment of distortions, ripples, swirls, and visual upgrades.
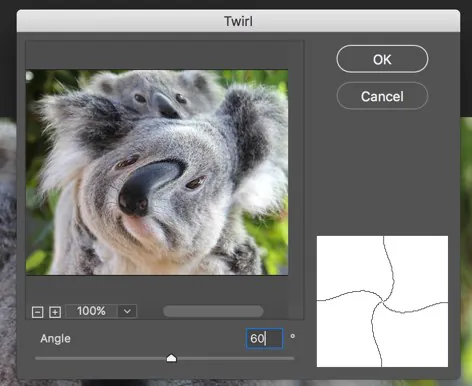
Locate highlights such as “Twirl,” “Ripple,” “Distort,” as well as “Filters,” “Effects,” or “Textures” to present creative distortions and captivating visual improvements.
Get the parameters related to each effect, like intensity, radius, blending modes, or color alterations, to control the magnitude and style of the integrated effects.
Include distortions and visual effects wisely, selecting particular elements inside your composition to enhance inventiveness.
Try out different creative effects to check how they correspond to the overall style of your artwork.
Optimize the effects to make them consistent with your vision and enhance the general visual story.
Adjust layering and blending options to reliably consolidate the effects with the existing components and changes in your composition.
Be progressive in making creative arrangements, testing openly, and saving distinctive adjustments to ensure diverse stages of your editing efforts.
Finally, assess the overall display of the creative effects, and once satisfied, spare your ultimate creation. Look ahead to sharing it and exhibiting the innovative image you have attained through your attempts.
Conclusion
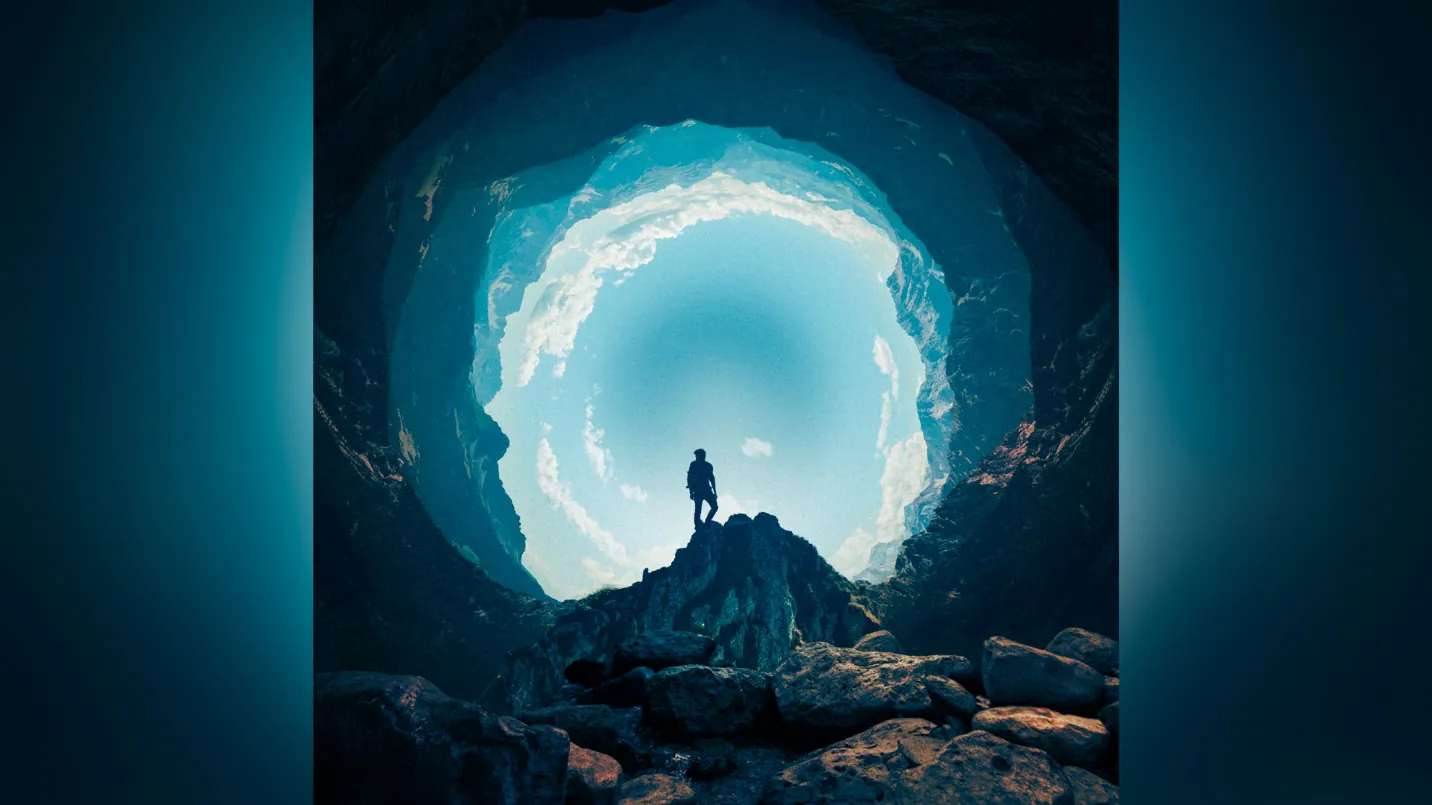
The integration of the polar coordinate technique that replaces the conventional cartesian coordinates includes a creative rotational effect in the photos. Polar coordinates, too, let you play with colors in an extraordinary way. You’ll make smooth color moves that go in a circle, giving your image more profundity and making it seem genuinely excellent. In eliminating parts of your picture, polar coordinates make it simple to center on particular circular regions. You can make your photo look immaculate while highlighting what matters—eventually, the resultant compositions vibe off exciting rotational illusions that set eyes on a hypnotic experience.
