How To Use Generative Adversarial Networks For Images
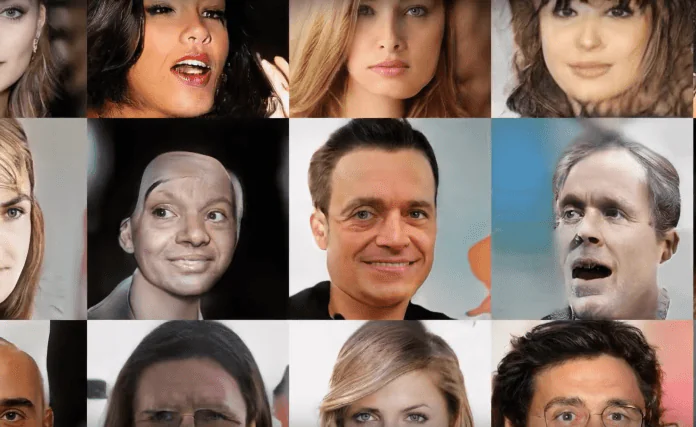
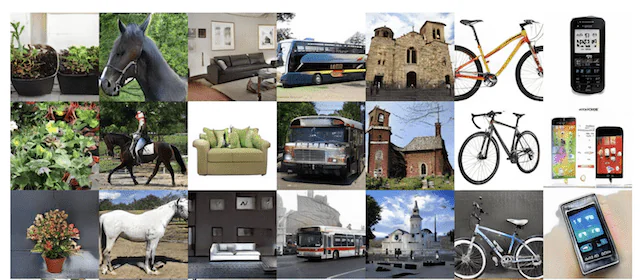
As an artificial intelligence model, a generative adversarial network (GAN) can create realistic images by acquiring information from a given dataset. The GAN generator system generates images to recount the patterns of the initial information. And the discriminator assesses these images, attempting to discern between real and created ones. GANs possess functions in different areas, like photo production, style exchange, and image modification. Primarily in image manipulation, GAN facilitates the creation of myriads of styles and versions of a photograph, thus delivering countless artistic outcomes. It creates several visually distinct and aesthetically pleasing images from a few pictures while preserving a consistent theme. Without much effort and manual work, GAN is the swiftest way of image enrichment and distortion detector. The resulting visuals can also be viewed as a visual succession of a particular saga or theme, defining and expressing the creator’s point of view actually and persuasively. This article highlights the essential step-by-step process of enhancing images with generative adversarial networks.
Step 1: Images Dataset Creation
Within the introductory phase of coordinating Generative Adversarial Networks (GANs) in your editing workflow, start by deliberately planning your dataset inside Photoshop.
Assemble an assorted collection of pictures important to your project. Photoshop helps in organizing and overseeing this collection proficiently.
Utilize Photoshop’s instinctive interface to import your chosen images into the program.
Use Photoshop’s capable preprocessing tools for errands such as cropping, resizing, and adjusting image parameters. This step guarantees uniformity and plans the dataset for successful GAN training.
Apply Photoshop’s improvement features to refine the visual engagement of your photos. That includes modifications, color correction, or other settings to optimize the dataset for consequent GAN utilization.
Utilize Photoshop to verify color profile accuracy, resolution, and general design for the imported pictures. Uniformity is crucial for the GAN to retain patterns successfully.
Step 2: Accessing Suitable GAN Model
After your dataset is ready in Photoshop, continue to select and actualize an appropriate Generative Adversarial Network (GAN) model.
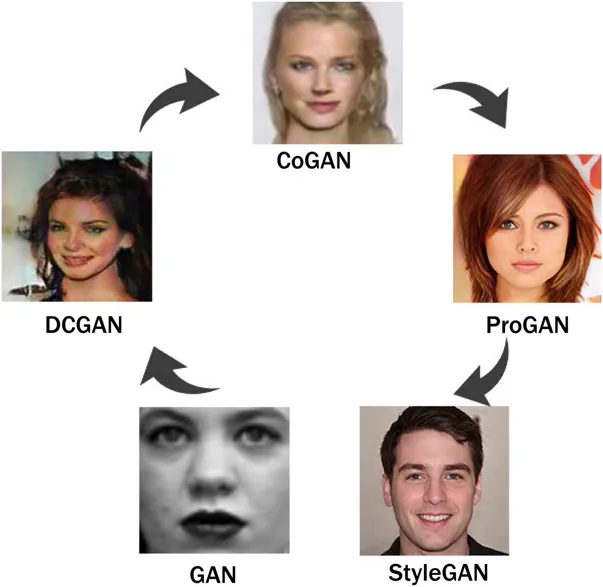
Based on your task requirements, look into prevalent GAN architectures such as DCGAN, StyleGAN, or others. Consider variables like image resolution, complexity, and the required output.
Select a machine learning system consistent with your chosen GAN architecture. TensorFlow and PyTorch are broadly utilized and give great back for GAN usage.
Start the execution of your chosen GAN architecture utilizing the chosen framework—type code to define the generator, discriminator, loss functions, and training strategies.
Coordinate the arranged dataset from Photoshop into your GAN implementation. Alter parameters to maintain compatibility and consistent training.
Design the training setup, counting hyperparameters, batch sizes, and the number of epochs. Screen the training process to guarantee the model meets effectively.
Carry out validation procedures to evaluate the model’s performance. Optimize parameters based on validation outcomes for ideal image generation.
Save the prepared GAN model for future utilization.
Step 3: Creating Images With GAN

Once you have confirmed that the GAN model has been executed accurately, you’ll use it to create images using your learned designs.
Introduce the saved, trained GAN model into your workspace, checking that the model is ready for creating new images. Employ the loaded GAN model to develop a set of sample pictures.
Change input parameters as required to find distinctive styles or adjustments within the output.
Evaluate the quality of the made images. Ensure you embrace the training’s obtained qualities, give thought to each detail, and keep up in general coherence. Regulate the model or tweak parameters as essential.
Save the produced photos for more profound analysis and potential integration into your venture.
Look into an incremental approach to optimization. If the made images don’t meet the criteria, return to the training parameters or alter the model to comply with the particular necessities.
Step 4: Refining The Generated Content
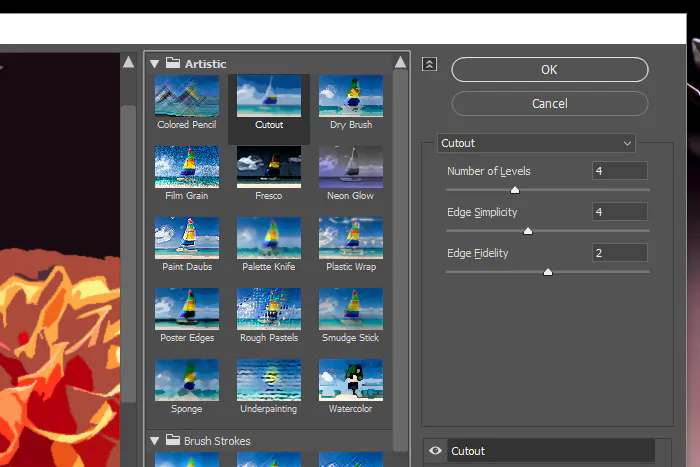
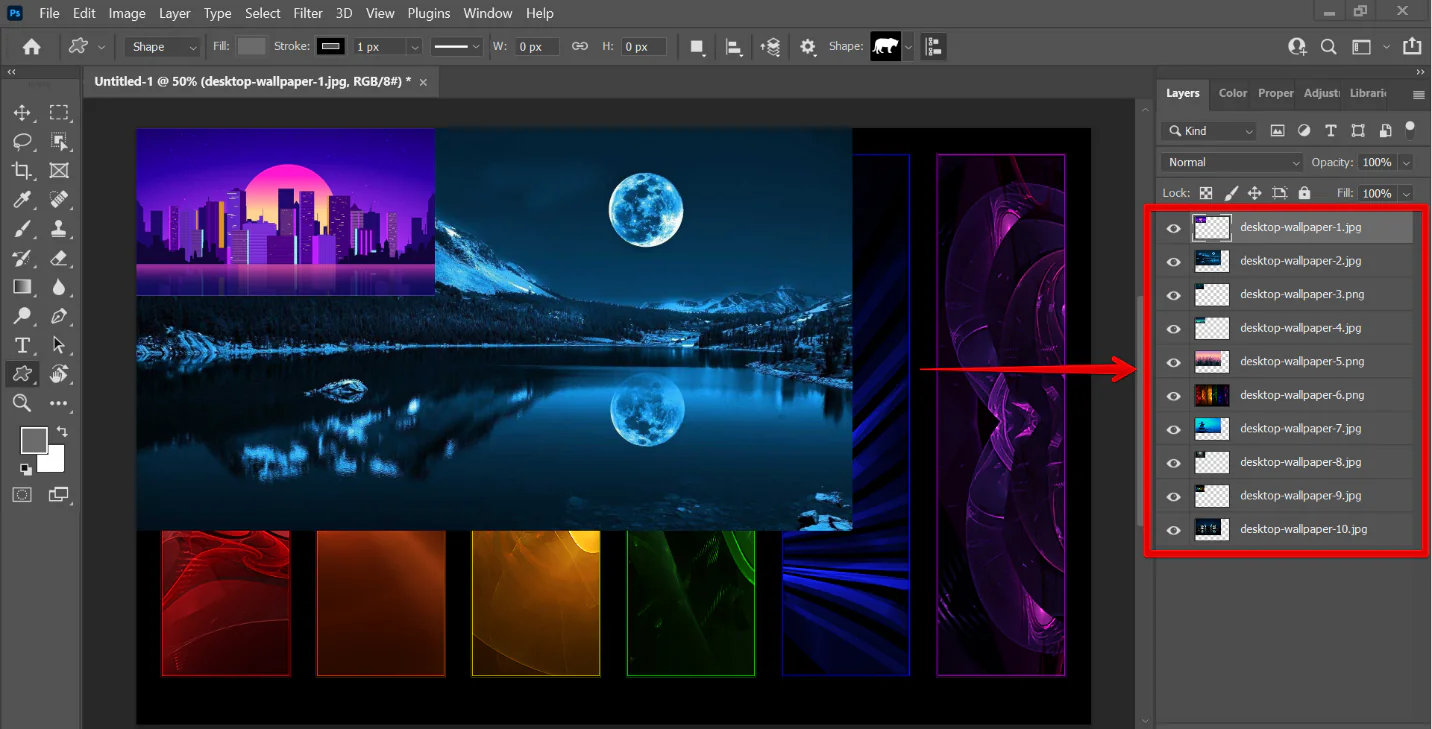
Import the created images into Photoshop, setting up a new canvas for each.
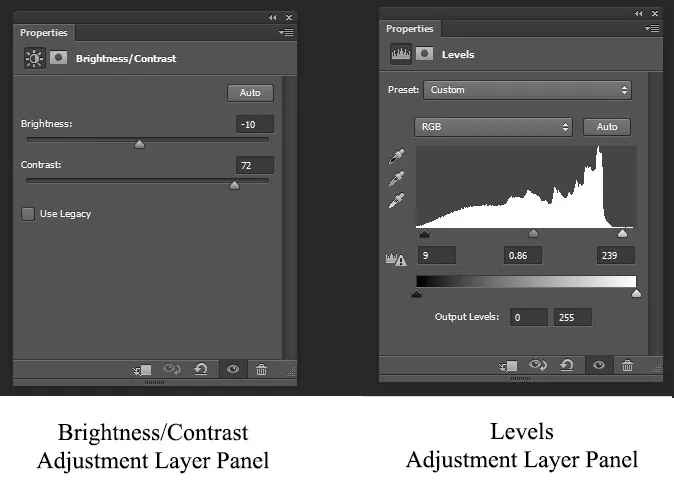
Use Photoshop’s broad toolkit for detailed edits. Access features like brushes, filters, and adjustment layers to refine particular aspects of the produced content. Address any blemishes or improve wanted features.
Verify visual consistency over the refined files and with your project’s overall concept. Photoshop’s real-time see highlights help evaluate and keep up a cohesive display.
Utilize Photoshop’s color adjustment tools to tune color tones and coordinate the refined images with the specified palette. Alter brightness, contrast, and saturation as required.
Utilize Photoshop’s texture and detail improvement options to include profundity and authenticity in the images. This step upgrades the quality and visual attraction.
Play with layer styles, blending modes, and effects to attain particular visual impacts.
Accomplish an agreement between the machine-generated components and human inventive input. Photoshop acts as a collaborative instrument, permitting you to implant your aesthetic vision into improved images.
Save the modified photos as separate records. Maintain high-resolution yield for ideal quality in ensuing project integration or presentation.
Step 5: Integrating Images And Design Elements
Taking after the refinement of GAN-generated images in Photoshop, the following basic step is the coordination of these assets together with your existing design components.
Start up Photoshop and open the project record where you want to consolidate the GAN-generated images. Opt for a consistent workflow by keeping your project tidy.
Import the refined GAN-generated pictures into your project file. Utilize Photoshop’s file import or drag-and-drop function for a precise integration process.
Order layers inside Photoshop to retain a clear progression.
Adjust and compose the GAN-generated images inside the existing layout. Navigate to Photoshop’s alignment tools to bring accuracy and keep up a coherent visual structure.
Apply blending modes and opacity alterations to consistently integrate the GAN-generated components with the background or other design components, getting a concordant visual stream.
Make vital adjustments to the GAN-generated components to adjust with the general design style of your project.
Look for feedback on the integrated design from relevant partners or collaborators. Utilize this input to create iterative alterations, making the GAN-generated components contribute successfully to the overall visual story.
Save the project record to preserve the integrated plan. If required, keep up a versioning framework, permitting easy retrieval or encouraging alterations.
Step 6: Enhancing Colors And Tones
Assess the overall color palette by focusing on color adjustment tools to the global fineness of the colors.
Be considerate of the color consistency between GAN-generated components and existing project components. Alter the colors of the generated pictures to adjust consistently with the specified up palette.
Utilize Photoshop’s tonal alteration highlights to adjust the composition’s light and dark tones.
Apply color editing to particular components inside the project, centering on GAN-generated and existing components. This accuracy upgrades the thorough visual effect.
Try gradient maps to make mild moves between colors and include profundity and abundance in the composition.
Execute steady color grading techniques across all components. Photoshop’s color grading tools empower you to attain a unified composition.
Check that the colors and tones of GAN-generated components finely coordinate the lighting conditions and vibe of the complete composition.
Step 7: Evaluating The Final Composition

Zoom in on distinctive ranges of your project to spend time on minute details. It helps to convey accuracy when refining individual components and attaining a gleaming result.
Look for brush and erase tools to perform edges and smooth transitions, and include or exclude elements as needed.
Work on textures inside the composition from the GAN-generated components and existing assets. Move to the texture refinement option to enhance or soften textures, making a more refined and pleasing composition.
Manage highlights and shadows to include profundity and dimension in your plan. Altering these components gives a realistic and well-balanced visual display.
Use dodge and burn tools specifically to highlight or darken particular regions. It prioritizes the foremost points and aids in the overall visual narration.
Try using the detail improvement filters accessible in Photoshop to include sharpness and clarity to particular components. Be careful not to exaggerate it to preserve naturism.
Frequently check for integration in detail over different parts of the project. Confirm that modifications contribute to a cohesive and consistent visual story.
Save your wrapped-up project in Photoshop, checking for high-resolution output. Export the project within the wanted format for presentation or sharing.
That concludes the process, conveying a cleaned and professionally created design for exhibition or execution.
Conclusion
Generative adversarial networks GANs generate visually distinct yet thematically synchronizing images, giving the initial photos a meaningful significance. The technique minimizes the time and effort spent on extensive image enhancement and editing. You can turn your pictures into realistic and highly appealing narratives that fascinate and resonate with viewers more. Moreover, this machine-learning model can generate stunning, awe-inspiring, phenomenal imagery regarding natural or inventive visual content. GAN technique is enduring in various fields related to designs, graphics, and images, facilitating designers and artists in their artistic encounters with infinite prospects for expression and innovation.
