
How To Use Image Warping
Image warping, or geometric transformation, uses special mathematical techniques and algorithmic play to digitally manipulate an image by changing its shape and orientation. It can work for different purposes, like correcting lens distortion, overlapping panorama images, and creating visual effects in computer graphics. As per your desired image transformation, you can use any of the several warping techniques, for example, mesh-based warping, affine transformation, TPS warping, optical flow warping and many others. So you can apply image warping for many effects and benefit from its multitude of techniques. It’s your part of choice whether to use a single of the warping techniques or a blend of two or more in your warping process. However, no matter which warping software or technique you adopt to alter your photographs, you must follow the proper step-by-step approach to warp images to get cent percent outcomes without any imperfections. This blog contains general steps, guidelines, and instructions for image warping, which can fit according to your choice of warping technique or software.
Choose a software or programming environment
To choosing a software or programming environment for image warping, you have several options available:
Adobe Photoshop is a popular commercial image editing software offering comprehensive image manipulation and transformation tools. It offers various warping and distortion features.
GIMP: A free open-source image editing software that provides various tools for image editing, including warping and transformation capabilities.
OpenCV: An open-source computer vision library with extensive image processing and manipulation functionality, including image warping. It supports multiple programming languages like Python, C++, and Java.
Python with NumPy and OpenCV: If you prefer programming, you can use Python along with libraries like NumPy (for numerical computations) and OpenCV (for image processing and warping) to implement image warping algorithms.
MATLAB: A proprietary numerical computing environment widely used in image processing research. It offers built-in functions for geometric transformations and image warping.
Consider factors such as your familiarity with the software or programming language, the specific requirements of your project, and the availability of resources or tutorials to guide you in your decision-making process.
Load the image
Open your chosen image editing software or programming environment.
Look for the option to open or import an image. In Adobe Photoshop, click “File” and select “Open.” In GIMP, go to “File” and choose “Open” or “Open as Layers.”
Navigate to the image file’s location on your computer using the file explorer window that appears.
Select the image file you want to warp and click the “Open” button.
The image should now be loaded into the software or programming environment, and you should be able to see it on the screen or in the image workspace.
Before proceeding with the image warping process, you can perform any initial adjustments, such as resizing, cropping, or applying basic enhancements.
Ensure the image file is in a compatible format supported by your chosen software or programming environment. Common image formats include JPEG, PNG, BMP, and TIFF.
Define the transformation
Defining the transformation in image warping involves specifying the type of transformation and the parameters that will be applied to the image. Here are the steps to define the transformation:
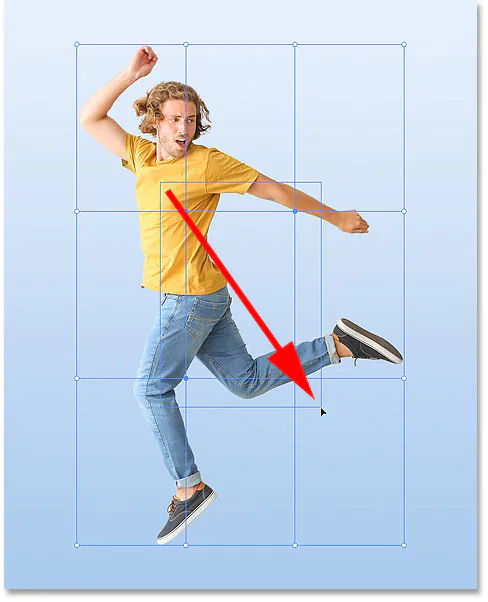
Determine the desired effect: Identify the specific transformation you want to achieve with the image. It could be correcting distortions, creating a panorama, or applying a creative effect like bending or stretching.
Select the transformation technique: Choose the appropriate technique based on the desired effect. Common techniques include affine transformations, projective transformations (homographies), or mesh-based warping.
Specify transformation parameters: Depending on the chosen technique, define the parameters that control the transformation. For example, parameters such as scale, rotation, translation, and shear are used in affine transformations. In projective transformations, you must specify the mapping between corresponding points in the original and warped images. For mesh-based warping, create a grid or mesh structure to control the local deformation of the image.
Fine-tune the parameters: Adjust the transformation parameters to achieve the desired visual effect. That involves iteratively modifying the parameters and observing the changes until the desired transformation is achieved.
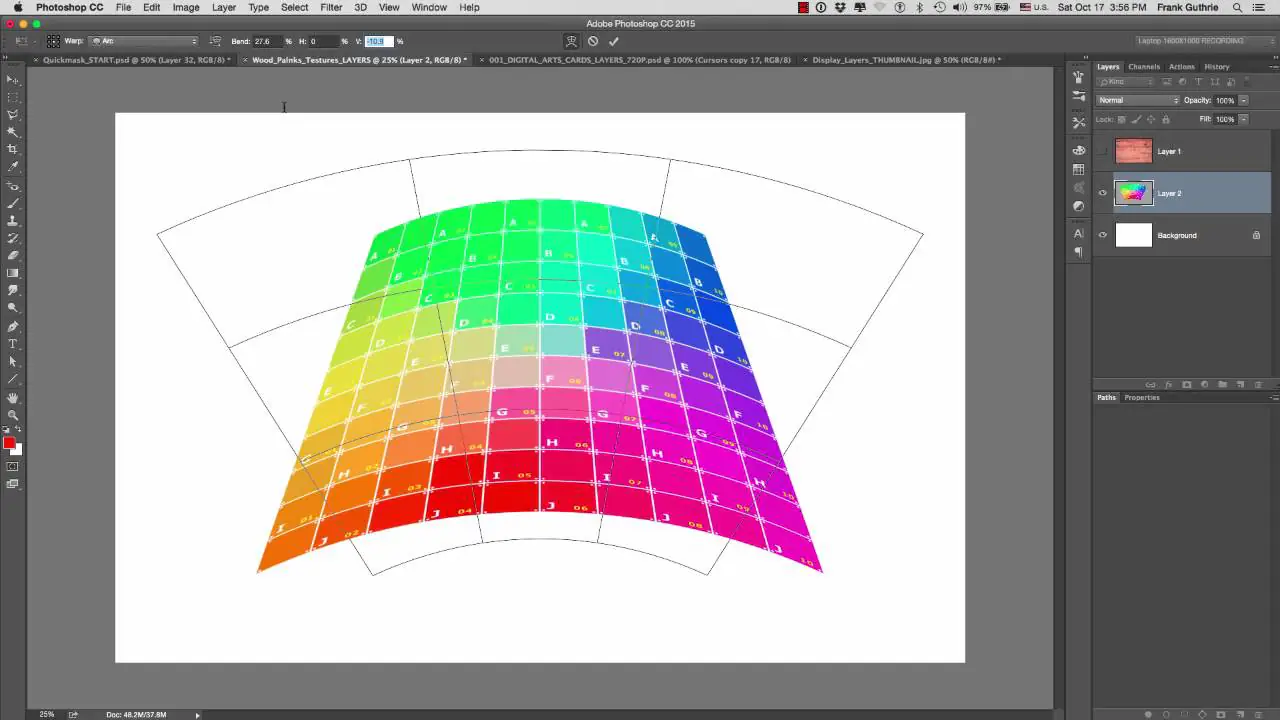
Specify control points
Specifying control points is crucial in image warping as it defines the reference points that guide the transformation. Here’s how to specify control points:
Identify distinctive features: Look for features or landmarks in the original image that can be easily identified and correspond to the resulting warped image. These features can be corners, edges, or any distinguishable patterns.
Select control points: Choose a set of control points in the original image and their corresponding locations in the warped image. Control points should be carefully chosen to capture the key areas that must be preserved or manipulated during the transformation.
Assign coordinates: Assign pixel coordinates to each control point in the original and warped image. That can be done manually by visually identifying the corresponding locations or using automated feature-matching algorithms.
Store control point information: Save the coordinates of the control points, either in a data structure or as a separate file. This information will be used to calculate the transformation matrix or guide the deformation process.
The selection of control points plays a vital role in the accuracy and quality of the image-warping result. Choosing sufficient control points that cover a range of important features helps ensure a successful transformation.
Calculate the transformation matrix
Calculating the transformation matrix is crucial in image warping as it determines the mathematical mapping between the original and warped images. Here’s how to calculate the transformation matrix:
Collect control point pairs: Gather the coordinates of the control points selected in the original image and their corresponding locations in the warped image.
Choose a transformation model: Based on the desired effect and the chosen transformation technique (e.g., affine, projective), select the appropriate mathematical model that represents the transformation. Each model has a specific form of the transformation matrix.
Set up the equations: Formulate equations that relate the control point pairs and the transformation matrix. The number of equations depends on the transformation model.
Solve the equations: Solve the system of equations to obtain the values of the transformation matrix. That can be done using various techniques, such as matrix algebra or optimization algorithms.
Verify the transformation matrix: Check the obtained transformation matrix for validity and accuracy. You can apply the calculated matrix to the control points and compare the resulting transformed coordinates with the desired warped image coordinates.
The transformation matrix captures the geometric relationship between the control points in the original and warped images, allowing for precise mapping and deformation of the image pixels during the warping process.
Apply the transformation
Load the original image and the transformation matrix obtained in the previous steps.
Iterate over each pixel in the original image.
Calculate each pixel’s new position in the warped image using the transformation matrix.
Apply interpolation if necessary to determine the pixel value at the calculated position. Common interpolation methods include a nearest neighbour, bilinear, or bicubic interpolation.
Assign the interpolated pixel value to the corresponding position in the warped image.
Repeat steps 2-5 for all pixels in the original image.
The image undergoes the desired deformation or manipulation by applying the transformation matrix to each pixel in the original image, resulting in a warped image. The applied transformation can correct distortions, stitch panoramas, track objects, or create visual effects based on the specified mapping and transformation technique.
Visualize and refine
After applying the transformation, it is important to visualize the resulting warped image and refine it if necessary. Here are the steps to visualize and refine the image:
Display the warped image: Show the transformed image on a screen or within the editing software.
Assess the visual quality: Examine the warped image to determine if the desired effect has been achieved. Compare it with the original image or reference images if available.
Fine-tune parameters: If the warped image requires adjustments, return to the previous steps and refine the control points, transformation parameters, or interpolation methods to achieve better results.
Iterate and reapply: Make necessary modifications to the transformation or control points, and reapply the transformation to generate an updated warped image.
Repeat until satisfied: Continue iterating and refining until you are satisfied with the final result, balancing the desired effect with visual quality.
Save the warped image
In your image editing software or programming environment, locate the option to save or export the image. It is usually found under the “File” menu.
Choose the desired file format for saving the image. Common formats include JPEG, PNG, TIFF, or BMP. Consider the balance between image quality and file size when making your selection.
Specify the file name and the destination folder where you want to save the warped image. Ensure that you have the necessary write permissions for the chosen location.
Adjust any additional settings related to image quality, compression, or metadata.
Click the “Save” or “Export” button to save the warped image.
By saving the warped image, you create a new file that preserves the transformation you applied, allowing you to utilize it for further analysis, sharing, or integration into other projects.
Conclusion
Image warping holds many possible ways to modify your photographs by correcting some warping-concerned default or adding more geometrical dimensions or shapes. This flexible technique offers many transformation options to alter the perspective of your images by scaling them using algorithms. Along with image manipulation, you can also scale, rotate, translate, and morph your computer graphics using image-warping approaches. Consequent warped images have distinctive geometrical features based on the warping parameter you choose for those images. Regardless of your warping technique, your images always leap to the eye and challenge others’ perceptions.
