How To Add Depth Of Field
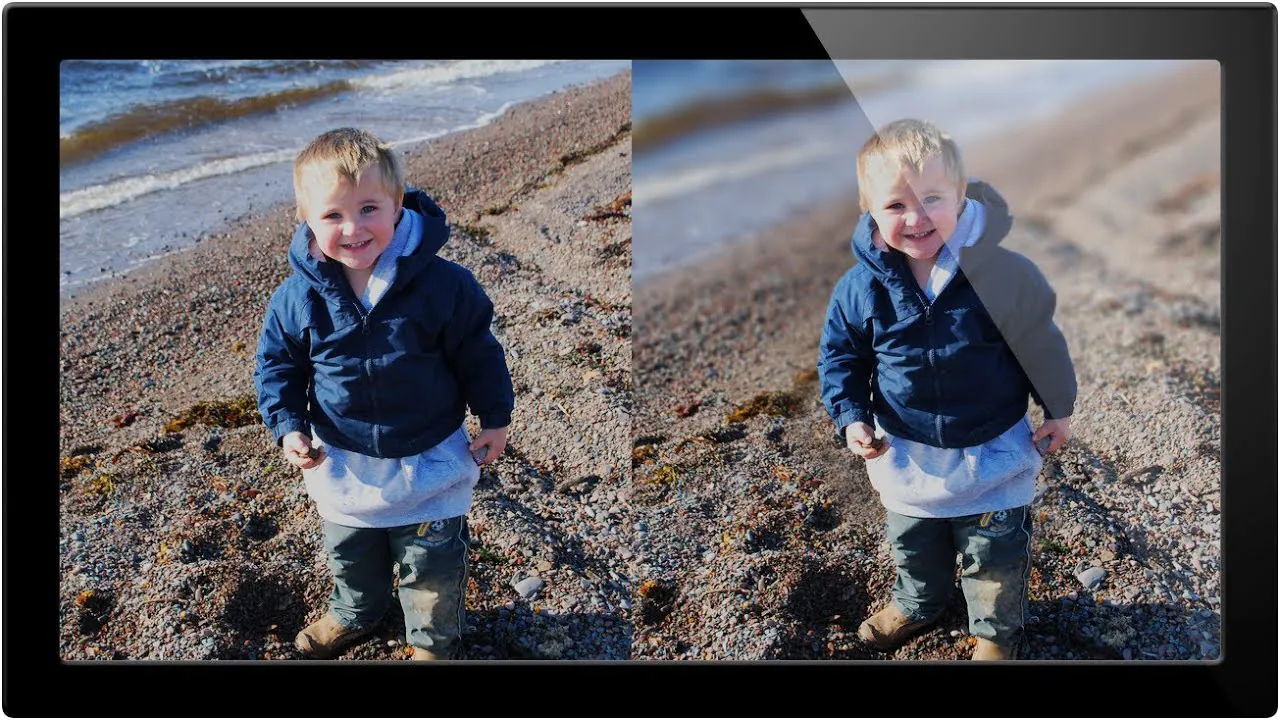
Depth of field assists you in directing the viewer’s attention by incorporating a finely defined subject and adding dimension and depth to the image. It gives you a free hand to choose what to focus on or which image areas to blur. Either working on shallow depth of field to concentrate on a small area of the image or deep depth of field to focus on a vast, wide portion of the image, the results are always intriguing, demonstrating selective control of sharpness or blurriness in different sections of the photo. When out-of-focus elements are blurred, a shallow depth of field produces a noticeable and pleasing bokeh effect. Depth of field can make your photographs a center of regard and can magnificently communicate your creative ideas. You can generate eye-catching depth-of-field photographs with great visual emphasis by carefully manipulating the sharpness and blurriness. Moreover, you can both create and minutely refine each depth-of-field related adjustment with modern editing techniques and tools. In the section below, some important techniques are discussed to help you add depth of field triumphantly.
Step 1: Import and Open the Image
Launch your preferred image editing software and locate the option to import or open an image file to adjust the depth of field using editing techniques. Navigate to the folder containing the image you want to work on and select it. The software will then load the image into the editing workspace, allowing you to view and modify it. Ensure the image is displayed correctly, and you can access the necessary editing tools and menus. This step sets the foundation for the subsequent adjustments you’ll make to manipulate the depth of field effect in the image.
Step 2: Duplicate the Background Layer
Creating a duplicate of the background layer is important once the image is opened in the editing workspace. That ensures you have a backup of the original image and can make non-destructive edits. Look for the option to duplicate the layer, usually found in the layer panel or through a right-click menu on the background layer. By duplicating the layer, you create a new layer that you can freely edit without affecting the original image.
A duplicate layer provides flexibility throughout the editing process, allowing you to compare the changes made and easily revert to the original if needed. This step acts as a safeguard while applying depth of field adjustments, ensuring that you have a preserved version of the image to refer back to or experiment with different editing techniques.
Step 3: Selective Focus/Blur
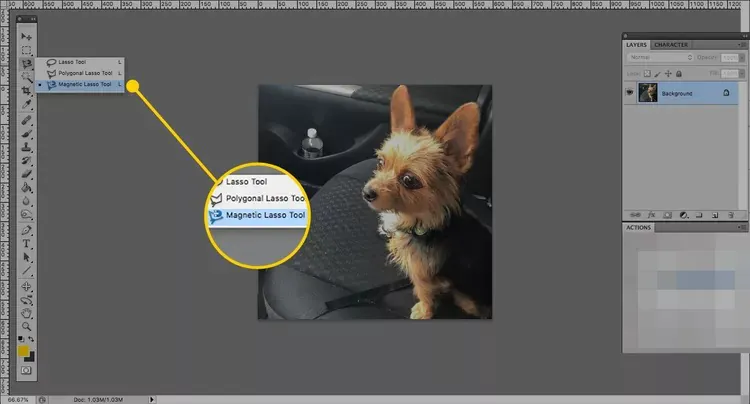
After duplicating the background layer, it’s time to apply selective focus or blur to achieve the desired depth of field effect. Identify the areas you want to adjust for focus and those that should appear blurred. Depending on your editing software, use the appropriate selection tools, such as brushes, lassos, or gradients, to make precise selections of the areas you want to keep in focus.
Once the selection is made, apply a blur filter or adjustment to the areas outside the selection. That can be done through dedicated blur filters, lens blur tools, or Gaussian blur adjustments available in your editing software. Adjust the intensity or strength of the blur effect to create a realistic simulation of a shallow depth of field, where the selected subject remains sharp while the background or foreground becomes blurred.
Continuously review the results and fine-tune the selective focus/blur settings until you achieve the desired depth of field effect. Ensure a smooth transition between the focused and blurred areas for a natural-looking outcome.
Step 4: Depth Masking

To further refine the depth of field effect, you can use masks to precisely control which areas of the image should be in focus or blurred. Create a mask on the duplicated layer, typically found in the layer panel or through a specific mask option in your editing software.
Using brush or selection tools, paint the mask black on the areas you want to blur or fade, revealing the original background layer. Adjust the opacity or apply a blur filter to the masked areas to achieve the desired depth of field effect. A soft-edged brush can create gradual transitions between the sharp and blurred regions, ensuring a natural and convincing result.
Continuously assess the image as you work on the depth masking, making any necessary adjustments to the mask, blur intensity, or opacity. This step allows for precise control over the depth of field effect, ensuring that specific areas of the image appear sharp or blurred as intended.
Step 5: Bokeh Overlay

You can utilize bokeh overlays to enhance the bokeh effect or simulate the appearance of out-of-focus elements. Find bokeh overlays or textures online or create your own using software or specialized brushes.
Import the desired bokeh overlay into a separate layer above the image. Adjust the blending mode of the overlay layer to “Screen” or “Overlay” to blend it naturally with the underlying image. You can experiment with the opacity of the overlay layer to achieve the desired level of bokeh effect.
Position and scale the overlay layer as needed to complement the depth of field in the image. Adding bokeh can enhance the aesthetic appeal of the shallow depth of field effect, creating more pronounced and pleasing out-of-focus highlights in the background.
Review the overall image and make any necessary adjustments to the bokeh overlay layer’s opacity, position, or blending mode to achieve the desired visual effect. The goal is to create a natural and visually appealing bokeh that complements the depth of field and adds a touch of artistry to the final image.
Step 6: Focus Stacking (Optional)
If you have captured multiple images at different focal points to use focus stacking, it’s time to incorporate them into your editing workflow. Import the individual images as separate layers into your editing software.
Align the layers if necessary, using alignment tools provided in your software to ensure proper registration of the images. That is important to avoid any misalignments or artifacts in the final result.
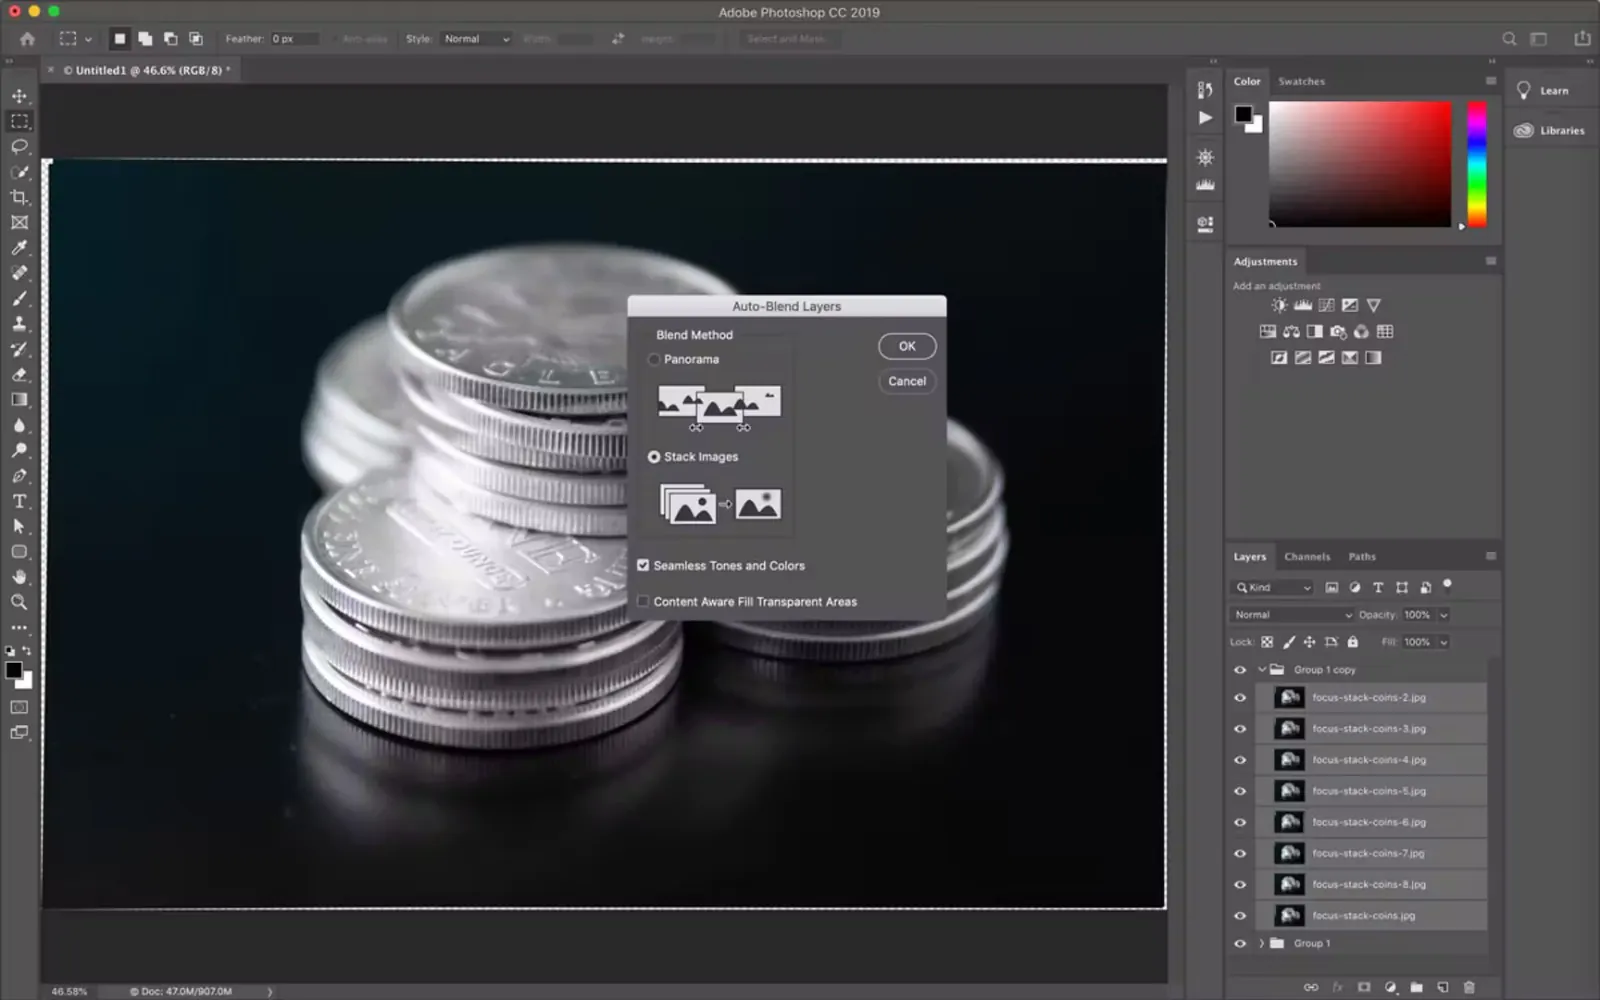
Next, initiate the focus stacking process specific to your editing software. That generally involves selecting the stacked layers, running the focus stacking algorithm or blending mode, and letting the software intelligently combine the sharpest parts of each image to achieve an extended depth of field.
After the focus stacking process is complete, review the image for any blending artefacts or imperfections. Make adjustments or refinements to ensure a seamless and natural transition between focused areas.
Lastly, save the final focus-stacked image, following the previous step’s instructions, ready to be shared or further processed.
Focus stacking is an optional step that can significantly increase the depth of field in your image, particularly useful when capturing scenes with a wide range of distances or macro photography.
Step 7: Fine-Tuning
At this stage, it’s time to fine-tune the depth of field adjustments you’ve made so far. Review the image with the applied depth of field effects and assess the overall visual impact.
Make any necessary adjustments to ensure perfect integration of the depth of field effect with the rest of the image. That may involve refining the intensity of the blur, sharpening certain areas, or adjusting the opacity of the depth of field layers.
Pay attention to the transitions between focused and blurred regions, ensuring they appear natural and gradual. Smooth any harsh edges or artifacts that may have been introduced during the editing process.
Continuously evaluate the image and make small adjustments until you achieve the desired look and feel. The objective is to generate a visually pleasing depth-of-field effect that enhances the composition and draws the viewer’s attention to the intended subject while maintaining a sense of realism.
Once satisfied with the adjustments, save the final image in the desired format and resolution, ready for sharing or further post-processing, if needed.
Step 8: Preview and Save
After fine-tuning the depth of field adjustments, previewing the final image to ensure it meets your desired aesthetic and visual impact is important. Zoom in and examine the image carefully, paying attention to the details and overall composition.
Make any additional adjustments or tweaks as needed. That may include adjusting the overall tone, contrast, color balance, or any other editing adjustments to enhance the image’s overall appeal further.
Once you are satisfied with the final result, save the edited image in the desired format and resolution. Choose a high-quality file format that preserves the image’s details and colors, such as JPEG or TIFF.
Consider saving a separate copy of the original image with layers intact if you want to revisit or make further adjustments.
Conclusion
In closing, you can add a depth of field to images using editing techniques and software to adjust and manipulate the blurriness and sharpness of different areas. While software tools may not thoroughly recreate a physical lens’s optical qualities of making the depth of field, they provide us with greater autonomy and oversight over generating desired depth of field effects during the post-processing stage using masking and blur effects. To keep a natural and realistic appearance in the final image, utilize these approaches sparingly.
