How To Use Gothic Art In Images
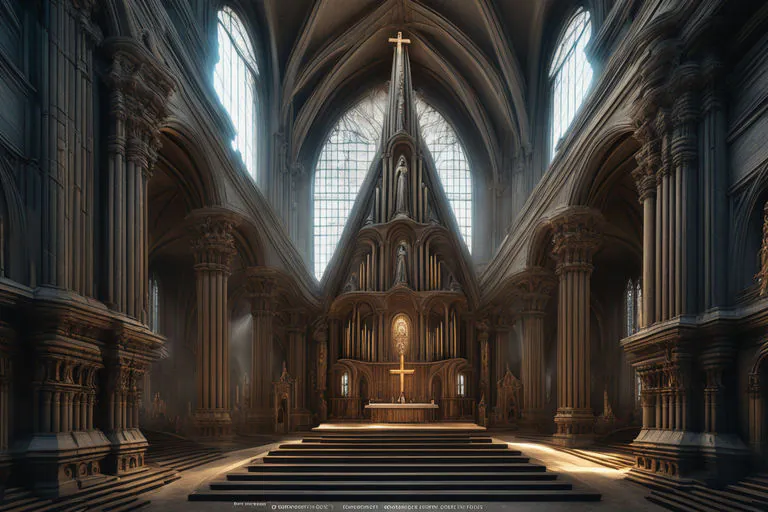
The cultural and architectural traditions that grew in late medieval Europe were the inspiration and catalyst behind the development of initial gothic art, particularly the distinctive infrastructures, sculptures, and ornate embellishments like glass art and paintings. Historic places like churches and cathedrals and monarchies like palaces and castles were also beneficiaries of Gothic artwork and architecture with brilliant and elaborate layouts. This incredible art approach continues to expand in various areas of modern art, including digital art and photography. Gothic paintings and illustrations have a broad viewer following; everyone cherishes them for their noteworthy charms. Besides creating gothic visuals, the distinctive elements are also integrated into the photographs to recast them into unparalleled compositions. The main techniques behind such compositions include light and shadow manipulations, color palette modifications, geometrical designs, vintage textures and filters, and many more. This blog will discuss suffusing gothic art in a photograph, presenting the significant techniques and tools that conform to this art style.
Step 1: Load the base image in Photoshop
Start the Adobe Photoshop application on your PC and select the “File” menu. Then, from the dropdown menu, select the “Open” button to browse your image files and find the image you need to upgrade with gothic art components.
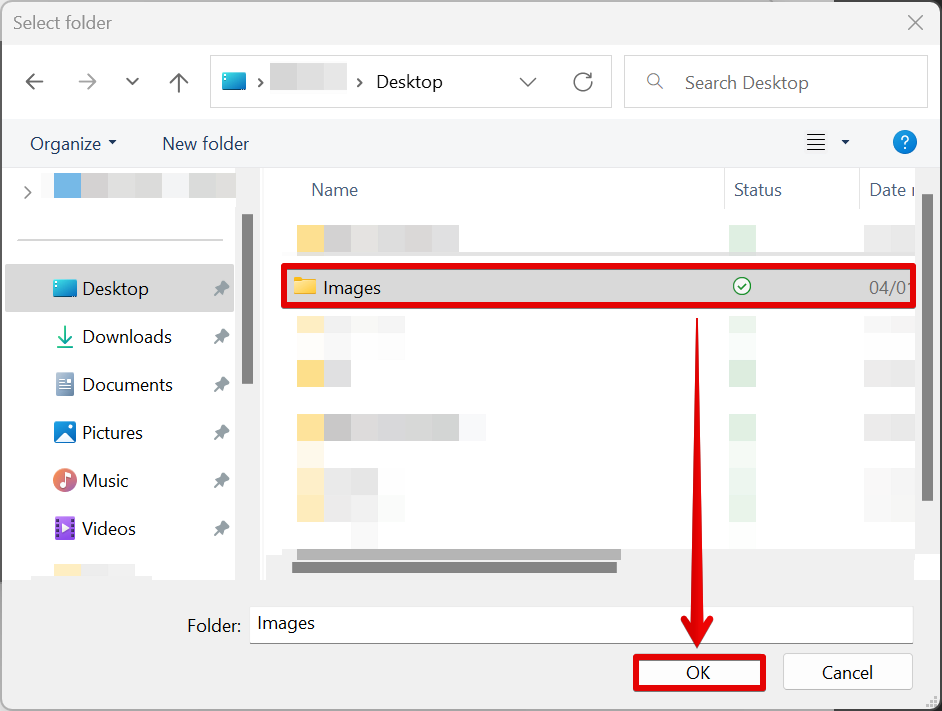
Within the file explorer window, get to where your typical image is put away. Select the picture file by clicking on it once to highlight it.
After you’ve specified the required image file, tap the “Open” button within the file explorer window to import the file into Adobe Photoshop.
According to the size and resolution of the picture file, it takes a couple of minutes for Photoshop to load the image into the workspace completely.
After your image has been successfully imported, it’ll show up within the Photoshop workspace, ready for you to start enhancing it with Gothic art details.
Step 2: Browse your gothic images or designs
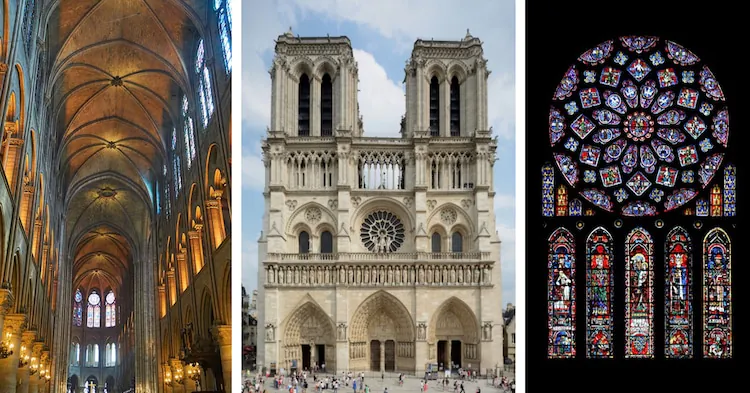
Conduct a web search utilizing particular keywords related to gothic design and art. Utilize search engines to find a wide range of images portraying gothic arches, painted glass windows, foreboding figures, and complex designs.
Check stock photo websites like Shutterstock, Adobe Stock, or Unsplash, which offer broad collections of royalty-free pictures, like gothic art components. Use search filters to limit choices and discover images that best fit your venture prerequisites.
Visit art and design websites dedicated to gothic art, where you’ll discover galleries or databases exhibiting a tremendous cluster of gothic art details accessible for download or reference.
Join in with online communities and forums related to digital art, photography, or graphic design. Members frequently share assets, tips, and instructional exercises related to gothic art, assisting you in finding exhilarating and motivating components for your project.
Browse public domain sites such as Wikimedia Commons or the Library of Congress, which offer free access to historical images and works of art. These repositories provide a wealth of images to utilize without copyright limitations.
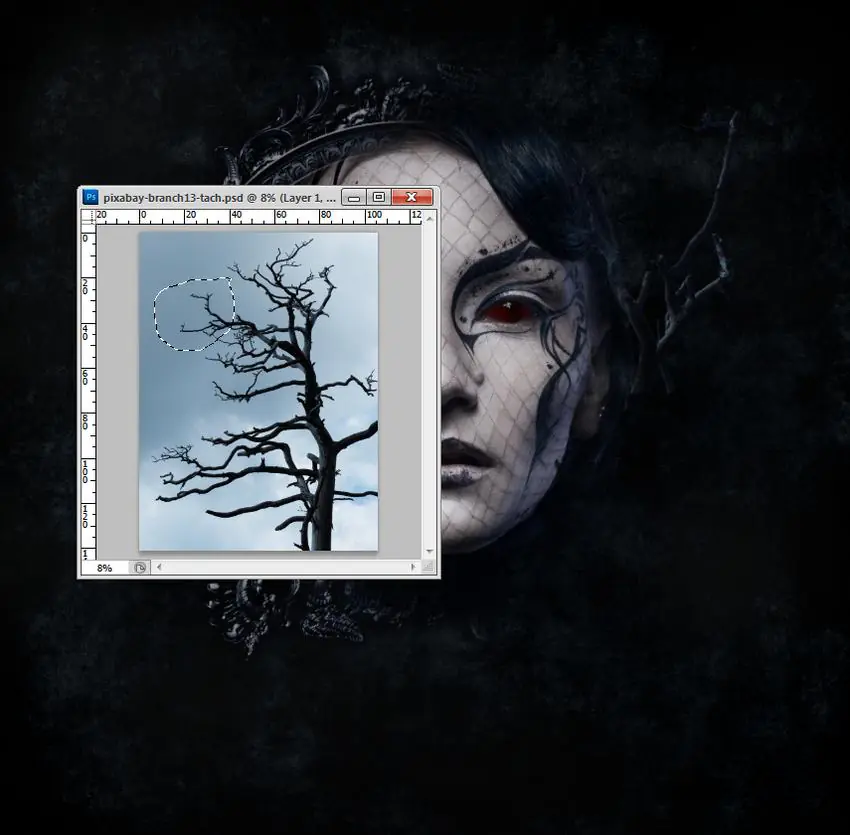
Step 3: Utilize selection features for element extraction
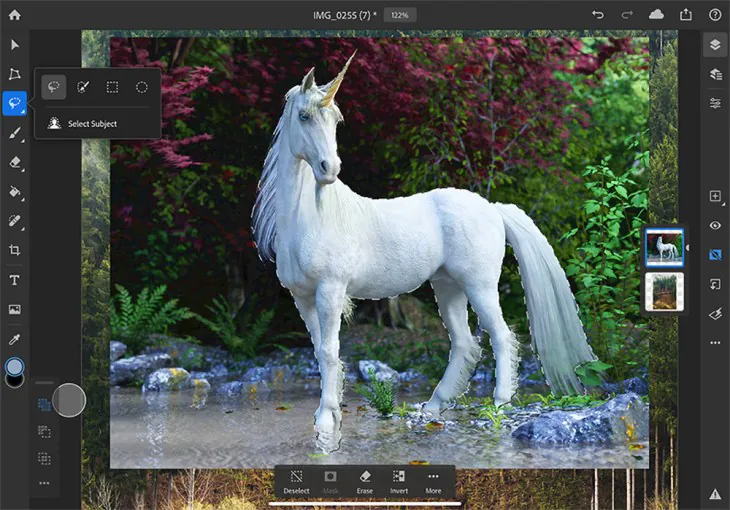
Use selection tools like the Magic Wand, Quick Selection, or Lasso Tool to separate the gothic art components from their backgrounds. Tap and drag over the regions you must choose, refining the selection as required.
Utilize the Refine Edge tool to fine-tune your selections and get smooth edges around complex details. Tweak parameters like radius, feather, and contrast to get exact selections, particularly for components like stained glass windows or delicate designs.
Create layer masks for your selected gothic art components to cover up or uncover particular ranges as required. Layer masks allow for non-destructive altering, empowering you to refine choices and make alterations without affecting the initial picture data.
For more complex selections or detailed cutouts, consider utilizing the Pen Tool to form exact shapes around gothic art objects. Pen feature selections offer more noteworthy control and precision, particularly when managing complicated shapes or fine details.
Save your choices as separate layers or files for subsequent editing and simple access after you’ve separated and gathered the gothic art elements.
Step 4: Integrate the gothic components into the base image
Duplicate the chosen gothic art components from their respective files or layers and put them onto your image canvas in Photoshop.
Utilize the Transform tools to resize, turn, and scale the gothic art chunks to fit your composition’s specified position and perspective.
Organize the layers of gothic art components within the Layers panel to control their stacking order and visual progression. Consider the spatial connections between components and the overall balance of the composition.
Try blending modes and opacity settings for each layer to consistently correspond the gothic art components with the background image. Options like Multiply or Overlay can help balance colors and tones.
Include distortion or perspective alterations to the gothic art components if essential, utilizing highlights like Warp or Perspective Transform to adjust them convincingly with the viewpoint of the main image.
Alter the edges and transitions of the components utilizing layer masks and the Eraser tool. Smoothen edges, remove undesirable ranges, or blend components for a natural and cohesive appearance.
Step 5: Regulate blending and overall adjustments
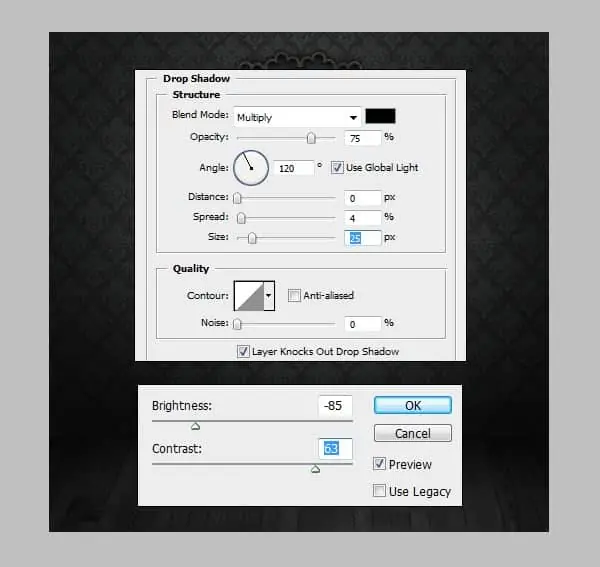
Actualize layer styles such as Drop Shadow, Bevel or Inner Glow, and Emboss to the gothic art parts to incorporate substance and dimensionality. Modify the settings to achieve the specified visual result.
Try adjustment layers involving Hue/Saturation, Levels, or Curves to uplift the gothic art components’ color and tone to fit the original image’s overall color plot and lighting.
Augment the texture and detail of the gothic art parts by applying texture overlays, sharpening filters, or particular dodging and burning techniques.
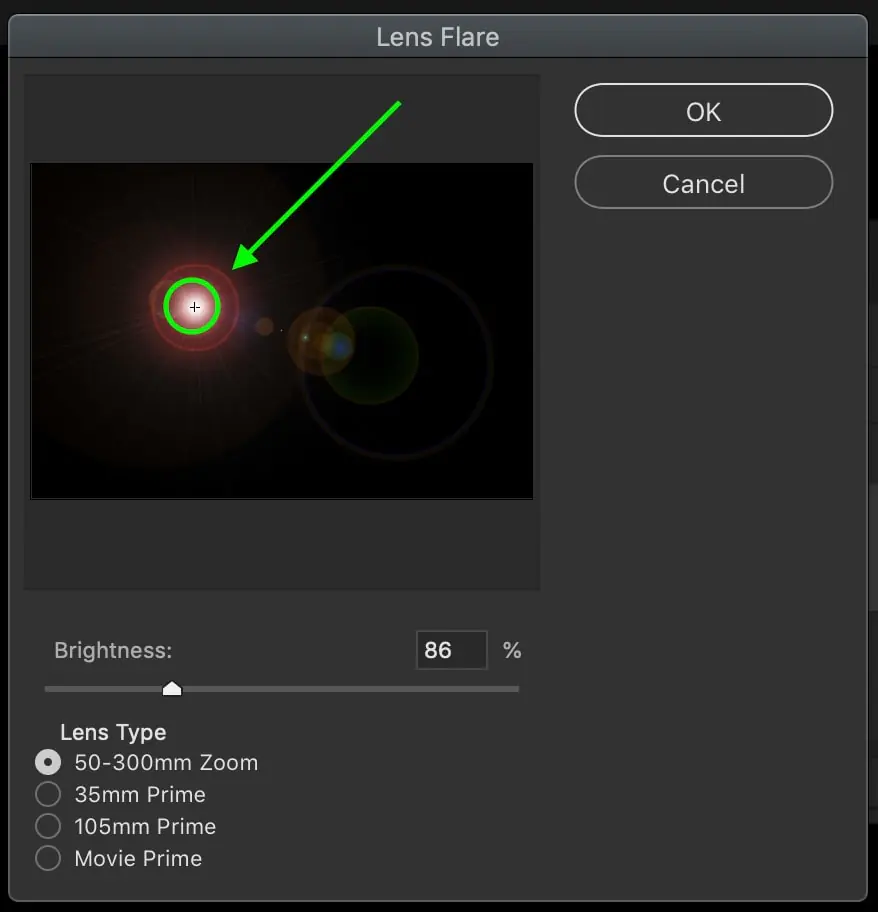
Try lighting effects like gradients, lens flares, or glow effects to include excitement and climate to the gothic components. Consider the heading and degree of light sources inside the original image for realistic lighting outcomes.
Look into distinctive blending modes for the gothic art layers to commune with the fundamental layers and base image. Options like Screen, Overlay, or Soft Light can show thrilling interactions.
Execute global adjustments to the whole composition utilizing adjustment layers or filters. Revamp the contrast, brightness, and saturation to attain a compatible appearance.
Step 6: Accelerate the composition’s depth and details
Set up the order of gothic art components within the foreground, middle ground, and foundation, establishing depth.
Integrate haze, fog, or mist to enhance perceptiveness and atmosphere. Apply mild gradients for climatic perspective.
Consolidate realistic lighting and shadow effects to improve authenticity. Alter shadows and highlights based on scene lighting.
Emulate standard depth of field by specifically blurring components. Utilize Photoshop’s Blur channels to center attention on essential components.
Enhance the visual involvement by upgrading the texture and detail of gothic art components. Utilize texture overlays and brushes for material qualities.
Adjust components with scene perspective utilizing perspective distortion strategies like Perspective Warp.
Try to improve ambiance and thrill with additional impacts like lens flares and light rays. Unpretentious vignettes can include interest in your Gothic-inspired photograph.
Step 7: Execute the ultimate tweaks and refinements
Audit the general composition of your image and make any last alterations to the placement, scale, and arrangement of gothic art objects. Recheck that the composition streams naturally and guides the viewer’s eye through the image.
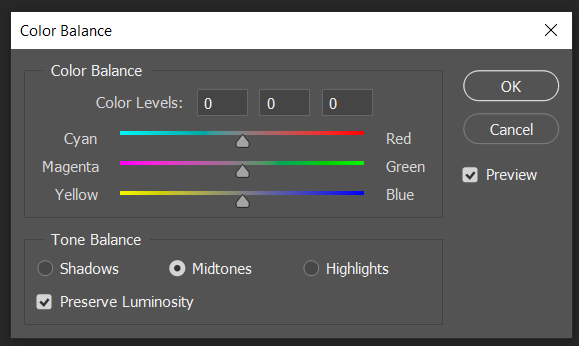
Apply colour-grading strategies to bring together your composition’s color palette and temperament. Utilize adjustment layers or colour balance settings to attain a cohesive and agreeable color plot that improves the gothic aesthetic.
Progress the fine details and surfaces of gothic art components to include profundity and authenticity in your composition. Utilize sharpening filters, texture overlays, or selective dodging and burning to emphasize details and highlights.
Access noise reduction procedures to lessen digital noise in your artwork. Utilize noise reduction filters or adjustment layers to get a polished final look.
After being fulfilled with the ultimate appearance of your composition, save it in a high-quality file format like PSD or TIFF to protect layers and editing capabilities. Moreover, export a flattened version of your work in a web-friendly format like JPEG or PNG for sharing or online publication.
Conclusion
In summary, combining gothic art elements in your shots is a dramatic approach that can whisk the viewer back to the bygone times of the Middle Ages. This art technique is not only about attributing the cultural lineage associated with the initial art movement, but it also reveals the creative wonderment and splendour demonstrated by the artist. Ultimately, after blending with gothic art components like pointed arches, rib arches, flying buttresses, and exquisite ornamentation, your photographs give off a vibe of mystery and antiquity. Your intriguing gothic art compositions also correspond to gothic movie scenes or art depicting a spirit of mystical tracery.
