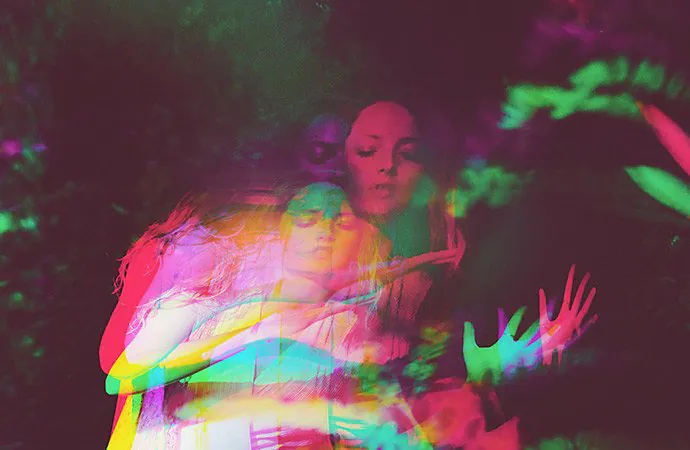
How To Create Chromatic Distortion In Images
The phenomenon of chromatic distortion is common in photography, which often happens due to camera lens aberrations or sensor issues. It results in color defects, including color bleeds and fringing, making photos distorted and blurry. Intrinsically, chromatic distortion is considered an unintentional process that makes photographers and editors work additionally on those images during the post-processing phase. However, with various other innovative effects, the intentional chromatic distortion has also made a name for itself in image modification and enhancement. It can yield discerning flairs, nostalgic feelings, and surreal narration in the photographs, benefitting their overall performance and thematic description. The frequent strategies employed to apply a chromatic distortion effect to images contain color splitting, double exposure, pixel sorting, color fringing, and chromatic aberrations. These techniques can cause aesthetically endearing distortions that conjure thorough sensations like exploring beauty in imperfections and appreciating appearances within their satisfying and undesirable contraries. This blog includes the steps needed to practically apply all related techniques for a thoughtful chromatic distortion effect in your photographs.
Step 1: Create a copy of the initial image
Initiate your choice of photo editing application.
Browse through your image files and select the image you want to work with.
Select the software’s “Open” or “Import” option to bring the photograph into the editing workspace.
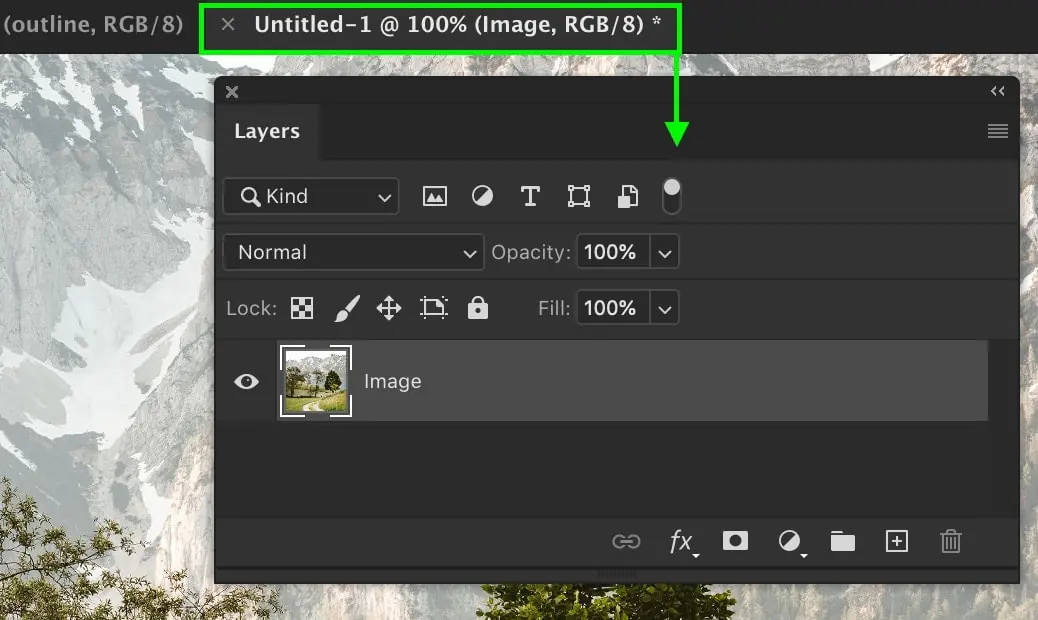
After the photo is imported, locate the layer or image tab within your program’s interface.
Click on the image layer or tab, and you will see a dropdown menu.
Click on the option to create a copy of the image layer In the menu.
On the other hand, utilize keyboard shortcuts; for instance, use Ctrl + J in Photoshop, and you can quickly copy the image layer.
Ensure that you have made a copy layer or duplicate of the initial photo to protect the initial information for reference and comparison.
You’re set to continue editing and applying chromatic distortion effects to the copied photo layer.
Step 2: Use color separation tools
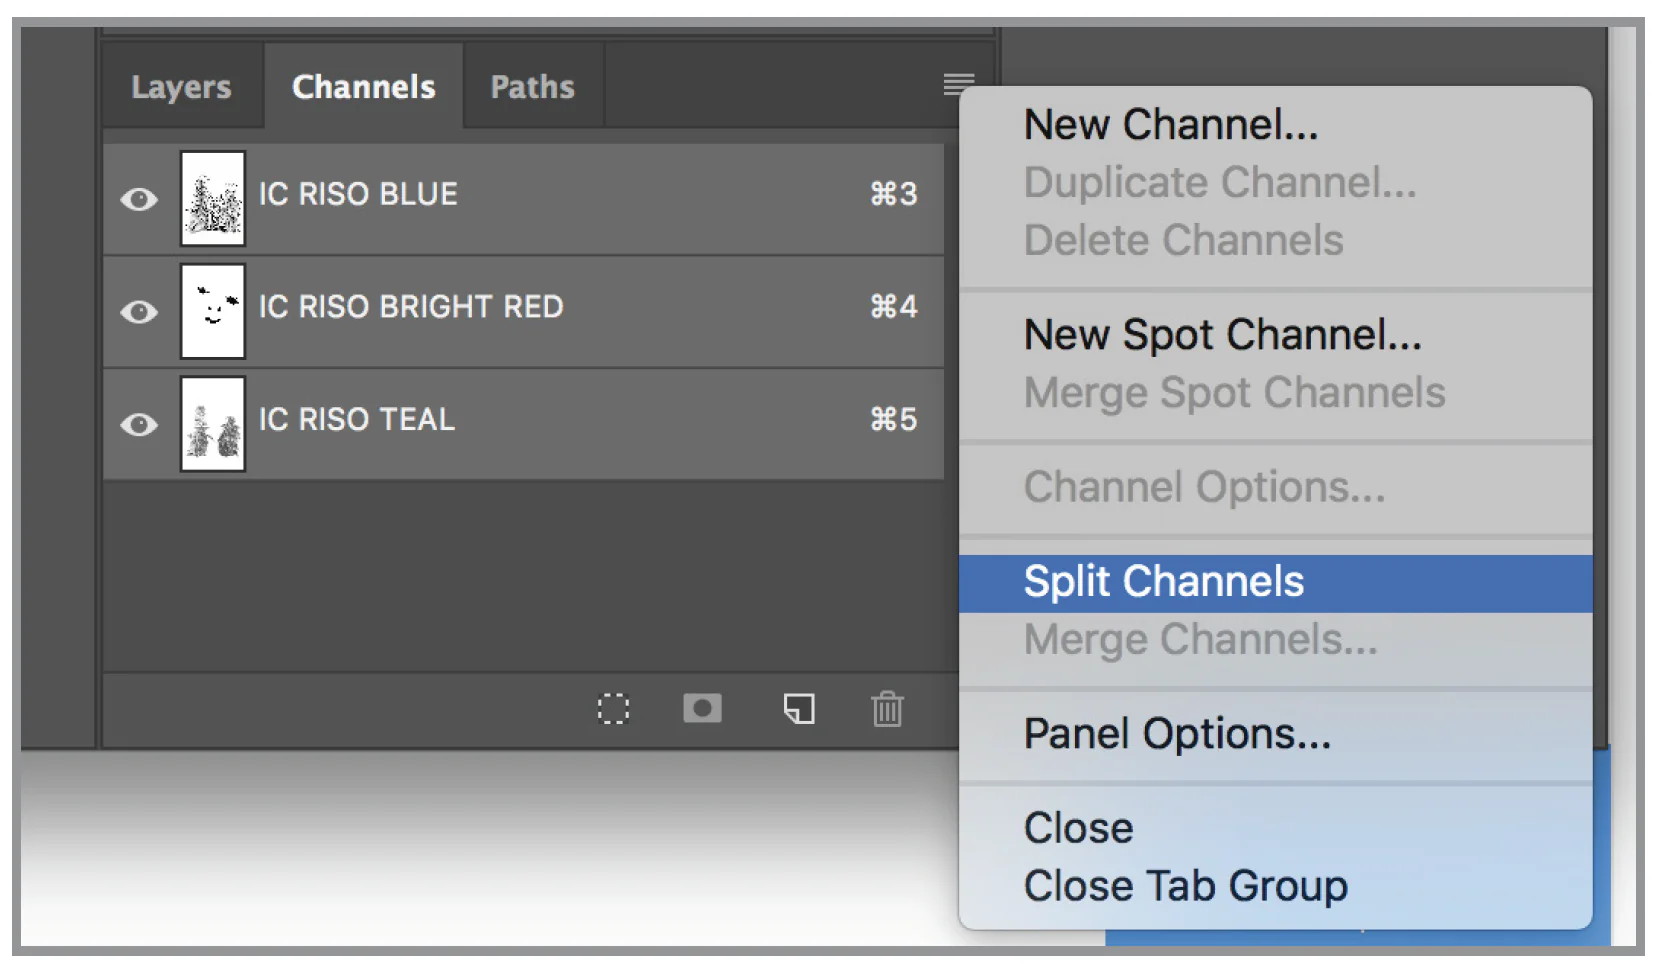
Get to the photo editing software’s toolbar or menu to discover the color separation options.
Find the choices like “Channel Mixer,” “Split Channels,” and “Separate RGB” according to the software.
Select the suitable feature to partition the image into the primary color channels, including red, green, and blue (RGB).
Explore sliders or settings inside the color partition tool to alter the level and conveyance of each color channel.
Watch how modifications in one channel influence the overall demeanor of the picture.
Try to make distinctions in color concentration and spread over the channels to get the wanted chromatic effects.
Take care of any unusual visual effects or combinations that emerge amid the color separation process.
This step is a foundation for further control and experimentation with chromatic distortion in consequent steps.
Step 3: Make color channels blurring and distortions
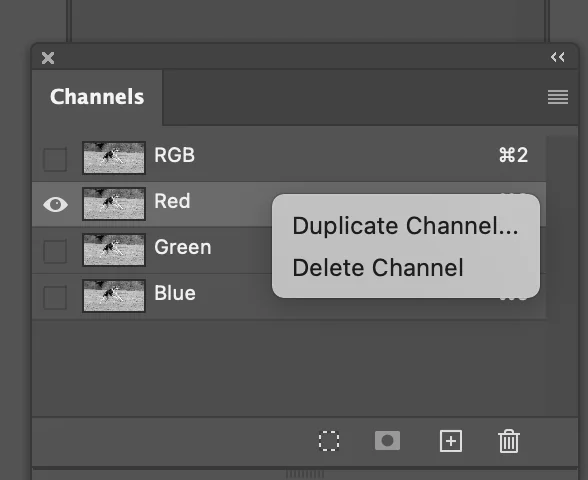
Employ your software’s features applicable for specific color alterations or channel control.
Distinguish regions of the picture where you need to present color fringing or distortions.
Try out strategies like particular blurring, shifting, or duplicating particular color channels.
Apply these procedures to make subtle or conspicuous color borders along edges or inside certain zones of the composition.
Reckon the aesthetic and temperament you need to communicate with the color-fringing upshots.
Tune the intensity and tint of the fringes to have the required visual effect.
Check out how the color fringing corresponds to other components within the image and chips in the general composition.
Keep assessing and touching up the color fringing effect to confirm that it lifts the shot’s required aura or narrating component.
Step 4: Try out creative filters and blending options
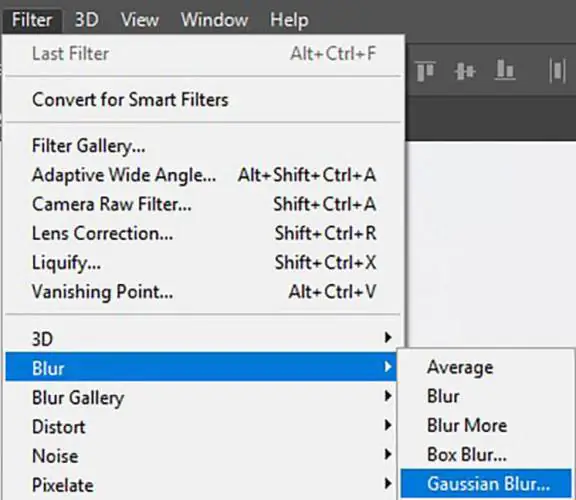
Check out your software’s filter options to get to various filter choices.
Test with diverse filters such as Gaussian blur, motion blur, or distortion filters to build up chromatic distortion impacts.
Transform each filter’s parameters to direct the distortions’ level and direction.
Use blending modes to combine layers and make interesting visual aftermaths.
Explore blending modes such as overlay, multiply, or screen to attain wanted color reciprocity and contrasts.
Put in gradients or texture overlays to extra-reform the chromatic distortion effects.
Fuse multiple filters and blending modes to make complex and energetic distortions.
Ceaselessly see and survey the effect of each filter and blending mode alteration on the general composition.
Repeat and elevate your approach based on the required elegance and visual narrating objectives.
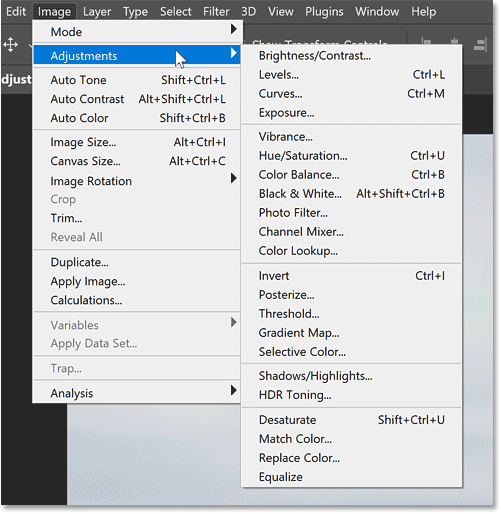
Step 5: Utilize fine-tuning and adjusting options
Survey thoroughly your composition and appearance of the image with the connected chromatic distortion.
Utilize adjustment layers or related tools offered by your editing app to polish particular aspects of the distortion.
Tune saturation, contrast, brightness, and hue to refine the chromatic effects.
Try color balance alterations to attain a pleasant color palette and general looks.
Take heed to how each setting impacts the visual harmony and temperament of the picture.
Persistently compare the altered picture with the first and make incremental alterations as required.
Consider the expected effect and group of onlookers’ discernment when modifying the chromatic mutilation impacts.
Strive for an adjustment between imaginative expression and visual coherence within the last picture.
Repeat through diverse alteration combinations until you accomplish the required creative vision for the picture.
Step 6: Check out additional distortion options

Look into extra distortion procedures to upgrade the visual effect of the image.
Try pixel sorting, glitch effects, or texture overlays to present special visual components.
Consider consolidating lens distortion or perspective control to make energetic and delightful compositions.
Access distortion brushes or custom effects to include complex, subtle elements and complexity to particular photo zones.
Include diverse distortion procedures to make layered and multi-dimensional visual impacts.
Check how each additional distortion technique is put into the overall temperament and narrative of the picture.
Persistently assess and touch up the composition to confirm that the added distortion strategies upgrade instead of degrading from the expected aesthetic vision.
Practice inventiveness and experimentation to find new and inventive ways to distort and manipulate the photograph.
Repeat through diverse combinations of distortion strategies to attain the required visual effect and narrating profundity level.
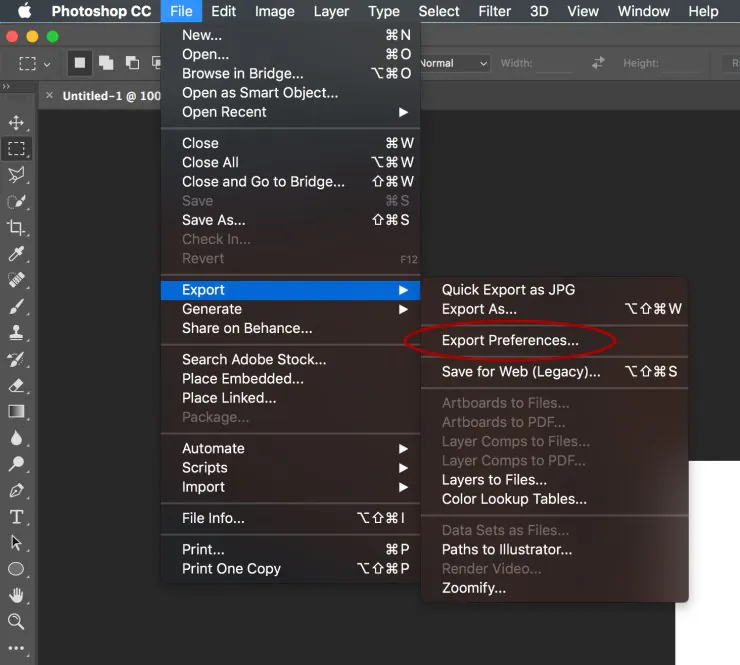
Step 7: Make a closing evaluation and export
Take a break and assess the edited image’s composition, symmetry, and visual impact with integrated chromatic distortion effects.
Review variables such as color agreement, contrast, central focus, and narrating components.
Contrast the edited photograph with the initial and make closing tweaks vital to attain the specified creative vision.
Confirm that the chromatic distortion effects improve the aiming disposition, atmosphere, and story of the picture.
After you are done with the composition, save your work within the native format of the editing program to protect all layers and altering aptitudes.
Furthermore, export the ultimate picture in a suitable format like JPEG, PNG, or TIFF, making it ideal for sharing or printing plans.
Select suitable export adjustments such as resolution, color profile, and compression level to preserve picture quality and compatibility.
You can also make different versions of the ultimate picture to oblige diverse shows or printing necessities.
Include graphic metadata and copyright information to secure your work and give a milieu for viewers.
Conclusion
In conclusion, the exquisite-looking multicolored distortions induced through intentional chromatic distortions can glamorize the images. The process can spotlight the essential objects and their fringes, which creates an enduring impact on the viewers. The unique mindset behind this editing approach inspires both the artist and the onlooker to ponder over the beauty and grace found within defects and flaws. It can make the ordinary and usual scenes of images immensely out-of-ordinary, thus advancing their visual status from realistic to surreal and fantasy. You can manipulate your photos with this inventive tool and introduce unexpected and peculiar color variations that dazzle the spectators at the soundest level.
