
How To Create Psychedelic Art Using Illustrator
As one of the most prevailing art styles during the 1960s, psychedelic art exhibited diverse aspects related to counterculture societies. It presented a blend of intermingled patterns and imageries that were beyond rational perceptions, leaving the eyes in an awestruck situation. The modern version of this approach, characterized by the same striking colors, perplexing designs, and strange symbolism as initial psychedelic art, opts to bring out sensations of astonishment, pondering, and exceptional quality. Artists tend to draw motivation from supernatural encounters, otherworldly existences, and cosmic consciousness, pointing to capture the unutterable and the glorious in their manifestations. Through a vivid integration of colors and shapes, psychedelic art welcomes viewers to rise above the unremarkable and dig into the domain of the exceptional. Various graphic and design software are proficient in creating this avant-garde craft. The eminent ones are Adobe Photoshop, Illustrator, Procreate, and many others. These digital art applications include all the essential features and tools to create ingenious designs like psychedelic art. This article will present the eight steps to develop enthralling psychedelic art using Adobe Illustrator, an efficient design software.
Step 1: The New Project Creation
Initiate the Adobe Illustrator application on your device and head to the File menu.
Click the New button to make a new document or utilize the keyboard shortcut Ctrl+N for Windows or Command+N for Mac.
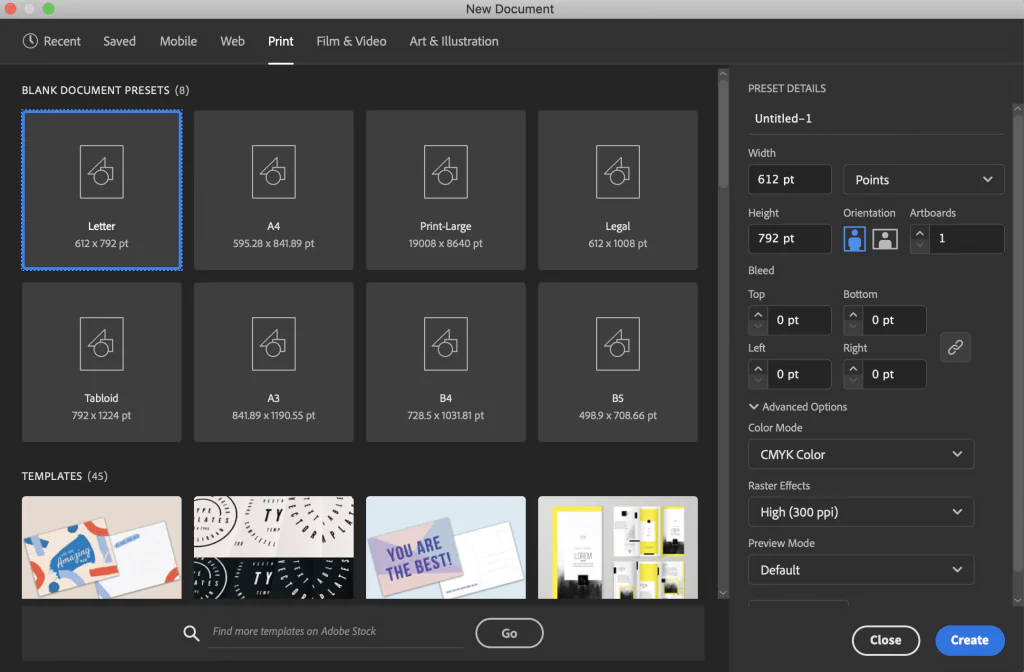
You will see a dialog box where you have to indicate the document’s dimensions, like width, height, and orientation (such as portrait or landscape).
Set the required units of measurement for your file, such as inches, pixels, or centimeters.
Indicate the number of artboards if you intend to work on different designs inside the same document.
Based on your aiming yield, alter other settings, such as color mode (RGB or CMYK) and raster effects resolution.
Title your document to keep it ordered and identifiable.
After you’ve arranged the settings according to your preferences, press “Create” or “Ok” to create the new document.
The new document will open in Illustrator, all set for you to start creating your psychedelic artwork.
Save your document to prevent losing progress and to confirm that you can effectively get to it for future editing.
Step 2: Drawing Basic Shapes
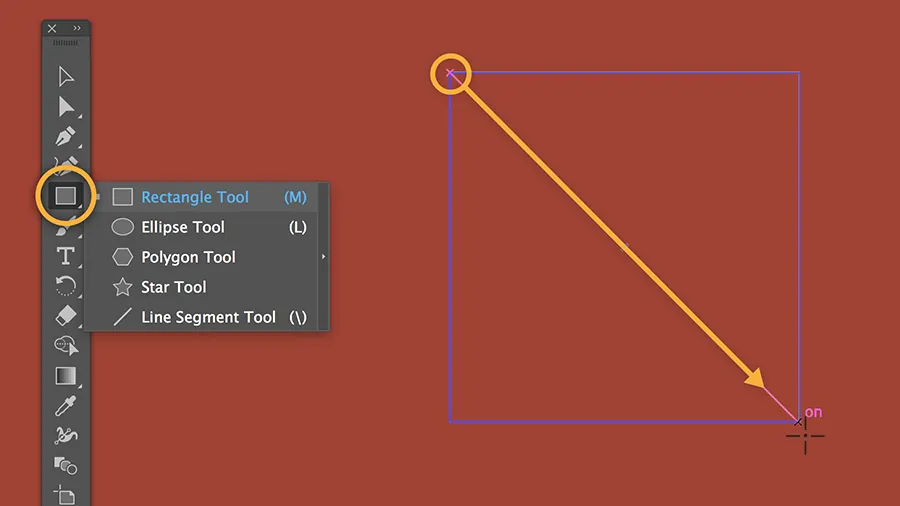
Pick the suitable Shape Tool from the toolbar on the left side of the Artist workspace. Standard tools are the Rectangle Tool, Ellipse Tool, and Polygon Tool, among others.
Press and drag on the canvas to draw your planned shape. Hold the Shift key and drag to set proportions for utter circles or squares.
Play with sundry shapes and sizes to lay down the basis of your psychedelic artwork.
Avail the Direct Selection Tool with key shortcut A to alter the shape’s anchor focuses and handles for proper customization.
Utilize the Pathfinder panel by clicking Window > Pathfinder to add, subtract, or cross shapes, making more complex and perplexing shapes.
Replicate shapes with the Selection Tool using the shortcut V to choose the shape; next, hold down the Alt key in Windows or the Option key in Mac while dragging the shape to form a duplicate.
Order and layer shapes to form compelling compositions. Move to the Layers Window > Layers and sort your artwork’s elements.
Proceed to play with assorted shapes, sizes, and placings until you accomplish the required composition for your psychedelic work.
Step 3: Choosing The Color Pallete
Inspect a dynamic and contrasting color palette propelled by the psychedelic art development. Consider utilizing intense and energizing tints such as neon greens, vigorous purples, and fiery oranges to devise a sense of visual strength.
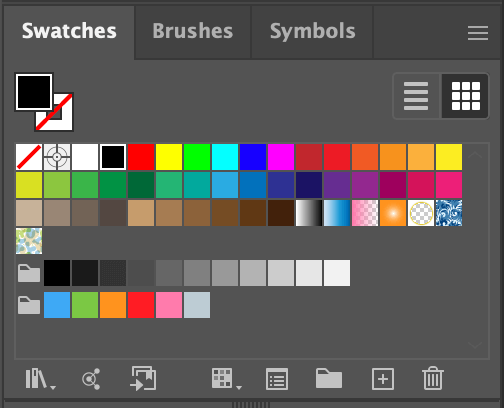
Get to the Swatches panel (Window > Swatches) to find pre-defined color swatches or make custom colors utilizing the Color panel (Window > Color).
Try mixed color combinations and contrasts and see how distinctive tones can bring out different feelings and sensations within the viewer.
Utilize the Eyedropper Tool to test colors from the existing work of art or outside sources, keeping consistency throughout your composition.
Apply strong fills, gradients, or designs to your shapes utilizing the Color panel or Gradient panel (Window > Gradient) to include dimension to your artwork.
Explore blending modes and opacity settings to make ethereal color impacts that improve the psychedelic climate of your artwork.
Frequently assess and adjust your color choices as you advance, refining and fine-tuning your palette to attain the required temperament.
Step 4: Using Gradient Fills
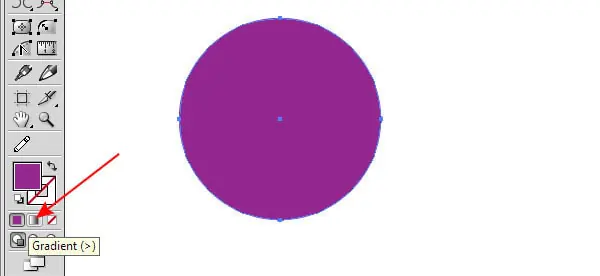
Start by selecting the shapes or objects to apply gradient fills utilizing the Selection Tool (V).
Get to the Gradient panel (Window > Gradient) for gradient choices.
Try unusual gradient types, like linear, radial, and freeform, to attain the required visual effect for your psychedelic artwork.
Alter the angle, position, and scale of the gradient inside each shape utilizing the Gradient Tool (G) or by explicitly controlling the gradient handles on the canvas.
Find out the Gradient panel to customize each gradient stop’s colors and transparency levels, permitting smooth moves and unpretentious variations in color level.
Check out the interplay between light and shadow inside your composition, utilizing gradients to make profundity and dimensionality in your psychedelic artwork.
Try blending modes such as Multiply, Screen, Overlay, and Soft Light to improve the interaction between gradients and basic shapes, creating mesmerizing and dreamlike effects.
Click Window > Appearance) to apply different gradient fills and strokes to a single shape, permitting detailed and layered compositions.
Play with gradient meshes to form complex and natural color transitions inside your artwork, including a sense of smoothness and activity in your psychedelic patterns.
Step 5: Blending Shapes
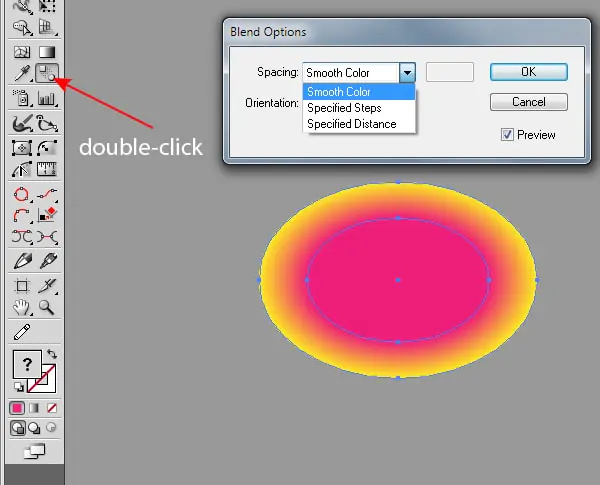
Find the Blend Tool within the Illustrator toolbar or get to it via the menu by clicking Object > Blend > Blend Options.
Select two or more shapes or objects on the canvas to blend.
With the shapes chosen, activate the Blend Tool by clicking on the beginning shape and then clicking on the finishing shape.
Illustrator will make a smooth shift, or blend, between the chosen shapes based on the desired blending alternatives.
Try different blending choices within the Blend Options dialog box to tailor the blend, including the number of steps, dispersing, and orientation.
Utilize the Direct Selection Tool (A) to alter the initial shapes’ anchor focuses and handles, impacting the blend’s shape and direction.
Try distinctive blending modes, such as Smooth Color, Specified Steps, or Specified Distance, to attain the specified blending impact for your psychedelic work.
Combine the Blend Tool with Illustrator highlights, such as gradients, transparency settings, and opacity masks, to form perplexingly captivating compositions.
Step 6: Repeating Shapes
Move to the Transform panel (Window > Change) to access the transformation options for copying and controlling shapes in your psychedelic artwork.
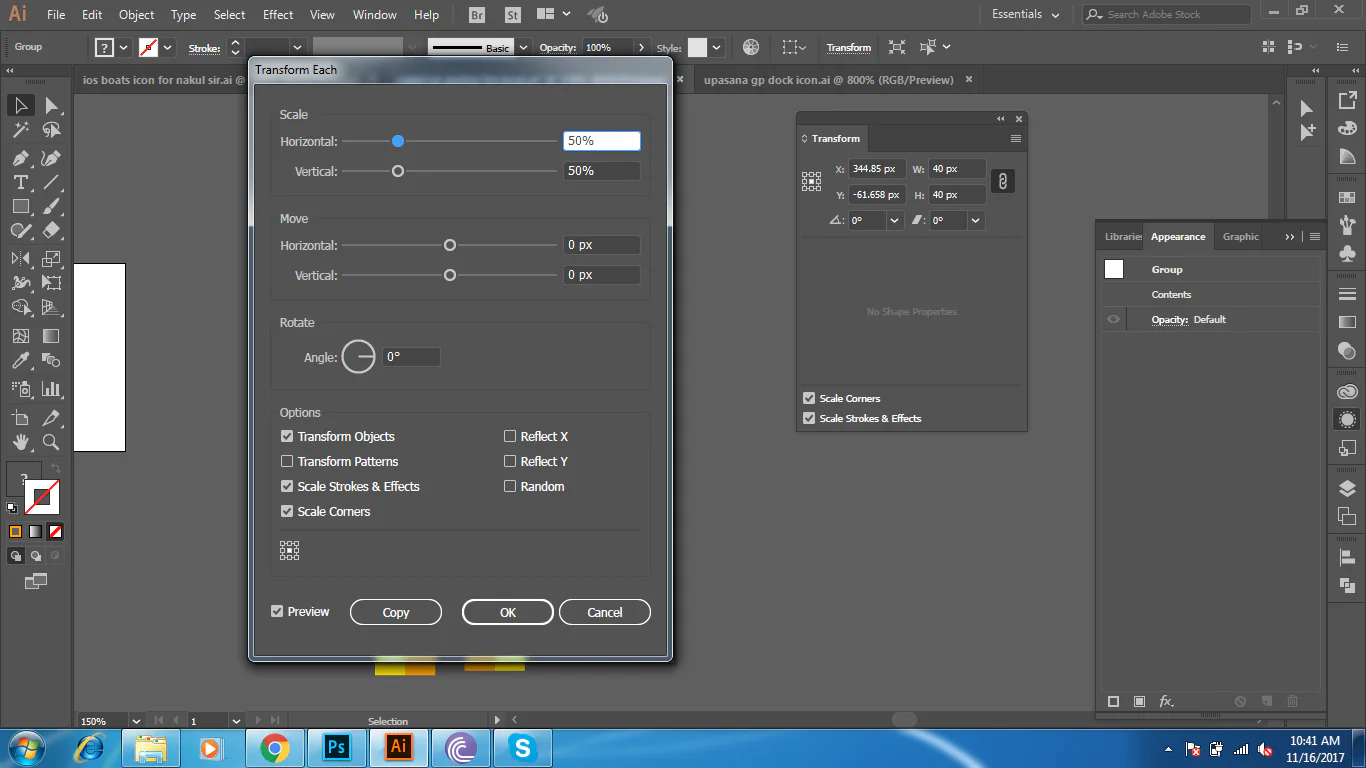
Select the shapes or objects you need to copy and play with transformation choices such as Rotate, Reflect, Scale, and shear for symmetrical designs.
Utilize the Transform Each function (Object > Transform > Transform Each) to apply changes independently to chosen shapes.
Consider utilizing the Repeat command (Object > Transform > Rehash) to make repeated designs and themes, altering the number of duplicates and spacing between repetitions as required.
Try using mirroring and flipping techniques to form symmetrical compositions that inspire a sense of harmony in your psychedelic composition.
Consider consolidating geometric shapes and repeating designs motivated by natural shapes and mathematical standards.
Utilize the Grid and Guides highlights to help adjust and divide shapes accurately, resulting in consistency and coherence inside your composition.
You can tessellation-like designs by consistently rehashing and interlocking shapes and themes over your artwork.
Step 7: Including Filters and Effects
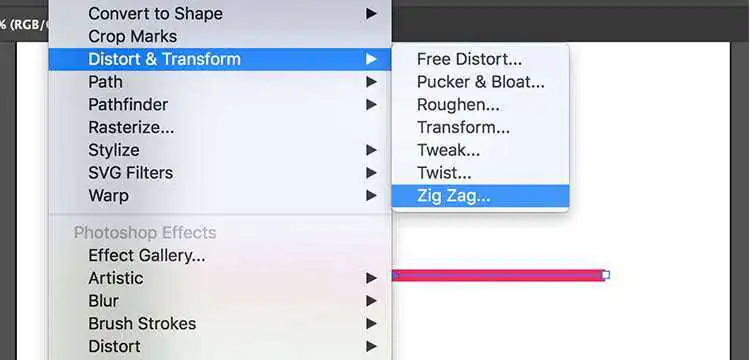
Access Illustrator’s Effects menu to get to inventive filters and distortion impacts.
Operate Gaussian Blur for dreamy effects, or apply Distortions like Zig Zag and Pucker & Bloat for optical distortions.
Utilize the Warp choices to twist and bend shapes, including energetic development to your psychedelic artwork.
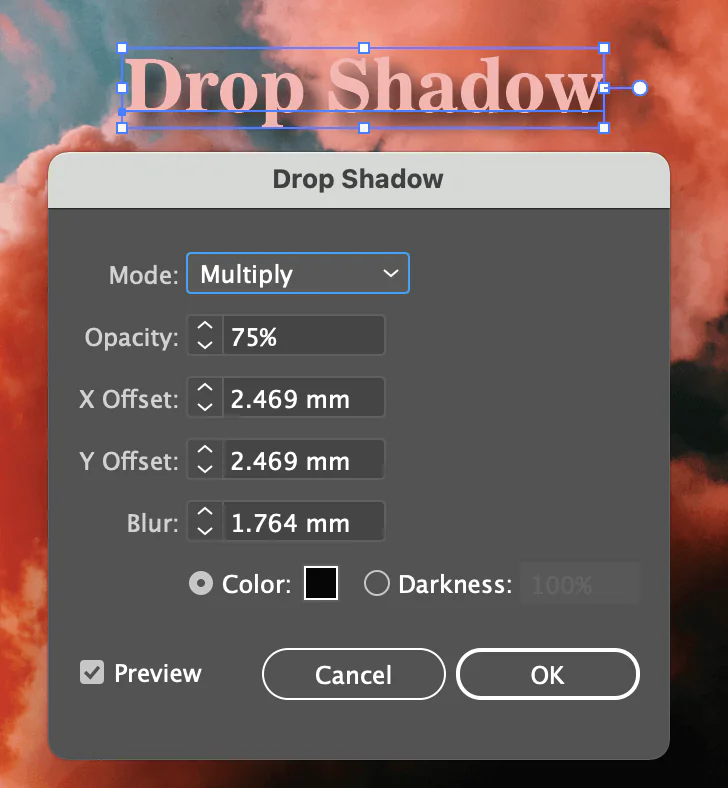
Use stylized effects such as Drop Shadow and Outer Glow to include profundity and dimension to your shapes and compositions.
Consider utilizing the Texture effects to overlay designs and textures, improving the material quality of your artwork.
Include multiple effects and filters to form exciting and impressive effects that cross the boundaries of recognition.
Step 8: The Final Assessment
Zoom in on your artwork to center on more minor details and refine the general composition.
Utilize the Direct Selection Tool (A) to alter person anchor focuses and handles, refining the shapes and forms of your components.
Try including complicated designs, lines, and themes to improve your psychedelic artwork’s complexity and visual interest.
Consider the uniformity and conveyance of visual components inside your composition, guaranteeing a concordant and cohesive overall plan.
Experiment with layering strategies to arrange components into closer view, middle ground, and foundation layers.
Consider including highlights and shadows to contrast and emphasize central points within your composition.
After all the final evaluations and tweaks, your artwork is prepared to share and present.
Conclusion:
Finally, psychedelic art’s wild manifestations spread over the canvas relate to distinctive components such as plants, creatures, or cosmic wonders. Such designs can summon up reinvigorated orientation for art lovers. Introducing unconventional imagery and color plans thrills viewers to probe into amended states of awareness, exceeding the commonplace recognition. Another paramount facet of the psychedelic technique is its candidness to translation. Viewers have to interpret the work of art in immeasurable ways, encountering individual explications and noteworthiness in designs and presentations. Psychedelic art could be a strong and multifaceted sort that continues to incite curiousness and inventiveness in artists and spectators much the same.
