How To Use Golden Ratio For Images
The mathematical concept of the Golden Ratio is extensively employed in art and graphics, where key elements are positioned on lines or grids in areas where they can instantly get attention and become highlighted above the rest of the components. This quantitative technique is advantageous when you want to resize or crop your images. You can realign the essential parts of the image so that they do not get eliminated from the size reductions. To organize those components, the Golden Ratio works by applying a grid system to the design or image that directs you in the computationally accurate positioning of your element to create a unified and well-proposed composition likely to induce viewers’ pull due to its visual neatness and perfection. Nevertheless, with aid from measurement and positioning tools like grids and resizing, your composition will most likely be error-free and accurate. However, you must still grasp a few practices for an ideal final Golden Ratio artwork. This blog post can guide you through a step-by-step approach to using the Golden Ratio for your images for actual aesthetic outcomes.
Step 1: Using Grid Overlaying
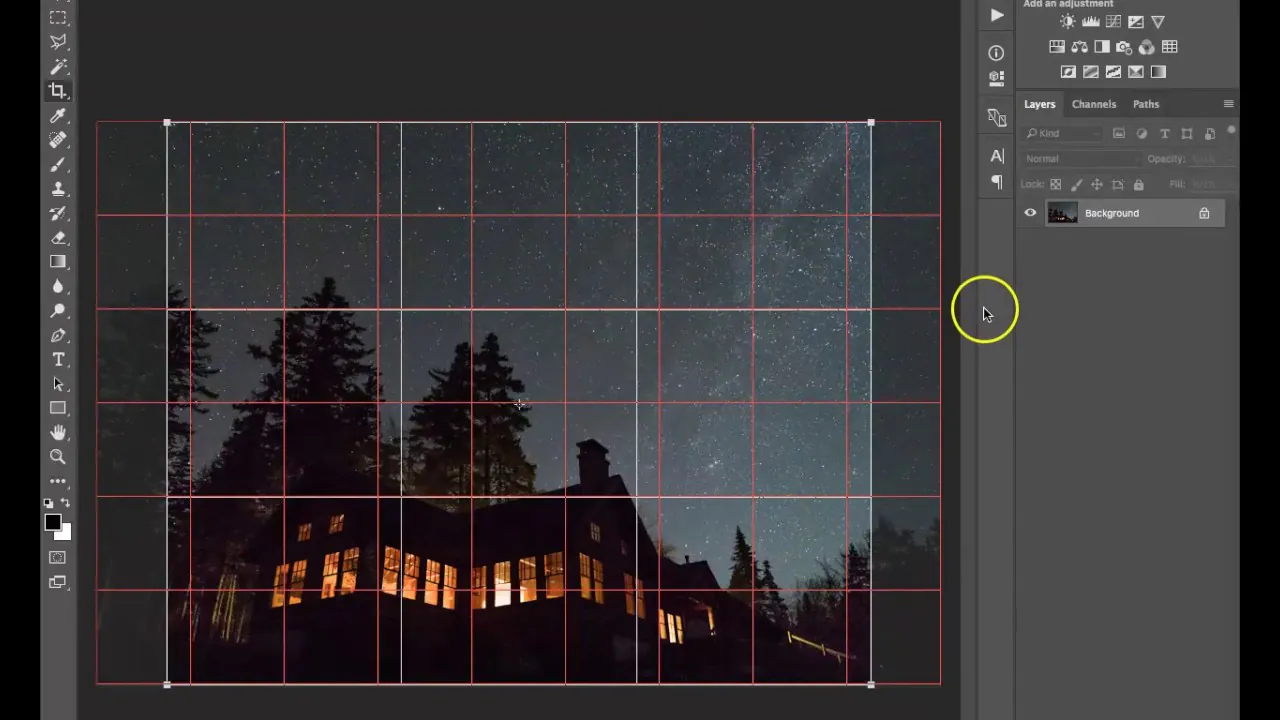
Begin the process of implementing the Golden Ratio into your image with approaching grid alignment. Launch your graphic design or image-altering program and empower the grid or guides tools or options. The grid system acts as your visual guide, letting you consistently apply the Golden Ratio to your artwork.
Next, you should take time to survey the pivotal components of your image. You must highlight and distinguish these central points, whether it’s a prominent subject, an imperative object, or a particular zone. With the grid overlay, begin adjusting these central focuses along the lines or intersection points of the Golden Ratio grid.
Suppose your subject could be an individual in a portrait. Consider setting their eyes or confronting them along the upper, horizontal line of the grid. Likewise, if you’re working on a scene, adjust noticeable highlights, like mountains or skylines, to the grid lines accordingly.
Grid arrangement guarantees that your composition follows the mathematical standards of the Golden Ratio without getting excessively theoretical. Alter the positions as required, permitting the grid to direct your choices and keeping up a realistic flow inside the frame.
Step 2: Recognizing The Key Elements
This step includes the diligent recognition and essential arrangement of focal points inside your picture, utilizing viable tools and options. Begin by employing the grid or guides options in your software menu, but in this phase, consider using advanced options just like the “Golden Ratio overlay” or “phi grid” some editing programs offer. These overlays give an immediate visual result of the Golden Ratio on your image.
Furthermore, experiment with the selection tools to accurately distinguish key central focuses, like utilizing the lasso tool to accentuate particular objects or zones you need within the Golden Ratio bodywork.
Try committed Golden Ratio plugins or extensions if your program supports them. These tools can simplify the process, offering extra highlights such as programmed alignment or suggestions for ideal arrangements depending on the Golden Ratio.
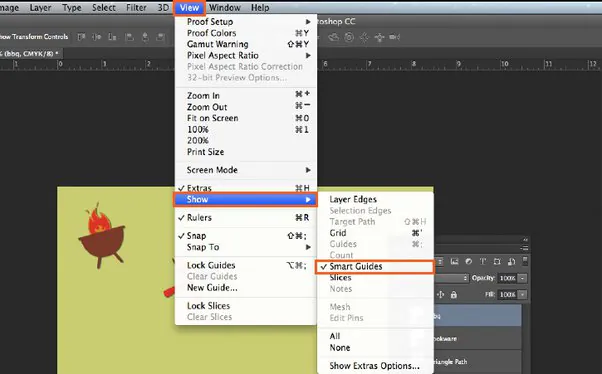
Keep in mind to utilize the software’s smart guides or snap-to-grid features for precise arrangement. These highlights guarantee that your chosen focal points comply consistently with the Golden Ratio grid, turning the theoretical standards into practical and outwardly impactful design choices.
Step 3: Incorporating Rule Of Thirds
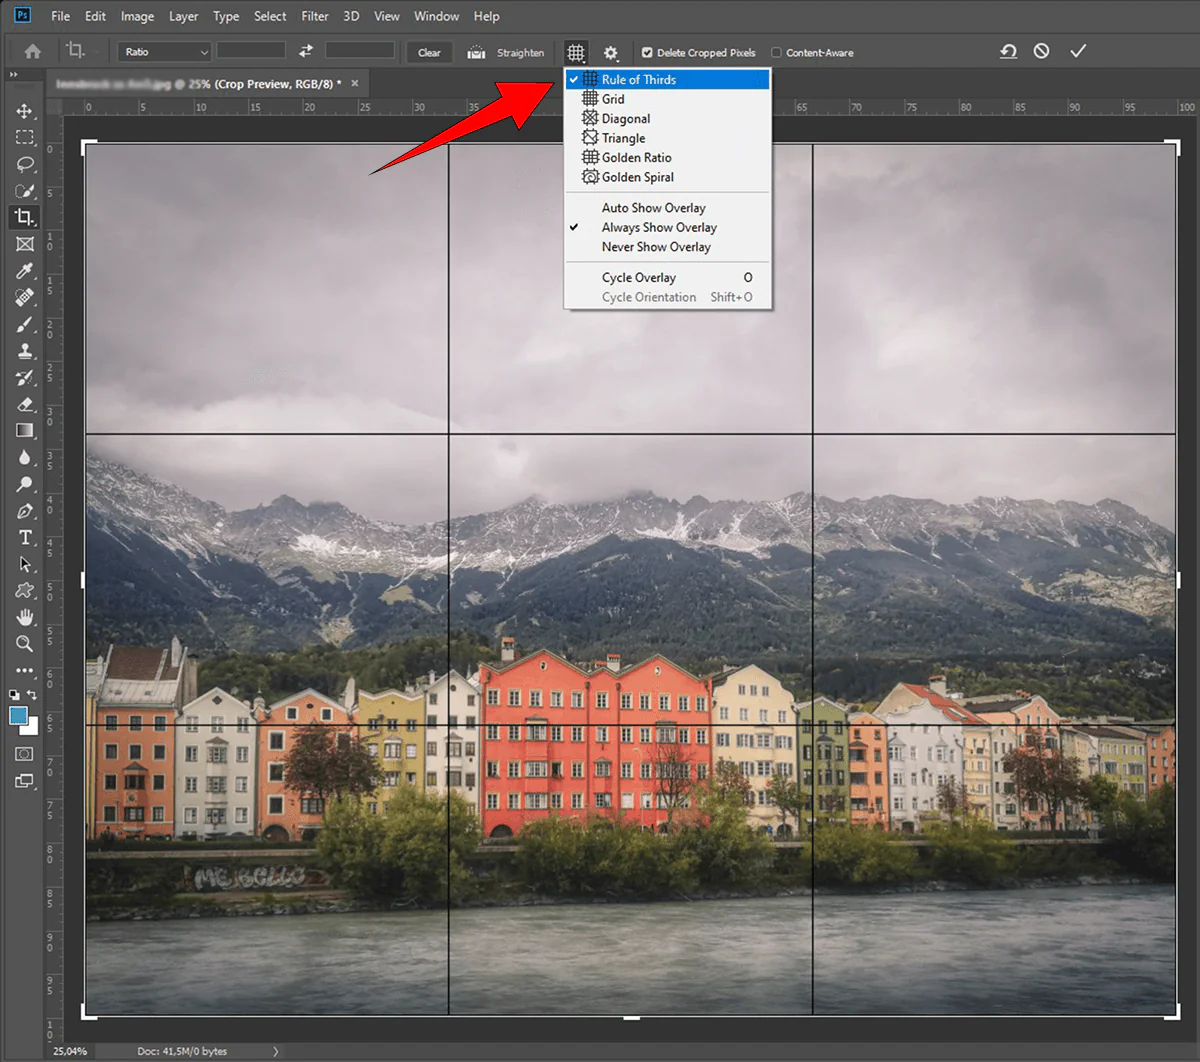
In this step, you have to incorporate the Golden Ratio with the Rule of Thirds to enhance your image’s visual alignment further.
Start by comprehending the Rule of Thirds, which isolates your picture into a grid of nine equal parts—two-level and two vertical lines. These lines form four focal points of intersection. Concurrently overlay the Brilliant Proportion network onto your picture, adjusting the key focal points with the lines and intersections of both grids.
Deliberately position your fundamental components along the intersecting focuses or the lines of both the Rule of Thirds and the Golden Ratio. If you are working on a portrait, consider setting the eyes at one of the intersection points. Adjusting key highlights with both grids includes profundity and visual intrigue to your composition.
Step 4: Fibonacci Spiral Techniques
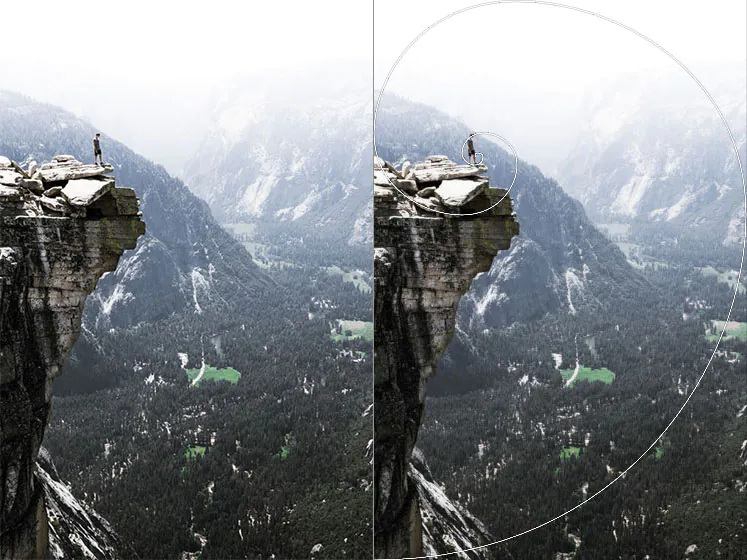
Head towards the composition guides or overlay settings in your image editing software. Seek out options associated with the Golden Ratio or Golden Spiral.
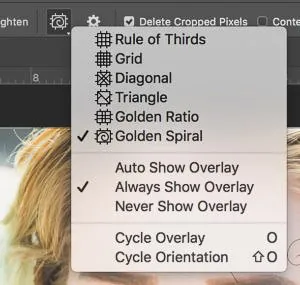
Check out the grid or overlay settings where you can get tools for creating the Golden Spiral. Some software may entitle it to the Golden Spiral, Logarithmic Spiral, or a related option.
Confirm if your app offers dedicated tools or plugins related to the Golden Ratio. Some modern tools may incorporate features particularly planned for consolidating a Golden Spiral into your composition.
If your app needs a built-in Golden Spiral feature, regard accessing online resources that produce Golden Spiral overlays. Import these overlays into your picture-altering app and modify them to correspond with your composition.
You can also manually create your golden spiral with the help of the drawing or shape tools within your software. Comply with the mathematical principles of the Golden Ratio to maintain exactness.
Step 5: Using Scaling Tools And Options
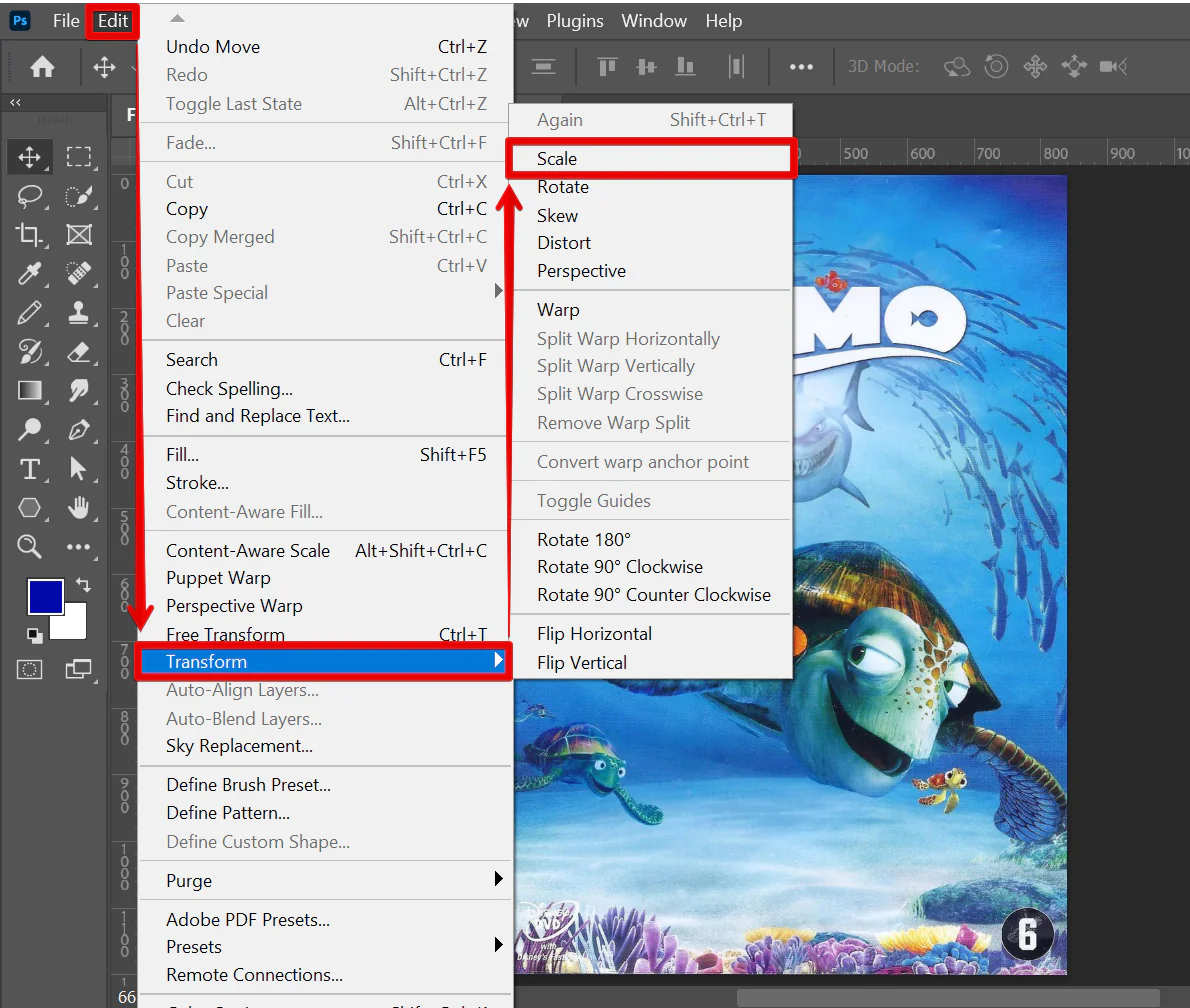
Guaranteeing the proportional scaling of objects or subjects inside your work is vital for an adjusted and stylishly satisfying composition aligned with the Golden Ratio.
Recognize the noteworthy components in your image that contribute to its by-and-large visual effect. These components can be subjects, objects, or focal points.
Access the scaling tools to tune the measure of these key elements. Be after the proportions that orient with the Golden Ratio, keeping up a concordant adjustment.
Pay consideration to the connections between diverse components. The bigger components should be proportionally linked to the smaller ones per the Golden Ratio standards.
Evaluate the general composition of your image. Proportional scaling works for individual components and contributes to the orderliness of the complete visual narrative.
Be bold to polish the scaling of elements according to the specific necessities of your composition. Try with distinctive sizes to discover the ideal balance while holding to the Golden Ratio.
Step 6: Cropping The Golden Ratio Composition

Executing flexible cropping strategies according to the Golden Ratio could be a beneficial step to preserve the visual agreement and improve the overall effect of your artwork.
Examine the existing composition of your picture, pondering the fundamental focal points and components. Identify the regions that contribute most to the visual charm.
Overlay the Golden Ratio framework on your picture with the grid or guides adjustments of your software. This grid serves as a visual escort for guided cropping.
Adjust key components, such as central focuses or critical highlights, along the lines or intersections of the Golden Ratio grid. That helps vital regions stay in necessary positions.
Select the crop tool and choose a crop range that matches up with the Golden Ratio proportions. Some applications may have separate Golden Ratio cropping settings.
Strive to keep the chosen crop in a standard visual rhythm within the outline. Contemplate the movement of the viewer’s eye and how the cropped image directs their sight.
Play with alternative cropping options within the Golden Ratio system. Observe the outcome of crop modifications on the overall display of the image.
Polish the selected crop based on the specified visual result. Finalize the edit to form a composition that not only cooperates with the Golden Proportion but also maximizes the narrating perspective of the composition.
Step 7: Experimenting with Varying Placements And Adjustments
With your visual composition perfectly integrated with the Golden Ratio, the final step concerns a process of constant testing, redoing, and improving to attain the most visually moving results.
Continue testing with different positions, layouts, and visual elements within the framework of the Golden Ratio. Enjoy the flexibility to investigate new ideas and creative manipulations.
Look up the opinions of your fellows or target audience and amend your image repeatedly based on that feedback, refining the overall ravishing and storytelling quality.
Consider minor particulars like the placement of focal points, elements, and any other factors to get a euphonic and visually satisfying balance.
Reassess whether the arrangement couples to the storytelling trait of your image. Verify that the visual elements conform with the tale or argument you aim to express.
Take a look back and judge the overall integration of your composition. Reaffirm that the inclusion of the Golden Ratio strengthens the image’s cohesion and emotional connection.
Relying on your testing, iterations, and feedback, enforce the final changes to your image. Establish a structure that not only abides by the codes of the Golden Ratio but also enchants people with its thoughtful and arresting style.
After keenly addressing all of the above suggestions, your final polished image with a Golden Ratio is all set for presentation or sharing.
Conclusion
In summary, Golden Ratio image manipulation modifies the image constituents by placing them into the zones that are the main focus of the whole image. Specifically for cropping or resizing images, it is significantly beneficial to preserve the image’s essential components from getting eliminated. Moreover, you don’t need to strictly adhere to the elementary positions recommended by Golden Ratio grids; this technique lets you try innovative adjustments and play with alternative alignments. The resultant images of the Golden Ratio give a perception of equalization and proportion that is often found visually pleasant.
