How To Create Mc Escher Art In Illustrator
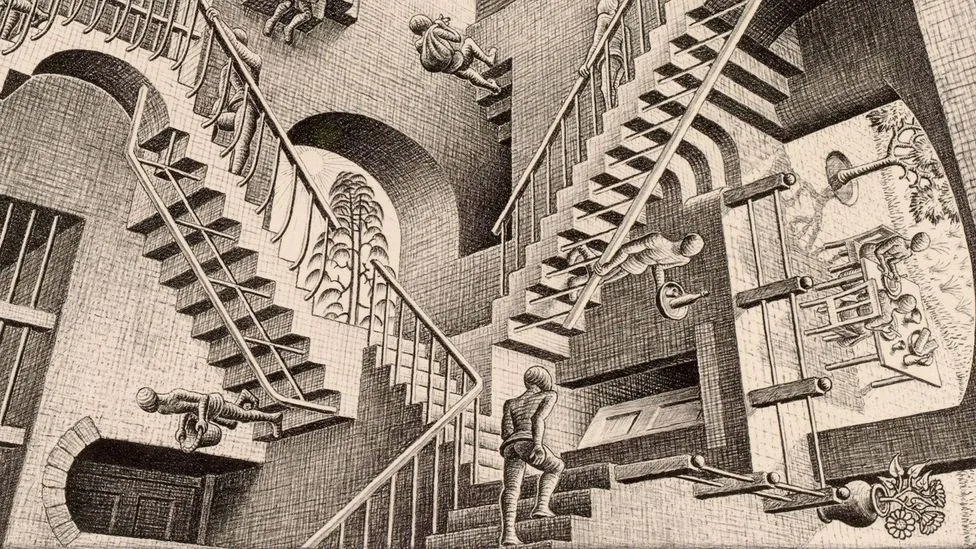
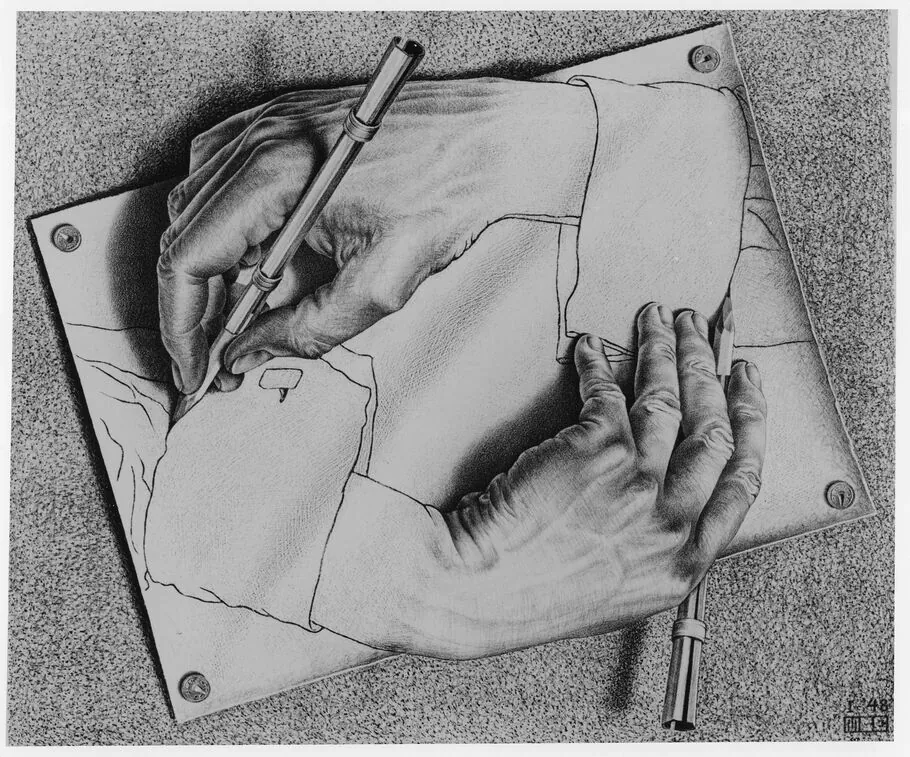
Escher art is the marvelous contribution of Dutch graphic illustrator M.C. Escher, who rendered the art of optic illusions geometrically, confidently portraying abstract structures in well-defined forms. Escher art themes included surreal tessellations and intermingled construction structures that gave the illusion of realistic infrastructure and blueprints, exciting the imaginations of construction design lovers. The random, impossible geometrical structures, unimaginable buildings, and staircase designs gave Escher’s artworks the attributes of impossible situations that enticed onlookers, influencing their impression of the unbelievable beliefs. Modern artists who practice fresh innovation are still vastly drawn to ancient art forms like Escher art, from which they get inspiration to renovate their contemporary art compositions using digital techniques like space and perspective manipulations. By combining Escher art elements like tessellations, impossible infrastructural plans, and crazy stair layouts, they are readily honoring the creator. This blog article aims to explain the process of creating breathtaking Escher art compositions using one of the most resilient design software, Adobe Illustrator, which offers all the tools advantageous to this art.
Step 1: Deciding Your Escher Art Theme
Start your creative process by conscientiously choosing a concept that pays tribute to the mesmerizing world of M.C. Escher. Escher’s art is exquisite in ideas like tessellations, inconceivable constructions, and optical figments. Choose something viable that adjusts to your aptitudes and interface.
Assemble real-world instances or references related to your decided theme for a diligent approach. Assuming that you’re considering a tessellations theme, get a few pieces of paper and try organizing basic shapes to form recurring designs. Utilize these physical components to get it well that your chosen theme can show in your composition.
Consider rules like the measure of your canvas and the tools accessible in Illustrator. Weigh up how your perceived theme can be interpreted into a digital canvas. Keep it genuine and doable, centering on viewpoints you can easily control within the software.
In this step, make choices that accommodate your aptitudes and available tools. By choosing a theme that resounds practically, you set a strong base for an inventive process that’s not only conceptually wealthy but also doable and pleasant.
Step 2: Creating the Grid Foundation
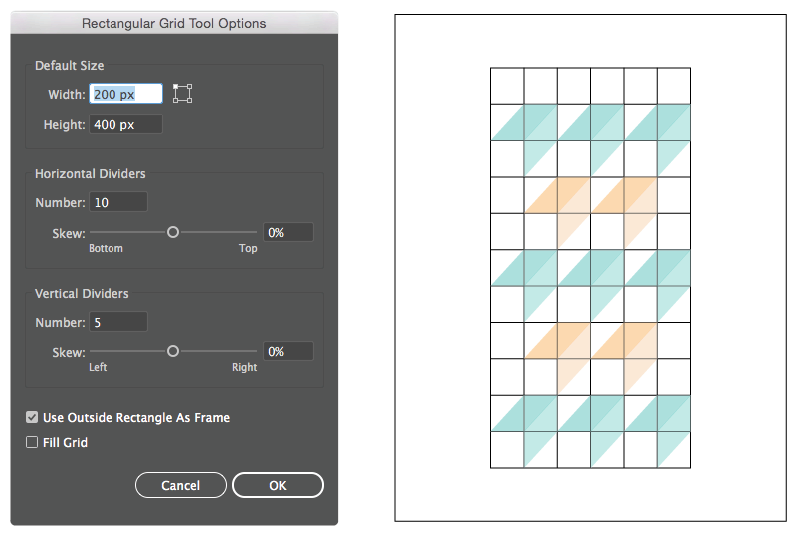
Since you have your idea ready, let’s look at the basic structure of your Escher-inspired art. Constructing a grid system will act as your leading framework throughout the design process. The grid is likewise a structural support and a creative tool, helping to conserve precision while allowing for artistic modifiability.
Select the Grid tool in Illustrator to provide a frame that tones with your chosen theme. This grid will be the foundation of your artwork, providing a well-set canvas for your artistic exploration. Escher art often includes scrupulous grids that create a coherent unification of shapes and patterns.
Observe the tempo and spacing of your grid, as this will affect the overall visual harmony of your art. Balance the grid according to the complexity of your selection theme; remember that this step lays the foundation for the complex interaction of elements in your final composition.
Step 3: Drawing the Basic Shapes

Now that you have finalized the grid structure and made your art foundation, you can proceed with creating your Escher artwork. Take advantage of the Illustrator tools and options available to complete the radial elements that interpret your layout.
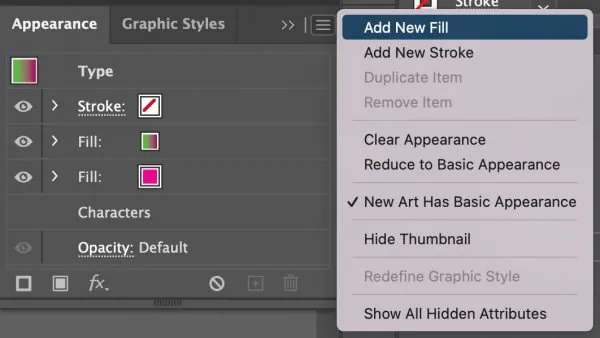
Start by selecting the Rectangle, Ellipse, and Polygon tools to fashion basic shapes that fit your specific theme. Navigate to the Pathfinder panel to connect or remove shapes, bringing about complex forms. Employ the Pen Tool for precision in drawing custom shapes with dexterity.
Take into consideration using the Stroke and Fill options to set visual depth and contrast. The artist Escher often used alternating line thickness to enrich the visual conduct of his work. For color transitions and shading effects, you can opt for gradients and color palettes to inculcate your shapes with an enchanting aesthetic.
Step 4: Repeating the Initial Shape For Tessellation Creation
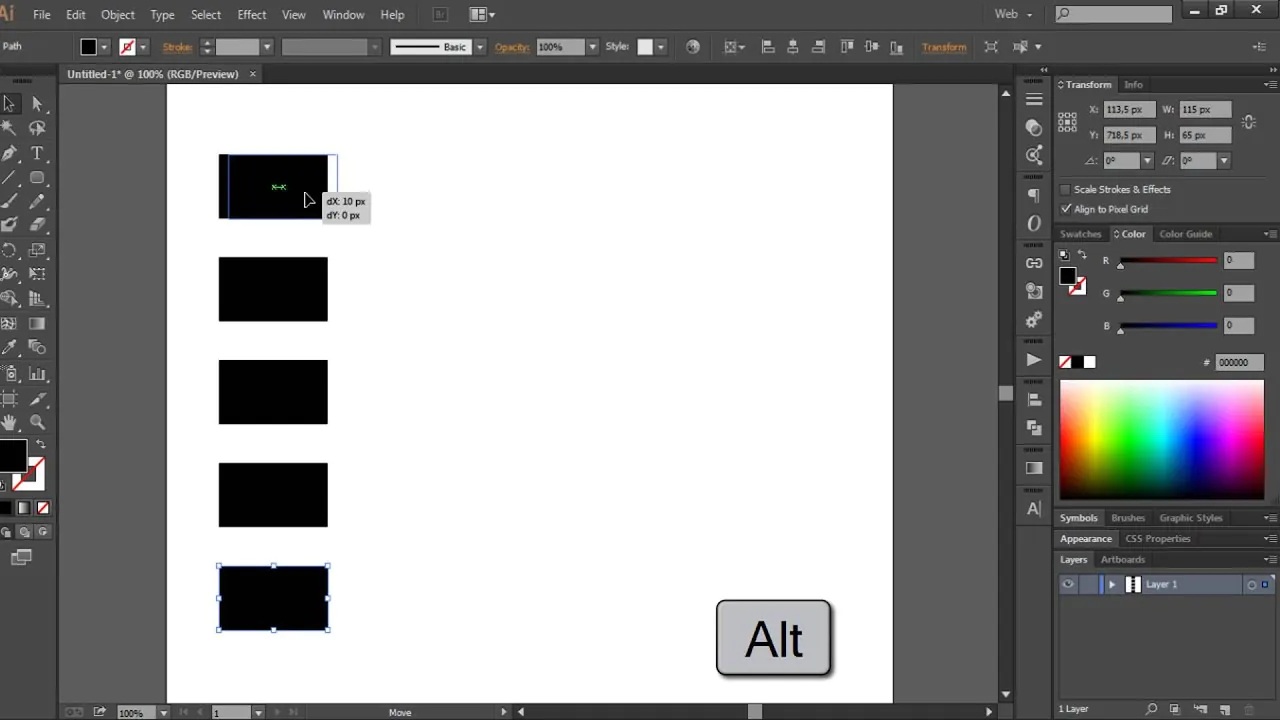
During this phase, you will center on creating stunning tessellations impersonating Escher’s work. In Illustrator, you can amplify your creativity by copying and arranging your basic shapes to create a recurring pattern organization.
Start by copying and placing your shapes so they sit together flawlessly, creating a pattern that stretches over your canvas. Use the alignment tools, as they can assist you in making your alignments accurate and consistent.
Experiment with shifts of scale, rotation, and reflection to infuse elaborateness and visual stake to your tessellation. You are intended to hit a harmonious repetition that highlights the individual shapes and creates a cohesive and appealing whole.
Escher art is about trying various transformations of characters and objects in the tessellations, introducing a storytelling element. Think about how your decided theme will unfold within the patterns, conveying an optic story as the shapes fit together and collaborate.
Step 5: Including Escher Element Manipulations
Amend your Escher-inspired work by inculcating optical illusions and unpredictable elements into the composition. Escher art is famous for challenging sagaciousness, so at this point, you can add up its charismatic illusions on the digital canvas.
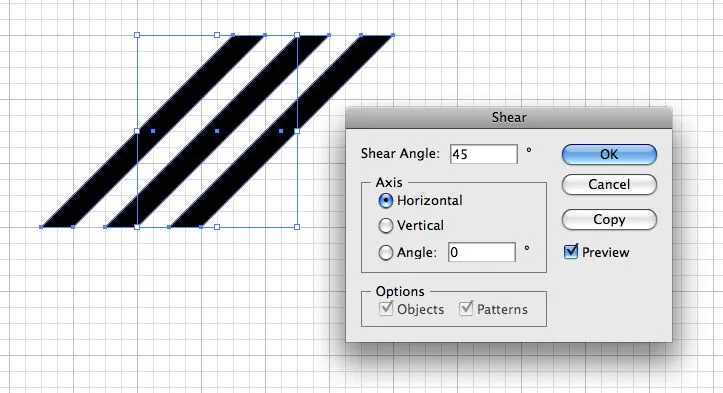
Play with shapes that oppose traditional configuration reasoning, creating unimaginable structures or perspectives that bluff the viewer’s perception. Use Illustrator’s transformation tools, like Shear and Perspective, to bend and fudge shapes, making the solid visual strain that features Escher’s iconic works.
Reflect on embodying elements that easily transition from one shape to another, creating a sense of flow and continuance in your composition. This developmental approach adjoins layers of conspiracy, inviting viewers to explore the subtle nuances of your optical illusion.
Escher’s art capability to associate the possible with the unattainable often catalyzes works of art that inspire curiosity and meditation. Embrace this spirit and push the confines of spatial reasoning in your composition.
Step 6: Using Perspective Manipulation Techniques
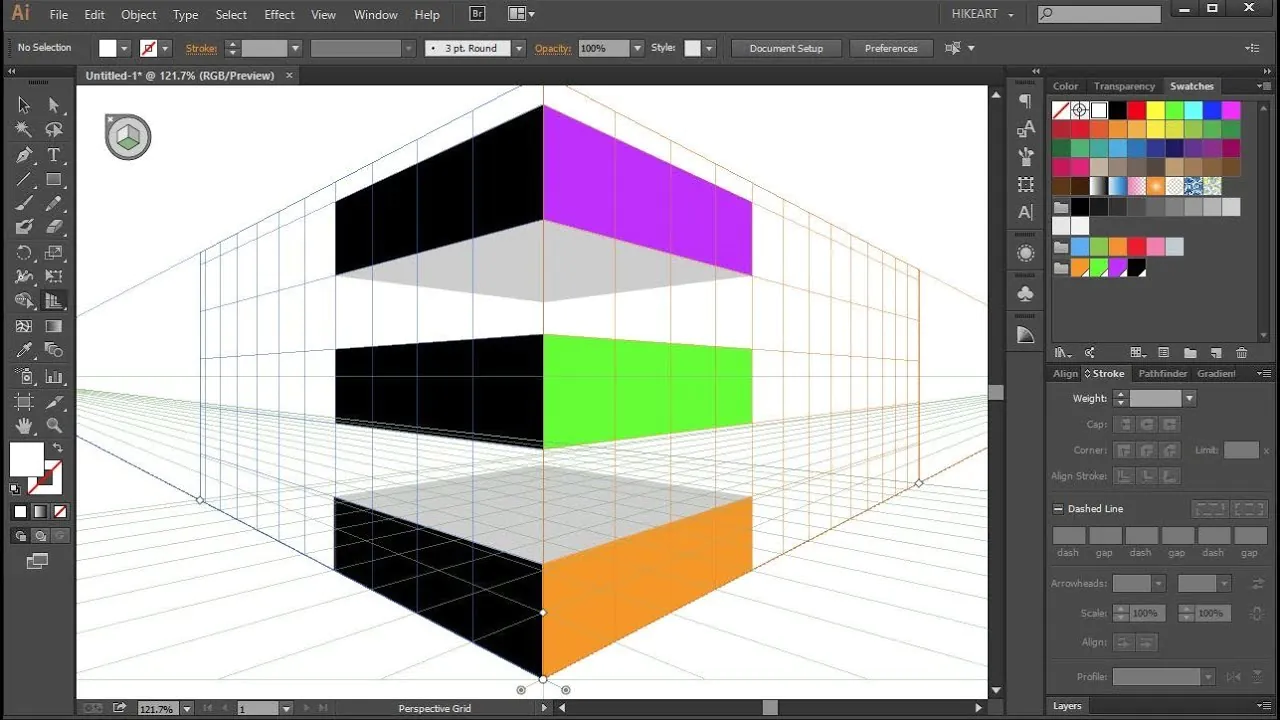
Choose the objects or forms you desire to manipulate, taking into account their position in your composition.
Click on the Perspective Grid tool to demonstrate a three-dimensional frame. Set vanishing points and calibrate grid lines to get a natural feeling of depth. This tool provides the basis for delicate manipulation of perspective.
Check out the Scale and Rotate tools to place objects within your set perspective. Tweak the size and direction of components for a natural simulation of depth and spatial connection. This technique lets you assess the visual strength of the layout.
Use Illustrator’s layering system to position the foreground, center, and background objects judiciously. Using these layers, you can improve the display of complexity in your work and chip into a more hypnotic visual proficiency.
Use shape overlapping and foreshortening techniques to create an effective illusion of space. These techniques are based on design principles and add visual consistency and realism to your perspective.
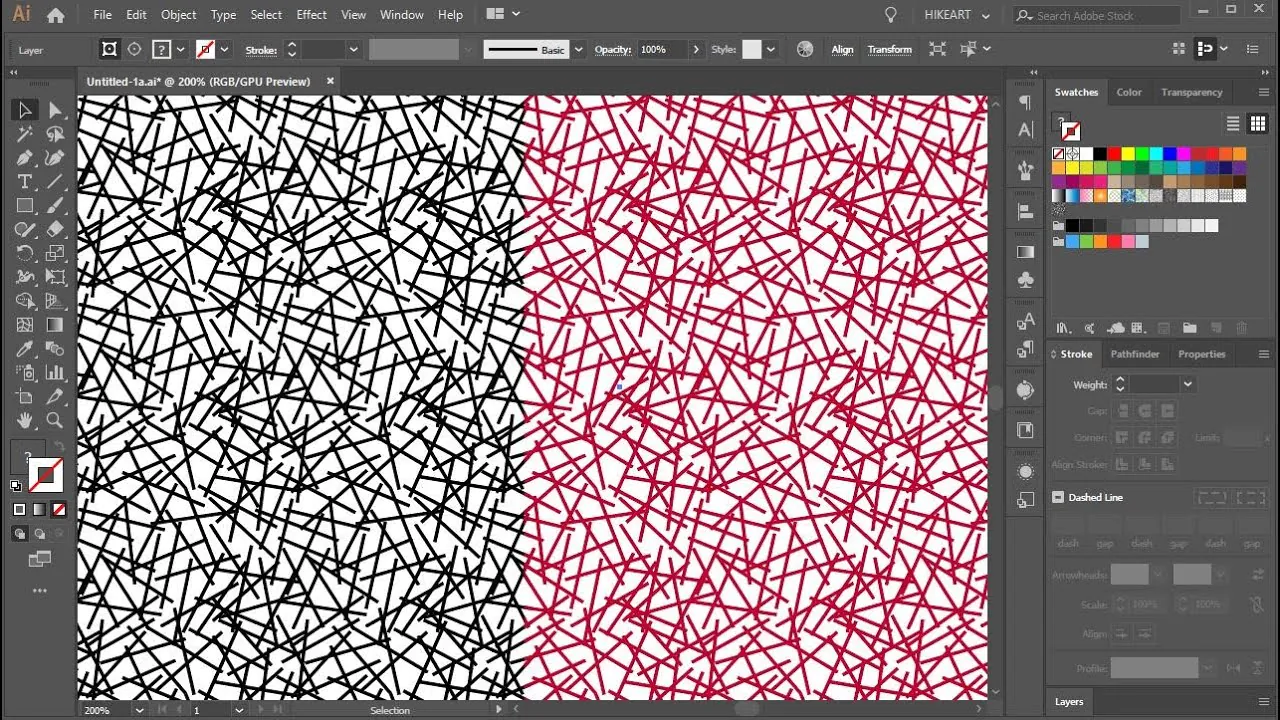
Step 7: Overall Assessment and Color Contrast Adjustments
Examine your artwork closely and make accurate edits with Illustrator’s all-rounder tools.
Confirm that each shape perfectly aligns with your tessellations and manipulated perspective canvas. Analyze fine details and set anchor points and curves for prime visual consonance.
Locate the color palette options to work on to enhance the beauty of your artwork. Whether you choose bold contrast or light gradations, Illustrator’s color options let you convey briskness and depth. Play with textures or patterns to add tactile factors to your shapes, boosting the visual outcome.
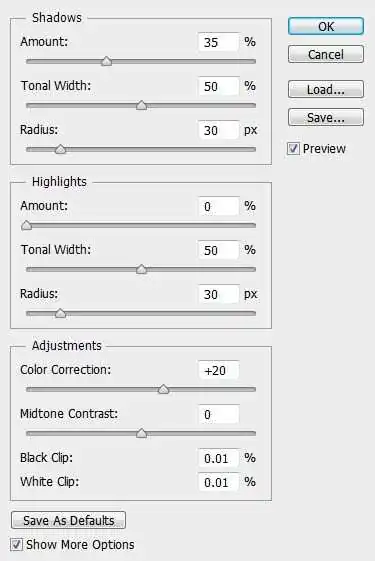
Deliberately include shadows and highlights to assume light sources in your composition. Illustrator’s shading tools can corroborate the illusion of three-dimensional shapes. This step adds a high degree of naturalism to your artwork.
Follow a constant approach, making gradual adjustments as necessary. Pause your work regularly to evaluate the overall composition, making sure that the details contribute cohesively to the optic story you have idealized.
Step 8: Finalizing Export Settings
Take a close look at your final composition and inspect that all elements align perfectly, perspectives are coherent, and the overall visual chronicle matches your initial idea. Make final adjustments to refine details and improve the cohesion of your artwork.
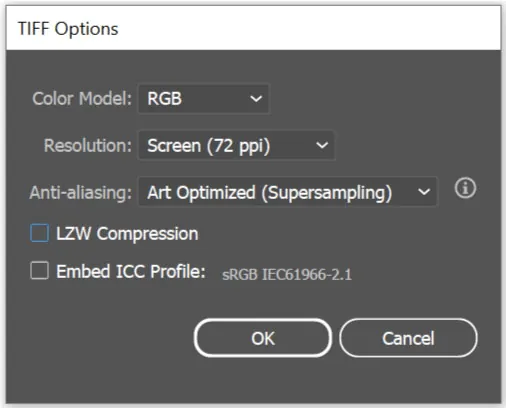
Think about the purpose or medium in which your artwork will be presented. Refine file size, resolution, and color profile duly.
Use Illustrator’s versatile export options to accommodate your file in both ways digital and print formats.
Get screenshots or generate step-by-step documentation of your innovational process. It can be an extravagant addition to your shared work, giving viewers insight into the meticulous steps and thoughtful decisions behind your Escher masterpiece.
Exhibit your work on social sites, art communities, or your portfolio. Get constructive feedback from friends, other artists, and your followers. Welcoming diverse perspectives can yield valuable perceptions and is favorable to your artistic maturation.
Conclusion
In brief, M.C. Escher’s compositions are a dedication to antiquated art that surpasses typical human creative energy. His works of art are a door for a part of battling artists who need interesting motivation to decorate their works of art and attract viewers. Escher art could be a treasure of the ages that seldom sheds its charm, as it gives figments of marvelous and strange developments that show up welcoming to the gaze. It opposes the standards of imaginary and nonexistent art utilizing a mathematical point of view, making individuals appreciate the show of inconceivable occasions, which looks so near to realness and genericity.
