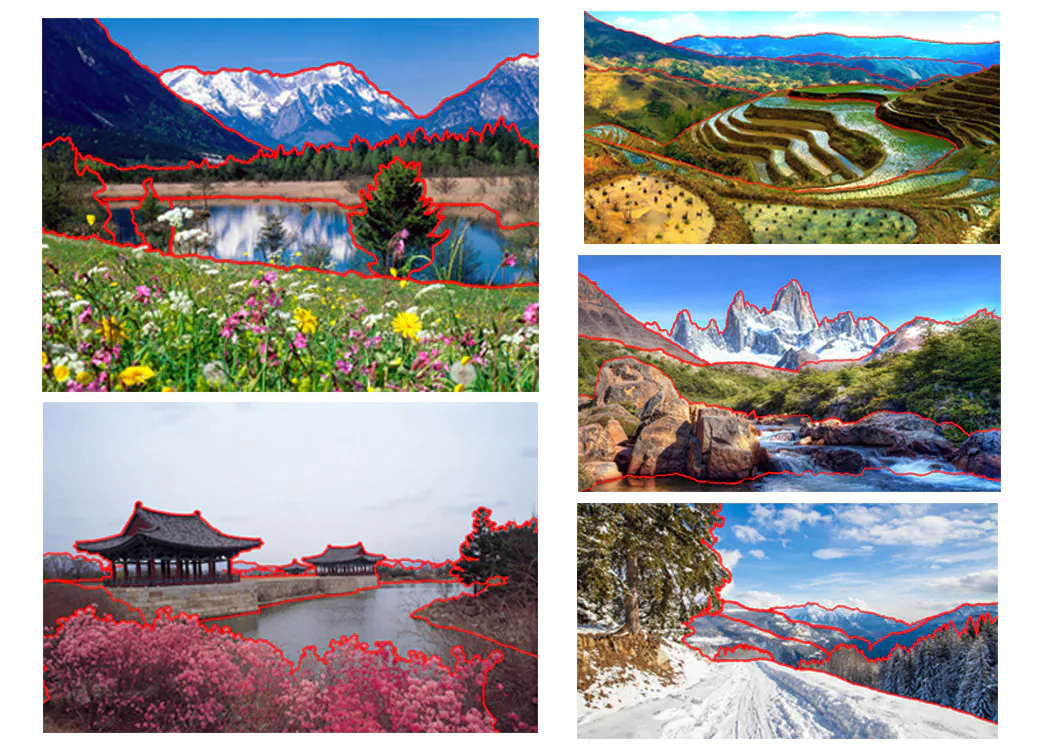
How To Apply Atmospheric Perspective To Images
Techniques like the atmospheric perspective are worthwhile to intensify the mood of images and prioritize the vital zones that are subsided due to atmospheric conditions like fog, varying light, or mistiness. This approach is generally utilized in landscape illustrations and photographs to induce depth and a sense of distance, making distant components more hazy and explicit to naturalism. It exalts the contrast and clarity in the foreground but lessens the intensity of these parameters within the background through color, contrast, sharpness, and other photo manipulation adjustments to make the subject emerge more sharply against the unique blend of natural and deliberate atmospheric effects. The resultant photos give the illusion of space and include a three-dimensional status to the image, upping the realism. They astonish the audience with the verismo and genuineness of the scene by constructing an aesthetically spectacular and profound level of excitement. This blog post will cover the simple steps of using atmospheric perspective to expand your images and make their subjects more pronounced and appealing.
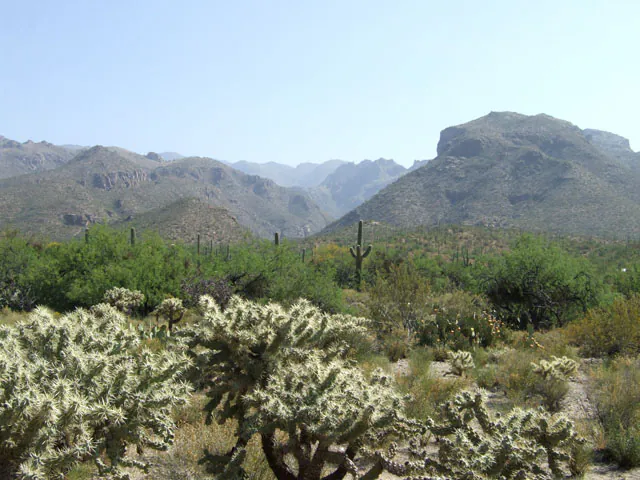
Step 1: Assess the initial image details
Recognize the particular components within the foreground and background to apply atmospheric perspective to your preferred image efficiently.
Start by visually isolating the essential subject or objects closer to the viewer’s view from those more distant.
Consider the corresponding placement and scale of objects within the panorama. Components within the foreground are often more extensive and noticeable, whereas background components are smaller and more set back.
Check for the relative arrangement and choose which parts of the photograph should show up closer and sharper and which ought to subside into the distance with diminished clarity.
Identifying the foreground and backdrop boundary is pivotal for the ensuing steps because it sets the starting point for altering contrast, saturation, and sharpness to make a persuading atmospheric perspective display.
Step 2: Set contrast in the foreground
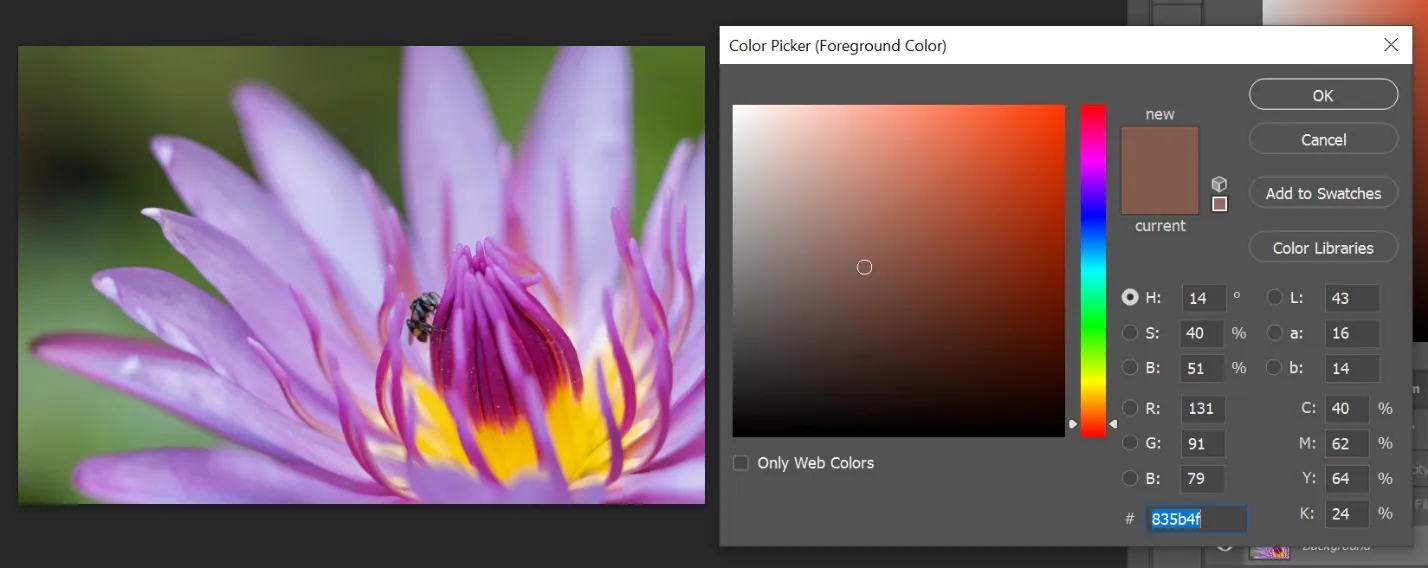
Import the assessed image in your software workspace and start utilizing your image editing software’s selection features to confine the components within the foreground. Utilize tools like the Lasso or Marquee to define the region accurately.
After the foreground is selected, go to your editing program’s contrast alteration tools, which include utilizing the “Brightness/Contrast” or “Curves” adjustment layers. Increment the contrast settings inside these tools to increase the refinement between light and dark regions.
Be conscious of subtlety to dodge an artificial appearance. Try for a balanced contrast that complements subtle elements, textures, and shapes within the foreground without losing realism.
This setting improves the partition of foreground components and ensures that noticeable objects’ visual effects and clarity are kept up. It furthermore lays the groundwork for ensuing adjustments in saturation and sharpness.
Step 3: Manipulate color saturation
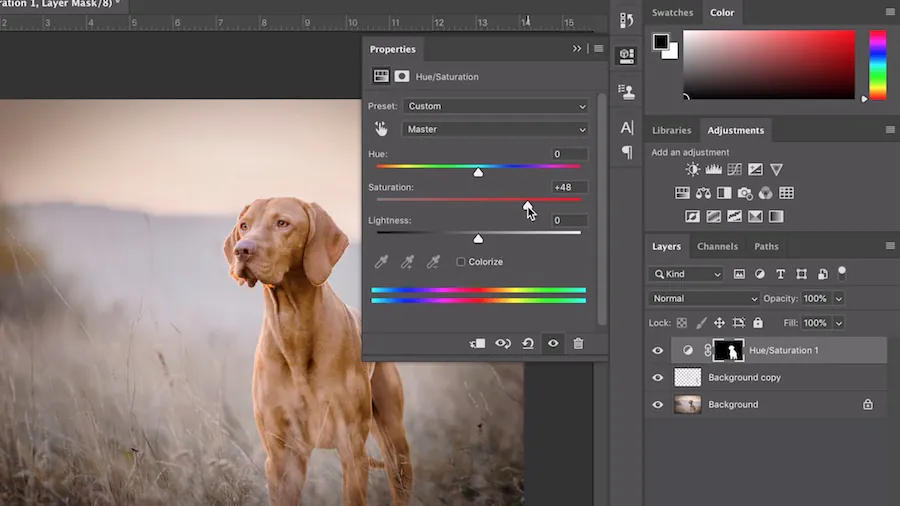
Move your focus to improving the color saturation within the foreground by utilizing related tools available in your software.
Employ tools like “Hue/Saturation” or “Vibrance” to target the chosen foreground components. Slowly enhance the saturation to form colors that are more dynamic and articulated. This step points to heightening the visual appeal of objects closer to the viewer.
Be moderate to preserve a natural appearance. Avoid oversaturation, which might lead to an unlikely or excessively vibrant look. Striking a balance guarantees that the foreground components will be more readily noticeable without appearing fake.
The expanded saturation contributes to the overall division between the frontal area and background, strengthening the profundity recognition made by atmospheric perspective. This step lays the foundation for consequent alterations in sharpness and depth of field, thereby improving your composition’s realistic depiction of distance.
Step 4: Enhance foreground crispiness
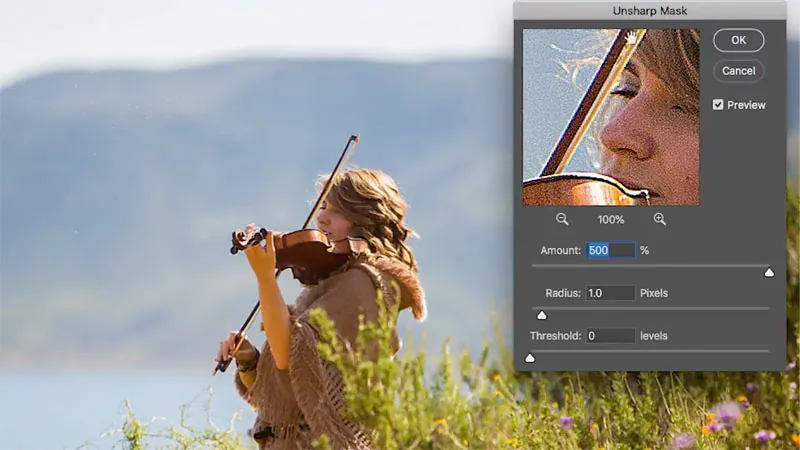
After refining contrast and saturation within the foreground, turn your attention to overseeing sharpness to preserve clarity within the prominent components.
Utilize your software’s sharpening features, such as “Sharpen” or “Unsharp Mask,” centering on the chosen foreground zone. Apply mild sharpening to improve the freshness of details, surfaces, and edges so that objects closer to the viewer stay well-defined.
At the same time, address the background by diminishing sharpness. That can be accomplished through the same sharpening tools but with adverse alterations or by utilizing blur tools. This deliberate softening of the backdrop contributes to the atmospheric perspective effect, imitating the natural blurring that happens with expanded distance.
Always try a concordant approach, preventing excessive sharpening that will make an unnatural display. By coordinating the viewer’s attention to the distinct, colorful components within the closer view, this step fortifies the profundity signals produced by the atmospheric viewpoint.
Step 5: Introduce depth of field effect
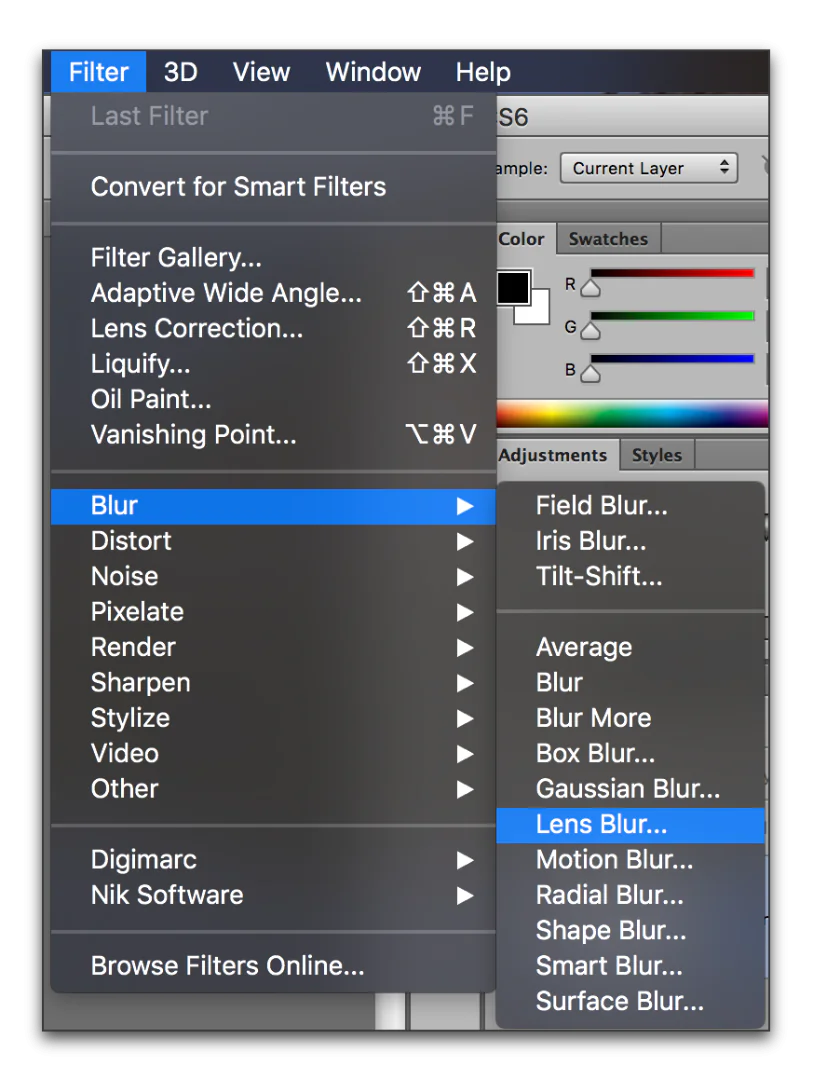
In this step, you must head towards the depth of field-related alternatives in your image editing program to blur the backdrop and naturally improve the atmospheric viewpoint.
Look for blurring highlights such as “Lens Blur” or “Field Blur” to emulate the depth of field effect. Concentrate on the foreground components while continuously expanding blur to the background.
Set the blur strength to attain a practical shift, imitating how our eyes see profundity within the real world.
Be cautious when applying depth of field, pointing for a mild and slow transition. Take extra care of the general composition so the foreground remains sharp while the foundation delicately retreats.
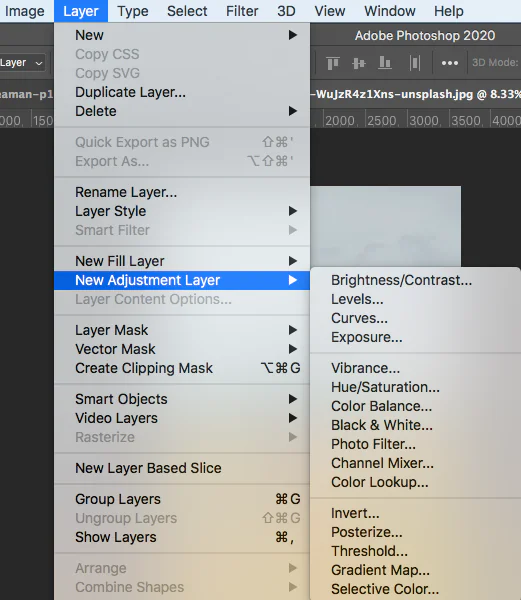
Step 6: Refine tonal curves
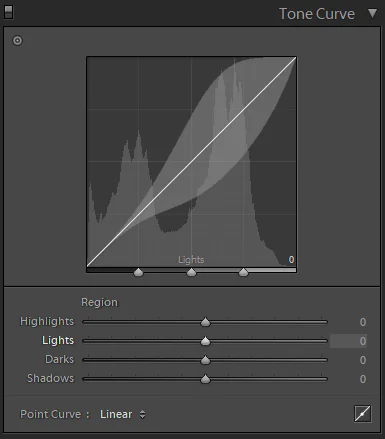
Advance to optimize the atmospheric perspective effect by integrating tone curves in your editing program.
Get to the tone curve apparatus, commonly found in programs like Adobe Photoshop or Lightroom. Emphasize tuning the curve to form a gradual progression in contrast between the frontal area and background. Lift the shadows slightly to preserve detail within the darker regions of the foreground and delicately lower highlights within the background for a subdued impact.
Thoroughly check the overall tonal harmony, ensuring that the move is smooth and visually cohesive. It adds subtlety to the atmospheric perspective, upgrading the gradual shift in contrast and paving the way to a more realistic expression of profundity.
Play with the tone curve alterations, making subtle changes to attain the required atmospheric effect and upholding a unifying and natural style throughout the whole image.
Step 7: Add additional blurs
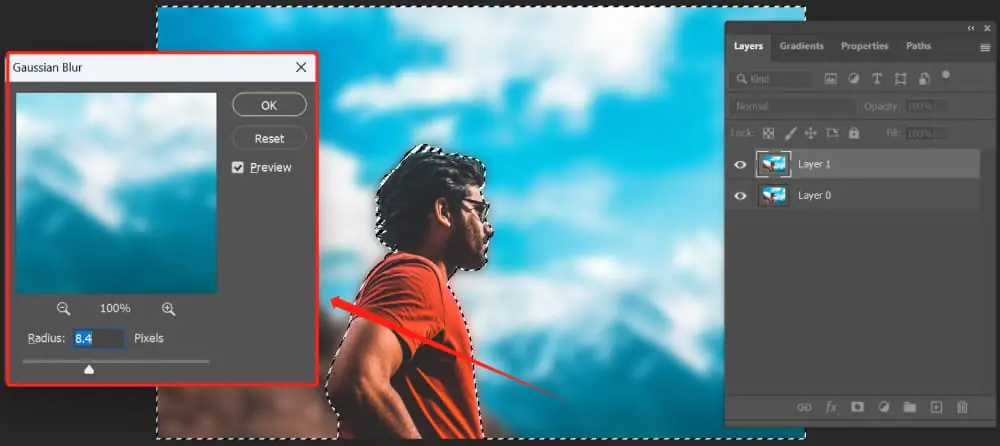
Retweak your atmospheric perspective effect by applying a gentle Gaussian blur, essentially focusing on the background of your picture.
Utilize the Gaussian Blur filter, altering the radius to present a delicate blur to the distant components. This supplementary blur reinforces the depth of field alterations made earlier, strengthening the sense of distance and atmospheric fog.
Take additional care to abstain from exaggerating the blur, as the objective is to preserve a realistic appearance. The gentle blurring contributes to the overall cohesiveness of the composition, making a smoother move between the strongly characterized foreground and the delicately obscured background.
This step is a conclusive touch, bolstering the atmospheric perspective by reflecting the natural impacts of atmospheric conditions on objects in the distance. Play with diverse blur settings to get your composition’s required balance and authenticity.
Step 8: Enhance the color tones and temperature
To form a cohesive and realistic atmosphere throughout the image, perfect the atmospheric perspective within this last step by altering the color temperature.
Utilize the color temperature or white balance tools to get warmer tones for the foreground and cooler tones for the background. That mirrors the natural variety in color temperature that happens with distance, contributing to a cohesive and engaging composition.
Warm tones within the foreground improve the energy of closer components, whereas cooler tones within the foundation recreate the subtle desaturation related to increased distance. Get a natural balance that complements your image’s overall temperament.
This adjustment strengthens the atmospheric perspective effect and includes a wrapping-up touch, making the complete composition concordant and successfully conveying a sense of profundity and separation. Play with diverse color temperature settings to attain the required atmospheric vibe.
Your composition, with improved profundity and naturalism particular to the atmospheric perspective, is all set presently for sharing and presentation.
Conclusion
Applying atmospheric perspective to your photographs revitalizes them by injecting natural energy into them. It is beneficial in augmenting scenes of nature or your photos with natural backdrops. Natural phenomena like dust particles, fog, and haze, which are readily apparent in open-air shots, can be further expanded with the atmospheric perspective technique. Yet the main subject is free from haziness and blurriness; instead, it is more highlighted using selective saturation and contrast techniques. Conversely, the background elements are selectively undersaturated and blurred to heighten their natural appeal. As a result, the photograph exudes vibrant authenticity and dimensional naturalism.
