How to Use Feathering Technique in Photoshop
The feathering technique applies a gradual changeover or blending over the edges of an image or a selected area within an image to make more natural shifts between components or to accomplish certain visual goals. Bit by bit, it blends the edges in the surrounding pixels so that the alterations become smoother and look uninterrupted. Feathering is often attained by altering the opacity or transparency of pixels along the edge or experimenting with different selection tools and settings in image editing software. The order of feathering can be adjusted to provide mild or strong transitions per the desired effect. Feathering is generally applied in software such as Adobe Photoshop for generating natural and polished results in various visual undertakings like merging items into multiple backgrounds, minimizing harsh edges when isolating intricate parts like hair, and improving the realism of digital compositions. Additionally, it is pragmatic for creating realistic text integrations, layered patterns, and elaborate collages and maintaining a smoother, more natural demeanor with an ephemeral aroma.
Open Photoshop:
Launch Adobe Photoshop, a premier tool for image manipulation and design.
Import existing images or create from scratch with Photoshop’s versatile toolkit.
Explore cutting-edge tools, filters, and effects to bring your ideas to life.
Navigate the user-friendly interface for seamless access to editing features.
Retouch, color grade, and engage in intricate graphic design with ease.
With each click and stroke, sculpt and refine your unique artistic expression.
Unleash your creativity as you delve into Photoshop’s vast repertoire.
Transform ordinary images into extraordinary visual masterpieces.
Your imagination knows no bounds within this realm of boundless potential.
Make a Selection:
Initiate the process by making a selection within Adobe Photoshop’s versatile environment.
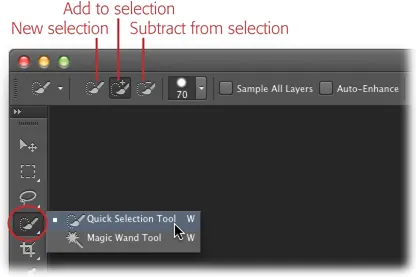
Selection Tools: Utilize an array of selection tools to outline your desired area precisely.
Refinement: Adjust and fine-tune your selection using tools like “Add to Selection” and “Subtract from Selection” for accuracy.
Selection Types: Choose from various selection types, including rectangular, elliptical, and freeform, depending on your project’s requirements.
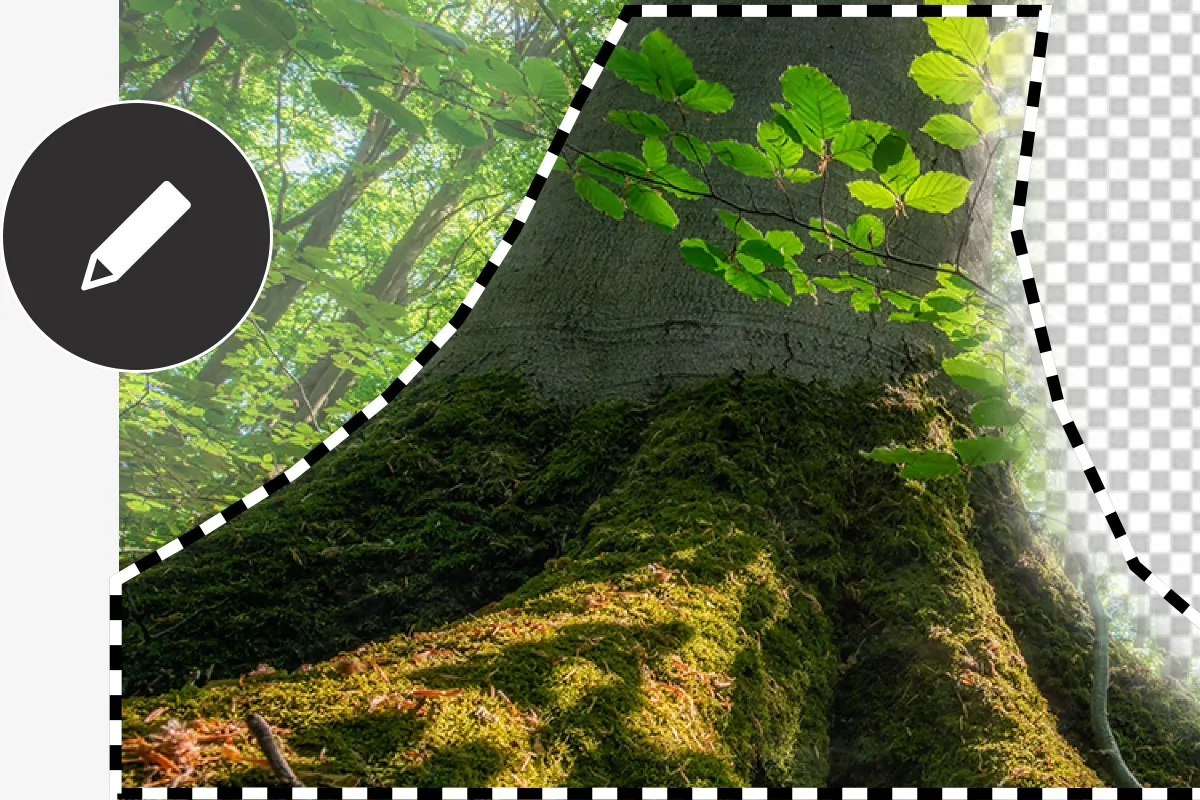
Feathering: Soften the selection’s edges using the feathering option. That creates seamless transitions and blends between selected and non-selected areas.
Selection Modification: Once your selection is made, explore modification options like “Transform” for resizing, rotating, or skewing the selection.
Copy, Cut, and Edit: Perform actions such as copying, cutting, or applying filters exclusively within the selected area.
Layer Mask: Convert your selection into a layer mask to non-destructively control the visibility of specific image areas.
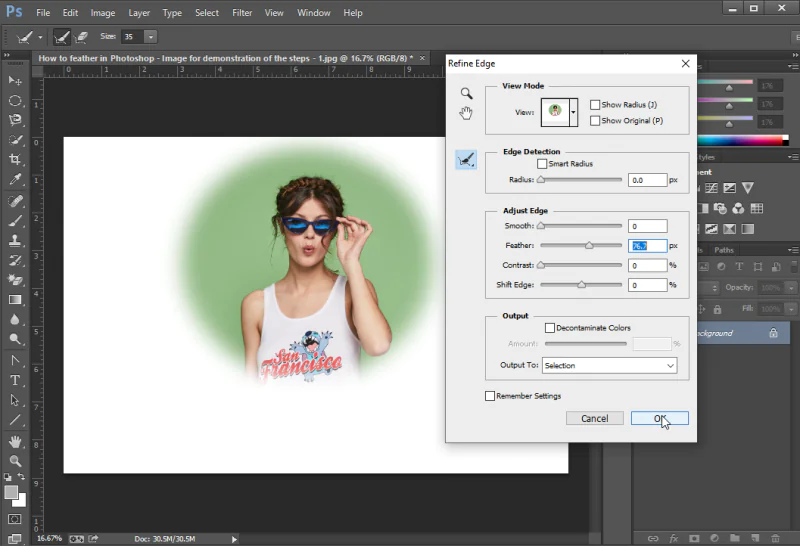
Refine Edge: For intricate selections, use the “Refine Edge” feature to enhance the selection’s edges and handle complex subjects like hair or fine details.
Save and Load Selections: Save selections for future use or load previously saved selections for consistent editing.
Deselect and Modify: Finish by deselecting the area, and if needed, modify your selection using the same tools for an optimal outcome.
Mastering the art of selection opens doors to limitless creative possibilities within image editing.
Feather the Selection:
Softening the transition between selected and unselected areas, feathering a selection in Adobe Photoshop adds a touch of finesse to your edits. Here’s how:
Select: Use tools like Marquee, Lasso, or Magic Wand to make your desired selection.
Modify: Head to the “Select” menu and choose “Modify.”
Feather: Select “Feather” from the dropdown menu. A dialog box appears.
Radius: In the dialog, input the feather radius in pixels. A higher value increases the softness of the edge transition.
Preview: Observe the real-time preview of the feathered effect on your selection.
Apply Edits: With the feather applied, edit within or around the selection. That ensures smoother integration with the rest of the image.
Layering: Feathering can also be useful when blending different layers. Select a layer’s contents, feather the selection, and then apply adjustments, masks, or other modifications.
Subtlety: Consider the context and purpose of your image; sometimes, a subtle feather is ideal, while other times, a more pronounced effect may be desired.
Undo and Adjust: If the feathering isn’t quite right, use undo (Ctrl + Z / Command + Z) and adjust the radius until it suits your needs.
Finalize: Complete your edits, and remember that feathering is reversible, allowing you to fine-tune or remove it later.
Feathering adds a professional touch to your images, ensuring seamless integration and a polished finish.
Apply Changes:
After adjusting or editing your selected area in Adobe Photoshop, applying changes finalizes your modifications. Here’s how to proceed:
Review Edits: Double-check your modifications within the selected region, ensuring they align with your creative vision.
Confirm Selection: Ensure your selection is active if working within a specific area. If not, reselect the intended portion.
Effects and Filters: If you’ve applied filters or effects to the selection, verify their impact and consider fine-tuning the settings.
Layer Adjustments: When working with layers, verify that adjustments within the selection harmonize with the rest of the composition.
Color Corrections: Check color balance, saturation, and other color-related changes within the selected area.
Fine-Tuning: If needed, make additional tweaks to achieve the desired outcome.
Undo or Revert: If you’re dissatisfied with the changes, you can undo (Ctrl + Z / Command + Z) or revert to a previous version.
Save a Copy: Before applying changes, consider saving a copy of your work to preserve the original state.
Apply: Once you’re satisfied with the modifications, apply the changes.
Preview: Review the entire image to ensure that the applied changes have the intended effect and contribute positively to the overall composition.
Save or Export: Save your work as a Photoshop file (PSD) to retain layers and editability. Alternatively, export the image in the desired format for sharing or printing.
Backup: Consider creating a backup of your edited file before finalizing the changes, especially if you need to make further adjustments later.
Applying changes is a crucial step in your editing process, as it transforms your creative vision into a tangible result while preserving your efforts and ensuring a polished outcome.
Adjust as Needed:
Adapting to your specific requirements and adjusting as needed in Adobe Photoshop allows you to fine-tune your edits for optimal results. Here’s how to proceed:
Review Changes: Take a moment to assess your changes to the image or selection.
Objectives: Consider the purpose of your edits and whether they align with your creative goals.
Fine-Tuning: Use various tools and adjustment options to make subtle or significant refinements.
Undo or History: If an adjustment doesn’t yield the desired outcome, you can undo (Ctrl + Z / Command + Z) or revisit the History panel to revert to a previous state.
Layer Adjustments: When working with layers, revisit individual layer settings to ensure cohesiveness across the composition.
Color and Tone: Examine color balance, contrast, and brightness, making adjustments to achieve the desired visual impact.
Detail Enhancement: Focus on specific details within the image, refining them for clarity and visual appeal.
Masking: Utilize layer masks or selections to isolate areas for further adjustments, ensuring precise control over changes.
Comparisons: Compare the adjusted image to the original or other reference images to gauge the effectiveness of your modifications.
Subtle Iterations: Incrementally adjust settings and observe the cumulative impact to avoid over-editing.
Test and Evaluate: Test your image on different screens or devices to ensure its quality and appearance across various platforms.
Feedback: See feedback from peers or mentors to gain fresh perspectives on your adjustments.
Save Versions: Consider saving multiple versions of your work as you adjust, allowing you to revisit and compare different iterations.
Patience and Experimentation: Be patient and open to experimentation, as adjustments often require a balance between creativity and technical precision.
Remove the Selection:
Removing a selection in Adobe Photoshop is a simple process that involves deselecting the area you’ve previously chosen. Here’s how to do it:
Deselect Shortcut: The quickest way to remove a selection is using the keyboard shortcut. Press “Ctrl + D” (Windows) or “Command + D” (Mac) to instantly remove the active selection.
Menu Option: Alternatively, navigate to the “Select” menu at the top of the screen and choose “Deselect.” This action clears any active selection.
Click Outside: Click anywhere outside the selected area on the canvas to remove the selection. This method is especially useful to switch between selected and unselected areas quickly.
Modify Selection: To fine-tune the area, use selection modification tools such as “Add to Selection” or “Subtract from Selection” to adjust the selection before removing it.
Layer Mask: If you’ve used a selection to create a layer mask, disabling or deleting the layer mask will effectively remove the selected portion from view.
Undo: If you accidentally remove a selection or want to revert to a previous selection state, use the undo function (Ctrl + Z / Command + Z) to step back in your editing history.
Refine and Repeat: As you work on your image, you may need to create, adjust, and remove selections multiple times. Practice refining your selection techniques for efficient editing.
Removing a selection provides you with a clean canvas or image area to work on or view without any restrictions, allowing you to proceed with further edits or adjustments.
Conclusion
Feathering, just like its name suggests, is a collection of gradual and subtle yet accurate adjustments that modify the edges of an image or the selected areas. This technique, analogous to the gentle touch of an artist’s brush, converts hard demarcations into beautiful transitions, refining the composition’s visual cohesion and aesthetic magnetism. Feathering provides an immaculate union between the targeted and surrounding regions by precisely softening the pixel boundaries. Hence equipping your images with a clean and professional look in numerous visual tasks with a symphony of pixels.
