How To Color Pop An Image
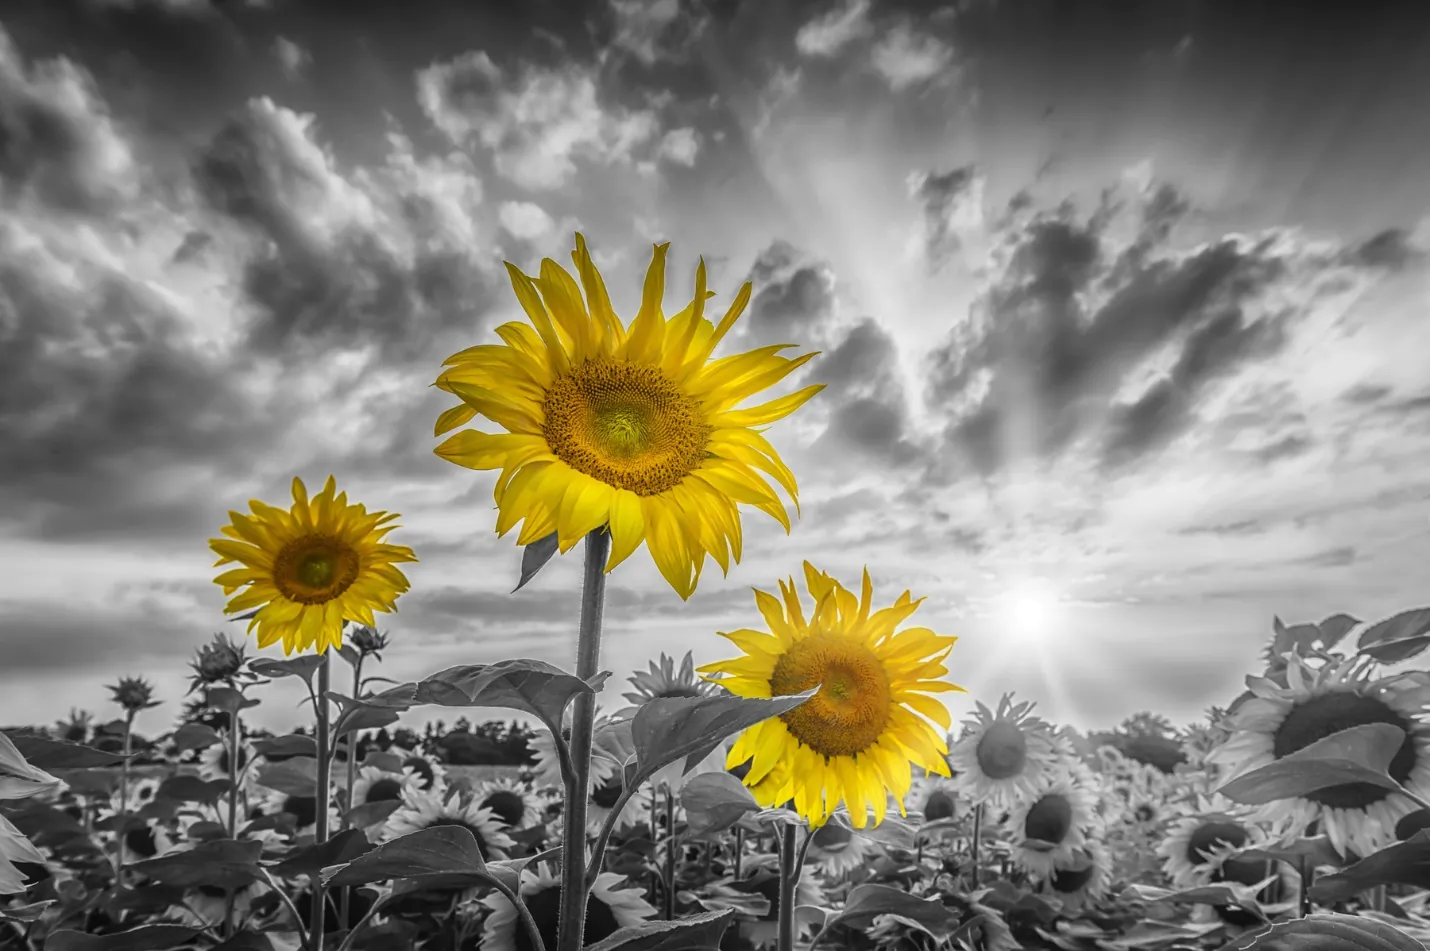
Color pop, or color splash, is a selective coloring technique that desaturates or turns specific areas of an image into black or white. The contrast between the absence of color and the rest of the colored parts makes those regions highlighted and attractive that remain vibrant and intact, directing the gazes to desired areas or elements within the photograph. The consequences can set up a focal point, highlight a specific subject, or express a specific temper. Thus making picture elements shine graphically and deliver a fascinating visual legend. Color pop images are produced using various graphic applications and tools, with Adobe Photoshop being one of the most preferred choices. These images are simplified compositions limited to specific areas and a confined color palette. Reducing the visual elements to just a few colors makes the image less cramped and the main subject more dominant. That aspect of color pop can be especially feasible in bustling or complex scenes where the subject might otherwise get discarded.
Step 1: Open Your Image
Begin by opening Adobe Photoshop. Access the software’s main interface and navigate to the “File” menu in the top left corner. From the dropdown menu, click on “Open.” This action prompts a file browser window, enabling you to browse and select the specific image file you intend to enhance using the color-popping technique. Once you have located your desired image, click on it to highlight it, then press the “Open” button at the bottom right corner of the file browser. This action loads your chosen image onto the Photoshop workspace, preparing it for the subsequent steps in the color-popping process.
Step 2: Duplicate the Background Layer
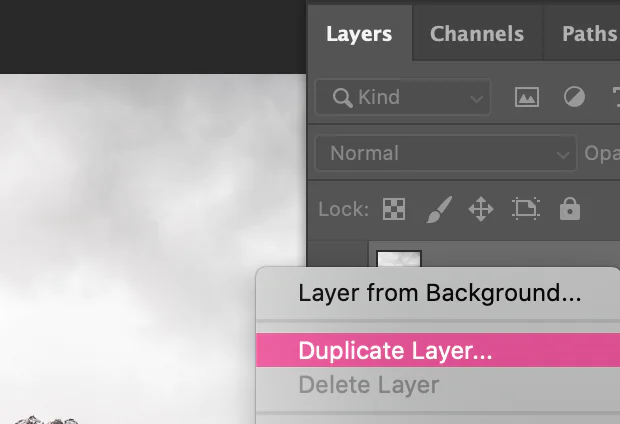
Next, proceed to duplicate the background layer of your opened image. This duplication process ensures you have a separate layer to work with while preserving the original image. To achieve this, navigate to the “Layers” panel on the right-hand side of the Photoshop interface. Right-click on the background layer within this panel, and a context menu will appear. From this menu, select the “Duplicate Layer” option. Once selected, a dialog box may appear, allowing you to name the duplicated layer if desired. Click “OK” or confirm to finalize the duplication. This step creates a new layer above the original background layer, providing a foundation for applying the color-popping effect without altering the primary image data.
Step 3: Desaturate the Duplicated Layer
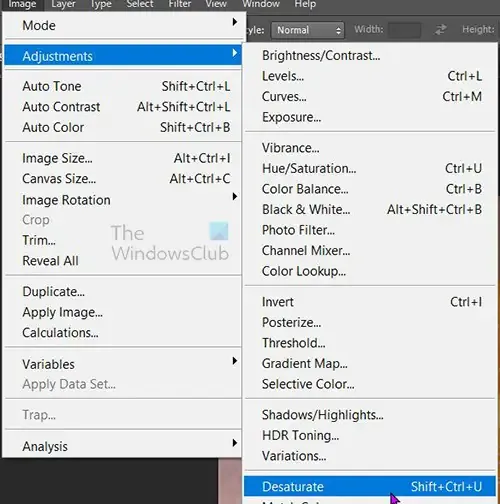
Following the duplication of the background layer, proceed to desaturate the duplicated layer. This step involves removing the color information from the duplicated layer and converting it into a grayscale or black-and-white representation. To accomplish this, ensure the duplicated layer is selected in the “Layers” panel. Then, navigate to the top menu and click on “Image.” From the dropdown menu, select “Adjustments,” and then choose “Desaturate.” This action instantly transforms the duplicated layer into a monochromatic version of the original image, eliminating all color information. The result is a grayscale foundation upon which you will reintroduce selective color elements to achieve the color-popping effect. This desaturation step creates a distinct contrast between the color-popped regions and the rest of the image.
Step 4: Create a Layer Mask
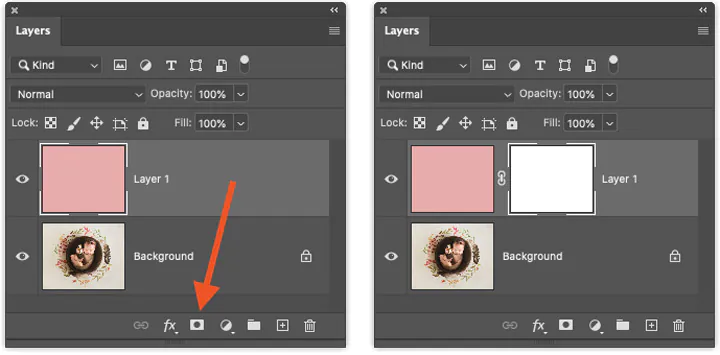
Once you have desaturated the duplicated layer, create a layer mask. A layer mask lets you control the visibility of specific layer parts, effectively revealing or concealing areas as needed. With the desaturated duplicated layer selected in the “Layers” panel, locate and click on the “Add Layer Mask” button at the bottom of the panel. This button resembles a square with a circle inside it. Adding a layer mask enables you to selectively reintroduce color to certain image portions while keeping other areas in black and white or desaturated tones. A white thumbnail will appear next to the duplicated layer in the “Layers” panel, indicating the presence of the newly added layer mask. This mask acts as a canvas you’ll paint to control the color-popping effect in the subsequent steps.
Step 5: Select the Brush Tool

The Brush Tool is versatile and allows you to apply or remove the color-popping effect precisely. In the Photoshop toolbar, you can typically find the Brush Tool represented by an icon that resembles a paintbrush. Alternatively, press the “B” key on your keyboard to quickly select the Brush Tool.
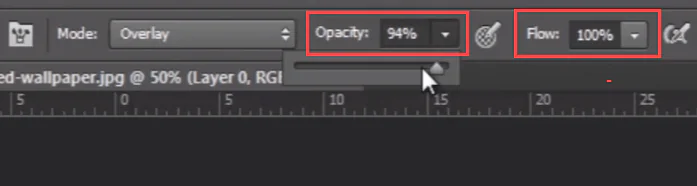
Once the Brush Tool is selected, adjust its settings according to your preferences. You can modify the brush size, hardness, opacity, and flow using the options at the top of the Photoshop interface. Larger brush sizes are useful for broader strokes, while smaller sizes offer finer control.
Before proceeding to the next step, ensure that the foreground color is set to white. You can quickly set the foreground color to white by pressing the “D” key, followed by the “X” key on your keyboard.
Step 6: Paint on the Layer Mask
Choose Brush Settings: Adjust the brush size, hardness, opacity, and flow settings based on your desired level of control. For precise detailing, a lower brush opacity and flow can be helpful.
Paint with White: Ensure that the foreground color is set to white. That is crucial because painting with white on the layer mask reveals the color from the duplicated layer, effectively bringing back the color to the selected areas.
Start Painting: Click and drag your brush over the areas of the image where you want the color to pop. As you paint white on the layer mask, the original colors reappear in those regions, standing against the desaturated background.
Adjust Brush Opacity: Depending on your desired effect, you can vary the brush opacity as you paint. Lower opacity results in a gradual and subtle color transition, while higher opacity creates a more pronounced color pop.
Undo Mistakes: If you mistake or accidentally reveal color in areas you didn’t intend, switch the foreground color to black and paint over those areas. Painting with black on the layer mask conceals the color-popping effect.
Toggle Layer Mask Visibility: To assess your progress, temporarily turn off the layer mask by clicking the eye icon next to the mask thumbnail in the “Layers” panel. That lets you view the color-popping effect on the entire image and compare it with the desaturated version.
Refine and Experiment: Take your time to refine your painting on the layer mask. You can zoom in for finer details and play with different brush sizes and opacities to achieve the desired look.
Step 7: Adjust the Opacity
Select the Duplicated Layer: Click on the duplicated layer in the “Layers” panel to ensure it’s active and selected.
Adjust Opacity Slider: In the “Layers” panel, locate the Opacity slider at the top. Drag the slider left or right to decrease or increase the opacity of the duplicated layer. Moving the slider to the left reduces the intensity of the color-popping effect, making it more subtle, while moving it to the right increases the intensity.
Observe the Effect: As you adjust the opacity, observe how the color-popped areas interact with the underlying desaturated background. Pay attention to the overall balance and visual impact of the image.
Combine with Brush Opacity: Consider how the opacity adjustment complements your brush opacity when painting on the layer mask. Balancing these settings can help you achieve the desired level of emphasis on the color-popped elements.
Undo and Retry: If unsatisfied with the result, you can undo the opacity adjustment and try different settings until you achieve the desired outcome.
Step 8: Fine-Tune the Selection
Refine Selection: Utilize selection tools like Lasso or Quick Selection to outline areas for color pop precisely. Adjust with “Add” or “Subtract” options and use “Refine Edge” for accuracy.
Invert if Needed: Reverse selection with “Select” > “Inverse” for targeting different areas while maintaining color pop focus.
Layer Mask Painting: Employ the Brush Tool to paint on the layer mask within the refined selection. Adjust brush settings for finer control.
Zoom and Detail: Zoom in to enhance small details within the refined area, ensuring a polished color pop effect.
Visibility Check: Temporarily hide selection outlines with “Ctrl” + “H” (Windows) or “Command” + “H” (Mac) to evaluate progress accurately.
Save and Experiment: Regularly save your work and experiment with selections for optimal color pop results. This step grants precision in highlighting specific image elements.
Step 9: Save Your Work
Once satisfied with your color-popping effect and adjustments, save your work. Review the image for accuracy and refinement, then flatten layers. Click “File” > “Save As” to choose the format (JPEG/PNG), name the file descriptively, and select a save location. Adjust settings like image quality if needed, and confirm the save. For the original image preservation, create a backup copy before editing. Consider exporting variations for different uses. Organize and store your edited image in a well-structured folder, noting editing steps for future reference. Saving your work ensures your polished color-popping creation is ready for sharing or application.
Conclusions
In conclusion, color pop reduces visual complexity and makes the subject illustrious even within a crowded setting. The selective desaturation of the least important components minimizes their impact on the overall image; therefore, the elements that are desired to look grabby do not require any additional efforts to look more vibrant. Moreover, this technique is confined to highlighting image subjects and works well in case you opt to point up the background. By magnifying the essential aspects of your photographs, the color pop effects enhance the potential for memorability.
