How To Use A Droste Effect To Enhance Your Photographs
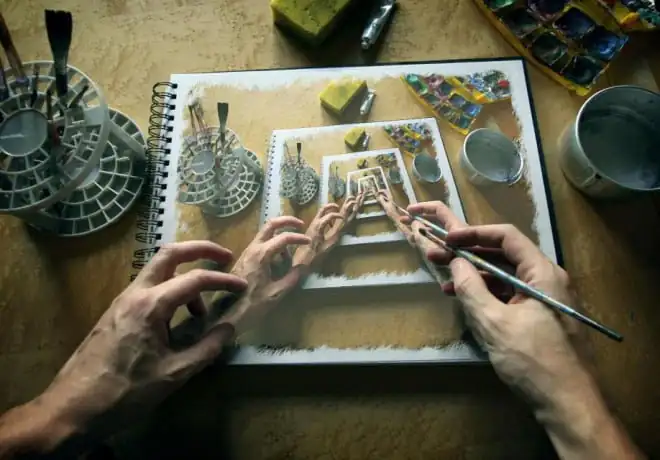
The droste effect creates exciting repeated replications of an image within the same frame in an infinite manner, resulting in a non-stop cycle. Each of the frames in the droste effect includes a mini version of itself, like a photograph inside an identical photograph, which is then inside another exact photograph, so the replicating activity continues. You can try different placements and angles to develop fascinating effects that evoke surrealism in your artwork. The recurrent aspects of this unique approach bring up uncertainty and mystery, which trigger the sentiments of the viewers and ignite their imaginations. To attain this adorable art effect, mainly involves rotation, scaling, and placement strategies, among others, which are manipulated according to the desired visual effects or general aesthetics. In this blog, we will go through the eight simple steps to create a droste effect in an image using Adobe Photoshop, which is proven to be quite capable in its features and tools.
Step 1: Establishing The Base For the Droste Effect
Open the Adobe Photoshop application on your PC. You can install it from the official Adobe site if it is not downloaded.
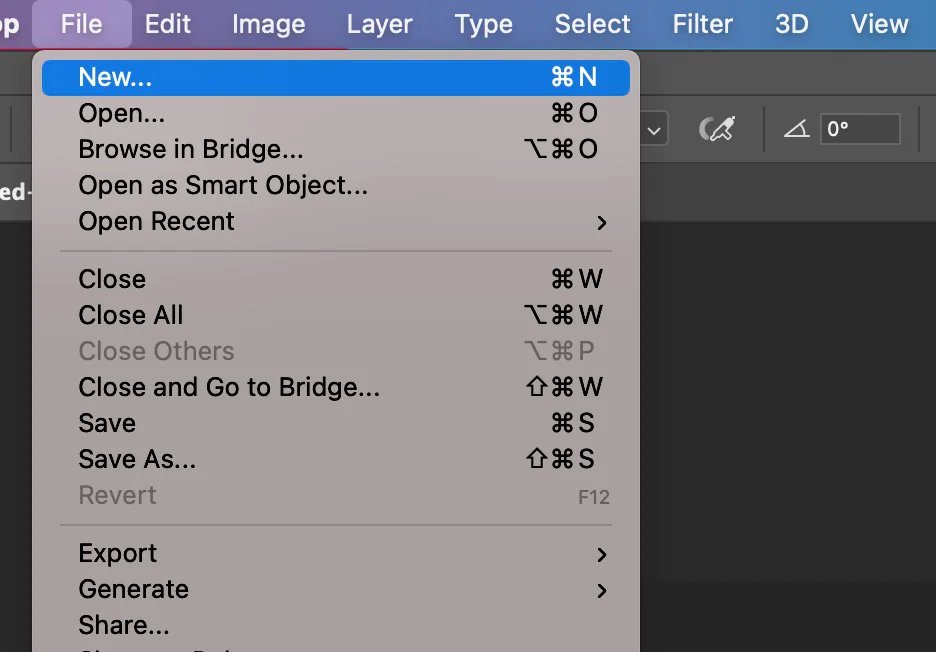
After opening Photoshop, seek out the “File” menu at the top-left corner of its interface. Tap on it to uncover a drop-down menu.
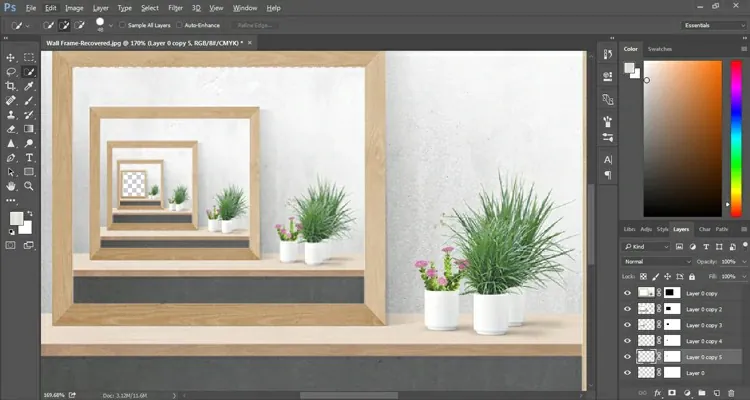
In the “File” menu, find and select the “Open” button. That opens a file explorer window where you can browse your computer files for the image you need to utilize as the foundation.
Explore your files to find the image you chose as the beginning point for your droste artwork. Tap on the picture file to choose it.
Once you have selected the picture, click the “Open” option within the file explorer window, and it will import the chosen file into Adobe Photoshop.
Step 2: Duplicating The Original Layer
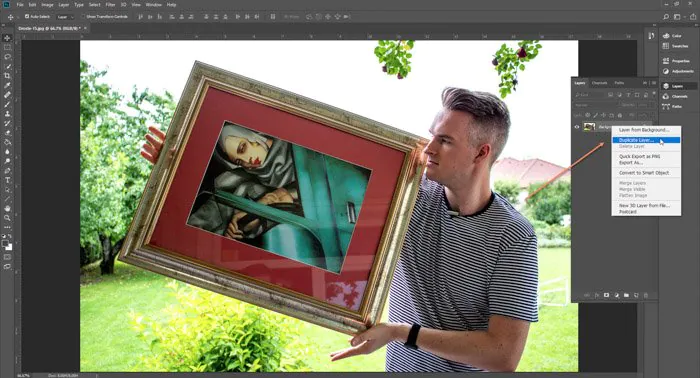
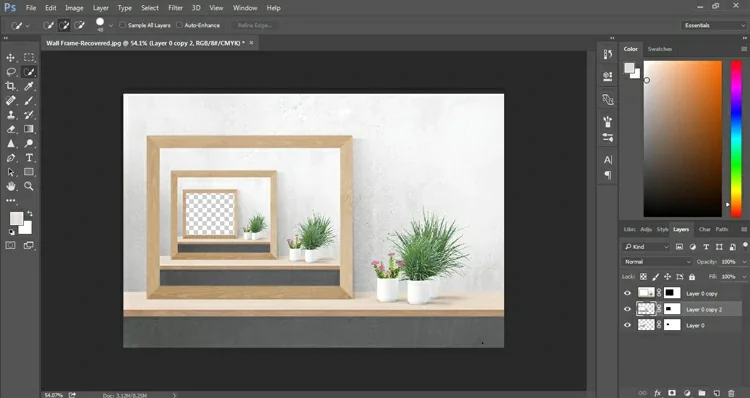
Find the “Layers” menu on the right of the Photoshop interface. If you can’t discover it, go to the “Window” menu and ensure the “Layers” option has a checkmark beside it.
Within the “Layers” panel, tap on the thumbnail of the base image layer to pick it. It accentuates the layer and indicates that any activities you take will apply to this layer.
Next to the base image layer selected, tab on it to open a relevant menu. From this menu, select the “Duplicate Layer” choice. Then again, you’ll utilize the keyboard shortcut Ctrl+J for Windows or Command+J for Mac.
After duplication, a discourse box may emerge, inviting you to title the new layer. You can label it with a recognizable title for organized editing.
Recheck the “Layers” panel to guarantee that a new layer has been made over the original, ditto to the base image. The new layer will be the beginning point for the looping droste impact.
If you want both the initial and copied layers together, alter the opacity of the duplicated layer for easy visualization amid the following changes.
Step 3: Using Transform Tools And Options
Within the “Layers” panel, press on the thumbnail of the copied layer to select it and perform any changes to this particular layer.
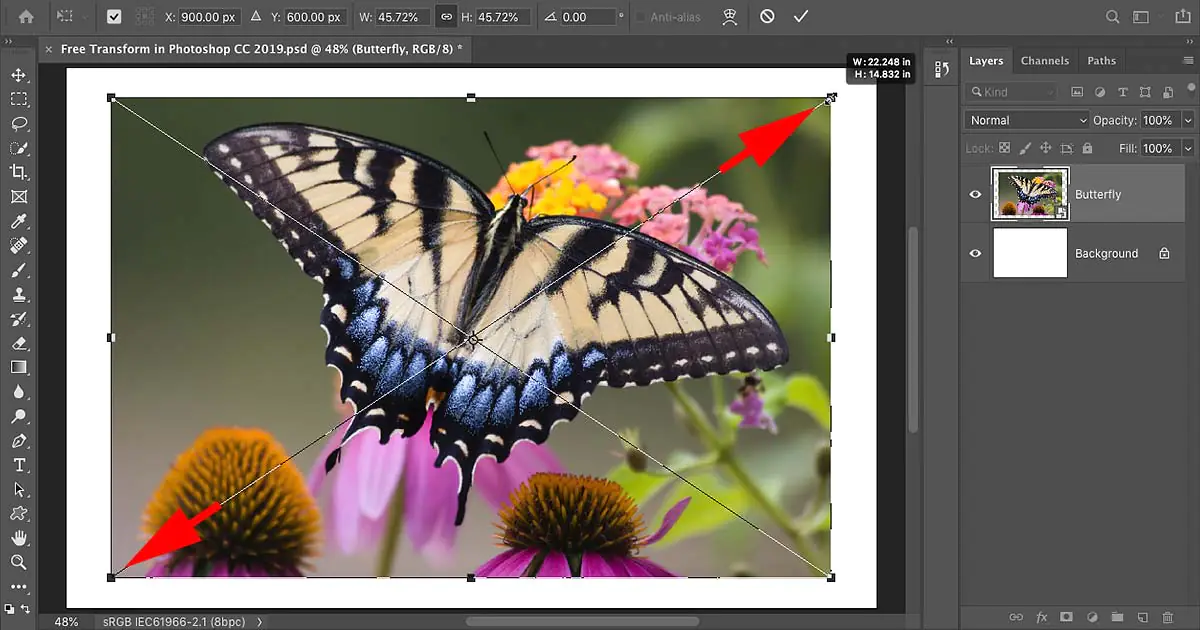
Head to the “Edit” menu and pick “Free Transform.” Alternatively, you can use Ctrl+T for Windows or Command+T for Mac.
In the transform mode, you’ll see handles around the chosen layer. Tap and drag these handles to resize the layer. Press the Shift key along with dragging to preserve the aspect proportion and avoid distortion.
Tap and drag inside the changed layer to reposition it inside the canvas. Try with diverse placements to start the recursive impact. Press Enter or press the checkmark within the toolbar to include the transformation.
To introduce variations, click inside the changed layer and select options like Rotate or Flip (horizontal or vertical).
For more modifications, return to the “Free Transform” mode and make alterations. Utilize the keyboard arrows for gradual alterations.
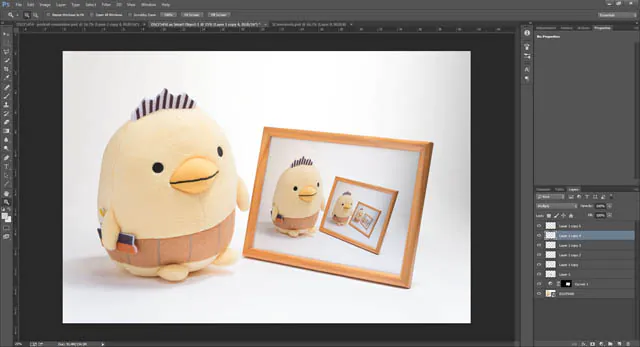
Repeat the method by making extra copied layers once you have transformed the first duplicated layer. Play with varying sizes and arrangements.
Step 4: Duplicating The Already Duplicate Image For Recursion
Select the transformed and repositioned layer, and a discourse box will arise, asking you to title the copied layer. Descriptive naming can keep organization when working with different layers.
After the recently copied layer is chosen, go into the transform mode. Here again, you can use the shortcuts Ctrl+T or Command+T. Resize, rotate, and reposition this layer autonomously from the past one to include complexity in the recursive design.
Proceed to duplicate the transformed layers and alter their positions. Each duplication adds to the recursive impact, making an attractive design within your picture.
To improve visual fascination, play with varieties in size, rotation, and arrangement of each duplicated layer. This experimentation brings profundity and complexity to the droste work.
Monitor the layer arrangement within the “Layers” panel. Layers higher within the menu will show up over others on the canvas.
Step 5: Continuing Duplication Of Layers And Scaling Variation
Pick up the most freshly transformed and repositioned layer by clicking on it or utilizing easy route keys.
Consider allotting a title to the recently copied layer for organizational purposes. That gets to be exceptionally accommodating as you work with numerous layers in a complex composition.
Alter the opacity of the recently copied layer if you need to see both the current and past layers at the exact time. That helps in identifying the advancing droste impact.
Apply the transform mode to the copied layer. Resize, rotate and reposition it freely from the past layers, and another layer of complexity will be added to the recursive pattern.
Continue the constant replication and changing layers. Each cycle makes for the recursion, persistently building a puzzling droste impact.
Try with variants in each duplicated layer’s measure, rotation, and arrangement. The experiment presents differing qualities inside the composition.
Be attentive to the layer sequence within the “Layers” menu. Layers higher within the board appear over others on the canvas, impacting the visual progression of the recursive components.
Step 6: Regulating Each Layer Adjustments On Individual Basis
Survey the existing composition on the canvas while assessing the existing layers and their positions within the droste impact.
Navigate to the “Layers” panel and tap on the particular layer you need to fine-tune and work on altering one layer at a time.
Start up the free transform mode by pressing Ctrl+T or Command+T. This mode empowers you to make error-free alterations to the chosen layer.
Use transform handles and carefully resize the layer by dragging the corners while holding the Shift key to preserve proportions. Readjust the layer by clicking and dragging inside the bounding box.
Present variations to the droste impact by turning the chosen layer. Right-click inside the bounding box, select “Rotate,” and alter the point.
Utilize the arrow keys for phased alterations and fine-tune the layer arrangement accurately.
Keep going with the process of tuning layers one by one within the composition. Each layer contributes extraordinarily to the overall effects.
Test with additional changes such as skewing or distorting particular layers and experiment with different blend modes for individual layers of the “Layers” panel.
Step 7: Using Layer Masks For Pristine Blending
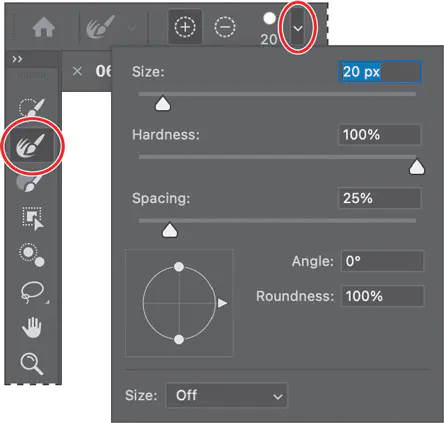
Tap on the layer you need to mask within the “Layers” panel and press the “Add Layer Mask” button at the bottom.
Click the mask thumbnail, select the Brush tool, and tweak the foreground color to dark. Stroke with dark on the mask covers up parts of the layer, resulting in smooth shifts between layers.
Adjust the brush opacity to control the intensity of the masking. Minimum opacity lets you progressively blend, consistently incorporating recursive components.
Go for a soft-edged brush for smoother moves between layers. It brings a natural and symmetric look to the droste effect.
Attempt diverse masking methods, such as gradient masks or shifting brush sizes, to refine the blending and improve the general visual concordance.
Step 8: Auditing And Improving The Final Work
Take a break and see the whole droste composition on the canvas. That gives an all-encompassing view of the evolving design and helps distinguish zones for enhancement.
Examine the visual uniformity of the recursive components. Confirm that the layers blend consistently, giving an agreeable and captivating outcome.
Look at the harmony of the composition. Confirm that the order of recursive layers keeps up visual excitement and detours misproportion.
Test with minor tweaks to layer positions, sizes, and rotations. Little changes can strengthen the sensation and optimize the droste impact.
If needed, explore color varieties. Alter layer colors or apply color grading tools to include profundity and temperament to the image.
If your droste impact is meant for a particular tale or topic, guarantee that the recursive design echoes and upgrades the expected narrative or theme.
Before making noteworthy changes, spare distinctive cycles of your composition. That permits you to backtrack later when it is required.
Conclusion
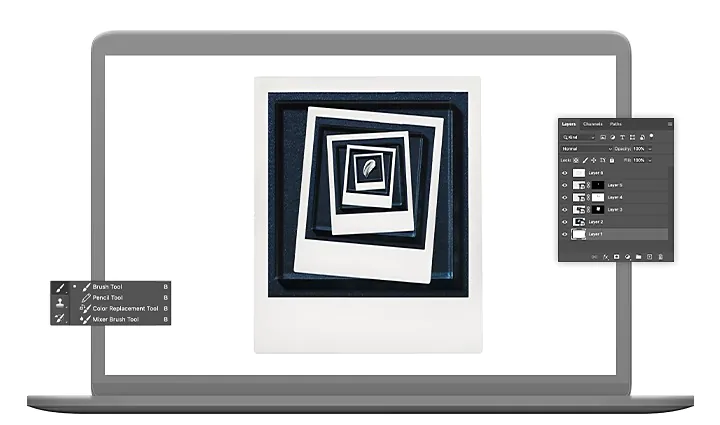
To sum up, the compelling loop work inside droste effect images is incredibly welcoming for the viewers, prompting them to explore the labyrinth of layers of images inside each other in a common frame. This effect also results in optical challenges using shifting placements, rotation, and scaling parameters, giving a perception of motion and dynamism. The infinite occurrence of images inside images and so on also facilitates artistic experimentations to create distinctive modifications using color grading, opacity tweaks, or scaling strategies. These features slightly diverge in every mini version, which designs an emotion-stirring narrative that appeals to others by transforming a still image into a meaningful concept.
