How High-Pass Filter Enhance Image Sharpness
A high-pass filter selectively works on the minute features of images like edges or surfaces, which are associated with high frequency; likewise, it minimizes the effect of the broader features with low-frequency regions, including color gradings and other parallel zones. As images consist of different frequencies, the high-pass technique illustrates the frequency distributions within a design, letting the editors figure out which frequency to highlight and which to minimize. The most distinctive aspect of this technique is sharpening the image points of interest, like edges, patterns, and textures, and increasing the visual clarity of the image. It lets you focus and work on specific points where a little more attention can accelerate the overall appeal and temperament of the image. A high-pass filter also intensifies the image contrast for a more colorful and energetic vibe in the atmosphere of your photographs. This blog unfolds the process of using a high-pass filter to enrich image sharpness, contrast, and overall charisma. The following are the seven essential steps:
Step 1: Import your image and create its copy
In the first step of adding high-pass filters for image sharpness, you have to open your desired picture. Access any advanced editing program, like Adobe Photoshop, and launch it on your computer. After that, locate the “File” option in the menu bar. Press “Open” from the drop-down menu to let you find and select the photo file you want to upgrade.
After your image file is loaded into the software canvas, take a minute to assess the particular elements you need to enhance. That includes recognizing surfaces, fine lines, or general sharpness that can benefit from the high-pass filter’s specific improvement.
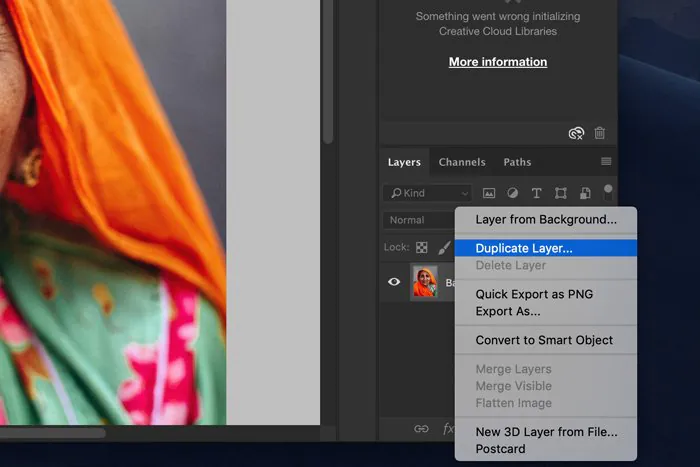
Make a copy layer of your image by clicking on the base layer visible within the Layers board and selecting “Copy Layer” from the options. This activity guarantees that any alterations made throughout the manipulation are applied to a copy instead of the initial image, keeping up the integrity of your source file.
This duplication provides a non-destructive approach to altering your image altering. With this copy layer in the spot, you’re prepared to advance to the successive steps, equipped with the affirmation that your original picture remains unaltered, giving adaptability and reversibility as you dig into refining and honing its complicated details.
Step 2: Access the high pass filter and apply it
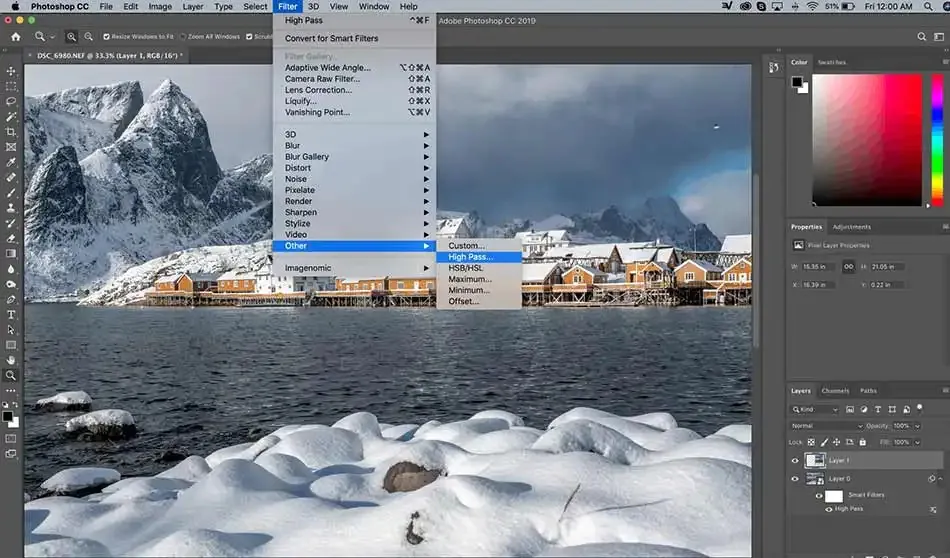
After importing and duplicating your picture, the next urgent step in amplifying image sharpness is applying the high-pass filter. With the copied layer chosen, move to the “Filter” menu, and select “Other,” then at last, select “High Pass.” That action will make a discourse box pop up where you’ll fine-tune the level of detail improvement.
Alter the radius slider inside the High Pass filter dialog to control the range of subtle specifics you want. A small radius value will highlight minor details; a higher value will cover larger elements.
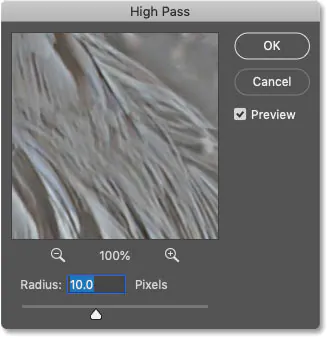
This step is vital for fitting the sharpening impact to your specific image and the level of detail you were looking forward to upgrading.
The high pass filter draws attention to edges and finer elements while minimizing broader, lower-frequency components. This selective technique lets your sharpening attempts be focused on the details that lead to superior image sharpness.
After arranging the Tall Pass filter adjustments, continue to consistently synchronize the sharpened details with the original picture, achieving an engaging and rectified result.
Step 3: Try blending modes and select one that fits your image
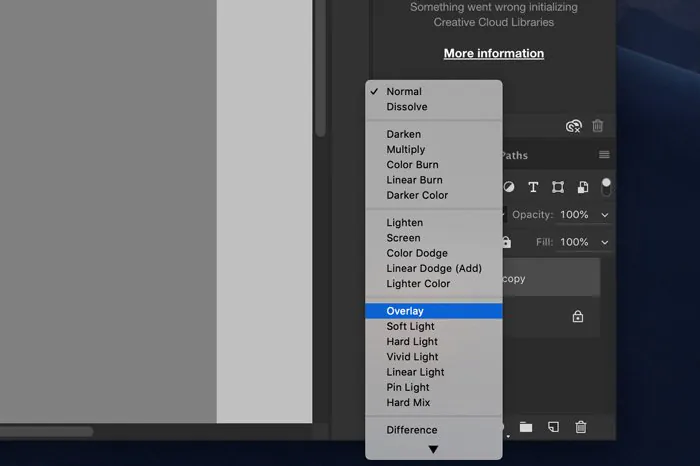
Next to the application of the high-pass filter and enhancing the image features in your picture, you need to blend the high-pass layer with the original using a suitable blending mode. In the Layers panel, click on the high-pass layer you’ve just made.
Alter the blending mode of the high-pass layer to “Overlay” or “Delicate Light.” These blending modes are particularly effective for coordinating the enhanced details consistently with the original layer.
The “Overlay” mode increments contrast, making the subtle elements pop, whereas “Soft Light” produces a milder, more unobtrusive impact. Play with both to see which supplements your picture well.
Adapting to the proper blending mode lets your high-pass layer collaborate with the underlying layers, improving the overall sharpness without affecting the natural style of the picture. This blending step is significant in accomplishing an optimized and satisfying result.
Note that the blending mode’s effects can be more effectively controlled in the coming steps, so feel free to return to this setting to revamp the general appearance.
Step 4: Strive to attain an ideal opacity value
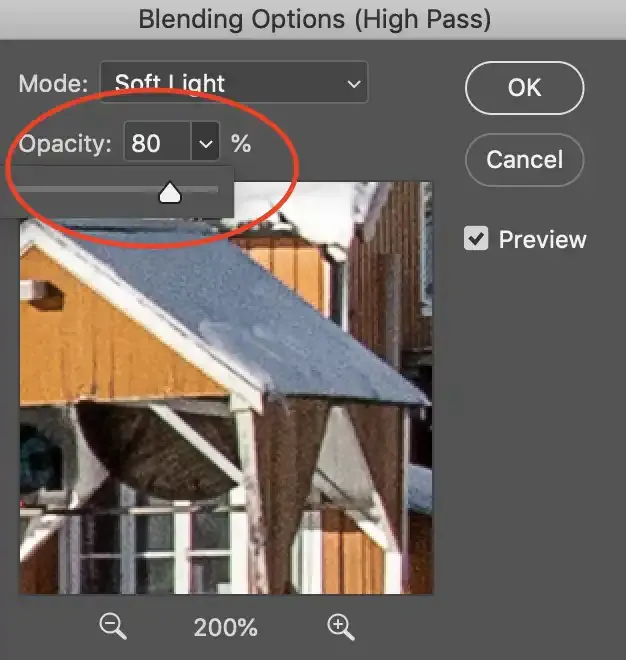
In the fourth step of enhancing image sharpness with a high-pass filter, you will be regulating the general sharpness of your composition by manipulating the opacity of the high-pass filter applied layer. Start by hitting the opacity slider for the high-pass layer in the Layers menu.
Slowly alter the opacity to find the ideal equilibrium between the enhanced details and the original picture. Minimizing the opacity diminishes the strength of the sharpening effect, giving a mild transformation. On the other hand, maximizing the opacity heightens the impact, making the details more articulated.
This step is significant for attaining a natural appearance in your work, so try your best. To get a balance that goes with your image’s particular characteristics, the added sharpness should enrich the photograph instead of ruining its original features.
Consolidating this fine-tuning phase gives you greater oversight over the sharpening process, making it possible for you to match the effect of the high-pass channel to the unique traits of your picture. Once finished with the opacity setting, you’re ready to carry on to the next adjustments.
Step 5: Select the layer mask icon to work on the all-around effect
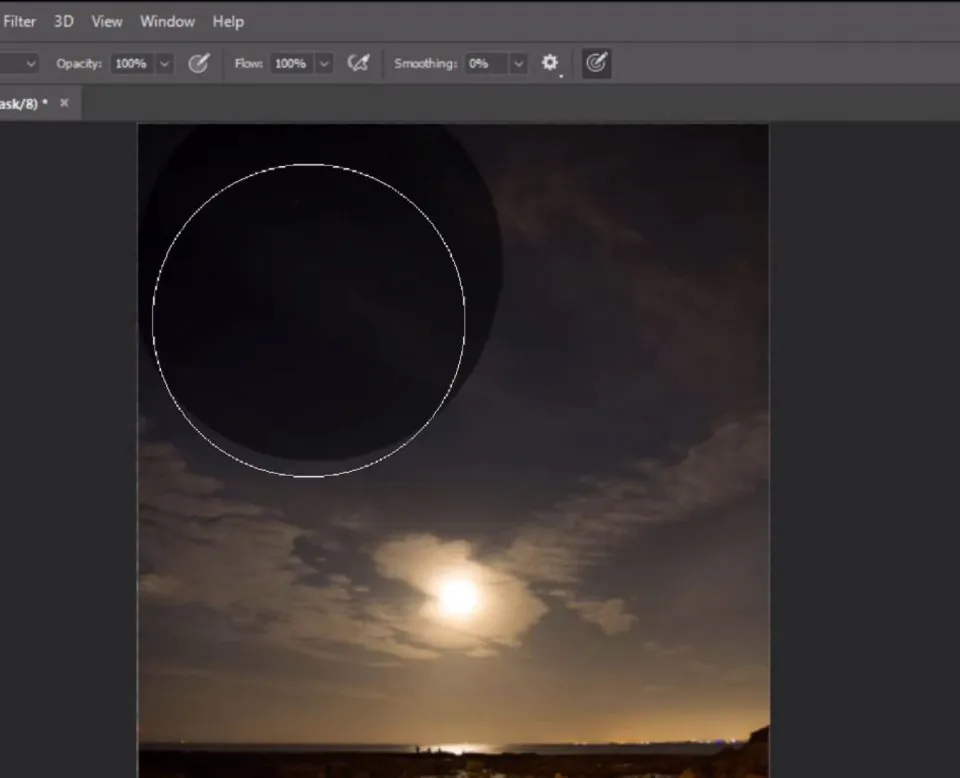
Consider including a layer mask in the high-pass layer for exact control over regions with the sharpening effect applied. This optional but rewarding step permits you to specifically uncover or hide the enhanced elements in particular zones of your picture.
Include a layer mask by selecting the high-pass layer, then press on the “Add Layer Mask” symbol at the base of the Layers menu. By default, a white mask will appear next to your layer, showing that the complete layer is right now obvious.
Utilize a dark brush on the layer mask to cover the sharpening in regions where you need to preserve a milder look. That is helpful for portraits, where you must distance yourself from over-sharpening skin tones or delicate highlights. Then again, utilize a white brush to uncover the honing impact in regions that benefit from expanded detail.
The masking technique accelerates the flexibility of your sharpening process, permitting you to customize the effect of the high-pass filter in particular areas of the image. It lets you supervise the overall style for a realistic and defined result.
Step 6: Take an evaluating survey of your entire composition for improvements
After including the layer mask, spend some time surveying the modified image. Examine carefully the minute aspects, sharpness, and overall visual impression.
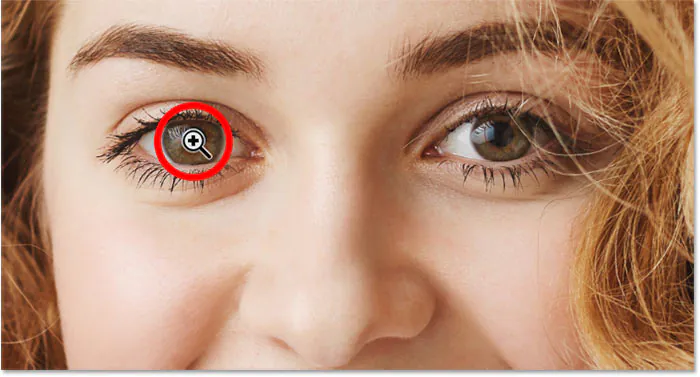
Zoom in to different image regions to recheck that the sharpening effect augments the composition without causing undesirable deformity or distortions. Pay heed to integral components, such as facial highlights in portraits or perplexing textures in other photos.
If any adjustments are required, return to the opacity setting, touch up the layer mask, or think of returning to the High Pass filter settings to alter the radius for a distinctive feature improvement. An ongoing audit process guarantees that your modifications add significantly to the picture without compromising its naturalism.
By carefully checking and altering your picture, you can maintain its realness as you’re taking advantage of the sharpening effects of the high-pass filter. After you are done with the conclusive review and tweaks, you’re all set for the image representation step.
Step 7: Preserve your finalized work in a suitable format
After carefully assessing and reforming, you can preserve your work by saving the final high-pass filter image. This step focuses on creating a high-quality, upgraded version primed for sharing, printing, or any specific application.
Head to the “File” menu to select “Spare As” or “Export” as per your preference. Pick a file format that suits your needs, like for common usage JPEG; for pictures with transparency, select PNG, and for quality prints, select TIFF format.
Make a fresh file title that demonstrates the altered aspect of the image, making it easily recognizable from the source image. That will keep up an organized library of images to get to both the initial and improved versions as required.
Moreover, in case your altering plan includes layers and you need to maintain adaptability for later alterations, opt for keeping the picture in an arrangement that supports layers, such as PSD format.
Saving your work marks the conclusion of the image editing process, leaving you with a neat and outwardly eye-catching finished composition.
Conclusion
In closing, a high-pass filter is a modest technique that complements image traits on a frequency basis. It lets the photographs glow up with intricate manipulations that never overshadow the naturality and genuine appearance. The before and after results of this filter are the least obvious to distinguish, as they improve clarity and energy without leading to an artificial layer of fancifulness. Furthermore, if the image is very well refined, with the exception of a few zones that need to be attended, the high-pass filter works best in a selective way, individually focusing on those areas while considering the whole transformation and visual magnetism.
